
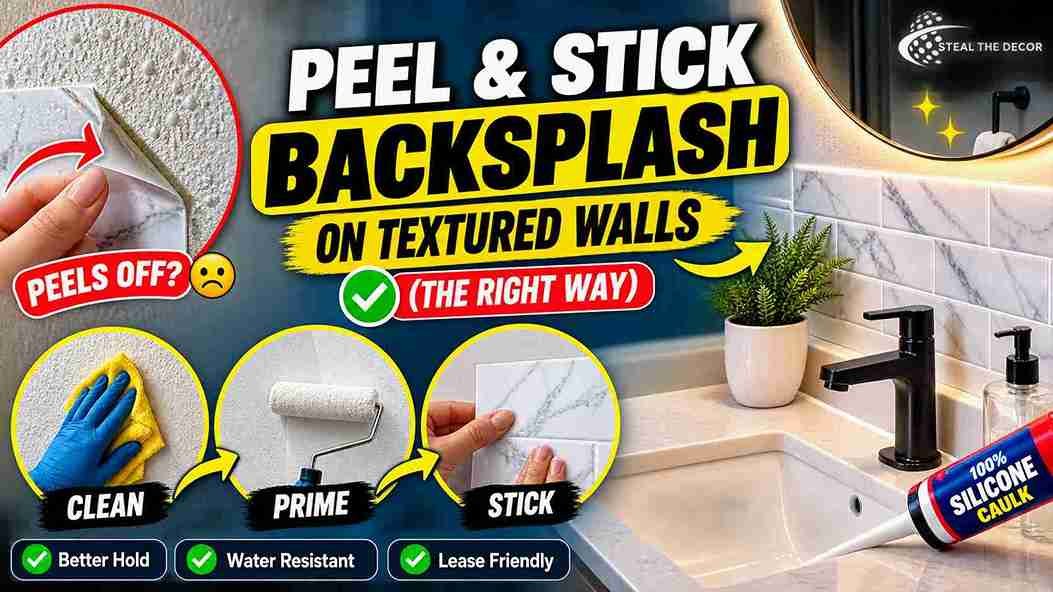
Two weeks after the tile went up a corner behind the toothbrush cup curled away from the wall like a sticker on a hot car window. Not the whole sheet. Just one corner lifting maybe a quarter inch right where the shower steam hit hardest.
That bathroom sat in a 1990s duplex with orange peel texture sprayed on every wall a vanity light that buzzed and a lease clause banning permanent alterations. No sanding. No painting. No retiling. What I could do was test so I did four prep methods across two walls three weekends and roughly $190 of materials all to figure out how to install peel and stick backsplash on textured bathroom walls so it stays up past month one.
Three methods held. One failed in 14 days.
Below is every step that worked what the failure taught me what it cost and how to take the whole thing back down when your lease ends.
Quick Answer: Peel and stick backsplash will bond to textured bathroom walls but only after you flatten or seal the texture first. On light orange peel texture a degreaser wash plus a coat of Zinsser Bulls Eye 1 2 3 by Rust Oleum gives most vinyl tiles enough smooth surface to grip. On knockdown texture or anything with ridges you can catch a fingernail on you need a thin skim coat of joint compound or a rigid backer panel Smart Tiles and most manufacturers warn outright that textured surfaces block proper adhesion. Seal every edge with 100% silicone caulk and keep tile out of direct shower spray.
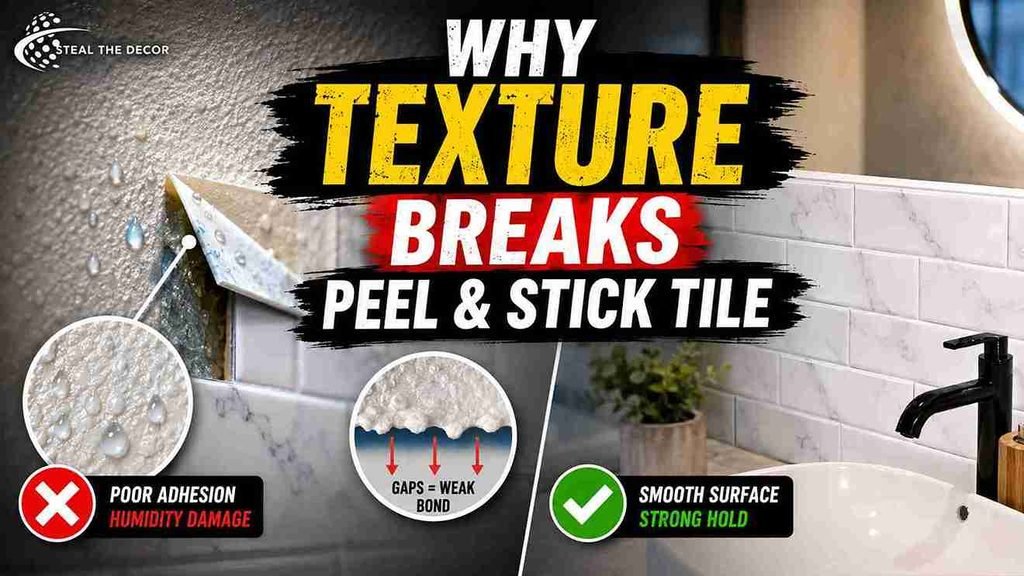
Why Textured Bathroom Walls Break Peel and Stick Tile
Peel and stick tile holds by surface area alone. That’s the whole mechanism. On smooth painted drywall the adhesive back touches close to 100% of the wall but on orange peel texture it only touches the raised bumps realistically 40% to 70% of the surface. On knockdown texture with its flattened plateaus and deep valleys contact drops lower still.
In a dry hallway you’d get away with that. In a bathroom you won’t. Bathroom humidity swings from 40% to well past 80% every time somebody showers and the EPA recommends keeping indoor humidity below 60 percent exactly because moisture finds every gap it can. Each unbonded valley behind your backsplash tile becomes a tiny pocket where warm wet air condenses. Add repeated water splashes at the vanity and the bond releases from the weakest point outward. Usually a corner. Usually near the sink.
And there’s a second problem nobody mentions: texture telegraphs through even when the tile sticks. Smart Tiles says so on its own site plain flat designs like Subway White show every wall surface imperfection while heavily patterned stone peel and stick models hide small reliefs better. If your wall has deep grooves no tile design saves you.
Bottom line: texture doesn’t just weaken the bond it also shows through the tile so you’re fixing two problems at once.
Does Peel and Stick Backsplash Stick to Textured Walls? The Honest Answer
Yes on lightly textured walls maybe on medium and no on heavy texture without real prep. Manufacturers are blunter than most blogs will be. The Smart Tiles FAQ states that textured or uneven surfaces stop the tiles from adhering properly and advises against installing on them at all with sanding plus primer and a 72 hour dry time listed as the workaround.
So before you buy anything run the fingernail test. Drag your thumbnail sideways across the wall where the first tile will go.
- You feel a faint grain nothing catches light orange peel. Clean and prime only. Skip the skim coat.
- Your nail catches on individual bumps medium orange peel or fine knockdown texture. You need primer plus a spray adhesive assist or a thin skim coat.
- You feel distinct ridges and valleys heavy knockdown or skip trowel. Skim coat or backer panel. Nothing else lasts.
One more disqualifier and this one catches people on smooth walls too. Fresh paint. Latex keeps outgassing for weeks and Smart Tiles specifies painted gypsum only if the paint went on at least 21 days earlier. If your landlord repainted the bathroom last month wait. I’ve watched tiles release off three week old paint with zero resistance which is a deeply annoying way to spend a Sunday.
Bottom line: run the fingernail test before you spend a dollar it decides your entire prep path.
5 Ways to Prep Textured Walls for Peel and Stick Backsplash Ranked by Damage Risk
Every one of these is something I’ve done in a rental. They run from zero risk to needs permission and the right pick depends on your texture depth and how strict your lease reads.
1. Deep clean and degloss only light texture zero risk
The cheapest prep is also the one everybody skips. Bathroom walls carry an invisible film of hairspray body oil and soap scum that kills adhesion faster than texture ever will. Clean the surface with a TSP substitute degreaser like Krud Kutter Original by Rust Oleum (roughly $8–$14 a quart) rinse with warm water then wipe with 70% isopropyl alcohol and let it dry completely. A full hour minimum in a bathroom.
Skip dish soap. It leaves a surfactant residue behind. And avoid using harsh chemicals like bleach or acetone which lift paint and hand you a patching job at move out.
Works on: light orange peel with a high quality peel and stick tile that has an aggressive adhesive. Cost: about $15. Damage risk: none.
2. Adhesion primer over the texture light to medium texture low risk
Primer doesn’t flatten texture. What it does is seal porous paint and give the tile adhesive a consistent non absorbent film to grab. Zinsser Bulls Eye 1 2 3 Water Base Primer by Rust Oleum (about $18–$26 a quart) is the standard pick and the manufacturer notes it recoats in an hour but full adhesion and hardness develop over seven days.
Don’t rush that part. I gave mine four days and the tiles went up fine but Smart Tiles asks for 72 hours minimum after priming so treat three days as your floor.
One roller one quart one small bathroom wall. Roll a thin layer let it cure tile.
Cost: about $30 with the roller. Damage risk: minor it’s paint and you may need to repaint at move out.
3. Thin skim coat medium to heavy texture low risk if you can repaint
To skim coat textured walls for peel and stick tile you spread lightweight joint compound over the texture with a 10 inch drywall knife feather it flat let it dry and sand lightly. USG Sheetrock Plus 3 Lightweight All Purpose Joint Compound runs about $16–$22 for a pre mixed tub and one tub covers a vanity backsplash three times over.
This method gives the best looking result by a wide margin. It also demands the most honesty with yourself because you’re altering the wall. Texture matching at move out isn’t realistic for most renters so only go here with written permission or a lease that treats wall finishes as cosmetic. Same logic drives everything else I do in a bathroom which is why I lean on reversible upgrades wherever I can.
Cost: $25–$40. Damage risk: moderate repaint required.
4. Rigid backer panel any texture zero wall contact
This is the renter only method and it’s the reason I keep pushing back on every guide that just says “sand it smooth.” Cut a sheet of 1/8 inch white hardboard or 3mm PVC panel to size at a home center apply your peel and stick tile to the panel on a table then mount the finished panel to the wall with heavy duty removable strips or a French cleat.
You get a perfectly smooth surface a strong bond and a backsplash that lifts off the wall in one piece when you move. The panel becomes a portable object you reinstall in the next apartment.
Honestly? I almost skipped this one entirely. It sounded like more work than it was.
Two cautions. Weight matters so a 2 by 3 foot tiled panel runs four to seven pounds use strips rated well above that and press 30 seconds per strip. And seal the panel perimeter with silicone so water can’t run behind it.
Cost: $22–$35 for the panel plus mounting hardware. Damage risk: none if you pull the strips slowly and straight down.
5. Full smooth wall skim coat with landlord sign off heavy texture best finish
Same as method three but wall wide instead of just the backsplash zone and done with permission in writing. Worth it only if you’re staying two plus years or your landlord agreed to cover materials. Some will especially in older units where the bathroom needed updating anyway.
Cost: $60–$90 for a full small bathroom. Damage risk: none if authorized.
And if you’re covering wall texture elsewhere in the apartment the same prep logic carries over to wallpaper on orange peel walls. The difference is that vinyl tile weighs more and forgives less.
Bottom line: match the method to your fingernail test result not to whichever prep looks easiest on YouTube.
Pro Tips for Renters
- Warm the tiles before you install them. Fifteen minutes in a room above 70°F or 20 seconds per sheet with a hair dryer on low makes the adhesive noticeably tackier and helps it flow into shallow texture. Cold tile straight off a January delivery truck is the number one cause of weak first day adhesion.
- Buy one sheet before you buy 12. Install a single tile in the worst corner of your wall wait a week through several showers then pull it. If it resists and leaves nothing behind buy the rest. If it slides off you’re out $6 instead of $70.
- Use a J roller not your palm. A $9 seam roller applies roughly 10 times the pressure per square inch that hand pressure does. Press tiles firmly from the center outward and you push out the air bubbles that would otherwise turn into lift points.
- Give it 48 hours before any water touches it. Smart Tiles states its adhesive sets firmly within 48 hours of contact. Shower somewhere else or at minimum run the exhaust fan nonstop for those two days.
- Photograph the bare wall before you start. Date stamped photos of pre existing texture damage cracks or stains have saved more deposits than any adhesive on the market.
Step by Step: The Best Way to Install Peel and Stick Tiles on Textured Drywall
Total time: two to three hours of active work plus drying and curing. Tools: degreaser isopropyl alcohol microfiber cloths level chalk line or pencil metal ruler utility knife J roller caulk gun.
Step 1 Strip the wall of everything invisible. Wash the entire kitchen wall or bathroom backsplash zone with degreaser rinse then wipe with isopropyl alcohol. Bathrooms hold hairspray and body oils that no visual inspection catches. Common mistake: washing with dish soap and calling it done. That surfactant film is exactly what releases your tile in week two.
Step 2 Dry it fully then dry it more. Run the exhaust fan at least an hour after cleaning longer if your bathroom has no window. Trapped moisture in the drywall surface undermines the bond. Common mistake: priming or tiling the same hour you washed.
Step 3 Run your prep method. Prime skim coat or build your backer panel based on the fingernail test. If priming follow the manufacturer’s instructions and give it 72 hours minimum. If skim coating spread a thin layer dry overnight then sand lightly with 220 grit to create a smooth surface. Common mistake: aggressive sanding that cuts through paint into bare paper facing which then needs sealing before anything will stick.
Step 4 Snap a level line. Never measure off the countertop or vanity. They’re almost never level. Use a level to draw a horizontal guideline at the height of your first row then mark where each vertical seam falls. Common mistake: starting at one end and working across which turns a 2mm error into a visibly crooked top row.
Step 5 Dry lay the layout on the counter. Arrange all tile options face up before you remove any backing so you can balance the pattern and push cut pieces to the ends instead of the middle. Common mistake: discovering at tile 10 that you’ll finish with a one inch sliver at eye level.
Step 6 Cut around outlets and edges. Score the vinyl face with a utility knife against a metal ruler and snap it or make repeat passes for stone tile and thicker gel styles. You don’t need a wet saw or a tile cutter for vinyl. Common mistake: cutting outlet openings tight. Leave 2mm of clearance so the cover plate hides the edge and you’re not wrestling the tile into place.
Step 7 Apply from the center outward. Fold back half the backing align the tile to your line gently peel the rest and set it down from the middle out. Overlap the printed grout lines where the design calls for it. Set one tile at a time and check level every third piece. Common mistake: peeling the whole backing off first and touching the adhesive which transfers finger oil to the one surface that needs to bond.
Step 8 Roll every square inch. Work the J roller across the whole surface then hit every seam and edge a second time. On textured walls this step does double duty forcing adhesive down into whatever grain is left. Common mistake: rolling the field but not the perimeter where lifting always starts.
Step 9 Caulk the wet edges. Run a bead of 100% silicone along the countertop seam and both vertical ends. Details in the next section. Common mistake: using painter’s caulk in a splash zone.
Step 10 Cure for 48 hours. No water no steam no cleaning. Run the fan. Common mistake: showering that night and then wondering why the corner lifted by Friday.
Bottom line: prep and cure time do more for adhesion than any brand of tile you can buy.
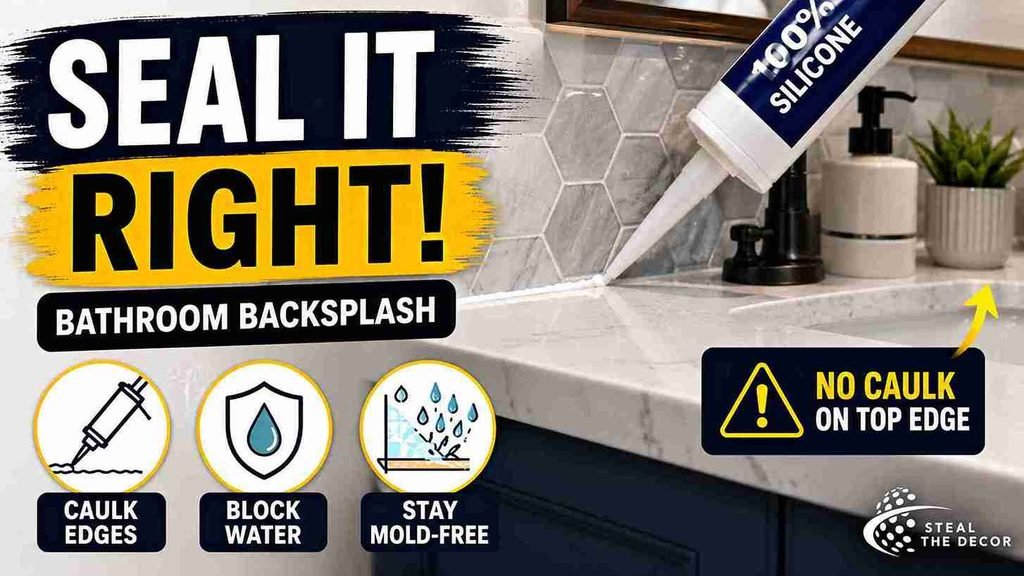
Sealing Peel and Stick Backsplash in a Bathroom: Caulk Edges and Wet Areas
Edges are where bathroom installations die. The tile field can be perfectly bonded while one unsealed seam at the counter wicks water sideways under the bottom row.
Where to caulk: the horizontal seam where tile meets the vanity top both vertical outside edges and the perimeter of any outlet cutout. GE Advanced Silicone 2 Kitchen and Bath (roughly $8–$12 a tube) is 100% silicone mildew resistant and stays flexible through humidity swings. Acrylic latex caulk tools easier and takes paint but it absorbs moisture and yellows in a bathroom. Save it for dry rooms.
Where not to caulk: the top edge if your tile stops partway up the wall. Leaving it open lets any moisture that does sneak behind the tile escape and dry instead of sitting trapped against the drywall.
Okay I need to walk that back slightly. If your tile runs all the way to the ceiling or meets a window trim seal the top too an open edge only helps when there’s dry wall above it to breathe into. In a standard vanity run stopping at 18 inches leave it open. Trapped moisture behind a sealed panel is how a cosmetic project turns into a drywall repair bill.
Bead technique: cut the tube tip at 45 degrees to a 3mm opening run one continuous pass then tool it with a wet fingertip inside two minutes. Two thin beads beat one thick one. Let silicone cure 24 hours before it meets water.
Wet areas versus splash zones. Vanity backsplashes behind toilet walls and the wall beside a tub are splash zones and those are fine. Direct shower spray is not no matter what the box promises. For that you want a product actually engineered for it and I go through the trade offs in the guide to tiles rated for shower walls. Wet space waterproofing needs a continuous membrane and adhesive backed vinyl isn’t one.
Bottom line: silicone the bottom and sides think twice about the top and keep peel and stick out of direct spray.
6 Mistakes Renters Make With Peel and Stick Tile on Textured Walls
Skipping the degrease step. This is the one I got wrong and I remember standing in that bathroom at 2 a.m. holding a two foot sheet of tile that had just slapped onto the vanity thinking the primer had failed. It hadn’t. I’d cleaned that wall with an all purpose spray instead of a degreaser because it looked clean and two years of hairspray was sitting under everything I’d done. Same tile same primer different cleaning. The second attempt is still up.
Priming with the wrong product. Standard wall primer exists to accept paint not to hold a pressure sensitive adhesive. Reach for an adhesion specific primer and give it the full cure window.
Tiling over fresh paint. Twenty one days is the manufacturer benchmark. Paint that hasn’t fully cured keeps releasing solvents and won’t hold a strong bond.
Installing in a cold bathroom. Contact adhesives lose tack below about 65°F. Warm the room and the tiles first especially in winter.
Hand pressing instead of rolling. Hand pressure feels like enough and isn’t. On textured surfaces it’s the difference between 50% and 80% contact.
Removing tiles cold and fast. When you move out warm each tile with a hair dryer for 30 seconds and pull slowly at a shallow angle parallel to the wall rather than straight out. Fast cold removal tears paint and turns a residue free job into a deposit deduction.
Bottom line: five of these six happen before the first tile ever touches the wall.
Peel and Stick Tiles Worth Buying for a Textured Bathroom
| Product / Method | Price Range | Ease of Use (1–5) | Damage Risk | Best For | Our Rating |
|---|---|---|---|---|---|
| Smart Tiles Metro by Smart Tiles | $6–$9 per sheet | 5 | Minor residue | Light orange peel after priming | 4.5/5 |
| Art3d Peel and Stick Backsplash by Art3d | $4–$7 per sheet | 4 | Minor residue | Budget vanity backsplash | 4/5 |
| STICKGOO Peel and Stick Subway Tile | $5–$8 per sheet | 4 | Minor residue | Flat classic subway tile look | 4/5 |
| Hardboard backer panel plus any tile | $22–$35 total | 3 | No damage | Heavy knockdown texture strict leases | 4.5/5 |
| Zinsser Bulls Eye 1 2 3 by Rust Oleum | $18–$26 per quart | 4 | Minor residue | Sealing porous or chalky paint | 5/5 |
| GE Advanced Silicone 2 Kitchen and Bath | $8–$12 per tube | 4 | No damage | Edge sealing at the counter seam | 5/5 |
Smart Tiles Metro has the most forgiving smart adhesive of the three tile brands I tested and repositions for a few seconds before it grabs which matters a lot when you’re aligning to a level line alone. Art3d is the value pick thinner gel slightly less dimensional but at nearly half the price per square foot it’s the right call for a small vanity run. STICKGOO sits between them with the cleanest flat white finish though flat finishes are exactly the ones that telegraph texture. Pair it with prep you’ve actually done.
And if your wall is failing the fingernail test badly put the money into the backer panel instead of a premium tile. Trust me on this one. A $5 tile on a flat panel outlasts a $9 tile on heavily textured drywall every single time.
The same reasoning applies elsewhere in the room. I used the leftover panel offcuts for a project in the guide to covering an ugly tile wall and the surface prep was identical.
Bottom line: on textured walls spend on prep before you spend on tile.
What to Check With Your Landlord Before You Start
- Read the alterations clause word for word. Adhesive products often fall under “decorations” rather than “alterations” and that’s a meaningful legal difference.
- Ask specifically about skim coating. Joint compound changes the wall finish permanently. Get a yes in writing by email before you open the tub.
- Confirm when the bathroom was last painted. Under 21 days and you wait permission or not.
- Ask whether texture matching is expected at move out. Some landlords require it and matching sprayed orange peel is a professional job.
- Get permission for the mounting method not just the tile. Removable strips and a French cleat are two different conversations.
- Document the wall condition first with dated photos of existing cracks stains or repairs.
- Save your receipts. If a dispute happens showing you used renter rated products helps your case.
HUD’s overview of what rights you have as a tenant makes a reasonable starting point though the rules that actually govern wall alterations get set at the state and local level. Check your state’s tenant handbook too.
Bottom line: a two line email asking permission costs nothing and is the cheapest insurance in this entire project.
Real Results: What I Spent and What Failed
Materials across both walls came to $187.40. Here’s the breakdown for the wall that worked: Smart Tiles Metro seven sheets $52.15. Zinsser Bulls Eye 1 2 3 one quart $22.98. Krud Kutter degreaser $9.47. J roller $8.99. GE Advanced Silicone 2 $9.86. Isopropyl alcohol and microfiber cloths $11.20. Total for the successful vanity backsplash: $114.65 and about four hours spread over two weekends.
The failure cost me $34 and taught me more than the success did. Wall two used the same tile same primer same roller. But I cleaned it with a general bathroom spray instead of a degreaser because I was in a hurry and the wall looked fine. It wasn’t. Two years of hairspray had built an invisible film and the primer sealed over it rather than bonding through it. Fourteen days and roughly 10 showers later the bottom row came away in one continuous sheet.
Redone properly with degreaser and alcohol that same wall has now held through 18 months of daily showers. Two seams have needed a fingernail press and a re roll. Nothing has lifted. At my last inspection the property manager assumed a contractor had retiled the vanity which I did not correct.
Bottom line: I spent $34 proving the cleaning step isn’t optional so you don’t have to.
FAQs: Peel and Stick Backsplash on Textured Bathroom Walls
Does peel and stick backsplash stick to textured walls?
It sticks reliably to lightly textured walls after cleaning and priming and unreliably to knockdown or heavy texture without a skim coat or backer panel. Smart Tiles advises against installing directly on textured surfaces because the reduced contact area blocks proper adhesion. Run the fingernail test to see which category your wall falls into.
Do I have to sand textured walls before peel and stick tile?
Not necessarily. Sanding is one option but renters usually can’t risk cutting into paint. A thin skim coat of joint compound an adhesion primer over light texture or mounting the tile to a rigid backer panel all get you a usable surface without sanding the wall itself.
Is peel and stick backsplash waterproof enough for a bathroom?
Vinyl and gel peel and stick tiles handle splash zones like vanity walls behind toilets and beside tubs. They aren’t a waterproofing membrane and shouldn’t go inside a shower where water hits directly. Seal all bottom and side edges with 100% silicone caulk to stop water tracking behind the tile.
Will peel and stick tile damage rental walls when I remove it?
Removed correctly it leaves little to no damage. Warm each tile with a hair dryer for about 30 seconds and pull slowly at a shallow angle parallel to the wall. Cold fast removal is what pulls paint. Any adhesive residue left behind usually wipes off with isopropyl alcohol.
How much does a peel and stick bathroom backsplash cost?
A standard vanity backsplash runs $60 to $130 in materials. My successful install came to $114.65 including primer degreaser silicone and a J roller. A rigid backer panel setup adds roughly $22 to $35 but removes the wall damage risk entirely.
Which peel and stick tile brand works best on textured walls?
Smart Tiles Metro has the most forgiving adhesive and repositions briefly during installation which helps on imperfect surfaces. Art3d gives better value across larger areas. On heavy texture brand matters less than prep any tile on a flat backer panel beats a premium tile on rough drywall.
What do I do if my peel and stick backsplash starts peeling?
Warm the loose section with a hair dryer clean underneath with isopropyl alcohol and re roll firmly. If it lifts again the wall was never properly degreased. Remove that section entirely wash with a TSP substitute dry for an hour and reinstall with fresh tile.
Key Takeaways
- Peel and stick backsplash tile bonds by surface contact alone so orange peel texture cuts adhesion to roughly 40 to 70 percent of a smooth wall and knockdown texture cuts it further.
- Smart Tiles states that textured and uneven surfaces prevent optimal adhesion and recommends smoothing plus primer with a 72 hour dry time before installation.
- Zinsser Bulls Eye 1 2 3 Water Base Primer by Rust Oleum recoats in one hour but full adhesion and hardness develop over seven days so allow at least 72 hours before applying tile.
- Mounting peel and stick tile to a 1/8 inch hardboard or 3mm PVC backer panel creates a fully smooth surface and leaves zero wall damage making it the safest method for renters facing knockdown texture.
- Bathroom walls need cleaning with a TSP substitute degreaser rather than dish soap because hairspray and body oil films cause more adhesion failures than texture does.
- GE Advanced Silicone 2 Kitchen and Bath should seal the countertop seam and both vertical edges while a partial height backsplash leaves its top edge open so trapped moisture can escape rather than sit against drywall.
- Peel and stick tile is rated for splash zones only and should never go into direct shower spray where a continuous waterproofing membrane is required instead.
Before You Start Peeling Backings
If you take one thing from three weekends of testing: the wall matters more than the tile. A $6 sheet on a properly degreased primed level surface will outlast a $12 sheet slapped onto textured drywall that only looked clean. And if your fingernail catches on the texture build a panel instead of fighting the wall. It comes down in one piece when your lease ends and it moves with you.
Have you tried this in your rental? Tell me what happened below especially if something failed. The failures are the useful part. And if you’re working through the rest of the bathroom the guide to storage that doesn’t need drilling covers what I tackled next while refinishing a vanity with contact paper uses the same surface prep you just learned.
Your deposit stays intact. Your bathroom stops looking like a rental.