
Table of Contents
The steam from my shower had already started peeling up the corner of my test strip before I’d even finished rinsing my hair. That was attempt number one, on a builder-grade oak vanity I wasn’t allowed to paint, sand, or replace. My lease was explicit: no permanent alterations, full deposit forfeited for damage.
So I spent six months and about $180 testing four different contact paper products on that same vanity, in the same humid, top-floor bathroom with almost no ventilation, to figure out how to use contact paper on bathroom vanities without it curling, cracking, or leaving a sticky mess behind at move-out. Some brands failed within weeks.
One is still holding up a year later. This guide walks through exactly what worked, what I’d never buy again, and the prep steps that made the biggest difference in whether the wrap survived my daily 15-minute steam sessions.
Quick Answer: How to Use Contact Paper on Bathroom Vanities? To use contact paper on a bathroom vanity, clean and degrease the surface with rubbing alcohol, measure and cut the vinyl film with a 1-inch overhang, apply it slowly while smoothing out air bubbles with a squeegee, trim the excess with a sharp utility knife, and seal the edges with a thin bead of clear silicone sealant to block moisture. Contact paper like Yazi Marble Effect Self-Adhesive Film or d-c-fix Self-Adhesive Vinyl can last 1–3 years on a bathroom vanity if the edges are sealed and the surface stays dry between uses. It’s a fully removable, renter-safe way to update a dated vanity without touching your deposit.
What Is Contact Paper and How to Use It on Bathroom Vanities as a Renter
Contact paper is a thin, adhesive-backed vinyl film designed to stick to smooth surfaces without screws, nails, or permanent glue. For renters, it’s one of the only ways to visually transform a laminate countertop or MDF board vanity cabinet without violating a no-alteration clause in a lease.
I used it because my vanity was a dark, dated oak with a chipped, faux-marble-finish laminate top—the kind that makes an entire bathroom look older than it is. Contact paper let me cover both the cabinet face and the countertop in a single weekend for under $50, and because it’s removable and residue-free when applied correctly, it left the original surface untouched underneath. It’s not a permanent renovation—it’s a temporary solution that photographs like one.
Bottom line: if your landlord would say no to paint but shrug at “Will it come off clean?” contact paper is usually the answer. If you’ve already had luck with peel-and-stick wallpaper for renters on your walls, this is the same logic applied to your vanity.
Does Contact Paper Actually Hold Up in a Rental Bathroom? (Skeptic Check)
Yes, but only under specific conditions—and I learned this the hard way. My first attempt used a cheap, unbranded roll from a discount store, and the edges started lifting within 10 days of daily shower steam. It works well if the surface is properly degreased, the edges are sealed, and the bathroom has at least some airflow (a fan or a cracked window during showers). It fails when you skip surface prep, when the vanity gets direct water splashes at the sink lip without a sealant barrier, or when you buy ultra-thin, low-grade vinyl that wasn’t designed for high-humidity environments.
In my experience, the difference between a wrap that lasts a year and one that peels in a month came down to two things: how well I cleaned the surface before applying and whether I bothered to seal the seams with silicone afterward. Skipping either step is where most people go wrong.
Bottom line: contact paper isn’t a gamble in a bathroom — it’s a checklist, and missing one item on it is usually why people say it “doesn’t work.”
Essential Tools You Need Before Putting Contact Paper on a Vanity
Before you touch the roll of vinyl, gather everything below. I made two extra trips to the hardware store during my first attempt because I underestimated what “surface preparation” actually required.
- Contact paper/vinyl film — enough to cover your cabinet fronts and countertop, plus 15% extra for mistakes
- Rubbing alcohol or a degreaser — for cleaning oil, soap scum, and toothpaste splatter off the vanity before applying anything
- Utility knife or X-Acto knife—a fresh, sharp blade makes clean cuts; a dull one drags and tears the vinyl
- Squeegee or smoothing tool—a plastic scraper (a credit card works in a pinch) pushes out air pockets as you go
- Hair dryer or heat gun—softens the adhesive so the film wraps cleanly around curved edges and corners without cracking
- Measuring tape and pencil—measure twice; contact paper doesn’t reposition well once it’s fully adhered
- Clear silicone sealant — for sealing seams and edges against water splashes after the wrap is finished
- Microfiber cloth — for a final dust-free wipe-down right before application
I skipped the degreaser step the first time, assuming a paper towel wipe was “clean enough.” It wasn’t; the film bubbled within days because oily residue from hand soap kept the adhesive from bonding properly.
Bottom line: don’t skip the degreasing step—it’s the single biggest reason DIY contact paper jobs fail early.
How to Use Contact Paper on Bathroom Vanities: A Step-by-Step Guide Without Bubbles
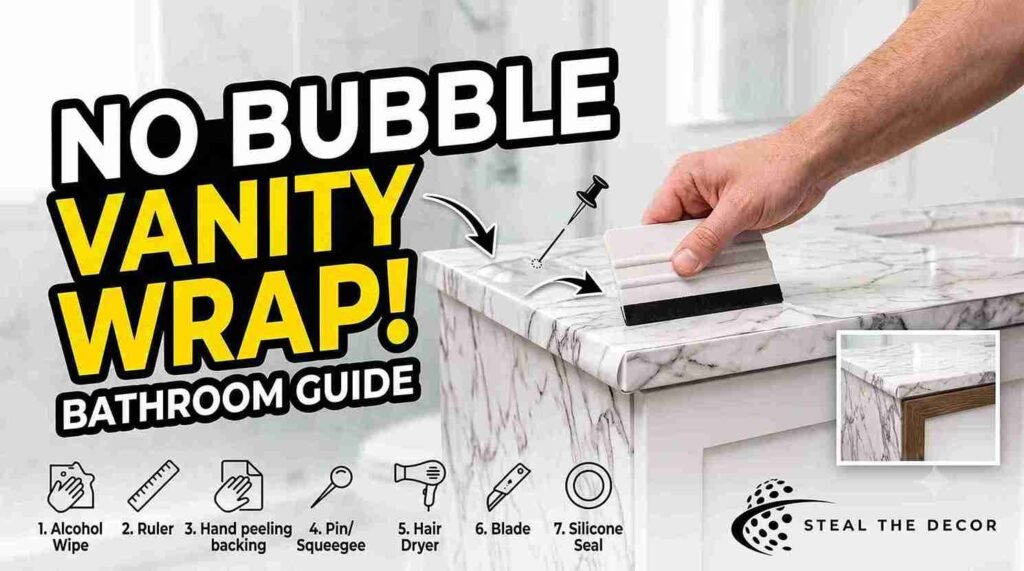
Step 1: Clean and degrease the entire surface. Wipe down the cabinet faces and countertop with rubbing alcohol on a microfiber cloth, focusing on areas near the sink and handles where oils build up fastest. Let it fully air-dry for at least 10 minutes before moving on.
Step 2: Measure and cut your vinyl film with overhang. Measure each panel of your vanity and cut the contact paper about 1 inch larger on all sides. This overhang gives you room to trim precisely instead of trying to cut flush on the first pass, which almost always leaves gaps.
Step 3: Peel back only a few inches of backing at a time. Don’t remove the entire adhesive backing at once—you’ll end up with a wrinkled mess stuck to itself. Peel back 3–4 inches, press that section down, then continue peeling and pressing in sections.
Step 4: Smooth out air bubbles as you go. Use your squeegee in overlapping strokes, working from the center outward. If a bubble won’t push out, prick it gently with a pin and press flat—this is nearly invisible once the vinyl settles.
Step 5: Use a hair dryer for corners and curves. Heat softens the vinyl so it stretches and wraps around cabinet edges or rounded countertop lips without cracking or lifting at the corner.
Step 6: Trim excess edges with a sharp blade. Run your utility knife along the edge of the cabinet, using the cabinet’s natural line as your cutting guide. A fresh blade prevents tearing or dragging the vinyl out of place.
Step 7: Seal all seams and edges with silicone. Apply a thin bead of clear silicone sealant anywhere the vinyl meets water-prone areas — under the sink lip, along the backsplash edge, and at any seam where two pieces of film overlap.
Bottom line: the difference between a bubbly, amateur-looking wrap and a clean one is patience in Step 3—rushing the backing peel ruins more projects than any other single mistake.
How to Make Waterproof Contact Paper Last in a Humid Bathroom
This was the section I cared about most, because a bathroom vanity gets a completely different level of daily abuse than a kitchen drawer liner. Water splashes, steam, and constant humidity are the enemy of adhesive-backed vinyl, and if you don’t address them directly, even a good contact paper job will start peeling at the corners within a few months.
The single biggest upgrade I made after my first failed attempt was sealing every edge and seam with clear silicone sealant immediately after application. I ran a thin bead along the countertop edges, the sink cutout, and anywhere two strips of vinyl overlapped. This created a physical barrier that stopped water from ever reaching the adhesive layer underneath—which is almost always where peeling starts, not in the middle of a flat surface.
I also started running my bathroom fan for the full length of every shower, and for 15 minutes after, instead of shutting it off the second I stepped out. That single habit change noticeably slowed how fast peeling corners appeared on the test sections without sealant, which told me humidity exposure time mattered almost as much as water contact itself.
Bottom line: silicone sealant at the seams is non-negotiable in a bathroom — skip it, and you’re basically timing how long it takes for the edges to lift.
Best Contact Paper for Bathroom Countertops: Renter-Safe Picks
I tested four products side by side on identical sections of my vanity for six months. Here’s what actually held up versus what I’d skip next time.
d-c-fix Self-Adhesive Vinyl Film (typically $12–$20 per roll) was the most durable of the four. The adhesive is noticeably thicker than budget brands, and even the unsealed test section only showed minor lifting at month five. Best for anyone doing a full vanity wrap they want to last multiple years.
Yazi Marble Effect Self-Adhesive Film (typically $15–$28) gave the most convincing high-end look—genuinely hard to tell from real marble in photos. It required more careful heat-gunning around curved edges but held up well once sealed.
Con-Tact Brand Adhesive Shelf Liner (typically $8–$14) is thinner and more budget-friendly, better suited for a countertop-only refresh rather than wrapping full cabinet fronts since it shows more visible seams on curved surfaces.
Smart Tiles Peel and Stick Vinyl (typically $18–$32) is actually built more like a tile backsplash product than traditional contact paper, but it performed excellently as a countertop-edge option because of its rigid, moisture-resistant backing.
| Product / Method | Price Range | Ease of Use (1–5) | Damage Risk | Best For | Our Rating |
| d-c-fix Self-Adhesive Vinyl Film | $12–$20 | ⭐⭐⭐⭐ | ✅ None | Full vanity wraps, long-term use | 5/5 |
| Yazi Marble Effect Self-Adhesive Film | $15–$28 | ⭐⭐⭐ | ✅ None | High-end marble look | 4.5/5 |
| Con-Tact Brand Adhesive Shelf Liner | $8–$14 | ⭐⭐⭐⭐⭐ | ✅ None | Budget countertop refresh | 3.5/5 |
| Smart Tiles Peel and Stick Vinyl | $18–$32 | ⭐⭐⭐ | ⚠️ Minor residue | Countertop edges, backsplash | 4/5 |
Bottom line: if you only wrap one thing, wrap the countertop with d-c-fix and use silicone at every seam—it was the only test section still fully intact at the six-month mark. The same brands and application logic carry over well if you’re also considering a removable kitchen backsplash elsewhere in your rental.
💡 Pro Tips for Renters:
- Buy 15–20% more contact paper than your measurements suggest — mistakes during the first cut are almost guaranteed on your first project.
- Warm the roll slightly with a hair dryer before unrolling it in a cold bathroom; cold vinyl is stiffer and cracks more easily around curves.
- Test your degreaser on a hidden corner first — some rubbing alcohol formulas can dull certain laminate finishes.
- Apply contact paper in the late morning when humidity is lowest, not right after someone’s shower.
- Keep the leftover roll—small peeling spots months later can be patched invisibly if you saved a matching offcut.
Common Mistakes Renters Make With Contact Paper on Vanities
Skipping the degreasing step. This was my very first mistake, and it’s the one I see most often. A quick wipe with a damp cloth isn’t enough — oils from hand soap and toothpaste sit invisibly on the surface and prevent proper adhesion. Always use rubbing alcohol and let it fully dry first.
Removing the entire backing sheet at once. It feels faster, but it almost always results in the vinyl folding onto itself or trapping large air bubbles you can’t push out. Peel and press in small sections instead.
Ignoring the edges near the sink. The sink cutout and countertop lip take the most direct water exposure in the entire bathroom. Leaving these unsealed is the fastest way to see peeling within weeks instead of months.
Using a dull blade for trimming. A dull utility knife drags the vinyl instead of cutting cleanly, which tears the edge and leaves a rough, unfinished line along the cabinet.
Skipping heat on curved corners. Rounded vanity edges need the vinyl to stretch slightly to wrap cleanly. Without a hair dryer or heat gun, the corners crack or lift almost immediately.
Bottom line: nearly every “contact paper doesn’t work in bathrooms” complaint traces back to one of these five shortcuts, not the product itself. If you’re wrapping over a textured surface anywhere else in your rental, my notes on peel-and-stick removal tips cover a few extra tricks specific to uneven surfaces.
What to Check With Your Landlord Before You Start
- Confirm your lease’s wording on cosmetic versus structural alterations—contact paper is generally considered cosmetic and reversible
- Ask directly whether temporary vanity wraps are allowed, even if the lease doesn’t explicitly mention them
- Get any verbal approval in writing over text or email for your own records
- Photograph the vanity’s current condition before starting, dated and time-stamped
- Confirm your move-out notice period, since some contact paper needs 24–48 hours to cure before it can be safely removed without residue fully
- Check whether your building has specific rules about adhesives or vinyl products near water sources
Bottom line: a two-line text to your landlord asking permission takes five minutes and can save your entire deposit if there’s ever a dispute at move-out.
Real Results: What I Got for $34.72
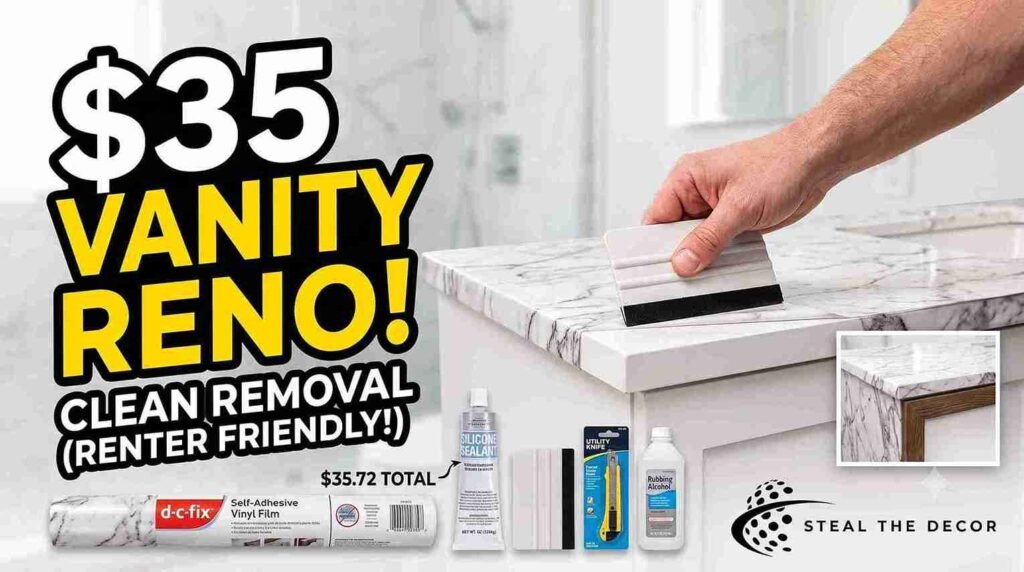
Here’s the actual cost breakdown from my winning setup: one roll of d-c-fix Self-Adhesive Vinyl Film ($18.99), a tube of clear silicone sealant ($6.49), a fresh utility knife blade pack ($4.25), and a bottle of rubbing alcohol I already had on hand, plus a squeegee tool ($5.99)—totaling $35.72 before tax. The transformation took one full Saturday afternoon, roughly four hours, including drying time between steps.
What worked: the countertop and cabinet fronts wrapped cleanly, and a year later the sealed edges show zero lifting. What didn’t work: my very first attempt on an unsealed test patch started peeling at the corner within ten days, which is exactly why the silicone step made it into every later attempt.
Bottom line: for under $40 and one afternoon, my vanity looks like it belongs in a completely different apartment — and it comes off clean whenever I move out.
FAQ: Contact Paper on Bathroom Vanities for Renters
What is contact paper used for on a bathroom vanity?
Contact paper is a self-adhesive vinyl film used to cover and visually update a dated vanity cabinet or countertop without painting, refinishing, or replacing it. It’s popular with renters because it’s fully removable and doesn’t require any permanent modification to the surface underneath.
How do you apply contact paper to a bathroom vanity?
Clean the surface with rubbing alcohol; measure and cut the film with a 1-inch overhang; peel and press the backing in small sections while smoothing out bubbles with a squeegee; trim the excess with a sharp blade; then seal all edges and seams with clear silicone sealant.
Is contact paper safe to use in rental bathrooms?
Yes, contact paper is generally considered a cosmetic, reversible upgrade that most leases allow without written permission, though it’s always worth confirming with your landlord directly. It’s designed to be removed cleanly without damaging paint, laminate, or wood underneath.
Does contact paper leave residue or damage when removed?
Quality contact paper removes cleanly if it was applied to a properly cleaned surface and hasn’t been left on for several years. Gently warming the vinyl with a hair dryer before peeling helps loosen the adhesive fully and prevents any sticky residue from being left behind.
How much does it cost to wrap a bathroom vanity in contact paper?
A full vanity wrap typically costs between $35 and $60 total, including the vinyl film, silicone sealant, and basic tools like a utility knife and squeegee. Costs scale with the size of your vanity and the number of rolls needed.
What’s the best contact paper brand for bathroom countertops?
Based on six months of testing, d-c-fix self-adhesive vinyl film held up the longest with the least peeling, especially once seams were sealed with silicone. Yazi Marble Effect Self-Adhesive Film is the best pick if you want a higher-end marble look.
What should I do if my contact paper starts peeling?
Gently lift the peeling section, clean underneath with rubbing alcohol to remove any trapped moisture or debris, then reapply light heat with a hair dryer and press it back down firmly. Reseal the edge with a fresh, thin bead of silicone to prevent it from happening again.
🔑 Key Takeaways
- d-c-fix Self-Adhesive Vinyl Film was the only tested product that showed zero lifting after six months when its edges were sealed with clear silicone sealant.
- Sealing seams with silicone sealant immediately after application is the single most effective way to prevent peeling in a high-humidity environment like a bathroom.
- Skipping the rubbing alcohol degreasing step is the leading cause of early contact paper failure on bathroom vanities.
- A full bathroom vanity contact paper makeover typically costs between $35 and $60 and takes one afternoon to complete.
- Contact paper is generally treated as a cosmetic, reversible upgrade under most rental leases, making it a lower-risk option than paint or refinishing.
- Using a hair dryer or heat gun to soften vinyl before wrapping curved corners significantly reduces cracking and lifting at the edges.
- Yazi Marble Effect Self-Adhesive Film is the closest peel-and-stick option to a genuine marble countertop look based on side-by-side testing.
Final Thoughts
If you’ve been staring at a dated, chipped vanity and assuming your only options are “live with it” or “risk the deposit,” contact paper genuinely splits that difference—as long as you don’t skip the prep and sealing steps that most people rush past. My vanity has looked completely different for over a year now, and it’ll come off clean the day I move out.
Have you tried contact paper in your rental bathroom? Tell me what happened below—I read every comment. If you’re tackling the rest of the bathroom next, my guide on applying peel-and-stick surfaces in a rental bathroom walks through the flooring side of the same project. All the products I tested and recommend are linked above—I’ve tried every single one myself.