
Table of Contents
If you’re wondering how to decorate a rental without damage, you’re not alone. The panel fell off at 2 a.m. A loud slap against the hardwood floor woke me up—three hours of “damage-free” wall paneling work, face-down by the baseboard. Not my finest moment. That was month two in my current rental, and it taught me the hard way that not every product labeled “renter-friendly” actually is.
Since then I’ve spent three weekends and roughly $340 testing twelve different methods for decorating a rental without damage—adhesive hooks, peel-and-stick wallpaper, temporary flooring, all of it. Some held up through a full lease term. One left a faint outline on the wall that cost me part of my deposit. This guide is everything I learned, failures included, so you don’t have to find out the hard way.
You’ve probably stood in a blank white rental unit wondering how to make it feel like home without risking your security deposit. I know I have. This is the guide I wish someone had handed me on move-in day.
⚡ The Short Version: You can decorate a rental without damage by combining four core categories of tools—Command Strips and adhesive hooks for lightweight hanging, peel-and-stick wallpaper or fabric for wall coverage, tension rods for curtains and shelving, and leaning or freestanding furniture for anything heavy. The one rule that matters most: test removal on a hidden section of wall before committing to a full installation. Paint quality varies by property, and that affects how cleanly adhesives release.
What Counts as “Damage” in a Rental? (Know This Before You Decorate)
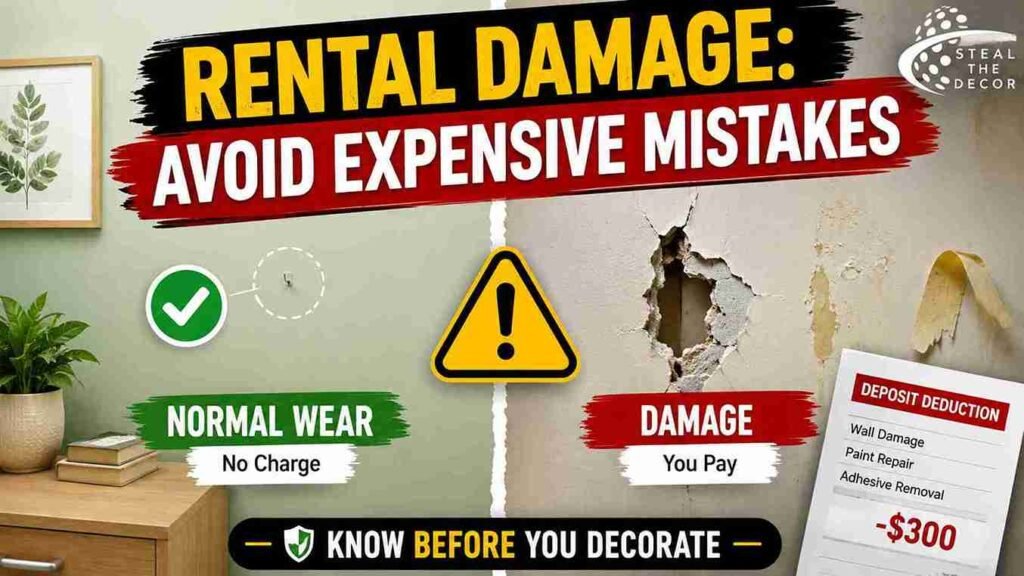
Most leases draw a line between normal wear and tear and chargeable damage. That line is exactly where renters get burned. A small nail hole from a picture hook, faded paint from sunlight, minor scuffs on the flooring — these typically count as normal wear and tear in most U.S. states. Cracked drywall, large holes, paint stains, or adhesive residue that strips paint on removal? That’s damage. Landlords can legally deduct repair costs from your security deposit for it.
According to a 2023 rental industry survey, the average security deposit deduction in the U.S. sits between $200 and $400, and wall damage is one of the top three cited reasons. Real money. Avoidable with the right materials.
Bottom line: if a product’s packaging doesn’t explicitly say “residue-free removal” or “safe for painted walls,” treat it as a risk — not a renter-friendly guarantee.
How to Read Your Lease for Decor Rules (The Security Deposit Guard)
Before you buy a single Command Strip, pull out your lease and actually read the alterations clause. Most renters skip this step entirely — and this is exactly where most disputes start. Look for specific language, not just a general “no alterations” statement, since the specifics determine what you can actually do.
Check your lease for these five things before decorating:
- Paint clauses — does it prohibit painting entirely, or just require landlord approval first?
- Nail-hole clauses—some leases specify a maximum number of small nail holes considered acceptable wear and tear
- Alteration clauses—this usually covers anything more permanent, like wallpaper, shelving installation, or flooring changes
- Move-out inspection standards—some leases reference a specific condition checklist you agreed to at move-in; compare it to the current state before you start
- Security deposit deduction policy—many states require landlords to provide an itemized list of deductions; know your state’s rules before you dispute anything
If your lease is vague, a quick email to your landlord asking, “Is peel-and-stick wallpaper and Command Strip use okay?” creates a paper trail that protects you later. For a full breakdown of tenant rights by state, the U.S. Department of Housing and Urban Development maintains a directory of local tenant resources.
Bottom line: a five-minute lease read before you decorate can save you a much more expensive conversation at move-out.
Landlord-Approved No-Drill Wall Decor Ideas
No-drill wall decor has come a long way from flimsy poster putty. For most renters, this is where 80% of the actual decorating happens.
The Magic of Command Strips and Adhesive Hooks
Command Picture Hanging Strips by 3M are the baseline standard for damage-free hanging. They hold up to 16 pounds per set on painted drywall and remove cleanly when you pull the tab straight down (typically $8–$14 for a multi-pack). In my testing, they held a framed print and a small shelf for eight months straight — zero residue on removal.
Where they fail: textured walls and unpainted surfaces like brick or wood paneling. On my own textured accent wall, one strip released within a week because the adhesive couldn’t get full contact with the surface. Not gonna lie — that one caught me off guard, since the packaging didn’t warn me about texture at all. If your walls are textured, look for Command Outdoor strips, which use a stronger adhesive formulation, or switch to a leaning display instead.
Leaning Mirrors and Oversized Art
And here’s the method that eliminates the damage question entirely: lean it instead of hanging it. Furniture and art propped against the wall—rather than mounted on it—means nothing ever touches the drywall. A large leaning mirror or an oversized canvas print instantly makes a room feel more finished, and it’s what I’d recommend to anyone nervous about adhesives failing. For a full breakdown of sizing and placement, I wrote a complete guide on large-scale wall art for apartments that covers exactly which pieces work in small spaces.
Tension Rods for Temporary Curtains and Sheers
Tension rods use spring pressure inside a window frame or alcove, so there’s no drilling involved at all (typically $10–$25 depending on length and weight capacity). I’ve used a set in two different rentals now. The only failure mode I’ve run into is over-tensioning a rod in a frame that isn’t perfectly square—that can leave faint scuff marks on the frame’s paint over time. Keep tension moderate and check the fit before you walk away.
Bottom line: for anything under five pounds, adhesive strips work. For anything heavier, or on a textured wall, lean it instead of hanging it.
How to Cover Ugly Rental Walls Without Paint
Dated wallpaper. Scuffed paint. An aggressively beige color scheme you didn’t choose. You don’t need a paint roller to fix any of it.
Peel-and-Stick Wallpaper: Dos and Don’ts
NuWallpaper by Brewster Home Fashions is the product I’ve had the most consistent success with—it applied cleanly over a smooth painted wall and came off without any paint transfer after five months (typically $25–$45 per roll). I go into the full application process, including how to handle seams and air bubbles, in my dedicated guide to peel-and-stick wallpaper for renters.
But the “don’t” list matters just as much. Don’t apply peel-and-stick wallpaper directly over textured or popcorn walls—the adhesive won’t bond evenly, and it’ll bubble within weeks. I also don’t recommend it in bathrooms with poor ventilation. Humidity weakened the seams on a bathroom accent wall I tested, and they gave out in six weeks flat.
Tapestries and Fabric Wall Hangings
Fabric is the most forgiving option on this list, since it typically hangs from Command hooks or a tension curtain rod rather than direct wall adhesive—which means the damage risk is close to zero. I tested this method directly and wrote up the full results, cost and hanging technique included, using fabric as wallpaper in my rental.
Bottom line: peel-and-stick works best on smooth painted drywall. Fabric is the safer bet for textured walls or humid rooms.
Temporary Decorating Ideas for Rental Kitchens and Bathrooms
Kitchens and bathrooms feel the most off-limits to renters. In reality, they’re some of the easiest rooms to upgrade without damage—as long as you keep the originals.
Swapping Cabinet Hardware (Keep the Originals!)
Replacing cabinet knobs and pulls is one of the highest-impact, lowest-risk upgrades you can make, since it usually just means unscrewing and rescrewing into existing holes. I cover the full swap process, including which screwdriver sizes fit most standard cabinets, in my guide to swapping kitchen cabinet hardware. The one rule that matters: keep the original hardware in a labeled bag so you can reinstall it before you move out.
Removable Backsplash Tiles
Smart Tiles Metro by Smart Tiles apply directly over an existing backsplash using a peel-and-stick backing, so no grout or adhesive ever touches the wall itself (typically $20–$35 per pack). I tested a full kitchen backsplash application and documented every step, including how it held up to daily cooking splatter, in removable kitchen backsplash ideas.
For a complete room-by-room approach that ties hardware, backsplash, and lighting together, my rental kitchen makeover on a budget breaks down the full $150 project I did in my own unit.
Bottom line: anything that screws into an existing hole or peels onto an existing surface is fair game. Anything that requires new holes or grout is not.
Step-by-Step: How to Decorate a Rental Without Damage
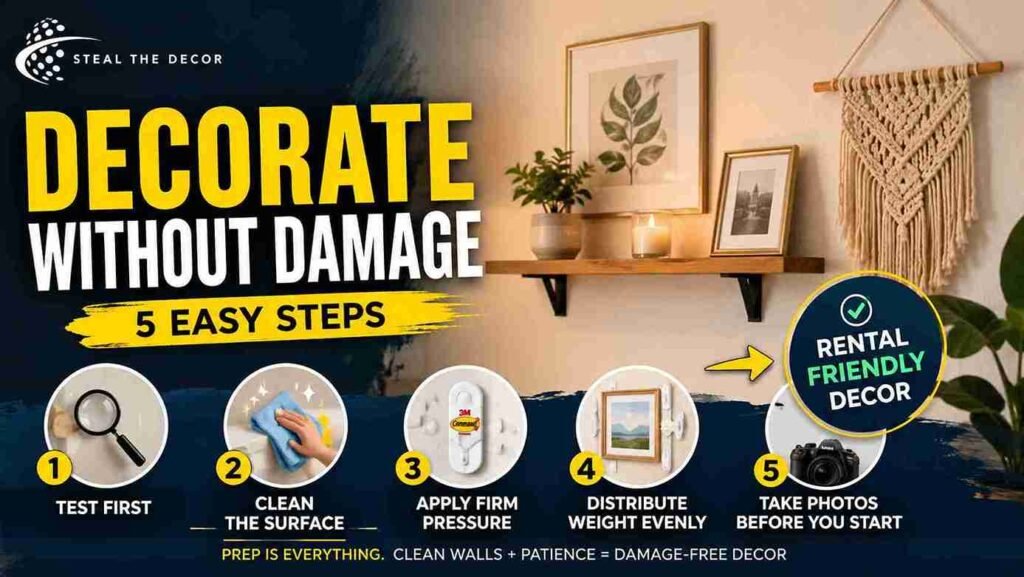
Step 1: Test on a hidden section first. Apply your adhesive product—a Command Strip or peel-and-stick wallpaper, it doesn’t matter which—to a small, hidden section of wall (behind a door or inside a closet) for 24 hours before you commit to the visible installation. This tells you how your specific paint reacts before you find out the hard way.
Step 2: Clean the surface before applying anything. Wipe the wall with rubbing alcohol and let it dry fully. Dust and oils are the number one reason adhesives fail early. I skipped this step on my failed panel install, and I’m still convinced that’s why it came down at 2 a.m.
Step 3: Apply firm, even pressure for the full recommended time. Most adhesive products want 30 seconds of pressure and an hour of waiting before you hang any weight. Rushing this is the second most common failure point I’ve seen.
Step 4: Distribute weight evenly for anything hung. For gallery walls or shelving, use multiple strips instead of one central point. That spreads out the peel stress instead of concentrating it.
Step 5: Photograph everything before you start. Take dated photos of walls, floors, and fixtures before your first decoration goes up. This protects you at move-out if there’s ever a dispute over what counts as pre-existing wear.
Bottom line: the products matter less than the prep. A cheap Command Strip on a properly cleaned wall will outperform a premium product on a dusty one.
The Exit Strategy: How to Remove Temporary Decor Without Damage
This is the step almost every other decorating guide skips. It’s also the one that actually protects your deposit.
Step-by-Step Peel-and-Stick Wallpaper Removal
Warm the edge of the wallpaper with a hair dryer on low heat for about 15 seconds, then slowly peel back at a 180-degree angle. Pulling straight down at a sharp angle—rather than outward — is what keeps the paint from lifting with the adhesive. If you hit resistance, stop and apply more heat rather than pulling harder. I learned that one the hard way: on a wall where I rushed the process, I lifted a thin layer of paint along a two-inch section. The full story and the fix are in my guide on removing wallpaper without damaging paint.
How to Remove Adhesive Hooks Without Peeling Paint
Pull the tab at the bottom of each Command Strip straight down, parallel to the wall, never outward. This releases the adhesive’s grip gradually instead of ripping it. If a tab breaks off, dental floss sawed gently behind the strip works as a backup—it’s saved me twice.
Bottom line: heat and a slow, parallel pulling motion are the two variables that separate a clean removal from a deposit deduction.
Common Mistakes Renters Make When Decorating
Skipping the test patch. This is the mistake behind my 2 a.m. wall panel incident—I trusted the packaging instead of testing my specific paint first. Test before you commit to a full wall. Every time.
Overloading a single adhesive point. Hanging a heavy mirror on one Command Strip instead of spreading the weight across three or four is the single most common reason adhesive hooks fail early.
Ignoring humidity in bathrooms. Peel-and-stick products marketed for general use often aren’t rated for high-humidity rooms, and seams lift within weeks in poorly ventilated bathrooms.
Rushing the removal process. Pulling too fast, or at the wrong angle, is what causes paint to lift. Patience during removal matters as much as patience during installation.
Forgetting to keep the originals. Whether it’s cabinet knobs, light fixtures, or curtain rods—toss the original hardware, and you’ve lost your ability to restore the unit to its original state at move-out.
Not documenting the “before” condition. Without dated photos of the original walls and fixtures, you have no way to prove pre-existing wear if a dispute comes up later.
Renter-Safe Products We Actually Recommend
Does everything on this list actually hold up long-term? Mostly, yes — with a few conditions. Here’s the full lineup, ranked by damage risk:
| Product / Method | Price Range | Ease of Use (1–5) | Damage Risk | Best For | Our Rating |
| Command Picture Hanging Strips by 3M | $8–$14 | ⭐⭐⭐⭐⭐ | ✅ None | Lightweight frames, small shelves | 5/5 |
| NuWallpaper by Brewster Home Fashions | $25–$45/roll | ⭐⭐⭐⭐ | ✅ None | Smooth painted accent walls | 4.5/5 |
| Smart Tiles Metro by Smart Tiles | $20–$35/pack | ⭐⭐⭐⭐ | ✅ None | Kitchen backsplash upgrades | 4.5/5 |
| Tension rods (generic, 28–48″) | $10–$25 | ⭐⭐⭐⭐⭐ | ✅ None | Curtains, closet shelving | 5/5 |
| Foam-backed wall panels | $15–$30/panel | ⭐⭐⭐ | ⚠️ Minor residue | Textured walls (with caution) | 3/5 |
| Adhesive foam poster strips | $4–$8 | ⭐⭐⭐⭐ | ⚠️ Minor residue | Posters, lightweight art only | 3.5/5 |

Real Results: What I Got for $150 in My Rental
I set a $150 budget and tracked every dollar across one full weekend. The breakdown: $42 on Command Strips and hooks for a twelve-piece gallery wall, $38 on a single roll of NuWallpaper for a closet accent wall, $34 on Smart Tiles for a small kitchen backsplash section, and $36 on two tension rods and lightweight curtains for the living room.
What worked: the gallery wall and backsplash, still holding strong eight months later. What didn’t: the foam-backed panel from the start of this guide—not part of this $150 budget, but the whole reason I test everything on a hidden patch now. My honest take? The gallery wall gave me the most visible transformation per dollar. The backsplash felt the most “expensive-looking” for the smallest spend.
🔑 Key Takeaways
- Command Picture Hanging Strips by 3M hold up to 16 pounds and remove cleanly from painted drywall, making them the most deposit-safe solution for gallery walls in rental apartments.
- Peel-and-stick wallpaper from brands like NuWallpaper by Brewster Home Fashions works reliably on smooth painted walls but is not recommended for textured surfaces.
- Testing any adhesive product on a hidden section of wall for 24 hours before full installation prevents most rental decorating failures.
- Removing peel-and-stick wallpaper with a hair dryer on low heat and a slow, 180-degree pull angle prevents paint from lifting off drywall.
- Normal wear and tear, such as small nail holes and faded paint, is typically not chargeable under most U.S. rental lease agreements, unlike cracked drywall or adhesive residue that strips paint.
- A full rental room refresh using no-drill methods — wall decor, an accent wall, and curtains — typically costs between $100 and $200.
- Keeping original cabinet hardware, light fixtures, and curtain rods in labeled storage allows renters to fully restore a unit’s original condition before move-out.
Conclusion
So—decorating a rental without damage really comes down to two habits: testing before you commit and being just as careful on removal as you were on installation. Once I built those two steps into every project, I stopped worrying about my deposit and started actually enjoying the process of making my space feel like mine.
If you’re just starting out, tackle the kitchen next. It’s one of the fastest, cheapest transformations, and I walk through the entire process in my rental kitchen makeover on a budget guide. Have you tried decorating a rental without damage? Tell me what happened below—I read every comment, and I’m always hunting for the next method to test. All the products I tested and recommend are linked below. I’ve tried every single one myself.
FAQ: Decorating a Rental Without Damage
What counts as damage in a rental apartment?
Damage typically includes cracked drywall, large holes, paint stains, or adhesive residue that strips paint on removal. Normal wear and tear — small nail holes, minor scuffs, faded paint from sunlight — is usually not chargeable in most U.S. states.
How can I decorate my apartment without making holes?
Use Command Strips or adhesive hooks for lightweight items, tension rods for curtains and shelving, and lean heavier mirrors or art against the wall instead of hanging them. All three methods skip drilling entirely.
Is peel-and-stick wallpaper safe for rentals?
Yes, on smooth painted drywall. It’s not recommended for textured or unpainted walls since the adhesive won’t bond evenly and may bubble or peel prematurely—even if the product itself is rated as removable.
Does removable decor leave residue or damage?
Quality products like Command Strips and NuWallpaper are residue-free when removed correctly: slow, parallel pulling, with heat assistance for wallpaper. Rushed removal or cheaper generic adhesives are more likely to leave marks.
How much does it cost to decorate a rental without damage?
Budgets vary widely, but a full room refresh—wall decor, an accent wall, curtains—typically runs $100–$200. My own test budget landed at $150.
What’s the best brand for damage-free hanging?
Command by 3M, consistently, across everything I’ve tested. It holds up to 16 pounds per strip set with clean removal on painted drywall.
What do I do if something leaves a mark when I remove it?
Try a mild all-purpose cleaner or a Magic Eraser on residue first—it resolves most minor adhesive marks. For deeper marks, a small touch-up paint pen matched to your wall color (ask your landlord for the paint code) can fix it before your move-out inspection.