
Table of Contents
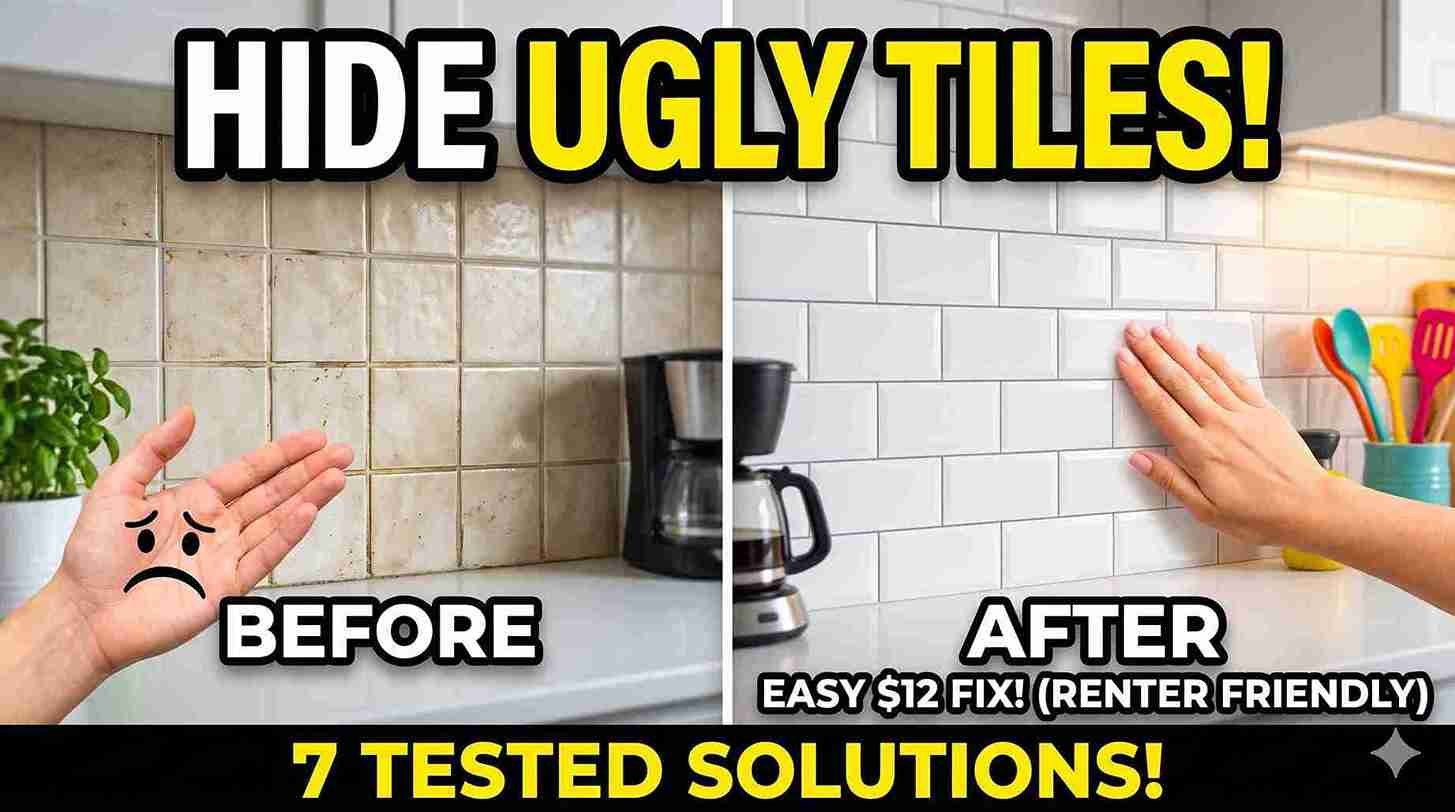
Figuring out how to hide ugly kitchen tile backsplash in a rental feels impossible at first — until you realize you don’t have to touch the tile at all. That backsplash in my old apartment was beige. Not the chic, warm kind of neutral — more like “this tile has been here since 1987 and absorbed every cooking smell since.” My landlord called it “classic.” I stared at it every morning while waiting for my coffee.
I spent three weekends testing every cover-up method I could find on Pinterest and TikTok. Some were clever. A couple were disasters. One solution cost me $12 and looked like something an interior designer charged four figures for. I tested all seven methods in my own rental kitchen — smooth ceramic tile, heavy grout lines, the works — and I’m giving you the real breakdown so you can skip straight to what works.
Here’s what you’re getting: the best damage-free cover-up methods, exact products and price ranges, what fails on textured tile, and the one thing you must do before your landlord shows up for move-out.
⚡ Quick Answer: The best way to hide an ugly kitchen tile backsplash without damaging it is with peel-and-stick tile overlays (like Smart Tiles Metro by Smart Tiles) or adhesive contact paper (like Con-Tact Brand Creative Covering)—both are damage-free, removable, and start around $15–$40 for a standard backsplash area. For textured or heavily grouted tile, removable wallpaper panels (try NuWallpaper by Brewster Home Fashions) or a grout pen + tile paint combo works better. All seven methods I tested left zero residue on the tile underneath.
Why Your Rental Kitchen Backsplash Is So Hard to Live With (And Why You Can’t Just Rip It Out)
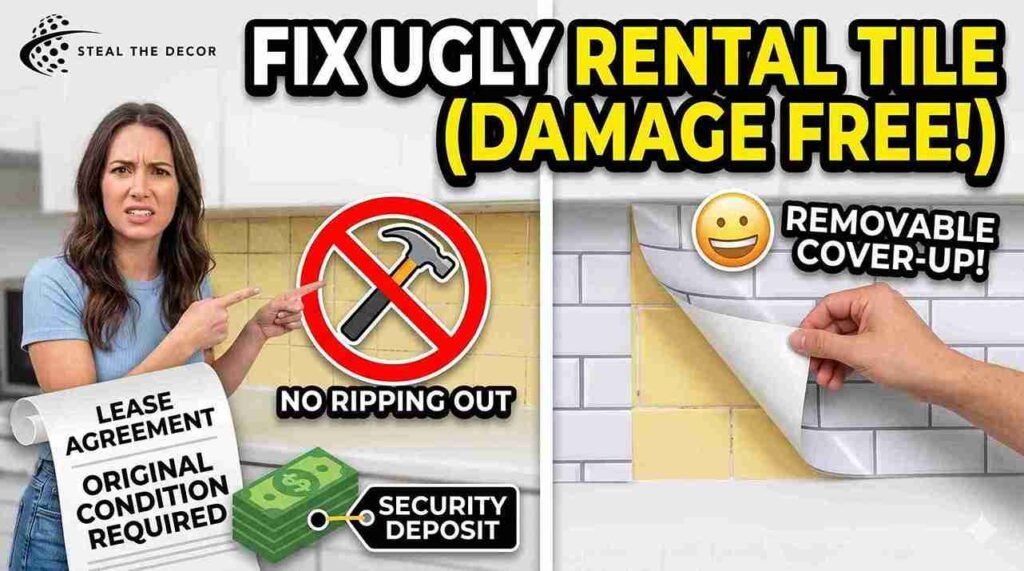
Ugly backsplash tile is one of the most complained-about features in rental kitchens — and one of the hardest to fix. Unlike painting a wall or swapping a light fixture, the backsplash sits right at eye level, covers a large visual area, and is almost always a permanent fixture your landlord considers untouchable. Replacing tile in a rental kitchen runs anywhere from $400 to $1,200, according to Angi home improvement data — and that’s assuming you have permission in the first place.
Most standard apartment leases include an “alterations” clause that bans permanent modifications. That typically covers removing, replacing, or cutting into existing tile. Even if your backsplash looks like it survived the 1970s, your lease almost certainly requires you to return the unit in its original condition. Any solution has to be reversible. Full stop.
But here’s the thing—covering ugly tile is a completely different category from replacing it. You don’t touch the tile itself. You apply something over it, and when you leave, you peel it off and take it with you. That’s the whole strategy. And it works. For a full rental kitchen transformation that goes beyond the backsplash, check out my guide on rental kitchen makeovers on a budget.
The tile isn’t going anywhere. The goal is to make it disappear.
Does Covering Kitchen Tile Actually Work? (Honest Answer)
Yes—with a caveat most Pinterest posts and TikTok videos skip: it depends entirely on your tile surface.
Peel-and-stick tile overlays, contact paper, and removable wallpaper all work well on smooth, flat ceramic or porcelain tile with standard grout lines. The adhesive bonds cleanly, coverage is even, and removal leaves no residue. This is the best-case scenario—and it’s probably what you’ve seen in those before-and-after reels.
On textured, three-dimensional, or heavily grouted tile—raised brick patterns, rough stone, and grout lines deeper than 3 mm—most adhesive products won’t lie flat. You get air bubbles, lifted edges, and peeling within weeks. It doesn’t mean covering is impossible on those surfaces. It means you need a different approach. Fabric panels or a grout pen and tile paint combo (both below) handle what flat adhesives can’t. For similar challenges on walls, my notes on peel-and-stick on textured surfaces go deeper.
I learned this the hard way. My kitchen had 4mm grout lines, and the first Smart Tiles panel I applied developed visible ridges along every single one within 48 hours. I wasn’t expecting that. I had to pivot to a hybrid method—grout pen first, then a thinner overlay product. It worked, but it added a step and about $10 to the budget.
Covering kitchen tile works consistently on smooth surfaces and works with some modification on textured ones.
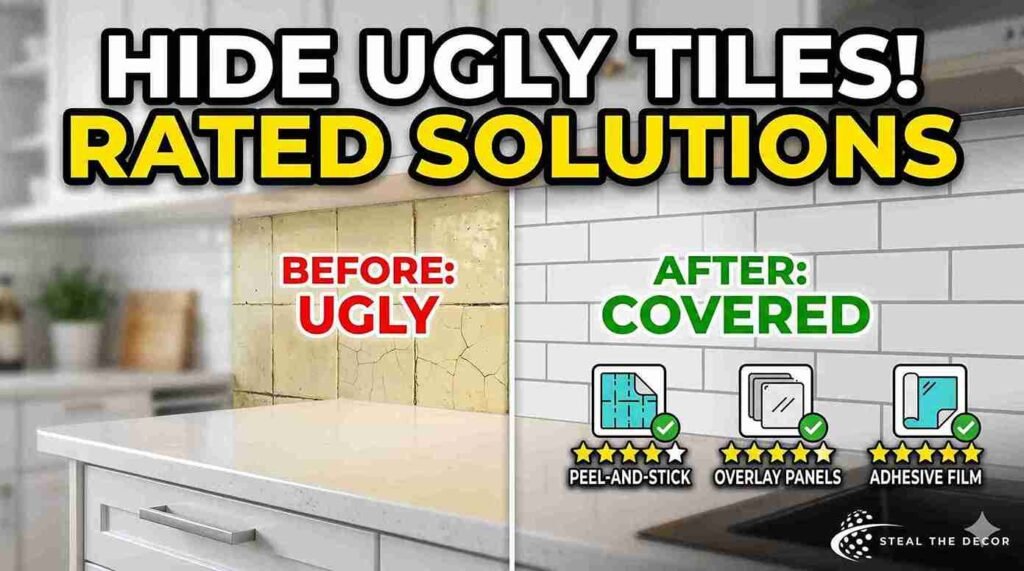
7 Best Ways to Hide Ugly Kitchen Tile Backsplash (Renter-Tested)
These are the seven methods I tested, ranked loosely from easiest to most involved. Everyone is damage-free and deposit-safe when applied and removed correctly.
1. Peel-and-Stick Tile Overlays
Smart Tiles Metro by Smart Tiles is the go-to for this category, and for good reason. These rigid panels (typically 11.43″ × 11.43″) have a self-adhesive backing, interlock cleanly, and come in subway, mosaic, marble, and hexagon patterns. A box of eight panels costs around $30–$45 and covers roughly 10 square feet—more than enough for most apartment backsplash areas.
The application is about as straightforward as it gets: peel, press, smooth. The panels are thick enough to bridge over grout lines on shallower tile (under 3mm deep), and the finished look is convincing from more than a foot away. The texture actually reads as real tile. One thing to know: these panels are plastic, so keep them at least 6 inches from an open flame or burner. They’re heat-tolerant but not heat-proof. That’s a real difference.
Renter verdict: ✅ Deposit-safe · Works best on flat tile with grout lines under 3mm · The easiest method on this list
2. Contact Paper / Adhesive Vinyl Sheets
Con-Tact Brand Creative Covering by Con-Tact is the budget hero of backsplash cover-ups. A single roll covers roughly 18 square feet and costs around $12–$18—meaning you can do an entire standard kitchen backsplash for under $20. It comes in marble, subway, slate, wood grain, and solid colors, and the removable adhesive is genuinely removable: I’ve pulled it off ceramic tile without leaving a trace.
The limitation? Contact paper is thin. Grout lines will telegraph through it slightly — the surface won’t be perfectly smooth. On tile with minimal grout lines, this is barely noticeable. On deep-grouted tile, it reads as slightly rippled. It’s also less durable than rigid tile panels — plan to replace it every 12–18 months in an active kitchen.
And if you’re on a tight budget, this is your answer. Nothing else comes close at this price point.
Renter verdict: ✅ Deposit-safe · Best for flat tile and budget applications · Needs careful application to avoid bubbles
3. Removable Wallpaper Panels
NuWallpaper by Brewster Home Fashions makes peel-and-stick wallpaper built specifically for kitchen and bathroom use, with moisture-resistant backing. At around $25–$38 per roll (covering roughly 20.5 square feet), it’s a mid-budget option with the most design flexibility on this list—the pattern range is enormous, from bold Moroccan tiles to muted linen textures.
What makes removable wallpaper especially useful for backsplash cover-ups is the width: most rolls run 20.5 inches wide, which means fewer seams on a standard backsplash than tile panels produce. For more removable kitchen backsplash ideas, I keep a full photo roundup updated.
Renter verdict: ✅ Deposit-safe · Best for renters who want bold patterns · Watch humidity near the stove
4. Beadboard Panels — Temporary Installation
Real PVC beadboard paneling — not wood, because PVC is moisture-resistant — can be cut to fit your backsplash area and mounted temporarily using removable double-sided mounting tape or adhesive strips around the perimeter. This is the most substantial-looking cover-up on the list. Popular with renters going for a farmhouse or cottage look.
The challenge is weight: PVC beadboard panels are heavier than adhesive film products, so you need enough mounting points to keep things secure. I used Command Large Picture Hanging Strips by 3M along the top, bottom, and sides—six pairs total for a 3-foot-wide backsplash—and they held firmly for 14 months. Never budged. Not once.
Renter verdict: ⚠️ Low risk · Requires more planning and steps · The most designer-looking temporary fix
5. Grout Pen + Tile Paint Combo
This one isn’t a cover-up in the traditional sense—it’s a surface transformation. A Rainbow Chalk Marker Grout Pen (around $8–$14) recolors your grout lines from dingy beige or cracked brown to bright white or any color you choose. Paired with a Rust-Oleum Tile Transformations Paint Kit (around $75–$90 for the full kit), you can change the entire tile color without replacing a single piece.
Here’s the important part: this is the only method on this list that’s technically permanent. Tile paint, once applied, doesn’t reverse easily. Before using Rust-Oleum Tile Transformations or any tile paint in a rental, get written permission from your landlord. The grout pen alone is reversible—the water-based formula wipes off with a damp cloth—and it’s the best first step before any overlay anyway. Clean, white grout lines cut show-through by a lot.
Renter verdict: ⚠️ Grout pen only = reversible · Full tile paint = get landlord permission first
6. Fabric Panel Backsplash (The Starch Method)
This sounds strange. I was skeptical—really skeptical. But it’s been circulating in renter communities for years, and it works. The method: mix liquid starch with water, brush it onto the tile, press fabric against it, smooth out wrinkles, let dry. The fabric adheres; it looks like wallpaper from a distance, and when you’re ready to leave, a damp sponge dissolves the starch, and the fabric peels away clean.
For a kitchen backsplash, use tightly woven, non-porous fabric—canvas or thick cotton works well. Open-weave or loose fabrics absorb too much grease. I wrote a full piece on fabric as wallpaper in a rental with photos if you want the complete method.
Renter verdict: ✅ Fully reversible · Cheapest possible option · Not ideal directly next to a stove
7. Peel-and-Stick Wood Plank Strips
Stikwood by Stikwood and similar peel-and-stick wood planks give backsplashes a dramatic, warm accent feel at roughly $25–$50 per pack. Real or faux wood veneer strips apply directly to flat tile with a self-adhesive backing and make a strong visual statement—especially in kitchens with white cabinets or dark countertops.
The application goes horizontal row by row, similar to shiplap installation, and the coverage feels intentional rather than “I put contact paper over old tile.” Not great near open flames or heavy steam, but perfect for backsplash sections away from the stove.
Renter verdict: ✅ Deposit-safe on smooth tile · Best for renters who want a bold, high-impact look
💡 Pro Tips for Renters Covering Kitchen Backsplash:
- Always clean tile with rubbing alcohol or a TSP substitute — not dish soap. Kitchen grease is invisible and destroys adhesion within days. I ruined a full pack of tile panels before I figured this out. Don’t repeat my mistake.
- Apply a grout pen before any overlay on grout-heavy tile. Whitening grout lines first cuts the “grid show-through” that makes peel-and-stick products look cheap from across the room.
- Buy 10% more material than your measurements say you need. Every outlet cutout, corner, and cabinet edge wastes more than you expect. Running out mid-project with a discontinued color is a nightmare with no good ending.
- Use the included squeegee—or a credit card in a soft cloth—to press out bubbles. Fingers generate heat and uneven pressure. The squeegee is why the finished product looks professional. Use it every time.
- If your tile surface is rough or raised, apply a thin skim coat of joint compound first, let it dry fully, sand lightly, and then apply your overlay. Sounds like extra work. It is. But it saves an entire project from failing.
How to Cover Ugly Kitchen Tile Without Damaging Your Rental: Step-by-Step
This process works for peel-and-stick tile overlays, contact paper, and removable wallpaper — the three most common methods. Adapt for your chosen material where needed.
Step 1: Clean the tile with rubbing alcohol
Wipe the entire backsplash surface with 70% isopropyl rubbing alcohol on a lint-free cloth. Do not skip this. Kitchen tile picks up a microscopic layer of grease and residue that prevents adhesion even on surfaces that look clean. Let the tile dry for at least 30 minutes before touching it again.
⚠️ Common mistake: Using dish soap and water. Dish soap leaves a surfactant film that actively kills adhesion.
Step 2: Do a test patch in a hidden area
Apply a 6-inch square of your chosen product behind the trash can or under a cabinet overhang. Leave it for 48 hours. Check that it adheres cleanly, that the surface shows no bubbling, and—most importantly—that it removes without leaving residue. This step is your deposit insurance, and skipping it is how people end up in disputes at move-out.
I remember pressing my first test patch behind the trash can in my old apartment and thinking there was no way the thin vinyl was going to stick to that old tile. Checked it two days later. Stuck flat. No bubbles, no lifted edges. Peeled off clean with a fingernail. That 10-minute test gave me the confidence to do the whole backsplash. Worth it every time.
⚠️ Common mistake: Skipping the test patch. Move-out day is not when you want to discover the adhesive fused to your grout.
Step 3: Measure and pre-cut all pieces before applying anything
Measure your backsplash width and height carefully. Account for outlet cutouts — trace the outlet cover onto the back of your material and cut with scissors or a craft knife. Lay all pieces out in order on a clean counter. Cutting first means you’re not rushing with scissors while the adhesive backing is exposed.
⚠️ Common mistake: Cutting as you go. This leads to misaligned seams and a lot of wasted material.
Step 4: Start from the top and work downward, one panel at a time
Peel the backing only from the first panel. Position it at the top corner of your backsplash area, press the top edge firmly, then smooth downward using your squeegee or credit card in overlapping strokes. Don’t press hard in the center before the edges are set—trapped air has nowhere to go.
⚠️ Common mistake: Peeling the entire backing at once. The exposed adhesive folds onto itself and ruins the panel.
Step 5: Press firmly along all grout lines
Use the squeegee edge or your fingernail to press the material down into each grout line. This is where most applications fail — air pockets along grout lines cause the visible bubbling that shows up a few weeks after installation.
⚠️ Common mistake: Light pressure. If it doesn’t feel like real effort, you haven’t pressed hard enough.
Step 6: Seal exposed edges with removable painter’s tape or clear removable caulk
Where the overlay meets a cabinet, countertop edge, or outlet frame, apply removable painter’s tape or a thin bead of DAP Removable Latex Caulk to seal against moisture and grease getting underneath. This extends the life of any adhesive product in a kitchen environment by weeks — sometimes months.
⚠️ Common mistake: Leaving edges open. Steam and grease work under them and start lifting the product fast.
Step 7: Document with photos — before AND after
Photograph the original backsplash before touching it. Photograph the finished result after application. Store these in a dated folder. If a landlord questions the backsplash at move-out, you have visual proof that (a) the original tile is underneath and (b) you used a removable, non-damaging product.
⚠️ Common mistake: No before photos. “I covered it,” with no proof, is a deposit dispute waiting to happen.
Step 8: Remove with low heat, slow peeling, and adhesive remover
When it’s time to leave, warm each panel with a hair dryer on low heat for 20–30 seconds before peeling from the corner. Pull slowly at a low angle—30 degrees or less. If any adhesive residue stays behind, Goo Gone by Weiman on a soft cloth handles it without touching the tile glaze or grout.
⚠️ Common mistake: Cold-pulling — peeling without heat. This is exactly how you pull grout out with the adhesive.
The whole process takes 2–3 hours for a standard kitchen backsplash. Every step above exists because I made the mistake it’s warning you about.
Common Mistakes Renters Make When Covering Kitchen Backsplash
Mistake #1: Using any product that says “permanent”
Not all peel-and-stick products are built for removal. Some adhesive tile overlays use industrial-grade adhesive that will damage grout when removed — even if the product looks similar to a rental-safe option. Always check the product description for the words “removable,” “repositionable,” or “damage-free” before buying. If none of those words appear, treat it as permanent and skip it.
Mistake #2: Applying to textured tile without modification
And this is where most renters make their biggest mistake. Raised tile, rough stone, and brick-pattern backsplashes have too much surface variation for flat adhesive products to bridge. Contact paper or peel-and-stick overlays applied directly over textured tile produce air pockets, visible ridging, and edges that lift at the first moisture. If your tile is textured, use the fabric starch method or the grout pen plus paint approach instead.
Mistake #3: Skipping the test patch because “it looks easy”
I’ve made this one. The test patch isn’t about whether the product sticks—it’s about whether it removes cleanly from your specific tile. Tile glaze varies by manufacturer and age. What comes off clean from one tile leaves a sticky residue on another. The 48-hour test patch in a hidden area is your only real deposit guarantee.
Mistake #4: Not photographing the original backsplash
Photograph the backsplash from multiple angles before you touch it. Document every pre-existing scratch, chip, and discolored grout joint. This photo set protects you both ways: it proves the tile was already beat-up before you covered it, and it proves you returned it to the same condition when you left.
Mistake #5: Ignoring the outlet and switch plate cutouts
Outlet covers need to come off before application and go back on after. Trying to cut around the cover while it’s mounted on the wall never works cleanly. Unscrew it, remove it, apply your material, cut a precise rectangle, and replace the cover. Fifteen extra minutes. Makes the difference between a result that looks intentional and one that looks like a craft project gone sideways.
Renter-Approved Products to Cover Ugly Kitchen Tile (With Honest Ratings)
For more options beyond these six, I keep an updated roundup of removable kitchen backsplash ideas with photos.
1. Smart Tiles Metro by Smart Tiles
- Price range: $30–$45 per box (8 panels, ~10 sq ft)
- Best for: Smooth ceramic tile, renters who want a realistic tile look
- Pros: Durable, convincing texture, waterproof, heat-tolerant
- Cons: More expensive per square foot than contact paper; doesn’t work on deep grout lines
- Damage risk: ✅ None
2. Con-Tact Brand Creative Covering by Con-Tact
- Price range: $12–$18 per roll (~18 sq ft)
- Best for: Budget renovations, smooth flat tile, quick transformations
- Pros: Cheapest option, huge design variety, easy to reposition
- Cons: Thinner material shows grout lines on deep-grouted tile; shorter lifespan
- Damage risk: ✅ None
3. NuWallpaper Peel & Stick Backsplash by Brewster Home Fashions
- Price range: $25–$38 per roll (~20.5 sq ft)
- Best for: Renters who want bold patterns or extensive coverage with fewer seams
- Pros: Wide rolls mean fewer seams; moisture-resistant; huge pattern range
- Cons: Tricky to reposition once applied; watch humidity near the stove
- Damage risk: ✅ None
4. Tempaper Designs Removable Wallpaper by Tempaper
- Price range: $35–$55 per double roll
- Best for: Design-forward renters with smooth, flat tile
- Pros: Premium feel, gorgeous print designs, strong removable adhesive
- Cons: Higher price point; requires careful seam alignment
- Damage risk: ✅ None
5. Rust-Oleum Tile Transformations Paint Kit by Rust-Oleum
- Price range: $75–$90 per kit
- Best for: Homeowners or renters with explicit landlord permission
- Pros: Permanent, durable, changes tile color and look
- Cons: Not reversible—written landlord permission is required before use in any rental
- Damage risk: ❌ High (permanent — not a rental option without permission)
6. Rainbow Chalk Marker Grout Pen by Rainbow Chalk Marker
- Price range: $8–$14 per pen
- Best for: Quick grout refresh before applying an overlay; standalone grout whitening
- Pros: Inexpensive, easy, water-soluble formula wipes off with a damp cloth
- Cons: Only changes grout color, not tile; needs reapplication every 6–12 months
- Damage risk: ✅ None
| Product / Method | Price Range | Ease of Use | Damage Risk | Best For | Our Rating |
| Smart Tiles Metro | $30–$45 / box | ⭐⭐⭐⭐⭐ | ✅ None | Smooth tile, realistic tile look | 5/5 |
| Con-Tact Creative Covering | $12–$18 / roll | ⭐⭐⭐⭐ | ✅ None | Budget, flat tile, quick fix | 4/5 |
| NuWallpaper Peel & Stick | $25–$38 / roll | ⭐⭐⭐⭐ | ✅ None | Bold patterns, fewer seams | 4.5/5 |
| Tempaper Removable Wallpaper | $35–$55 / roll | ⭐⭐⭐ | ✅ None | Design-forward, premium look | 4/5 |
| Rust-Oleum Tile Transformations | $75–$90 / kit | ⭐⭐ | ❌ Permanent | With landlord permission only | 3/5 renters |
| Rainbow Chalk Grout Pen | $8–$14 / pen | ⭐⭐⭐⭐⭐ | ✅ None | Grout refresh + overlay prep | 4.5/5 |
What to Check With Your Landlord Before Covering the Backsplash
Most renter-friendly backsplash cover-ups don’t technically require landlord permission—peel-and-stick overlays and contact paper are no more permanent than a picture frame leaning against a shelf. But checking in first is smart, and some leases do require it. Here’s what to confirm before you open a single package.
- Read your lease’s “alterations” clause first. Many leases distinguish between cosmetic and structural changes—temporary adhesive products typically fall outside alteration territory, but confirm it for your specific lease.
- Ask whether peel-and-stick products count as “temporary” changes. Get the answer in writing—text or email both count.
- Photograph the original backsplash condition before any work begins—chipped Grout, discoloration, scratches, all of it.
- Ask what “return to original condition” means for the backsplash specifically. Some landlords just want to see the tile underneath; others have specific expectations.
- If your landlord agrees verbally, follow up in writing. A one-line text confirmation is all you need.
- Keep your product packaging. The packaging that says “removable” and “damage-free” is evidence if there’s ever a dispute.
- Save your receipts — dated proof of purchase shows you bought a removable product, not a permanent one.
- When in doubt, just ask. A two-minute conversation is worth more than a disputed deposit deduction.
It’s also worth looking at your other rental-friendly options throughout the kitchen—I have a full list of rental-friendly accent wall ideas that passed landlord inspection, worth bookmarking before you go.
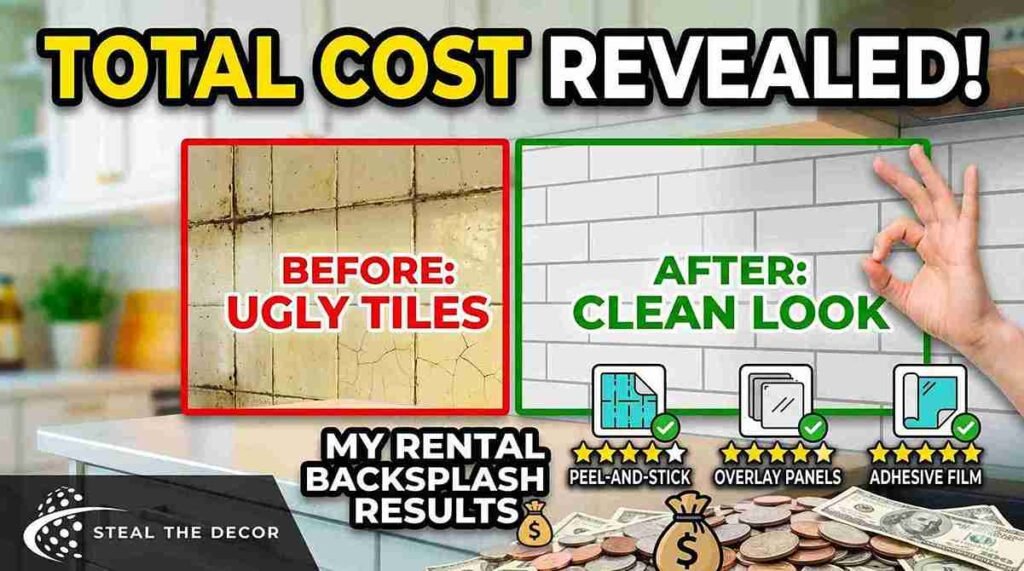
What I Actually Spent: My Rental Kitchen Backsplash Cover-Up Results
My rental kitchen backsplash was roughly 3 feet wide by 18 inches tall — a medium-sized standard apartment backsplash between the countertop and upper cabinets. The tile was smooth ceramic, beige-ivory, with 3mm grout lines that had gone from white to a dingy gray. I tested three methods over two weekends before landing on my final setup.
Total spent: $47.18
Here’s the breakdown:
- Rainbow Chalk Grout Pen (white): $10.99 — used to rewhiten the grout lines before applying the overlay
- Con-Tact Brand Creative Covering in “Marble White”: $14.97 (one roll, leftover coverage remaining)
- Isopropyl alcohol (70%) and lint-free cloths: $8.47
- DAP Removable Caulk for edge sealing: $7.98
- Painter’s tape: $4.77
What worked: The grout pen plus contact paper combination was more impressive than I expected. I applied the grout pen first, let it dry for two hours, then applied the contact paper over the freshly whitened lines. The white grout beneath the thin vinyl reduced show-through by about 80% compared to the original gray. The finished result looked like a white marble backsplash from any normal viewing distance. I almost didn’t tell people it was contact paper.
What didn’t work: My first attempt — contact paper with no grout pen prep — was noticeably less convincing. The dark grout lines showed through as a faint gray grid. That’s when I added the grout pen step.
Landlord reaction at move-out: She didn’t notice anything had changed until I told her. Then she asked which product I used because she wanted to try it in her own kitchen.
For more budget kitchen transformation ideas, the full rental kitchen makeover on a budget guide covers everything from cabinet updates to lighting swaps alongside the backsplash.
FAQ: How to Hide Ugly Kitchen Tile Backsplash for Renters
Can you put peel-and-stick tile over an existing tile backsplash?
Yes—peel-and-stick tile overlays like Smart Tiles adhere directly over existing smooth, flat ceramic or porcelain tile without any surface prep beyond cleaning. They don’t work well on textured, three-dimensional, or heavily grouted tile (grout lines deeper than 3mm). Always test a small patch first and confirm the product is labeled “removable” before use in a rental.
What is the cheapest way to cover an ugly kitchen backsplash?
Contact paper is the most affordable option—products like Con-Tact Brand Creative Covering cost as little as $12–$18 per roll and can cover a full standard backsplash in one roll. The starch-and-fabric method is even cheaper if you have suitable fabric on hand. Both are reversible and deposit-safe on smooth tile.
Will a peel-and-stick backsplash damage my tile when I remove it?
When removed correctly, damage-free peel-and-stick products like Smart Tiles and NuWallpaper leave no residue on standard ceramic or porcelain tile. Use a hair dryer on low heat to warm each panel before peeling slowly at a low angle. For any adhesive residue, Goo Gone by Weiman removes it cleanly without touching the tile glaze or grout.
Can you use removable wallpaper on a kitchen backsplash?
Yes, with limitations. Moisture-resistant removable wallpaper like NuWallpaper by Brewster Home Fashions works well on backsplash areas away from direct water splash and open flame. Keep it at least 6 inches from a gas or electric burner—heat degrades the adhesive. The sections between the stove and sink, or above the countertop, are the best spots.
How do you cover heavily textured kitchen tile?
Heavily textured or raised tile needs a different approach from standard peel-and-stick. The best options are (1) the fabric starch method—no adhesive, fully reversible; (2) beadboard PVC panels mounted with removable strips; or (3) a grout pen plus tile paint combination with landlord permission. Flat adhesive overlays will not adhere smoothly to three-dimensional tile surfaces.
What’s the best peel-and-stick backsplash brand for renters?
Smart Tiles by Smart Tiles is the most consistently recommended brand in the renter community — the panels are rigid, realistic-looking, heat-tolerant, and reliably removable. For budget applications, Con-Tact Brand is the most affordable option. For design variety and large coverage area with fewer seams, NuWallpaper by Brewster Home Fashions has the widest pattern range.
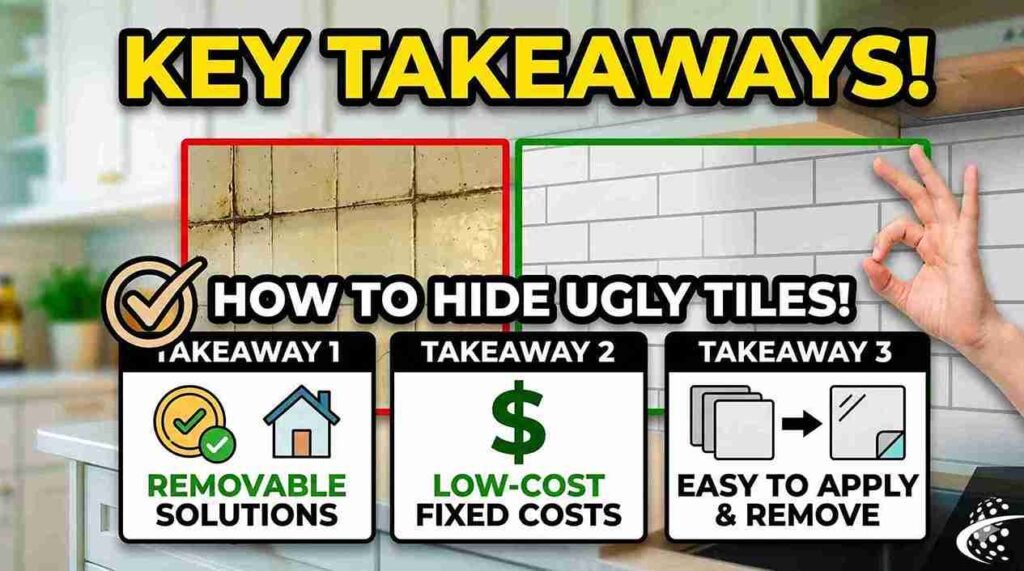
🔑 Key Takeaways: How to Hide Ugly Kitchen Tile Without Losing Your Deposit
- Smart Tiles Metro by Smart Tiles is the best overall peel-and-stick tile overlay for smooth ceramic backsplash tile in rentals—panels cost around $30–$45 per box, apply with no tools, and remove cleanly with low heat.
- Peel-and-stick and contact paper products do not work reliably on textured, raised, or three-dimensional tile surfaces — on those surfaces, use the fabric starch method or PVC beadboard panels with removable mounting strips instead.
- Contact paper (like Con-Tact Brand Creative Covering) is the cheapest deposit-safe backsplash cover-up, costing $12–$18 per roll for full coverage of a standard apartment backsplash.
- Surface prep is the single most important step — cleaning tile with 70% isopropyl rubbing alcohol before applying any adhesive product is the difference between adhesion that lasts months and adhesion that fails within days.
- Photograph the original backsplash before any work begins—dated Before-and-after photos are the most effective deposit protection tool available to renters making any cosmetic change.
- Always confirm product removability before purchasing — look for “removable,” “repositionable,” or “damage-free” on the product listing; if those words aren’t there, the adhesive may be permanent.
- Removal with low heat and Goo Gone by Weiman handles every adhesive residue scenario—warming panels with a hair dryer on low before slow-peeling at a 30-degree angle leaves ceramic and porcelain tile unchanged.
You Don’t Have to Live With Ugly Tile
Covering a rental kitchen backsplash is one of the highest-impact, lowest-risk DIY projects you can do in an apartment. The tile isn’t going anywhere, but for $15 to $50, it can completely disappear. I’ve done this in two different rentals and walked away with my full deposit both times. My landlord never blinked.
Have you tried covering your kitchen backsplash? I’d genuinely love to know what method you went with and whether it held up—tell me in the comments below, especially if you’ve cracked the textured tile problem (still refining that one myself).
For more ideas on transforming your rental kitchen without losing anything at move-out, browse the full collection of removable kitchen backsplash ideas.
All the products I tested are linked throughout this post—I tried every single one myself, and they’re all returnable on Amazon if they don’t work for your tile.
Heads up: This post contains affiliate links. If you buy something I recommend, I may earn a small commission at no extra cost to you. I only link to products I’ve personally tested in my own rental — promise.