
Table of Contents
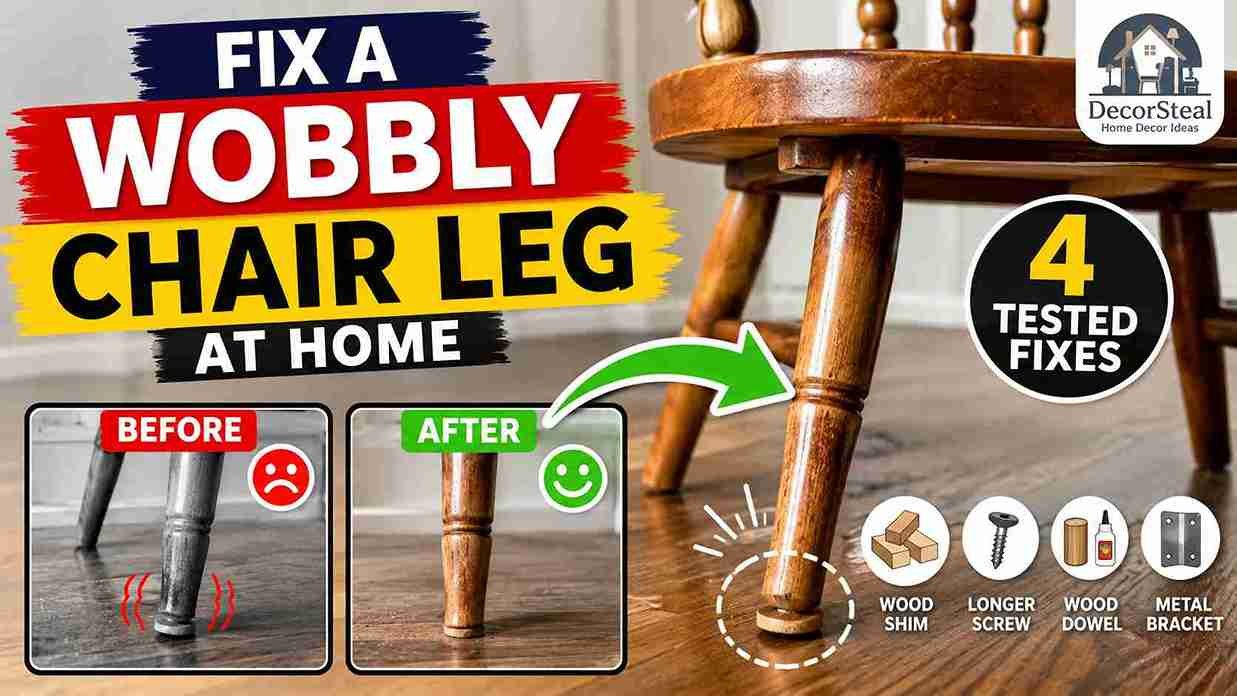
Clack. That was the sound my dad’s chair made the second he sat down for dinner—a sharp little knock against the kitchen tile that made the whole table jump. Four wobbly dining chairs. One very unimpressed guest. Zero interest in buying a new set. That was the night I finally sat down and figured out how to fix a wobbly wooden chair leg at home, and over the next three weekends I tested pretty much every method out there: tightening hardware, sanding a leg flat, re-gluing joints from scratch, and reinforcing with brackets. Some worked in ten minutes. One ate an entire weekend.
I rent, so every fix also had to stay damage-free and reversible where I could manage it—nothing that puts my deposit on the line.
This is exactly what I did, in the order I’d actually recommend trying it, with real costs and real drying times attached. Including the mistakes that cost me an extra trip to Home Depot. By the end, you’ll know which fix matches your chair’s actual problem—instead of just guessing and hoping.
The Short Version: Most wobbly wooden chairs come down to a loose joint, an uneven leg, or worn hardware—not a broken chair. Quick fix: tighten any visible screws or bolts and add a felt furniture glide to the short leg. Permanent fix: disassemble the loose joint, clean off the old glue, apply fresh Titebond Original Wood Glue (around $8–$12), and clamp it for a full 24 hours. If the wobble comes back after gluing, the problem is usually your floor or leg length — not the joint. Check that before you re-glue again.
What Causes a Wobbly Wooden Chair Leg?
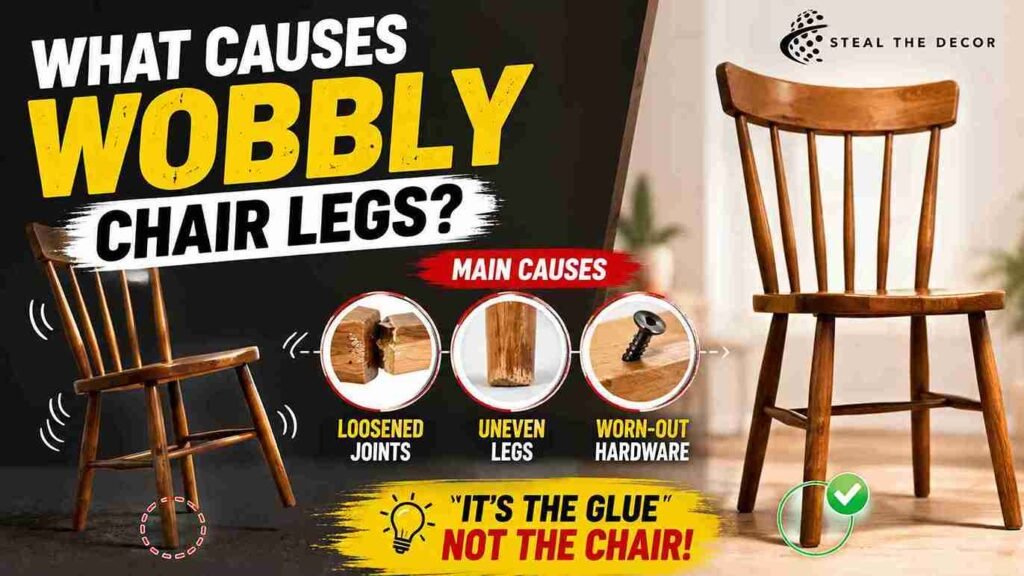
A wobbly chair almost always comes down to one of three things: a loosened joint, an uneven leg, or worn-out hardware. Wood glue naturally dries out and shrinks over time, especially in mortise-and-tenon joints and dowel joints—which is exactly why even a well-built chair starts rocking after five or ten years of daily use.
Humidity plays a bigger role than most people expect. In humid parts of the US—the Southeast and the Midwest in summer—wood expands and contracts with the seasons, and that slowly works joints loose even if nobody’s mistreating the chair. Cold, dry winters do the opposite: the wood shrinks and leaves gaps in the joint. A chair that wobbled all summer might tighten up on its own by January. That’s actually a decent clue that humidity, not damage, is the real culprit.
Bottom line: if your chair is more than a few years old, assume it’s the glue and joints before you assume it’s the chair itself.
Is It the Floor, the Leg, or the Joint? (Diagnostic Check)
Before you touch a single tool, figure out what’s actually causing the wobble. Almost every other guide skips this step — and it’s the difference between a five-minute fix and an afternoon you don’t get back.
- Move the chair to a hard, flat floor—tile, hardwood, or a countertop. Carpet hides the real problem because it flexes under the legs.
- Rock the chair gently and watch; don’t just feel. Get down at eye level with the legs and look for a visible gap between one leg and the floor. See daylight under one leg? That’s your uneven-leg culprit.
- Grip each joint individually and wiggle it—where the leg meets the seat frame and where the seat frame meets the back. Movement here means a loose joint, not an uneven leg.
If the chair wobbles on every surface, including a countertop, it’s the chair. If it only wobbles on your kitchen floor but sits flat on the counter, the floor itself is uneven. No amount of gluing fixes that. You’re better off with felt glides or shims instead.
Bottom line: test on a hard, flat surface first. Thirty seconds. Saves you from re-gluing a joint that was never the problem.
Tools and Materials You’ll Need
You probably won’t need all of this—just grab what matches the fix you’re attempting.
- Screwdriver or hex key—for tightening existing hardware (most chairs use Phillips screws or hex bolts)
- Wood glue—Titebond Original Wood Glue (around $8–$12) for most repairs, or hide glue if you’re working on an antique or heirloom chair, since it’s reversible with heat and won’t damage original joinery
- Bar clamps or a ratchet strap—around $10–$25 for a basic bar clamp, or a ratchet tie-down strap works well for wrapping around chair legs evenly
- Sandpaper — 80-grit for removing material, 120-grit for smoothing
- Wooden toothpicks or thin dowels — for stripped screw holes, around $3
- L-brackets or corner braces — around $6–$10 for a pack of four
- Furniture glides or felt pads — around $6–$15 depending on style
- Safety glasses — non-negotiable if you’re sanding or swinging a rubber mallet
Bottom line: a basic repair kit runs well under $30, and most of it will outlast the chair you’re fixing.
4 Ways to Fix a Wobbly Chair Leg (Core Methods)
Here’s the order I’d actually try these in, fastest to most permanent.
Method 1: Tighten Hardware and Fix Stripped Screw Holes
If your chair has visible screws, bolts, or a cam-lock system — common on modern ready-to-assemble (RTA) chairs from IKEA and similar brands — start here. Flip the chair upside down and check every screw and bolt with a screwdriver or hex key, tightening gradually and evenly rather than cranking one side down first.
If a screw spins freely without tightening, the hole is stripped. Remove the screw, dip 2–3 wooden toothpicks (or a thin dowel) in wood glue, pack them into the hole, snap off the excess, and let it dry about 20 minutes before reinstalling the screw. Fastest fix on this whole list — usually under 10 minutes. And honestly? It’s often all a newer chair needs.
Bottom line: always check hardware before you assume the chair needs re-gluing — that’s the difference between a 10-minute fix and a weekend project.
Method 2: Sand or Shim the Short Leg
If your diagnostic check showed one leg is genuinely shorter than the others (and the joints are tight), you’ve got two options. Sanding the longer legs down to match is the more permanent route: Set the chair on a flat surface, wrap 80-grit sandpaper around a flat block, and sand the bottom of the longer legs evenly, checking often. Slow, deliberate work. You’re removing a fraction of an inch at a time—nothing more.
Shimming the short leg is faster and fully reversible, which makes it the better call if you rent. Slide a thin wood shim under the short leg, trace the leg’s outline onto it, cut it to size, and attach it with a furniture glide rather than glue or nails so it stays damage-free and removable.
Bottom line: shim if you rent or want a reversible fix. Sand it if you own the chair and want a permanent, invisible solution.
Method 3: Disassemble and Re-Glue the Joint (Permanent Fix)
This is the method that actually solved my dining chair problem, and it’s covered step by step in the next section. It takes the longest—plan for about an hour of active work plus 24 hours of clamping—but it’s the only fix that deals with the root cause instead of masking it. Want to see this same approach applied to a more complex chair with multiple joints? Family Handyman’s full disassemble-and-re-glue walkthrough is a solid reference.
Bottom line: if your chair wobbles on every surface and the joints feel loose when you grip them, skip straight to re-gluing. Hardware tightening won’t fix a dry glue joint.
Method 4: Reinforce with L-Brackets
For chairs where the joint is too worn to hold glue well — or where you want extra insurance after re-gluing — L-brackets add mechanical strength that doesn’t rely on adhesive at all. Position the bracket so it braces the leg to the seat frame, mark the screw holes, pre-drill small pilot holes to avoid splitting the wood, and screw it into place.
The tradeoff: brackets are visible unless you mount them on the underside of the chair, and they’re not reversible. I’d skip this one on any chair with real antique or resale value.
Bottom line: brackets are the most durable fix but the least gentle on the chair itself — save them for everyday chairs, not heirlooms.
Method Comparison Table
| Method | Time | Cost | Skill Level | Best For | Permanence |
|---|---|---|---|---|---|
| Tighten hardware / fix stripped holes | 10–20 min | $3–$10 | Beginner | RTA and modern chairs | Temporary–Medium |
| Sand or shim the short leg | 20–40 min | $5–$15 | Beginner | Uneven leg length | Shim: reversible / Sand: permanent |
| Disassemble and re-glue | 1 hr + 24 hr drying | $8–$25 | Intermediate | Loose wood joints | Permanent |
| Reinforce with L-brackets | 30–45 min | $6–$15 | Intermediate | Worn joints, heavy-use chairs | Permanent |
Pro Tips for a Repair That Lasts:
- Always dry-fit the joint before adding glue—press the pieces together without adhesive first to make sure they still align correctly after years of wear.
- Clamp for the full 24 hours. Not just until it “feels” dry. Titebond’s own clamp-time guidance confirms stressed joints need a full 24-hour clamp time even when the glue seems set way sooner.
- A ratchet tie-down strap wrapped around all four legs distributes clamping pressure more evenly than a single bar clamp on one joint.
- Wipe away excess glue with a damp cloth immediately—dried squeeze-out is much harder to sand off later and can show under a finish.
- Repairing an antique? Use hide glue instead of PVA. It’s reversible with gentle heat, which protects the chair’s value for future repairs.
Step-by-Step: How to Re-Glue a Loose Chair Joint
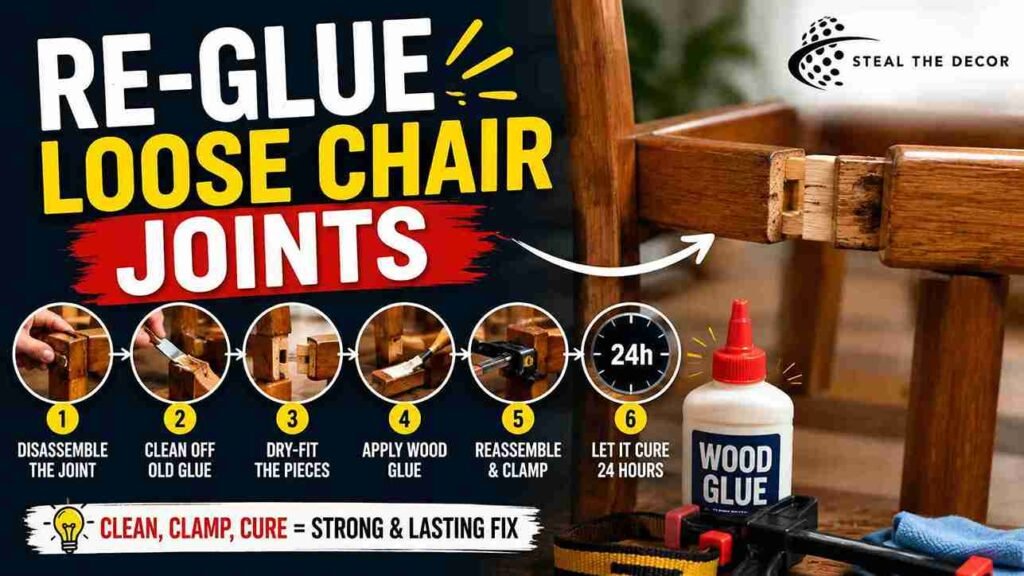
Step 1: Disassemble the loose joint. Gently wiggle and pull the leg free from the seat frame. If it won’t budge, a rubber mallet tapped lightly against a wood block (never directly on the chair) helps break the old glue bond without cracking the wood.
Step 2: Clean off every trace of old glue. Use a small chisel or 100-grit sandpaper to scrape dried glue from both the tenon (the peg) and the mortise (the hole). Old glue left in place actually blocks the new glue from bonding properly — this was my first mistake, and the joint failed again within a week. Not gonna lie, that one stung a little.
Step 3: Dry-fit the pieces. Push the joint back together without glue to confirm it still fits snugly. A joint that’s loose from wear (not just dried glue) may need a thin wrap of wood veneer or a slightly thicker glue application to fill the gap.
Step 4: Apply wood glue evenly. Use a small brush or a craft stick to coat both the tenon and the inside of the mortise. Don’t overfill — excess glue just squeezes out and means more cleanup later.
Step 5: Reassemble and clamp immediately. Push the joint fully together, wipe off any glue that squeezes out with a damp cloth, and clamp it. Bar clamps work well, but a ratchet strap wrapped around the whole chair distributes pressure more evenly across multiple joints at once.
Step 6: Let it cure for a full 24 hours. Don’t sit on the chair or test the joint early, even if it feels solid after an hour. It won’t be. Stressing a joint before the glue fully cures is the single most common reason a reglue job fails.
Bottom line: the two steps everyone skips—cleaning off old glue and clamping for the full 24 hours—are exactly the two steps that decide whether this fix lasts five years or five days.
How to Level Uneven Chair Legs
If your joints are already tight but the chair still rocks, the leg lengths themselves may be uneven—from manufacturing variance, wear, or a previous repair. Set the chair on the flattest surface in your home (a countertop or tile floor beats carpet here) and figure out exactly which leg is short by watching for a gap as you rock it gently.
For a reversible fix, slide a wood shim under the short leg until the rocking stops, then trace and cut it to size before attaching it with a felt-backed furniture glide instead of glue. For a permanent fix, sand the three longer legs down to match the shortest one in small, even passes—checking the chair’s balance every minute or two so you don’t overcorrect.
Bottom line: shimming takes less time and skill than sanding three legs evenly. Start there unless you’re already confident with a sanding block.
Modern RTA Chairs: Fixing Cam-Lock or Metal-Hardware Wobble
Most guides assume every chair has traditional wood joinery. But a huge share of dining chairs sold in the US today—especially from IKEA and similar retailers—use cam locks, bolts, or metal brackets instead of glued mortise-and-tenon joints. If your chair came flat-packed, start by locating every cam lock and bolt (usually hidden under the seat) and retightening each one with the hex key or screwdriver that came with the assembly instructions.
If a bolt hole has stripped out, the toothpick-and-glue trick from Method 1 works here too—though for particleboard construction, you may need a slightly larger wood dowel to fill the gap properly. Adding a flat washer under a loose bolt head can also stop it from working free again over time.
Bottom line: don’t reach for wood glue first on a flat-pack chair. Check every cam lock and bolt before you assume you have a joint problem.
Common Mistakes That Make a Wobbly Chair Worse
Using super glue instead of wood glue. It sets fast, sure, but it has almost no flex, so it cracks under the repeated stress of someone sitting down and shifting their weight. I learned this the hard way on a kitchen chair that wobbled again within a week.
Skipping the clamp time. Wood glue can feel dry to the touch in 30 minutes but hasn’t reached full strength yet. Sitting on a joint too early is the number one reason a reglue job fails.
Gluing over old glue. Fresh glue doesn’t bond well to dried glue residue. Skip the cleanup and you’re basically gluing two coats of dried adhesive together—not the actual wood.
Over-tightening screws. Cranking a screw down hard on a stripped or worn hole just strips it further or splits the wood around it. Snug and even beats tight and cracked, every time.
Drilling into an antique without checking value first. Adding L-brackets or new screw holes to a genuinely old or valuable chair can permanently tank what it’s worth. Check with a furniture appraiser before you modify an heirloom piece.
Ignoring the floor. I spent an entire evening re-gluing a joint that was never loose—the real problem was an uneven kitchen tile. Always run the diagnostic check before you disassemble anything. Trust me on this one.
Prevention: How to Keep Chair Joints From Loosening Again
Humidity is the biggest long-term threat to glued wood joints, especially in the Southeast and Midwest US, where seasonal swings hit hard. Running a dehumidifier during humid months and keeping dining chairs away from heating vents or windows helps joints stay stable year-round.
Beyond climate control, a few small habits go a long way. Add felt pads or furniture glides to every chair leg to soften the shock of dragging chairs across hard floors. Check joints for movement every six months or so. And maybe gently remind whoever leans back on two legs at dinner that they’re putting uneven stress directly on the rear joints—you know who you are.
Bottom line: most wobble is preventable. It’s slow wear from humidity and dragging, not a manufacturing flaw.
When to Repair vs. Replace (or Call a Pro)
Most wobbly chairs are worth fixing yourself—the materials cost under $30, and the skills involved are beginner-friendly. Replace it or bring in a pro if you’re dealing with cracked or splintered wood (not just a loose joint); a chair with genuine antique or sentimental value where a mistake would be costly; or a joint that’s failed the same repair two or three times despite you doing it correctly—that usually signals worn-out wood fibers, not a glue problem.
Bottom line: loose glue or an uneven leg—fix it yourself. Cracked wood or a valuable chair—get a second opinion first.

Real Results: What I Spent and What Actually Worked
Across four dining chairs, I spent $34.18 total: one bottle of Titebond Original Wood Glue ($9.99), a four-pack of L-brackets for one particularly worn chair ($7.49), a set of eight felt furniture glides ($8.97), wooden toothpicks and sandpaper I already had lying around, and a cheap bar clamp ($7.73) I didn’t strictly need but that made the clamping step way easier.
Two chairs needed nothing more than tightened hardware and new felt glides—a 20-minute fix, tops. One needed the full disassemble-and-re-glue treatment, which meant an hour of active work and a full day of clamping before I could even sit on it again. The fourth chair had a joint so worn that re-gluing alone wouldn’t hold, so I backed it up with an L-bracket underneath. Not elegant. But six months later, still solid.
My honest failure: I tried super glue on the worst chair first as a shortcut. Cracked within four days. I wasn’t expecting that—I figured super glue was just… stronger, somehow. It’s not. Wood glue and patience won every single time.
Key Takeaways
- A wobbly wooden chair is most often caused by a dried-out glue joint, an uneven leg, or loose hardware rather than structural damage to the wood itself.
- Titebond Original Wood Glue, priced around $8–$12, is a reliable choice for most modern wood chair repairs, while hide glue is the better option for antique furniture because it stays reversible.
- Stressed glue joints need a full 24-hour clamp time to reach lasting strength, even though the glue may feel dry within an hour.
- Diagnosing the wobble on a hard, flat surface before starting any repair prevents wasted effort on the wrong fix, such as re-gluing a joint that was never actually loose.
- Felt furniture glides and wood shims offer a fully reversible, deposit-safe way to level an uneven chair leg without sanding or drilling.
- Modern ready-to-assemble chairs typically wobble due to loose cam locks or bolts rather than dried wood glue, so hardware should be checked first on flat-pack furniture.
- L-brackets provide the most durable mechanical reinforcement for worn joints but are not reversible, making them a poor choice for antique or high-value chairs.
Wrapping Up
A wobbly chair isn’t a sign you need a new dining set. Most of the time it’s a five-dollar bottle of glue and a bit of patience away from being solid again. Start with the diagnostic check, match the fix to the actual cause, and give the glue its full 24 hours before you trust it with dinner guests. Tackling other small rental repairs while you’re at it? My guide on budget-friendly rental kitchen makeovers covers more damage-free fixes that won’t put your deposit at risk.
Have you tried fixing a wobbly chair in your own place? Tell me what worked — and what didn’t — in the comments below.
FAQ: fix a wobbly wooden chair leg
What causes a wobbly wooden chair leg?
Most wobble comes from a loosened glue joint, an uneven leg length, or worn hardware—not structural damage. Wood glue naturally dries out over years of use, and humidity swings speed that process up, especially in humid US climates.
How long does wood glue need to dry before I can sit on the chair?
Plan for a full 24 hours of clamping before putting any weight on a re-glued joint, even though the glue may feel dry within 30–60 minutes. Manufacturer guidance from Titebond confirms stressed joints need a full 24-hour cure for lasting strength.
Can I use super glue instead of wood glue?
Not recommended. Super glue sets fast but has very little flexibility, so it tends to crack under the repeated stress of someone sitting down. Wood glue like Titebond Original is built to flex slightly and bond more strongly to wood grain.
Is this repair safe for a rental apartment?
Yes — if you stick to reversible methods. Shimming a short leg with a felt glide, tightening existing hardware, and re-gluing an internal joint don’t touch the chair’s exterior or your apartment itself. No deposit risk involved.
How much does it cost to fix a wobbly chair?
Expect to spend $8–$35 depending on the method. Simple hardware tightening costs under $10. A full disassemble-and-re-glue with clamps runs closer to $20–$35 if you’re buying tools for the first time.
What’s the best glue brand for a wobbly chair?
Titebond Original Wood Glue is a reliable, widely available choice for most modern chairs. For antiques or heirloom pieces, traditional hide glue is the better call—it stays reversible with gentle heat, which protects the original joinery.
What should I do if the chair still wobbles after gluing?
Re-run the diagnostic check on a hard, flat surface. Still wobbles everywhere? The joint may need a second, thicker glue application or a mechanical reinforcement like an L-bracket. Only wobbles on one surface? The floor — not the chair — is the actual problem.