
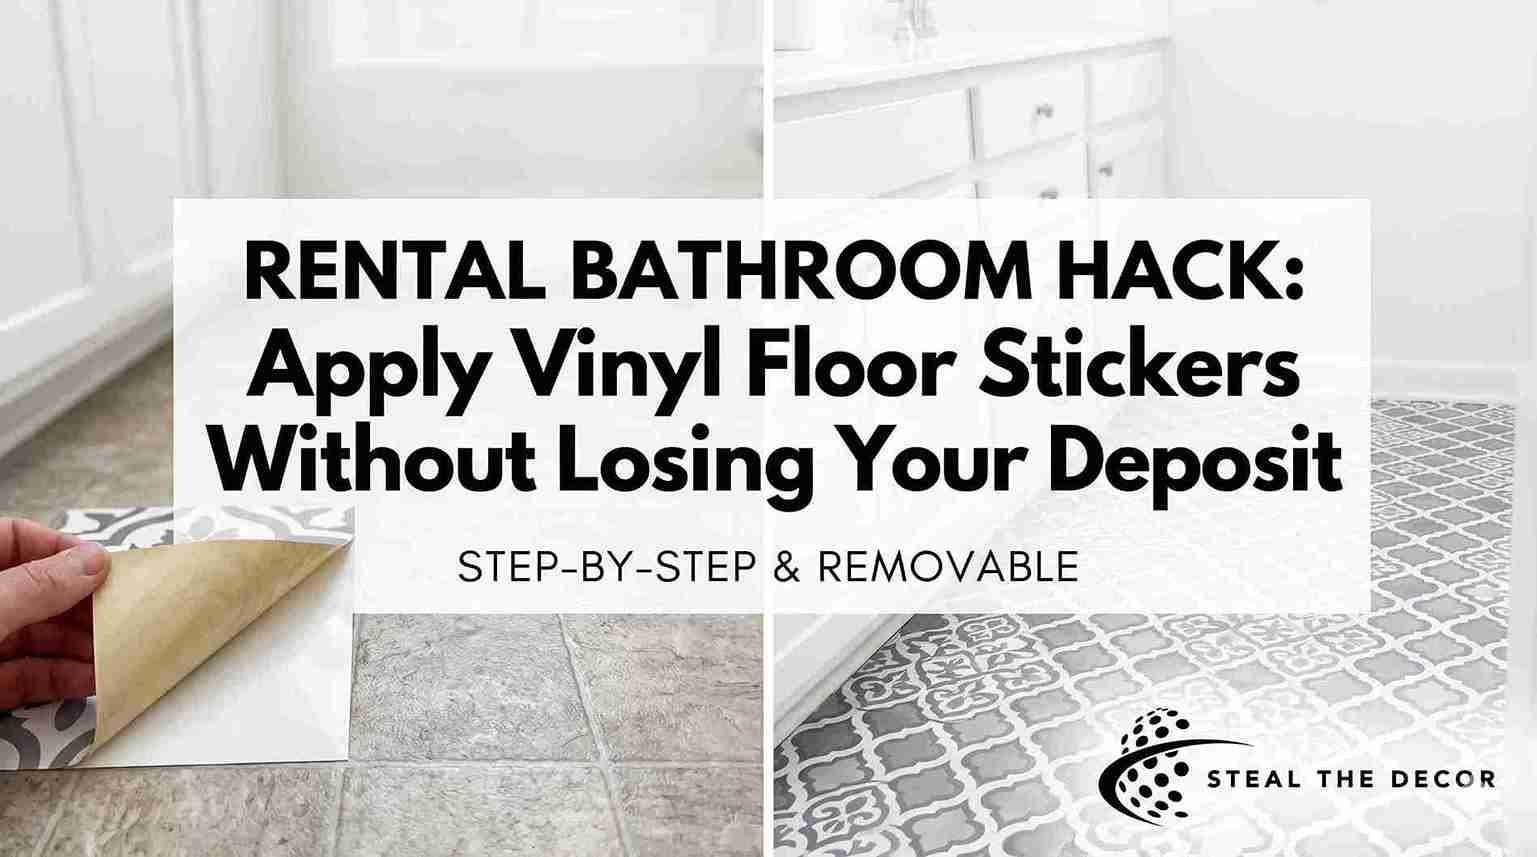
My bathroom floor was offensive. Like, genuinely, personally offensive. The previous tenant had left behind a cracked, yellowed linoleum situation that no amount of bleach could fix. I scrubbed it three times in one weekend. Still looked terrible. And because I rent a small studio apartment in Austin, I couldn’t rip it out and replace it. My lease made that extremely clear.
That’s when I found vinyl floor stickers — and honestly? They changed the entire room.
Learning how to apply vinyl floor stickers in a rental bathroom is genuinely one of the most practical rental skills out there. No contractor. No landlord permission call. No deposit drama. Just a clean floor and a weekend afternoon.
Here’s exactly how I did it — including the mistake I made on the first tile that I’m still a little embarrassed about.
What Are Vinyl Floor Stickers and Why Renters Love Them
Vinyl floor stickers are self-adhesive, peel-and-stick decals designed to go directly on top of your existing floor tiles. They’re made from a durable PVC material that’s waterproof, moisture-resistant, and thin enough to sit flat without creating a tripping hazard. Each sticker mimics the look of ceramic, marble, stone, or patterned tile — without the grout, the mess, or the permanence.
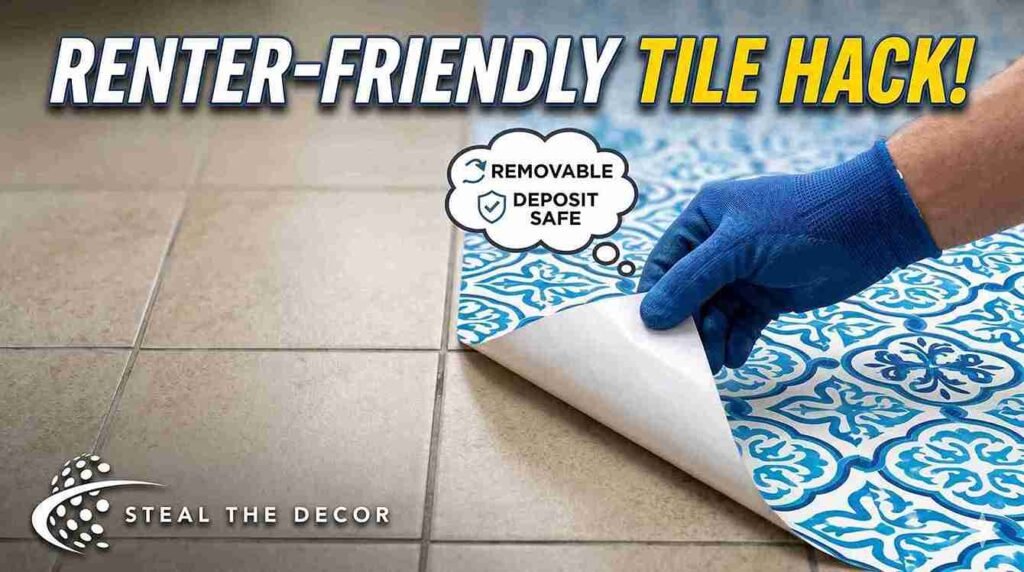
For renters, the real magic is the “removable” part. Unlike actual tile replacement, vinyl decals don’t damage the surface underneath when removed correctly. They leave no gouges, no stains, and — if you pick the right product — no sticky residue either. That’s the deposit-safe detail your landlord will never notice. According to a widely cited renter tip on Apartment Therapy, one tenant covered an entire backsplash in peel-and-stick vinyl, peeled it off on moving day, and the wall underneath looked untouched.
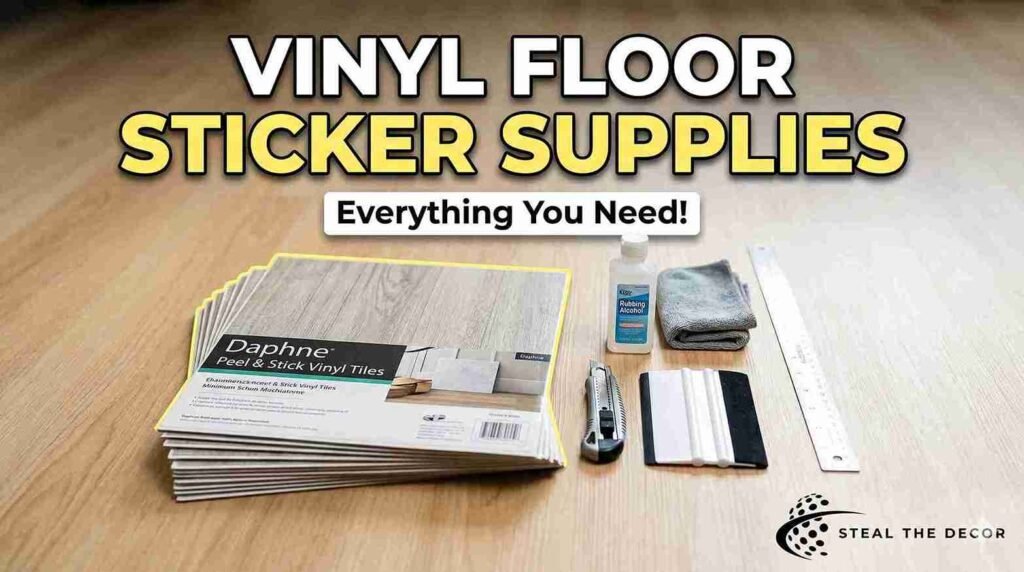
What You’ll Need Before You Start
Don’t skip this part. I did, sort of, and it cost me an extra Target run on a Sunday.
Here’s what to gather before you touch a single sticker:
- Vinyl floor stickers (measure your bathroom first — always buy 10% extra)
- A squeegee or an old credit card
- A utility knife or sharp scissors
- A long ruler or metal straightedge
- A pencil or chalk line
- Rubbing alcohol or a floor degreaser
- A clean microfiber cloth
- A hair dryer (helpful for corners and tight edges)
- Painter’s tape (optional, but useful for marking your center line)
The product I used was the FloorPops Daphne Peel & Stick Vinyl Tile, which I picked up at Target for around $28 for a 20-square-foot case. It’s a black-and-tan floral pattern. Not what I originally planned — I wanted something more minimal — but the Daphne pattern actually worked beautifully in my tiny bathroom. It’s not a perfect match for everyone’s style, and the colors lean slightly warm, which took some getting used to. But at that price point, it’s hard to argue.
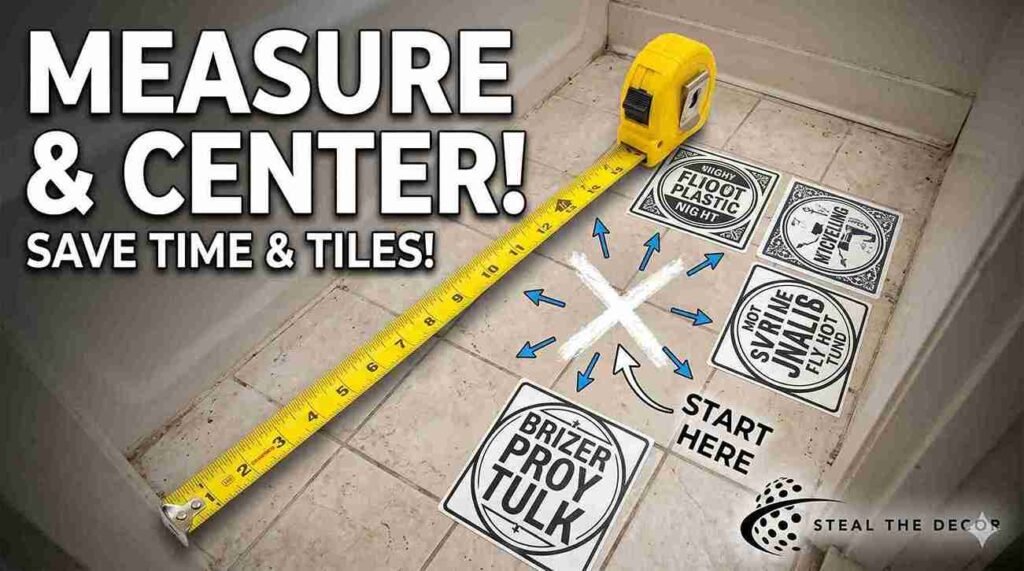
How to Measure and Plan Your Rental Bathroom Floor Layout
Measuring is the most boring step. It’s also the one that saves you the most money.
Start by measuring the full length and width of your bathroom floor in inches. Multiply those numbers to get your total square footage. If your bathroom is 5 feet by 7 feet, that’s 35 square feet. Add 10% for cuts, mistakes, and the inevitable moment you peel a sticker wrong and have to toss it. Order at least 38–40 square feet in that case.
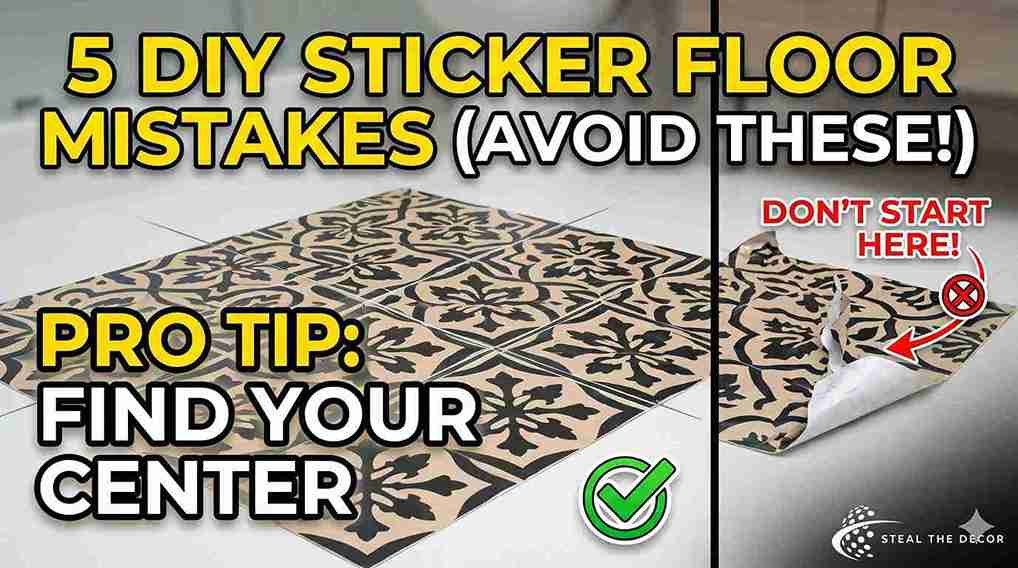
Now here’s the step most articles skip: find your visual center. Don’t start applying stickers to a wall or corner. Walls in rental apartments are rarely perfectly straight. If you start from the edge, your pattern will look crooked by the time you reach the toilet. Instead, measure the width of the room and divide by two. Do the same for the length. Where those two midpoints intersect is your starting point. Mark it lightly with a pencil or lay down a piece of painter’s tape as your guideline. Work outward from the center in all directions — it gives the finished floor a balanced, intentional look.
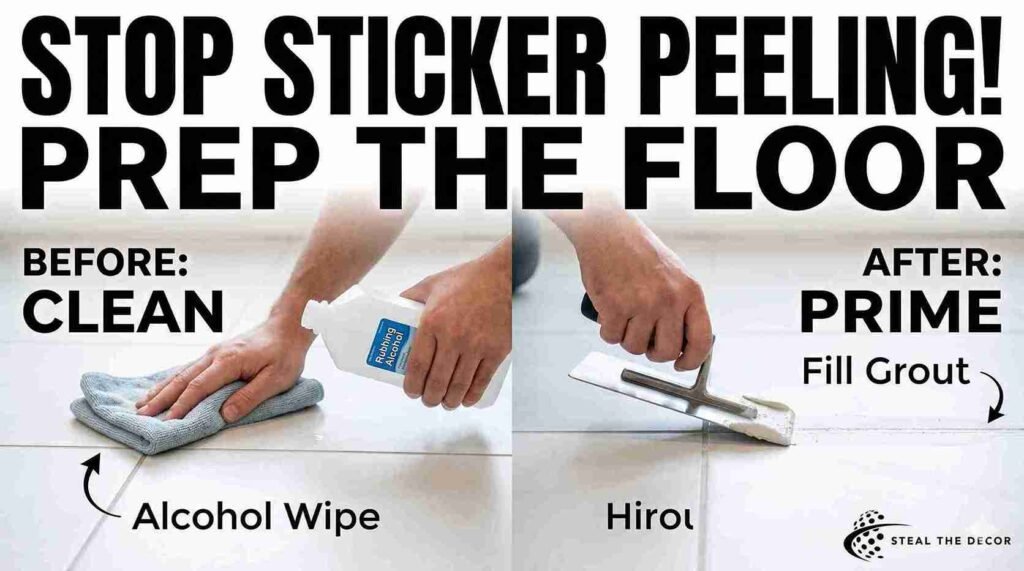
How to Prep the Floor Surface for Vinyl Stickers
This is non-negotiable. The surface prep is literally everything.
Vinyl sticker adhesive bonds to clean, dry, grease-free surfaces. If there’s any soap residue, cleaning product buildup, or even a thin layer of dust, the stickers will peel up within weeks. I learned this the hard way when one corner of my very first tile started lifting after four days. Went back and checked — I’d missed a patch of dried floor cleaner near the toilet base. Classic.
Here’s the cleaning process I now follow every time:
- Sweep or vacuum thoroughly — get every bit of hair, dust, and debris
- Mop with warm water only — no soap, no Pine-Sol, no Murphy’s Oil
- Wipe the entire floor with rubbing alcohol on a microfiber cloth
- Let it dry completely — at least 2 hours, or use a fan to speed it up
- Do a final pass with a dry cloth before you start sticking
For grout lines, which are recessed and uneven, fill them in with a grout filler or leveling compound if they’re deep. Thick grout gaps create air pockets under your stickers, which eventually cause them to bubble or peel at the edges. I didn’t fill mine because they were relatively shallow, and my stickers held fine — but if your grout lines are raised or deep, fill them first. It takes 20 minutes, and it’s absolutely worth it.
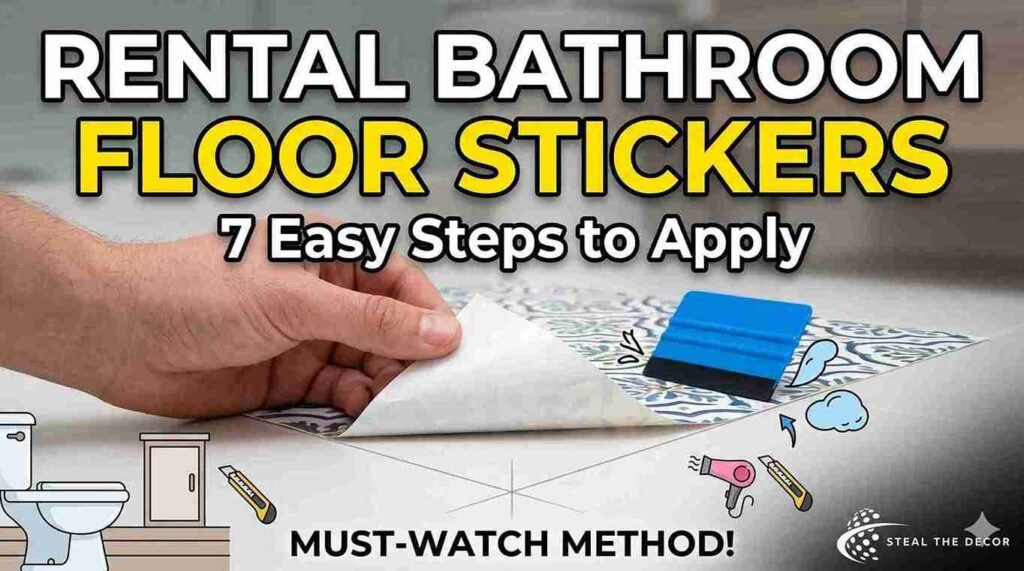
Step-by-Step: How to Apply Vinyl Floor Stickers in a Rental Bathroom
Okay. This is the part you came for. Let’s go step by step.
Step 1: Start at Your Center Point
Take your first sticker, peel back about one inch of the backing paper from one corner, and align that corner with your marked center point. Don’t peel the whole backing off at once — you’ll lose control of the sticker instantly, and repositioning a fully exposed adhesive tile is a nightmare.
Step 2: Peel-and-Press in Sections
Fold back a small section of the backing, press that portion firmly to the floor, then slowly continue peeling and pressing. Work from the center of the sticker outward, using your squeegee or credit card to push out any air bubbles as you go. Think of it like applying a screen protector on your phone, but on the floor.
Step 3: Apply Firm, Even Pressure
Once the sticker is fully down, go over the entire surface with your squeegee — firmly, edge to edge. Then go over it again with your hand, pressing down on the corners and edges. The adhesive needs full contact to bond properly. Edges and corners are the first places that peel, so give them extra attention.
Step 4: Work Row by Row
Lay your stickers one by one, working outward from the center in a grid pattern. Make sure each sticker is perfectly aligned with its neighbor before you press it down. Even a 1/8-inch gap will be obvious once the whole floor is done.
Step 5: Cut Edge Pieces with a Utility Knife
When you reach the walls, vanity base, or toilet, you’ll need to cut stickers to fit. Measure the gap, mark the sticker face down with a pencil, and cut along a metal ruler using a sharp utility knife. Score and snap, don’t drag — it gives a cleaner edge. A utility knife with a fresh blade cuts vinyl stickers perfectly. Dull blades tear the material and leave rough, frayed edges.
Step 6: Use a Hair Dryer for Tricky Spots
Around the toilet base and vanity edges, the floor curves slightly. Heat softens the vinyl just enough to make it pliable. Hold your hair dryer about four inches above the sticker for 10–15 seconds, then press the warm vinyl firmly into the curve or corner. It bonds much better than cold vinyl in those tight spots.
Step 7: Let It Cure Before Getting It Wet
This is the one everyone skips. Wait at least 24 hours before walking on the floor normally, and 72 hours before it gets wet — showers, mopping, or anything else involving water. The adhesive needs time to fully cure. I waited one day and then took a shower, and while my floor turned out fine, I got lucky. The 72-hour rule exists for a reason.
Common Mistakes to Avoid When Applying Vinyl Floor Stickers
Every DIY project has its “I wish someone had told me” moments. These are mine.
Starting from a wall. I already mentioned this, but it’s worth repeating. Your walls are not square. Your floor pattern will look crooked if you start there. Always find your center first.
Not cleaning with alcohol. Soap leaves a film. That film destroys adhesive bonding. Even if your floor looks clean, wipe it down with rubbing alcohol before you apply a single sticker.
Peeling the full backing off immediately. You have about two seconds of control once the full adhesive is exposed before the sticker folds onto itself or sticks to your knee. Peel in sections. Always.
Ignoring the grout lines. Deep grout gaps are air pocket factories. Either fill them or accept that some edges will lift eventually. Plan accordingly.
Not buying enough stickers. I ran out with six tiles left to go and had to reorder. Shipping took five days. My bathroom was half-finished for nearly a week. Order 10–15% extra. Always.
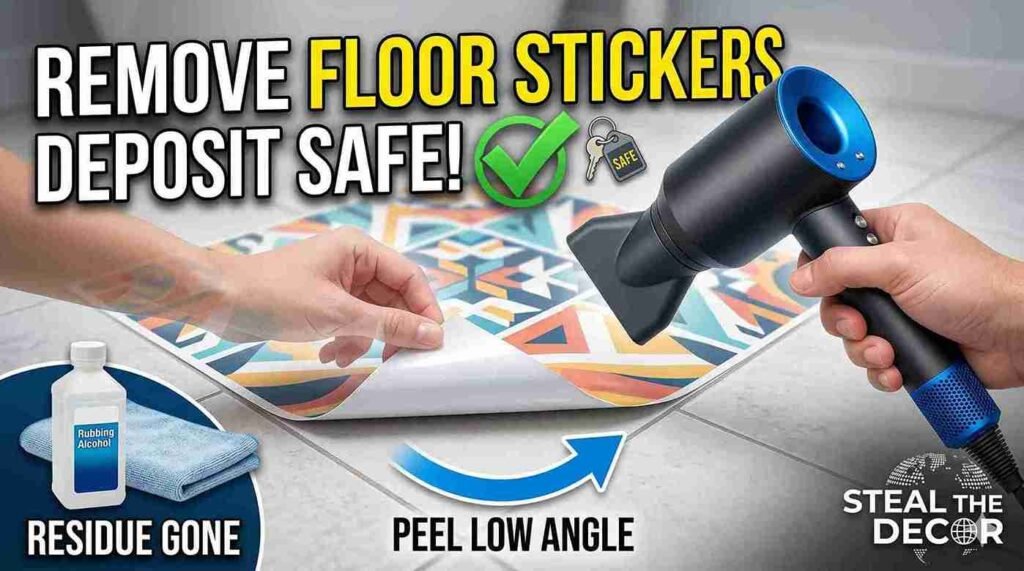
How to Remove Vinyl Floor Stickers Without Damaging the Floor
This is the question renters care about most — and for good reason. Your security deposit depends on it.
The good news: removing vinyl floor stickers is usually straightforward, especially if you’ve chosen a quality brand. Start by warming the sticker with a hair dryer on medium heat for about 15–20 seconds. This softens the adhesive and allows the vinyl to peel away cleanly. Grab a corner and peel slowly, at a low angle — almost parallel to the floor, not straight up. Pulling straight up puts stress on the floor surface and can sometimes pull up old grout or weak tile glaze.
If there’s any sticky residue left behind, apply a small amount of rubbing alcohol or a product like Goo Gone to a cloth and rub gently. Don’t pour it directly onto the floor — you just want to dissolve the adhesive without saturating the grout. Once the residue is gone, wipe the area clean with warm water and let it dry. Your original floor should look exactly as it did before.
I’ve moved once since doing this project and removed all 40-something stickers in about 90 minutes. My landlord did a walkthrough and didn’t mention the floor once. Zero deposit deductions. That alone made the whole project worth it.
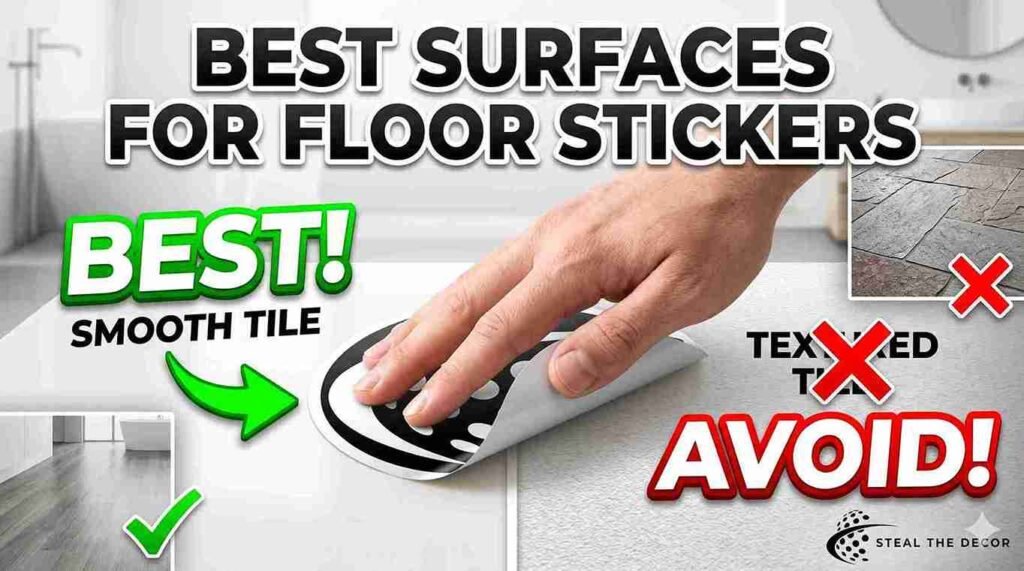
Best Surfaces for Vinyl Floor Stickers in a Bathroom
Not every bathroom floor is an ideal candidate. Here’s a quick breakdown:
| Floor Type | Sticker Compatibility | Notes |
| Ceramic tile (smooth) | Excellent | Best surface for adhesion |
| Vinyl or linoleum | Excellent | Smooth, clean bond |
| Porcelain tile | Good | Clean thoroughly first |
| Natural stone | Fair | Porous — test a tile first |
| Textured/non-slip tile | Poor | Air pockets form easily |
| Carpet | Not recommended | No adhesion possible |
Textured floors are the real challenge. If your bathroom has those rough, non-slip tiles, vinyl stickers won’t bond cleanly to the raised texture. You can try filling the texture with leveling compound first, but honestly, for heavily textured floors, a removable vinyl mat might be a better option than individual stickers.
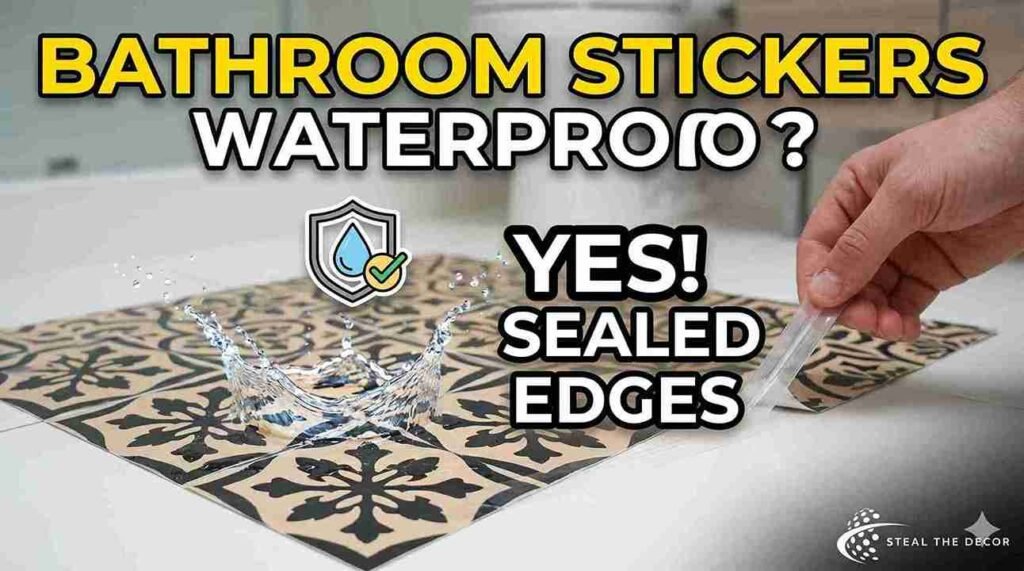
Are Vinyl Floor Stickers Actually Waterproof Enough for a Bathroom?
Short answer: yes, if you buy the right ones.
Waterproof vinyl stickers made from PVC are fully moisture-resistant — they can handle splashes, bathroom humidity, and the occasional puddle from getting out of the shower. Water sitting on top of the sticker won’t damage it. The vulnerability is water getting under the sticker through poorly bonded edges or unsealed grout lines. That’s why surface prep and edge sealing matter so much.
What vinyl floor stickers are not is heat-proof. If a surface gets hot to the touch — like near a heated floor system or a floor vent — the adhesive can soften and cause the sticker to shift or peel. For most standard bathroom floors, this isn’t a concern. But if your apartment has radiant floor heating, test one sticker for a week before committing to the whole floor.
Also worth noting: most quality vinyl stickers are slip-resistant when dry. Wet, they can get slightly slippery, just like any hard floor. Adding a non-slip bath mat over the stickered area near the shower or tub is a smart, practical move regardless.
Conclusion
The cracked linoleum is a distant memory now. My bathroom actually feels like mine — which, when you’re renting, is rarer than it should be.
If you take nothing else from this, take these three things: prep your surface obsessively, start from the center, and buy more stickers than you think you need. The application itself is genuinely satisfying once you get the hang of it. There’s something weirdly meditative about laying tiles row by row and watching the floor transform.
Vinyl floor stickers won’t work on every surface, and they’re not a forever fix — but as a renter-friendly flooring upgrade, they’re about as close to a perfect solution as you’ll find. No contractor, no lease violation, no drama at move-out.
So what about you — have you tried peel-and-stick stickers in your rental bathroom? Did they hold up the way you hoped, or did you run into a surface prep nightmare? Drop your experience in the comments. I genuinely want to know what worked (and what didn’t).
Frequently Asked Questions
Will vinyl floor stickers damage my rental bathroom floor?
No — provided you remove them correctly. Quality vinyl floor stickers are designed to be deposit-safe. The adhesive is strong enough to hold through daily foot traffic and humidity, but gentle enough to release without pulling up tile glaze or leaving permanent residue. Peel them slowly with heat, clean up any leftover residue with rubbing alcohol, and your original floor will look the same as when you moved in.
How long do vinyl floor stickers last in a bathroom?
With proper surface prep and installation, vinyl floor stickers typically last one to three years in a bathroom environment. Some users report their holding up well past the two-year mark. Longevity depends on how thoroughly you clean the surface before application, the quality of the sticker brand, and how much moisture and foot traffic your bathroom gets.
Can I apply vinyl floor stickers over existing vinyl or linoleum?
Yes, and it’s actually one of the better surfaces for them. Smooth vinyl and linoleum floors provide excellent adhesion because they’re flat, non-porous, and easy to clean. Just make sure the existing floor is in good condition — no bubbling, peeling edges, or loose sections. If the old floor is already lifting in spots, the sticker won’t bridge those gaps cleanly.
Do I need to seal vinyl floor stickers after installation?
It’s optional, but applying a thin coat of floor sealer over the edges can extend the life of your stickers significantly, especially in a high-moisture bathroom. Use a water-based, polyurethane floor sealer on the edges only — not the full surface, which can make the stickers slippery. This is especially helpful around the toilet base and shower area, where water tends to pool.
What if a sticker bubbles or lifts after a few days?
Don’t panic. Lift the edge gently, clean the floor underneath with rubbing alcohol, let it dry, then re-press the sticker. Use a hair dryer to warm the adhesive before pressing it back down. For persistent lifters, a small dab of vinyl-safe floor adhesive under the corner can solve the problem permanently.
Author Bio: Ali Ahmad is a freelance writer and serial renter who has lived in six apartments across four cities and has strong opinions about tile. He once bought three nearly identical white ceramic mugs because he kept thinking the next one would be the mug. The first one was fine. He covers home decor, rental living, and budget DIY projects from his (currently sticker-floored) bathroom in Austin, TX.