

My 42-pound arch mirror sat on the floor for three weeks. I’d already looked up at least five damage-free ways to hang large mirrors — read every blog, watched the YouTube tutorials — and I was still scared of what my landlord would say.
I’d just moved into a rental in Austin, and my lease had that line every renter dreads — “No holes, no nails, no permanent alterations.” The mirror I bought from HomeGoods for $89 was gorgeous. It was also heavy. I didn’t know how to hang it without drilling into the drywall I didn’t own.
So I did what most people do. I Googled it. I tried one method. It failed spectacularly at 2 a.m. on a Tuesday. The mirror slid down the wall, scraped the baseboard, and cracked slightly at one corner. I still cringe thinking about it.
After that little disaster, I got serious. I tested four different damage-free hanging methods over the next two months, asked two friends to help with the heavier attempts, and figured out — through real trial and error — what actually works for large mirrors without nails. This guide covers the five best options, including one I almost didn’t try because it sounded too simple.

Why Finding Damage-Free Ways to Hang Large Mirrors Is Harder Than It Looks
Damage-free mirror hanging refers to any installation method that mounts a mirror securely to a wall without drilling, nailing, or permanently altering the surface. It’s not just about convenience — for renters, it’s often the difference between keeping or losing a security deposit.
The real challenge? Large mirrors are heavy. A standard 24″ x 36″ framed mirror weighs between 15 and 25 pounds. Go bigger — say, an arched or floor-to-ceiling style — and you’re easily hitting 35 to 50 pounds. Most people reach for Command strips and call it a day. But standard Command strips are rated for 16 pounds per set, and using too few is the number-one mistake I see (and made myself).
The other issue is surface compatibility. Textured walls, fresh paint, and humid bathrooms all reduce adhesive strength. What holds perfectly in your living room might peel off in your bathroom in two weeks. Knowing which method matches your wall type is just as important as knowing the weight limit.
One thing competitors seldom mention: the angle of your wall matters too. Walls that are slightly concave or uneven — common in older apartments — reduce the contact surface area for adhesive strips. If your wall isn’t flat, adhesive-only methods have a real ceiling. I learned this the hard way with my arch mirror. The wall had the faintest curve near the baseboard, and three out of four Command strip pairs barely made full contact. That’s what caused the midnight slide.

Method 1: Heavy-Duty Adhesive Strips (The Most Popular Option)
Heavy-duty adhesive strips are the go-to rental-friendly mirror hanger for most people. They’re easy to find, easy to use, and when applied correctly, genuinely strong. The keyword there is correctly, because most people don’t apply them correctly.
I picked up a pack of 3M Command Large Picture Hanging Strips (the 17206 set, rated up to 16 lbs per pair) for about $14 at Target. For my 42-pound mirror, I needed at least three pairs — I used four to be safe. The trick is to space them evenly across the top edge of the frame, not just the corners. Corners concentrate the load. Spreading strips across the full width distributes weight more evenly across the drywall surface and dramatically reduces the chance of failure.
How to make adhesive strips actually work for large mirrors:
- Clean the wall with rubbing alcohol and let it dry completely — not just wipe-and-go, but fully dry, at least 5 minutes
- Press each strip pair onto the wall first, hold for 30 seconds, then remove the mirror side backing
- Press the mirror firmly against the wall for 60 seconds
- Do not hang anything on the mirror for at least 72 hours — curing time matters more than most packaging suggests
- Avoid humid areas like bathrooms unless you’re using humidity-rated strips specifically
The honest downside: even with multiple strips, I wouldn’t hang anything heavier than 30–35 pounds using adhesive strips alone. They work, but they’re not forever. I check mine every few months by lightly pressing the edges of the frame. If there’s any give, I reinforce before there’s a problem.
My mistake: I originally only used two pairs for a 42-pound mirror. That’s what caused the 2 a.m. slide. The strips weren’t wrong — I just severely under-applied them.

Method 2: French Cleat System (Best for Heavy Mirrors)
A French cleat is two interlocking strips cut at a 45-degree angle — one attaches to the wall, one attaches to the back of the mirror. When you hang the mirror, the angles lock together, and the weight distributes across the entire length of the cleat. It’s genuinely clever, and it’s what professional installers use for heavy pieces.
French cleats are ideal for mirrors over 30 pounds, especially large rectangular or rectangular-arch styles. The load-bearing capacity depends on how you mount the wall piece — if you hit a stud, you can hold 100+ pounds. Even with drywall anchors spaced every 8 inches, you can support 50 to 60 pounds comfortably.
The setup takes more time than adhesive strips, and you do need basic tools — a saw to cut the cleat angle, a level, and a drill (or very strong toggle anchors if you’re going truly nail-free). Some people are surprised to see “drill” in a damage-free guide. But here’s the distinction: a few small screw holes filled with spackling before you move out is dramatically less damaging — and less expensive — than a mirror that falls and gouges the wall.
I mounted a 38-pound hallway mirror with a French cleat last spring. I used 1×4 plywood cut to 28 inches, routed to 45 degrees, and secured the wall piece with four #10 drywall anchors. The mirror has not moved one millimeter since. It’s the most secure hanging method on this list.
Pros: Incredibly strong, easy to rehang, good for adjustments.
Cons: Requires tools and a bit of woodworking skill, not completely hole-free

Method 3: Adhesive Mirror Clips and J-Channels (Best for Frameless Mirrors)
Frameless mirrors are a different animal entirely. There’s no frame to attach strips or cleats to — you’re working directly with bare glass edges. Mirror clips and J-channel tracks solve this problem.
Mirror clips (sometimes called mirror rosettes) are small brackets that grip the top and bottom edges of a frameless mirror. The bottom clips hold the mirror from below, while the top clips press it gently against the wall. Some sets use only adhesive for the mounting plate behind each clip — no nails required. Others use a single small screw per clip.
J-channel tracks are aluminum rails that slide along the bottom or top edge of a frameless mirror. You mount the rail to the wall, slide the mirror in, and the glass sits securely in the channel. This method is popular for large bathroom mirrors and full-length closet-style mirrors.
For a 24″ x 48″ frameless mirror, I used a set of OOK Frameless Mirror Hangers (around $9 at Walmart) along with two heavy-duty adhesive mounting pads along the top edge. The clips handled the positioning, the pads handled the load. It’s held for over a year in a room that gets some humidity from a nearby bathroom.
One thing nobody talks about: frameless mirrors expand and contract slightly with temperature changes. J-channels that allow a little horizontal movement — like the professional-grade aluminum versions — accommodate this better than rigid clips. If you’re using a rigid all-adhesive clip set and your mirror starts showing hairline stress cracks along the edges, temperature movement is likely the reason.
Pros: Designed specifically for frameless glass, clean look, good for bathrooms
Cons: Not ideal for very heavy frameless mirrors (over 25 lbs) without additional support

Method 4: Leaning and Floor Display (Zero-Risk, Zero-Damage)
I know. This sounds like giving up. It’s not.
Leaning a large mirror against the wall is one of the most popular styling choices in interior design right now — and it’s genuinely damage-free because you’re genuinely not hanging it. A leaned mirror display works especially well for oversized arch mirrors, full-length bedroom mirrors, and statement pieces in living rooms.
The thing competitors miss: leaning isn’t just a cop-out for people afraid to hang things. It’s a legitimate design choice that’s easier to restyle, safer for rented walls, and — if done right — looks intentional rather than lazy. The key is anchoring the bottom so it doesn’t slide.
I use two non-slip furniture pads (the rubber kind, about $6 for a pack at Target) tucked under the bottom corners of the mirror. For extra security with heavier mirrors, you can use adhesive velcro strips to lightly tack the bottom of the frame to the baseboard — completely removable, and enough friction to prevent accidental kicks from shifting a 50-pound mirror.
If your mirror doesn’t have a frame or a flat bottom edge, a small decorative wooden ledge — the kind usually sold for picture rails — gives the glass something stable to rest on.
Pros: Zero wall contact, unlimited adjustability, works for any weight
Cons: Takes up floor space, can tip if bumped (add anti-tip straps for safety if children are in the home), not ideal in tight rooms
One real caveat: If you have kids or pets, a large mirror needs either a wall tether or a dedicated corner where it won’t get knocked. I didn’t think about this until my friend’s toddler nearly grabbed the frame during a dinner party. Anti-tip furniture straps — the kind usually sold for bookshelves — work perfectly and are also damage-minimal.
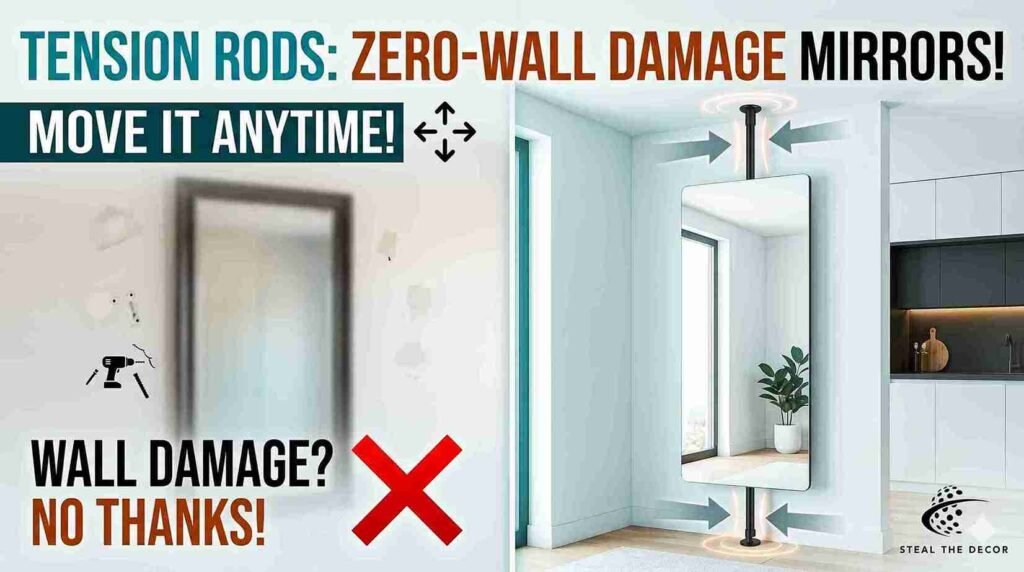
Method 5: Tension Rod and Rail Systems (Underrated and Surprisingly Solid)
This is the method I almost skipped. Tension rod systems for mirrors sound fragile. They’re not — at least not the right ones.
Tension mounting systems use floor-to-ceiling compression rods (like the heavy-duty kind used in closet organization) as a vertical support structure. You attach the mirror to the rod with brackets or clamps, and the rod holds everything in place through friction against the floor and ceiling. No drilling, no adhesive, nothing on the walls at all.
They work best for full-length mirrors — especially in small apartments where a floor-to-ceiling visual element opens up the space. The rod becomes part of the aesthetic, and you can style around it with plants, small shelves, or decorative clips.
I tested the SONGMICS Heavy-Duty Tension Pole system (sold on Amazon for around $45) with a 36″ x 60″ frameless mirror. Setup took about 25 minutes. The system holds the mirror firmly, and the rubber foot pads prevent floor and ceiling scuff marks. It’s not going to hold a 50-pound ornate framed piece — the weight limit is around 22 to 25 pounds for mirror attachments — but for a mid-weight frameless or lightly framed mirror, it’s genuinely reliable.
The real advantage: you can move it. Rearranging your room? Pick up the whole system, reposition it, and re-tension. Done. No residue, no repair, no second-guessing your layout from six months ago.
Pros: Truly zero wall contact, moveable, great for renters, looks modern
Cons: Weight limit is lower than other methods, not ideal for ornate or very heavy frames, ceiling height needs to be standard (8–10 ft)

Choosing the Best Damage-Free Ways to Hang Large Mirrors Based on Weight
Not every method works for every situation. Here’s a quick comparison to help you decide:
| Method | Best For | Max Weight | Wall Damage | Difficulty |
| Adhesive Strips | Framed mirrors, light to medium weight | ~35 lbs (multiple pairs) | None | Easy |
| French Cleat | Heavy-framed mirrors | 60+ lbs | Minimal (small screws) | Moderate |
| Mirror Clips/J-Channel | Frameless mirrors | ~25–30 lbs | None to minimal | Easy–Moderate |
| Leaning Display | Any size, design-forward spaces | Unlimited | None | Easiest |
| Tension Rod System | Full-length, frameless, lightweight | ~25 lbs | None | Easy |
The single most important factor: weigh your mirror before you buy anything. Seriously. Use a bathroom scale. Step on, record your weight. Step on holding the mirror, subtract. It takes 90 seconds and saves you from buying the wrong hanging system entirely.

Avoid Mistakes When Using Damage-Free Ways to Hang Large Mirrors
Most people don’t fail at these methods because the methods don’t work. They fail because of small prep mistakes that are completely avoidable.
Not cleaning the wall surface is the number one culprit. Dust, cooking grease, or even the oils from your hands on the wall create a barrier between the adhesive and the drywall. Wipe down the surface with a 70% isopropyl alcohol wipe and give it five full minutes to dry before applying anything. Not two minutes. Five.
Skipping the cure time is the second-biggest mistake. Most adhesive strip packaging says “wait one hour.” In my experience, 24 hours is the real minimum for any mirror over 15 pounds, and 72 hours is better. Adhesive polymers continue curing after initial contact, and loading a mirror too early — especially in a cool room — dramatically increases failure risk. I set a phone reminder now and don’t touch the mirror for three days after mounting.
Ignoring humidity trips up a lot of bathroom mirror projects. Standard adhesive strips and mounting tapes have reduced holding strength in humid environments. If you’re hanging a mirror in or near a bathroom, specifically look for products labeled “humidity-resistant” or “for wet areas.” 3M makes variants for this; they’re usually a few dollars more and completely worth it.
Frequently Asked Questions
Can Command strips hold a large, heavy mirror without falling?
Yes, but only if you use enough of them and apply them correctly. Command Large Picture Hanging Strips hold 16 pounds per pair. For a 40-pound mirror, you need at least three to four pairs, evenly spaced across the top edge of the frame — not just at the corners. The wall must be clean, smooth, and given full cure time (at least 24–72 hours before loading weight). On textured walls, adhesive strips perform poorly regardless of quantity.
What is the safest way to hang a mirror without nails?
The safest method depends on the mirror’s weight. For mirrors under 35 pounds, heavy-duty adhesive strips with proper prep are reliable. For mirrors over 35 pounds, a French cleat system is the safest damage-free option — it distributes weight across a wide surface and won’t fail the way an overloaded adhesive can. If no holes are acceptable at all, leaning the mirror with rubber floor pads and a wall tether is technically the safest because it eliminates vertical load on the wall.
How do you hang a frameless mirror without drilling?
Use mirror clips or J-channel track systems combined with heavy-duty adhesive mounting pads. The clips or channels handle the positioning and edge grip while the adhesive supports the weight. Clean the wall thoroughly with alcohol, apply the mounting pads per instructions, allow full cure time, and use clips specifically rated for your mirror’s weight. Alternatively, a tension rod system works well for full-length frameless mirrors.
Will adhesive mirror hangers damage painted walls?
When removed correctly, quality adhesive strips — especially Command brand — are designed to release cleanly from painted drywall without pulling paint. The key is removing them slowly and at the correct angle (usually pulling the tab straight down, parallel to the wall). Pulling outward or at a diagonal angle significantly increases the risk of pulling paint. Walls with fresh paint (less than 30 days old) or low-quality flat paint are the highest risk.
Can I hang a mirror on drywall without hitting a stud?
Yes. Drywall anchors — specifically toggle bolts rated for your mirror’s weight — can securely hold mirrors on drywall without studs. For truly damage-free options, heavy-duty adhesive systems work on most standard drywall surfaces without any drilling. The trade-off is weight limit: adhesive solutions max out around 35–40 pounds with multiple strips, while toggled anchors can hold 50+ pounds in drywall alone.
Wrapping It Up
Here’s what I know after doing this wrong once, learning from it, and spending two months testing real options: damage-free mirror hanging works. It’s not a compromise. But it does require actually reading the weight ratings, cleaning the wall properly, and giving adhesive products the cure time they need.
The adhesive strip method is still my go-to for most situations — it’s fast, inexpensive, and leaves no trace. The French cleat is what I recommend for anyone with a mirror over 30 pounds who doesn’t mind a couple of small anchor holes. Leaning is genuinely underrated as a design choice, not just a default. And the tension rod system surprised me — I wouldn’t have believed it held a full-length mirror until I tested it myself.
The most important thing? Weigh your mirror first. Everything else follows from that number.
What method have you tried for hanging large mirrors in a rental or small space? Did it work, or did you end up with a midnight floor situation like me? Drop your experience in the comments — I’m always curious what works (and what really, really doesn’t) for other people’s walls.
About the Author: Ali Ahmad is a home improvement enthusiast and rental-living advocate based in Houston, Texas. He once spent an entire Saturday rearranging the same three pieces of furniture because he was convinced a different layout would “fix the energy” of the room — it did not. When he’s not stress-testing adhesive strips at midnight, he writes practical decorating guides for renters who want their space to look like they actually tried