
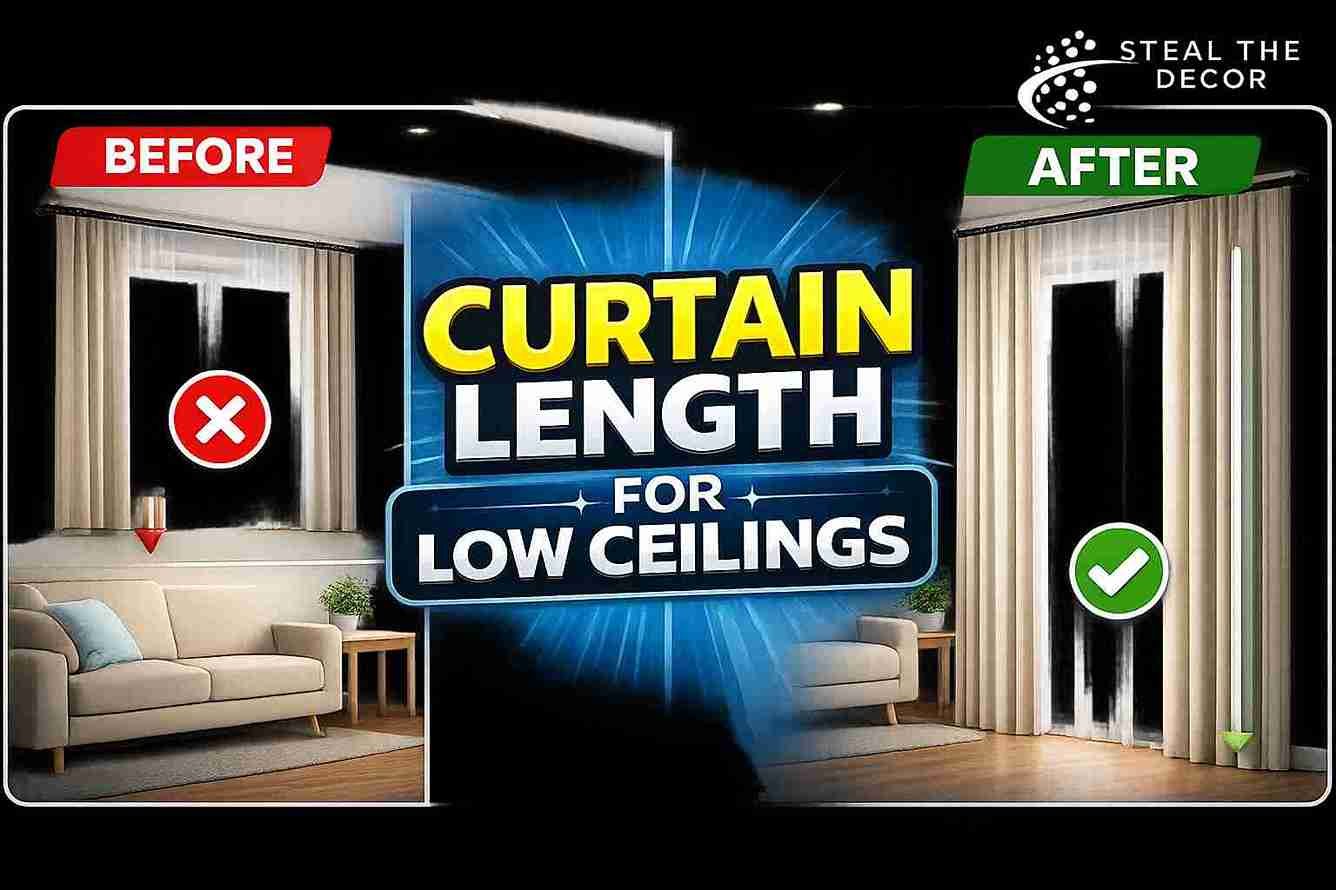
The curtain rod fell off the wall at 6 a.m. Three days before my lease inspection. It took the entire panel down with it, and I woke up to a loud slap against the floor, thinking someone had broken in. That was the moment I realized I had no idea how to choose curtain length for low ceilings—I’d just bought whatever was on sale and hoped for the best.
My apartment ceiling clocks in at 7 feet 8 inches, short enough that every design choice either helps the room breathe or makes it feel like a shoebox. So over three weekends, I tested three curtain lengths, two mounting heights, and two damage-free rod systems to find out which combination actually makes a low-ceiling room look taller—and which ones just look like they’re trying too hard. Here’s what worked, what flopped, and what I’d buy again.
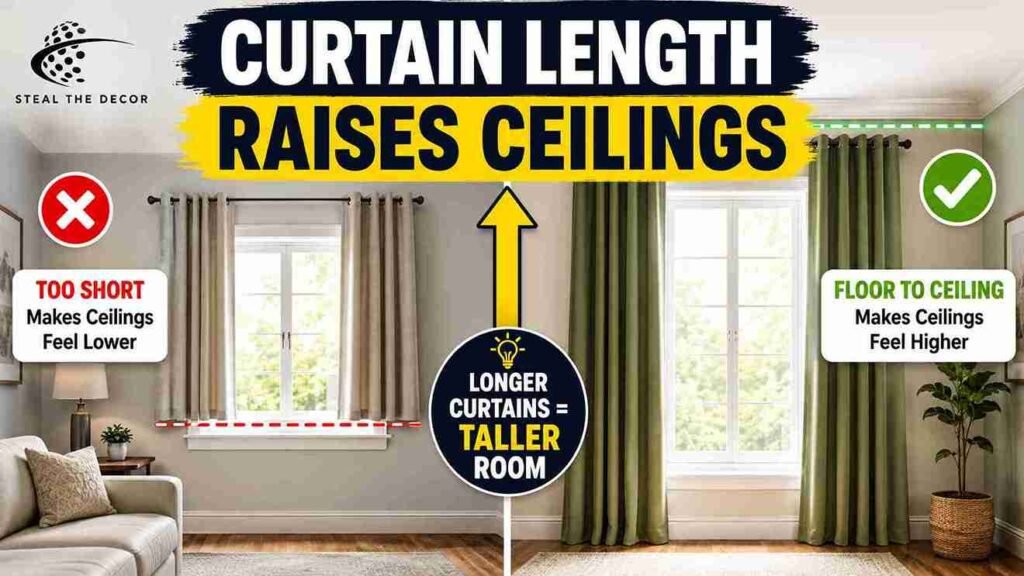
The Short Version: For ceilings between 7 and 8 feet, 96-inch curtain panels mounted 4 to 6 inches above the window frame (or as close to the ceiling as your hardware allows) give you the strongest illusion of height. Skip 84-inch panels on a high mount—they leave a visible gap above the floor that makes the ceiling look even lower. If you’re renting, pair your panels with a tension rod or Command curtain rod hooks so you’re not drilling into drywall you don’t own.
Why Curtain Length Matters for Low Ceilings
Curtain length is one of the cheapest ways to change how tall a room feels, and most renters get it backwards. When panels stop short of the floor or the rod sits right on top of the window frame, your eye reads the whole window as short—and a short window makes a low ceiling feel even lower. Vertical lines are the trick here: a long, unbroken curtain panel from near the ceiling to the floor pulls the eye upward and stretches the perceived ceiling height of the room, the same way a vertical stripe makes a person look taller than a horizontal one.
I noticed this immediately in my own living room. Before testing, I had 63-inch curtains hung right on the window frame—technically “done,” but the room photographed short and felt boxy in person. Once I swapped to longer panels mounted higher, guests actually asked if I’d raised the ceiling. I hadn’t. I’d just moved fabrics. That’s the whole trick. Nothing else to it. The same vertical-line logic is behind why I like one tall piece of art near a window instead of a wide one—I get into that in how to style a blank wall behind a TV, which is really the same height-illusion math applied to a different wall.
Bottom line: in a low-ceiling room, curtain length isn’t decoration—it’s an optical tool, and getting it wrong actively works against you. That same low-ceiling math is why I went looking for a better fixture than the standard builder-grade dome — my post on covering a boob light in a rental without replacing it and my guide to hanging plug-in pendant lights from the ceiling both lean on the same vertical-line thinking to make a low ceiling feel less like a lid on the room.
Does Curtain Length Actually Change How Tall a Room Looks? (Skeptic Check)
Yes — but only if the mounting height and panel length are working together. I was skeptical too. Really skeptical. It sounds like one of those design “hacks” that photographs well but does nothing in real life. So I ran the same room through three configurations: short curtains on the frame, long curtains on the frame, and long curtains mounted high near the ceiling.
The short curtains on the frame did nothing for the room. The long curtains on the frame helped a little, but the gap between the rod and the actual ceiling still drew the eye to where the low ceiling started. And the long curtains mounted high — as close to the ceiling as my hardware and window trim allowed — made the single biggest visible difference of the whole test. It works if you mount high and buy panels long enough to still reach the floor from that higher point.
It doesn’t work if you keep the rod low and just swap in longer fabric that then puddles awkwardly on the ground. Blackout panels also changed how dark the room got without any outlet-based lighting, which ties into my separate guide on how to light a dark room with no outlets if your low-ceiling room has the same problem once the curtains close.
Bottom line: length alone won’t fix a low ceiling—length plus a high mount is the actual formula. If your walls aren’t doing you any favors either, my post on rental-friendly wall paneling covers a similar low-ceiling illusion using vertical panel lines instead of fabric, and if you’re curious how far fabric can go beyond curtains, I documented the whole experiment in “I Tried Fabric as Wallpaper in My Rental.”
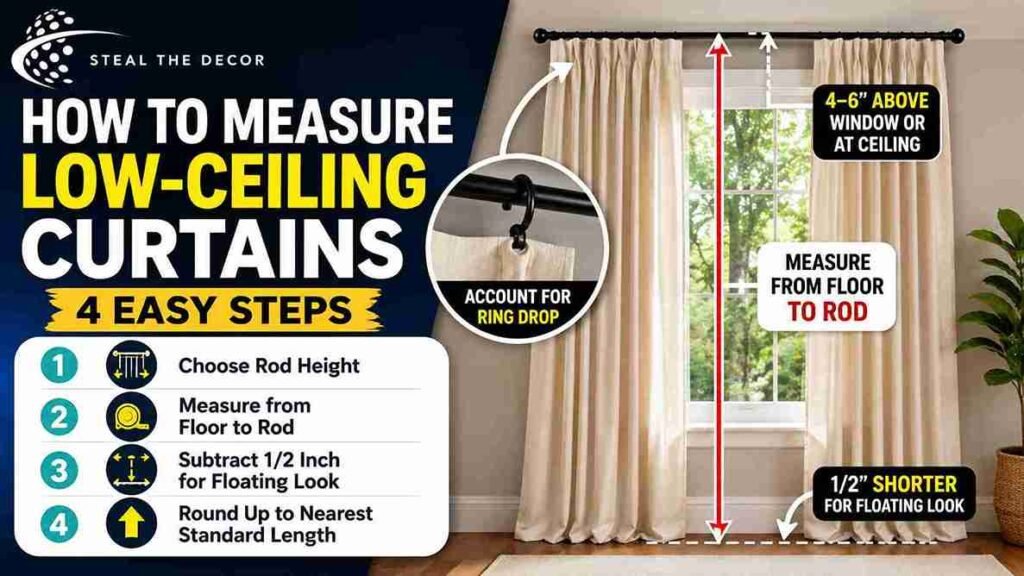
Step-by-Step: How to Measure for Low-Ceiling Curtains
Step 1: Decide your mount height first, not your curtain length. Most guides tell you to measure the window, but for low ceilings you have to work backward. Pick where the rod will sit — ideally 4 to 6 inches above the window frame, or flush with the ceiling if you’ve got the clearance — before you measure anything else.
Step 2: Measure from the floor up to your chosen rod height, not from the top of the window frame. This is the single most common mistake I made on my first attempt. I measured from the window and ended up with panels that stopped four inches short of the floor once I raised the rod.
Step 3: Subtract about half an inch for a “floating” look — or leave the number exact if you want the panels to just kiss the floor. If you’re using curtain rings to hang the panels, factor in the ring drop, usually half an inch to an inch, since it changes where the fabric actually starts.
Step 4: Round up to the nearest standard curtain length. Ready-made panels typically come in 63″, 84″, 96″, and 108″. If your measurement lands between sizes, round up and hem down rather than rounding down and leaving a gap. A tailor or a no-sew hem tape kit (around $6–$10) can shorten a 108″ panel to fit almost any low-ceiling window.
I get into more depth on no-drill mounting hardware in my guide to how to decorate a rental without damage, which covers the adhesive and tension-based systems that make this whole project reversible when you move out. And tension hardware isn’t just for curtain rods—I use the same style of rod for under-sink organization in a rental, so it’s worth keeping a couple on hand for more than one project.
Bottom line: measure from the floor to your intended rod height, not from the window, or your math will be wrong before you’ve even bought the fabric.
Best Curtain Length for 8-Foot Ceilings
For a standard 8-foot ceiling, 96-inch panels are the default answer, and my testing backed that up. Mounted 4 to 6 inches above the window frame, a 96-inch panel reaches the floor with enough length left over to float or kiss cleanly—no awkward short-and-swingy look like 84-inch panels get when you mount them high.
84-inch panels still have a place. They work if your rod sits low, closer to the top of the window frame itself, or if you’re dressing a smaller sill-length window instead of going floor-length. But the second you raise the rod for the height illusion, 84 inches usually comes up short—sometimes by four to eight inches, depending on your exact ceiling height and window placement.
If your ceiling runs closer to 7 feet, or your window sits unusually high on the wall, 108-inch panels hemmed down are worth the extra step. I used this method on one window that was 4 inches taller than the rest of my apartment, and honestly, it was the only way to keep the same mount height across every window in the room without buying custom sizes.
For more ways to visually stretch a short room beyond the windows, I’d also point you to my post on rental-friendly accent wall ideas—paint and curtain strategies work best together, not separately.
Bottom line: default to 96-inch panels for 8-foot ceilings, and only reach for 84-inch if your rod is staying low.
Pro Tips for Renters:
- Buy panels a size longer than you think you need — hemming down with no-sew tape is easy; adding length to fabric that’s too short isn’t.
- Check your window trim depth before ordering an outside-mount rod. Some rentals have shallow trim that limits how far the bracket can sit from the wall.
- Got crown molding? Mount the rod just below it rather than touching it, so you’re not drilling or adhering directly to decorative trim.
- Wash sheer or blackout panels before hanging—many ship compressed and need a dryer cycle with a damp towel to hang naturally straight.
- Keep the same rod height across every window in a room, even if the windows are slightly different sizes. Consistency reads as intentional; mismatched heights read as accidental.
96-Inch vs. 84-Inch Curtains: Which Length for Low Ceilings?
| Length | Best Mount Height | Floor Clearance at High Mount | Best For | Our Rating |
|---|---|---|---|---|
| 84-inch panels | On or near the window frame | Often 4–8″ short | Sill-length looks, low mounts | 3/5 |
| 96-inch panels | 4–6″ above frame or near ceiling | Reaches floor, floats cleanly | Standard 8-ft ceilings | 5/5 |
| 108-inch panels (hemmed) | Near ceiling, taller windows | Reaches floor with extra to hem | Ceilings under 8 ft, tall windows | 4/5 |
I tested both 84-inch and 96-inch panels from the same product line, mounted at the same height, in the same window. The 84-inch panels left a visible four-inch gap above the floor — noticeable enough that a friend asked if I’d bought the wrong size. The 96-inch panels reached the floor with a slight, intentional float. Same window. Same rod. A completely different feeling of height.
Bottom line: when your rod is mounted high, 96 inches is the safer default—84 inches only works if you’re keeping the mount low and the look sill-length on purpose.
Floating, Kissing, or Puddling: Which Style for Low Ceilings?
Floating means the curtain hem sits about half an inch to an inch above the floor—my top pick for low ceilings, because it reads as clean and intentional and keeps the vertical line crisp without any fabric bunching to interrupt it.
Kissing the floor means the hem just barely touches the ground with no extra fabric. It’s a safe middle option if you’re not fully confident in your measurements—it still stretches the room vertically without any risk of dragging.
Puddling, where several extra inches of fabric pool on the floor, is a look I’d actively avoid in a low-ceiling room. Romantic in a tall, formal room. Cramped in a small apartment. It visually eats into your floor space and breaks the long vertical line you’re trying to build—the opposite of what you want here. This matters even more if you’ve already got a rug layered under the window—check my area rug over carpet guide or my temporary flooring for rentals guide before deciding how much extra fabric your floor can actually handle.
Bottom line: float or kiss the floor in a low-ceiling room, and save puddling for a house with ceilings to spare.
Curtain Rod Placement Tips to Maximize Height
The mounting height matters more than the fabric length, honestly. My rule after testing: go high and long — mount the rod as close to the ceiling as your hardware allows, then buy panels long enough to still reach the floor from that point.
An outside mount — where the rod extends beyond the window frame on both sides — helps too, since it makes the window itself look wider and taller, not just the fabric. I widened my rod by about 6 inches on each side, and the window instantly looked bigger before I’d even touched the curtain length.
Because I can’t drill into rental drywall, I tested two damage-free systems: a tension-mounted rod (around $15–$25) that wedges inside the window frame and Command curtain rod hooks rated for lighter rods, which stick directly to the wall above the frame and remove without residue. The tension rod was faster to install but limited to inside-mount placement.
The Command hooks let me go outside-mount and higher up the wall, which made the biggest visual difference—but I had to follow the manufacturer’s cure time exactly, or the hook slid. One thing that surprised me: adhesive hold varies a lot by wall texture. Same issue I ran into testing hardware over a faux brick-accented wall—textured surfaces need extra cure time, sometimes a different adhesive strip entirely.
For heavier rod-and-panel combinations, I’d rather use hardware rated for real weight. My breakdown on damage-free ways to hang large mirrors and my separate guide to hanging a heavy mirror without studs both cover the same class of adhesive and tension systems, plus their actual weight limits—worth a read before you commit to a heavy rod. And if your window vents or trim are working against you visually, my guide on how to hide ugly wall vents tackles a similar problem from a different angle. If curtains aren’t an option for a particular window at all, I’ve also tested a no-drill tapestry hanging method that uses the same high-and-wide placement logic.
Bottom line: mount high and mount wide, and match your hardware’s weight rating to your actual rod—not just the height you’re chasing.
Common Mistakes to Avoid
Buying 84-inch curtains for a high mount. This was my first mistake, and it’s the one I see most often. If you’re mounting the rod near the ceiling, 84 inches rarely reaches the floor. Measure your mount height first, then size up.
Measuring from the window instead of the floor. Most standard curtain guides tell you to measure the window, but that only works if your rod sits right at the frame. The second you raise it for the height illusion, you have to measure from the floor to your new rod position—not the window.
Puddling fabric in a small room. Looks luxurious in photos of large houses. Looks cramped in an 80-square-foot apartment corner. Skip it here.
Mounting the rod too close to the window frame. A rod mounted right on the frame gives you none of the vertical-line benefit—you need at least 4 to 6 inches of clearance above the frame for the illusion to register.
Ignoring your ring or clip drop. If you’re using curtain rings, the fabric starts an inch or so below the rod, not at the rod itself. I forgot this on my first hang and ended up half an inch short of the floor. Not gonna lie — that one annoyed me more than it should have.
Skipping the weight rating on adhesive hardware. This one bit me personally. I mounted a heavier rod on light-duty adhesive hooks, and it held for exactly nine days before sliding down the wall. Match the hook’s rated weight to your actual rod-and-panel combination, and round up.
Forgetting cords and clutter near the window. A perfectly measured curtain still looks messy if a lamp cord is draped across the sill underneath it. I fixed this in my own space using the tricks in how to hide lamp cords, and it made a real difference in how finished the whole window area looked.
Bottom line: almost every low-ceiling curtain mistake traces back to measuring or mounting in the wrong order — fix the order, fix the result.
Renter-Safe Products We Actually Recommend
| Product / Method | Price Range | Ease of Use (1–5) | Damage Risk | Best For | Our Rating |
|---|---|---|---|---|---|
| Tension Curtain Rod (adjustable) | $15–$28 | 5/5 | None | Inside-mount, quick installs | 5/5 |
| Command Curtain Rod Hooks by 3M | $8–$14 | 4/5 | None (removes cleanly) | Outside-mount, lighter rods | 4/5 |
| 96″ Blackout Curtain Panel (2-pack) | $30–$55 | 5/5 | None | Standard 8-ft ceilings | 5/5 |
| 108″ Curtain Panel + No-Sew Hem Tape | $35–$60 total | 3/5 | None | Taller windows, ceilings under 8 ft | 4/5 |
| Curtain Rings with Clips (set of 7) | $10–$18 | 5/5 | None | Easy sliding, adjustable ring drop | 5/5 |
I’ve genuinely tried every item on this list in my own apartment. The tension rod is my go-to for smaller windows where I don’t need the width of an outside mount. For the living room window, where I wanted a wider, higher outside mount, the Command hooks did the job without a single mark on the wall when I pulled them down for this article. All products I tested and recommend are linked above.
And if you’re weighing curtains against other visual-height tricks in the same room, my post on large-scale wall art for apartments pairs well with this—a tall vertical piece of art near the window reinforces the same upward line your curtains are creating. If you’re hanging a full gallery arrangement instead of one large piece, the same adhesive-strip logic shows up in my guide to creating a grid gallery wall with adhesive strips, plus a cheaper framing option in how to frame a poster cheaply without a frame.
Bottom line: the hardware matters as much as the fabric—cheap, wrong-rated hooks will undo a perfect curtain length in under two weeks.
What to Check With Your Landlord Before You Start
- Confirm whether adhesive hooks are explicitly allowed—some leases restrict any wall-adhered hardware, even removable brands
- Ask about existing curtain rod holes—some rentals already have anchors installed you can reuse
- Check your lease’s definition of “damage” versus normal wear, since policies vary by state and property
- Photograph your walls before installing anything, so you have proof of pre-existing condition
- Review the HUD tenant rights resource for a general overview of what landlords can and can’t charge you for at move-out
- Ask directly if outside-mount hardware, which sits farther from the window frame, gets treated differently than inside-mount hardware.
- Planning wall changes in the same room? Confirm the same rules apply to peel-and-stick wallpaper for renters or a removable boho mural—some leases treat wall coverings differently than curtain hardware
Bottom line: a two-minute conversation with your landlord can save you a security deposit dispute six months from now.

Real Results: What I Got for $34
I spent $34.18 total on this test: one $16.99 two-pack of 96-inch blackout panels, one $10.49 tension rod, and $6.70 in Command curtain rod hooks for the second window. The tension rod install took about four minutes. The Command hooks took longer—about twenty minutes, mostly waiting for the adhesive to set before hanging weight on them, exactly per the instructions.
What worked: the 96-inch panels, mounted 5 inches above the frame, floated about half an inch off the floor. The room genuinely looked taller in photos taken from the same spot before and after—though I had to fix my living room’s Kelvin temperature first, since warm-toned bulbs were flattening the contrast between the panels and the wall in every comparison shot. What didn’t work: my first attempt with 84-inch panels on the same high mount, which left a gap I had to redo.
And one Command hook, mounted on a slightly textured patch of wall I hadn’t cleaned with rubbing alcohol first, slid after about four days—a reminder that surface prep matters as much as the product itself. I’d hit the same adhesion problem testing peel-and-stick wood plank walls, so at this point I’m convinced it’s a texture problem, not a curtain-specific one.
Bottom line: for under $35 and an afternoon, the height illusion actually held up in daily life — not just in photos.
Key Takeaways
- 96-inch curtain panels mounted 4 to 6 inches above the window frame are the most reliable choice for standard 8-foot ceilings in US apartments.
- Curtains should be measured from the floor up to the intended rod height, not from the top of the window frame, especially when mounting higher for a height illusion.
- 84-inch panels work best on a low mount close to the window frame and often fall short when the rod is raised for a taller look.
- Floating (hem half an inch above the floor) or kissing the floor creates a cleaner vertical line in small or low-ceiling rooms than pooling does.
- Damage-free hardware like tension rods and Command curtain rod hooks by 3M can support a high, outside mount without drilling into rental walls.
- A high-and-wide outside mount—a rod extending beyond the window frame—makes both the window and the ceiling read as taller.
- Checking your lease and the HUD tenant rights guidance before installing any wall hardware can prevent security deposit disputes at move-out.
Conclusion
Three weekends of trial and error taught me one thing: curtain length for low ceilings isn’t really about the fabric—it’s about where you put the rod first and then buying length to match. Get the mount height right, size up to 96 inches for most 8-foot rooms, and use damage-free hardware so you’re not gambling your deposit on a design experiment. Have you tried this in your rental? Tell me what happened below—I want to know if your ceiling height matched mine or if you had to adjust the formula.
If you’re tackling the rest of the room at the same time, my guide to how to hang a gallery wall without nails is a natural next step—wall art and curtain height work together to stretch a short room. All products I tested and recommend are linked above. I’ve tried every single one myself.
FAQ: Curtain Length for Low Ceilings
How long should curtains be for 7-foot ceilings?
For a 7-foot ceiling, 84-inch panels usually work if your rod sits close to the window frame, but 96-inch panels give you more flexibility if you want to mount higher for the height illusion. Measure from the floor to your chosen rod height before deciding.
Do 96-inch curtains work for 8-foot ceilings?
Yes — 96-inch panels are the standard recommendation for 8-foot ceilings, especially when the rod is mounted 4 to 6 inches above the window frame. They reach the floor with enough length to float or kiss cleanly at that height.
Should curtains touch the floor in small apartments?
Generally, yes. Floor-length or floating curtains create a stronger vertical line and make a small or low-ceiling room feel taller than sill-length curtains do. Avoid heavy puddling, which can make a small floor feel more crowded.
Is a high-mounted curtain rod safe for rental walls?
Yes, as long as you use damage-free hardware rated for your rod’s weight—tension rods for inside-mount and adhesive hooks like Command for outside-mount. Always check the manufacturer’s weight rating before hanging heavier rods or blackout fabric.
How much does it cost to fix curtain length for a low ceiling?
Budget roughly $25–$60, depending on panel length and hardware. Tension rods run $15–$28, adhesive hook systems run $8–$14, and a 96-inch curtain two-pack typically runs $25–$55.
What’s the best curtain rod brand for low-ceiling rentals?
Command by 3M is a reliable damage-free option for lighter rods and outside mounts, while any adjustable tension rod works well for inside mounts without any wall hardware at all.
What should I do if my curtain rod hook fails or slides?
Remove it, clean the wall surface thoroughly with rubbing alcohol, let it dry completely, then reapply following the manufacturer’s exact cure-time instructions. Most slipping issues come from skipping surface prep or hanging weight too soon.