
Last spring, I signed a lease on a small apartment in Denver, and the moment I walked into the living room, my stomach dropped. The floor was this brownish-beige laminate — scuffed, hollow-sounding, and honestly depressing. I couldn’t paint. Couldn’t nail anything down. My landlord was very clear about that. So I started obsessing over temporary flooring, specifically interlocking tiles that could cover the whole mess without leaving a single scratch behind. What followed was three weeks of Amazon rabbit holes, one regrettable purchase, and eventually — a living room I actually liked sitting in. If you’re in the same situation, this guide will save you the headache I went through.

What Is Temporary Flooring and Why Interlocking Tiles Are the Smart Choice
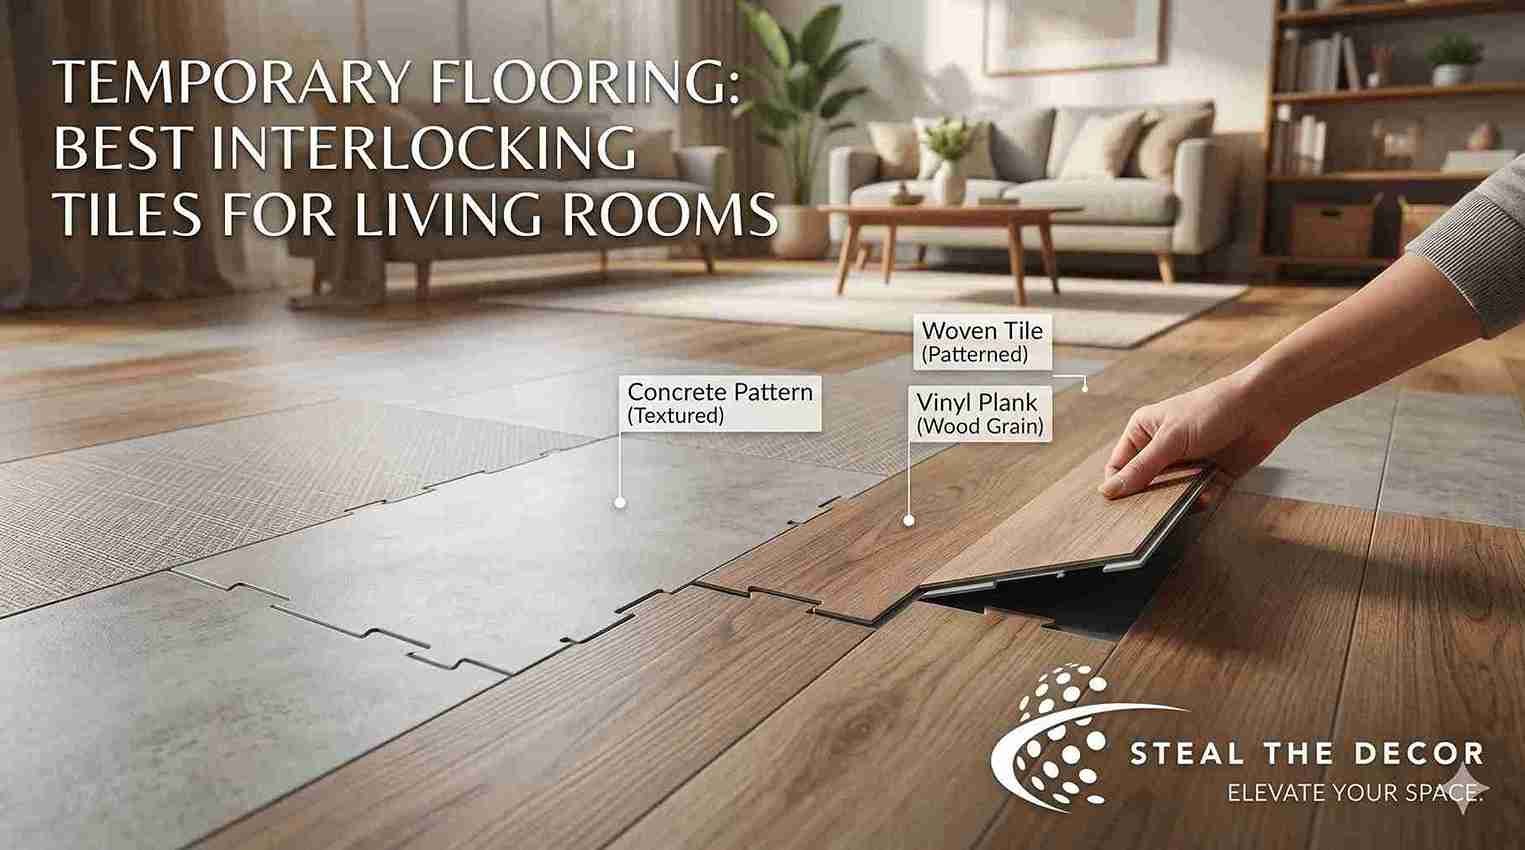
Temporary flooring is any non-permanent floor covering that installs without adhesive, nails, or modifications to the subfloor — and comes up cleanly when you’re done. It’s become a huge solution for renters, event hosts, and homeowners doing staged renovations.
Interlocking tiles, specifically, are the most practical version of this concept. Each tile connects to the next using a snap-together or puzzle-piece edge system — no tools needed, no glue, no mess. You get a stable, good-looking floor that you can disassemble and take with you when you move. According to industry data, the global temporary floor protection market was valued at around $2.5 billion in 2024, and that number keeps climbing as more people rent instead of owning.
Types of Interlocking Tiles for Living Rooms: Which Material Actually Works
Not all interlocking tiles are the same. Material matters — a lot — especially in a living room where you want comfort underfoot, not just durability.
Here’s a quick breakdown:
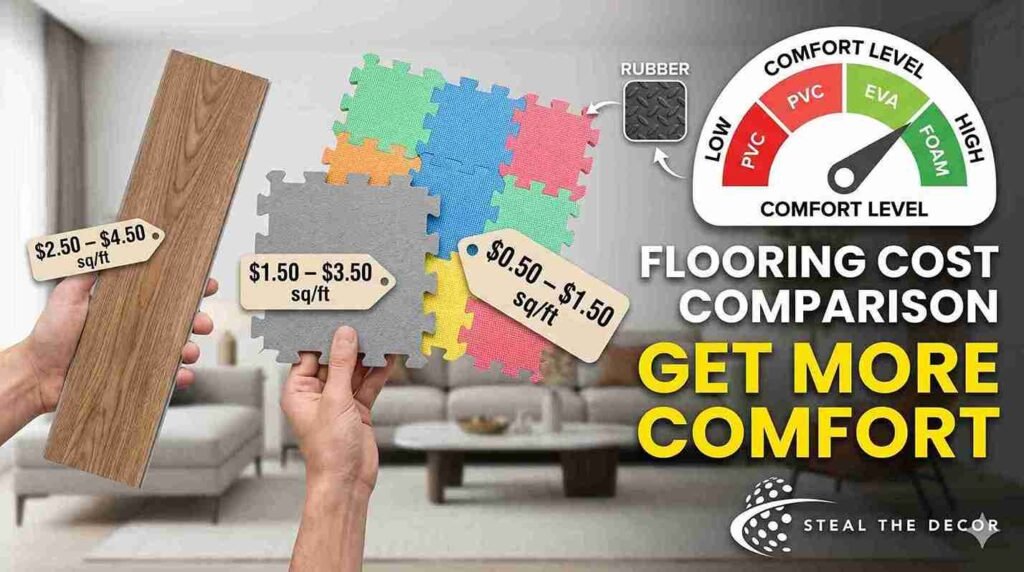
| Material | Best For | Avg. Price per Sq Ft | Comfort Level |
| PVC / Rigid Plastic | High traffic, durability | $1.50 – $3.50 | Medium |
| EVA Foam | Soft areas, playrooms | $0.50 – $1.50 | High |
| Rubber | Sound absorption, stability | $2.00 – $5.00 | Medium-High |
| Wood-Top Vinyl | Living room aesthetics | $2.50 – $4.50 | Medium |
| Carpet Tiles | Cozy, warmth | $1.00 – $3.00 | High |
For a living room specifically, wood-top vinyl interlocking tiles and rigid PVC tiles with a decorative finish tend to win. They look polished enough not to scream “temporary,” and they hold up under furniture, foot traffic, and the occasional dropped coffee mug.
The One Product I Tried First (And Shouldn’t Have)
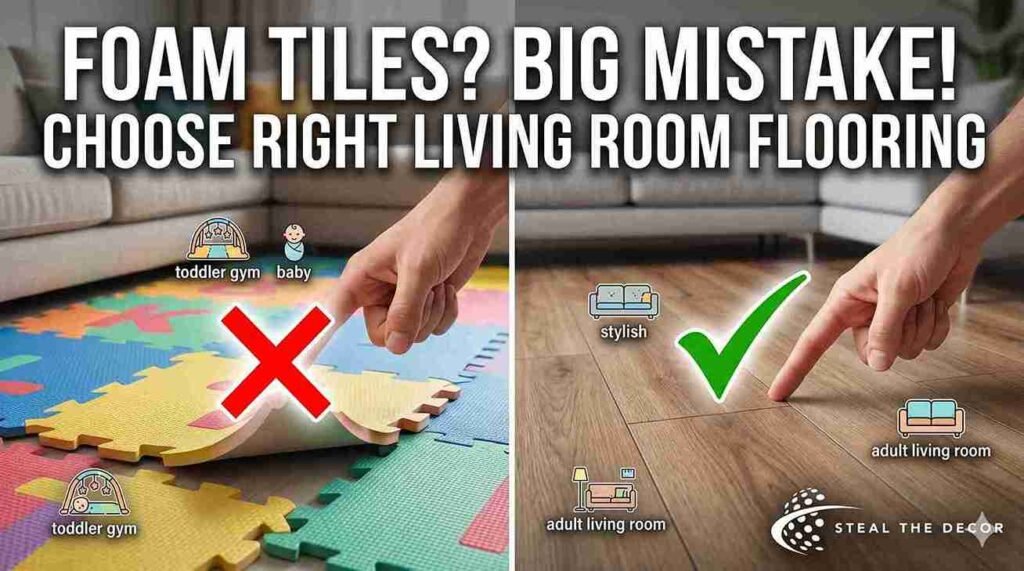
I’ll be honest — I made a mistake early on. I grabbed a set of foam puzzle tiles, thinking they’d look fine in my living room. They were cheap, maybe $18 for a 6-pack at Walmart, and they showed up fast. But within two days, the edges started peeling up at the seams, and they looked more like a toddler gym than a living room floor. Not a great look when your couch is three feet away.
The lesson? EVA foam tiles are fantastic for playrooms and home gyms. But for a main living space where you want something that reads as actual flooring, you need a harder surface tile — wood-top or rigid vinyl.

Best Interlocking Tiles for Living Rooms Right Now
After my foam tile disaster, I got more serious. I tried a few options and researched others obsessively. Here’s what actually holds up:
IncStores Nitro Tiles — Rigid PVC, Great for Renters
These are the ones I ended up going with. I picked up the IncStores Nitro Tile 12×12 interlocking floor tiles for around $54 for a 10-pack on Amazon. They’re rigid PVC with a raised base that allows airflow underneath — great for going over slightly uneven floors. The surface looks like a textured hardwood, and the snap-together system is genuinely easy. I did my 140 sq ft living room in under two hours, alone, with no instructions.
Pros: Durable, stylish, no glue needed, removable, works on carpet or hard floors.
Cons: The raised base creates a slight edge — I tripped on it once in the dark. Not a dealbreaker, but worth noting.
ModuTile Wood Vinyl Top Tiles — The Aesthetic Pick
If you want something that genuinely looks like hardwood, ModuTile’s wood-top vinyl interlocking tiles are impressive. Each tile is 12×12 inches with a vinyl top surface over a polymer base. Available at Home Depot for around $2.80 per square foot. The seams are tight, and from a normal standing distance, it really does look like a real floor. Visitors asked me what kind of wood it was. I didn’t correct them.
Pros: Beautiful finish, good airflow underneath, moisture-resistant.
Cons: A bit pricey for large rooms. Also, the color selection is limited — you’re getting brown or a darker shade of brown. That’s basically it.
Royal Interlocking Carpet Tiles — When You Want Warmth
For a cozier vibe — think reading nook, energy — carpet interlocking tiles are underrated. I haven’t used these personally, but a friend in her Minneapolis apartment swore by them through a full Minnesota winter. She bought a set from FlooringInc for about $1.80 per square foot. They’re waterproof, odor-resistant, and go directly on concrete or wood without adhesive. Decent thickness, real warmth underfoot.
Pros: Cozy, insulating, great for cold floors, and easy to replace individual tiles.
Cons: Vacuuming around the seams is annoying. Pet hair loves those edges. She mentioned it twice.
How to Install Interlocking Tiles in Your Living Room (Step-by-Step)
Installing interlocking floor tiles is genuinely one of the easier DIY projects you’ll do. Here’s how I did it — and what I’d do differently:
- Measure your room — Calculate square footage and add 8–10% for cuts and mistakes.
- Clean the existing floor — Dust, debris, or anything gritty will cause tiles to sit unevenly.
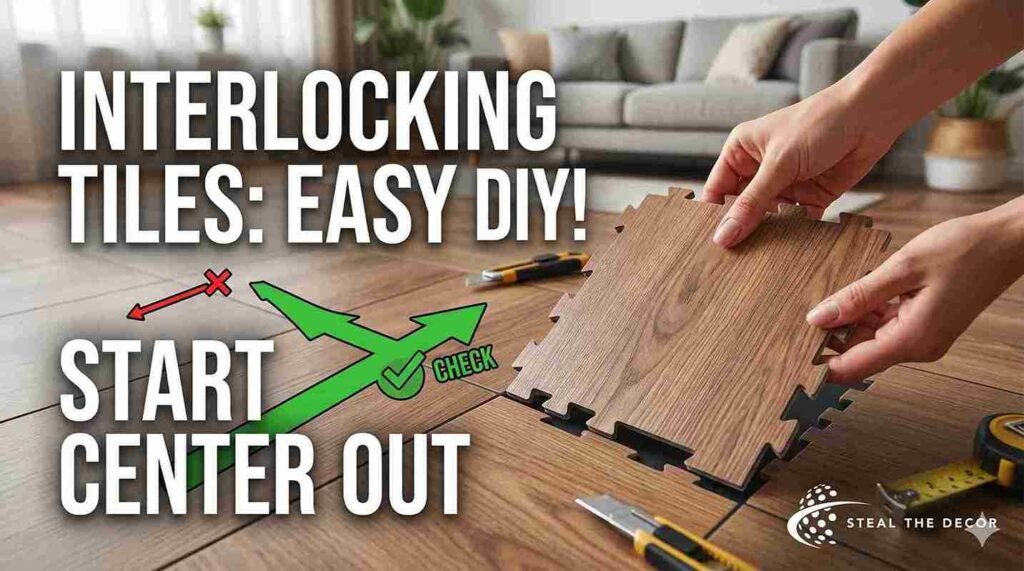
- Start from the center — Find the center point of the room and work outward. This keeps the layout balanced.
- Snap tiles together — Press firmly along the interlocking edges until you hear a click. Don’t force it.
- Cut-edge tiles — Use a utility knife and a straight edge for perimeter cuts. Score twice, snap once.
- Check for lifting edges — After full installation, walk the perimeter. Press down any edges that didn’t seat properly.
- Add transition strips — If your tile meets carpet or another floor type in a doorway, a thin transition strip keeps everything flush.
One thing I’d do differently: I started from a corner on my first try. Looked terrible. Center-out is the right call.

Interlocking Tiles vs. Other Renter-Friendly Flooring Options
It’s worth knowing what you’re choosing over when you go with interlocking tiles. Not every option fits every situation.
| Option | Installation | Removability | Living Room Suitability |
| Interlocking Tiles | Snap-together, DIY | Easy, no residue | Excellent |
| Peel-and-Stick Vinyl | Adhesive-backed | Moderate, may leave residue | Good (with care) |
| Floating LVP Planks | Click-lock, DIY | Easy | Excellent |
| Area Rugs | Just lay it down | Immediate | Good (limited coverage) |
| Roll-Out Vinyl | Tape at edges | Moderate | Good |
Interlocking tiles win on portability and reusability. You can take them to your next apartment and reinstall. That’s a real value no one talks about enough.
Common Mistakes People Make With Temporary Interlocking Flooring
I’ve made a few of these myself, and I’ve seen others make them in every rental forum I’ve ever lurked in.
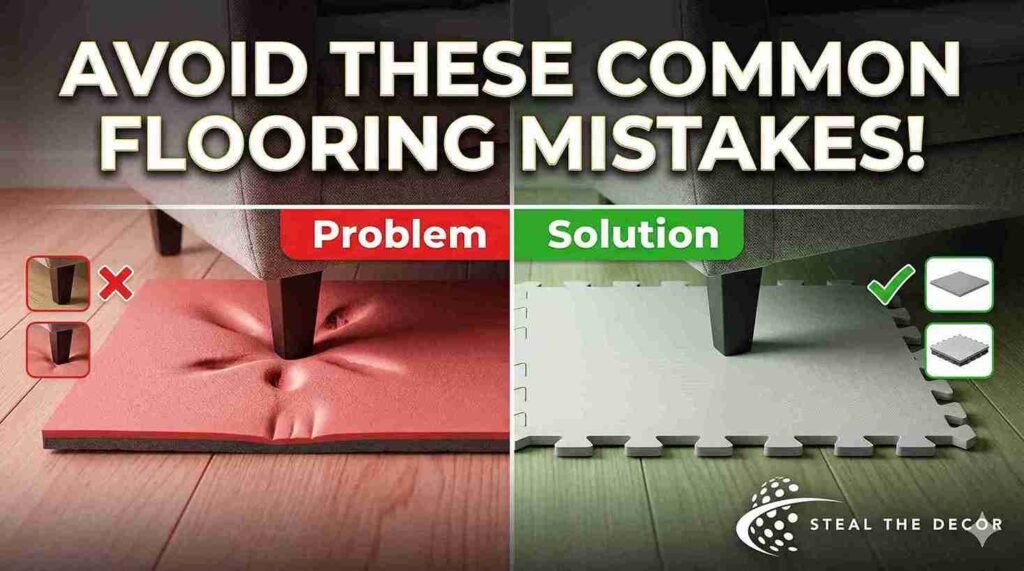
Using foam tiles in high-traffic areas. I already told you about my Walmart foam tile regret. Foam is soft and comfortable, but compresses under furniture legs and shows every dent. In a living room, it ages poorly.
Skipping the cleaning step. Putting interlocking tiles over a dusty or uneven floor means the tiles won’t sit flat. One dirty spot can cause a whole section to lift. Sweep, mop, let it dry. Then lay the tiles.
Buying without measuring. This sounds obvious, but a lot of people eyeball it. Tile packages are sold per square foot or per pack. Short by even a few tiles and you’re making another Target run. Measure twice, order once — and add that 8% buffer.
Ignoring the furniture weight issue. Most rigid PVC and vinyl-top tiles handle furniture just fine. But foam tiles under a heavy sectional or TV console will compress and dent permanently. If you have heavy furniture, go rigid.

Renter-Specific Tips: Protecting Your Deposit and Your Sanity
Living in a rental adds a layer of anxiety to every home decision. I’ve moved four times in six years — I know the feeling of measuring every choice against “will I lose my deposit over this?”
The good news is that properly installed interlocking tiles — no adhesive, no nails, no modifications — are completely landlord-safe. The floor underneath stays untouched. But there are a few extra precautions worth taking.
Place a thin felt pad or rubber grip mat under tiles near furniture to prevent any micro-scratching from tiles shifting over time. When you remove tiles before moving out, do it slowly — don’t drag them across the existing floor. Stack them flat in a storage bin, and they’re ready to reinstall at your next place. Also, photograph your floors before installing. That timestamp is worth its weight in gold if your landlord ever raises questions.
How to Choose the Right Tile Size for Your Living Room
Tile size sounds like a minor detail. It’s not. Getting it wrong means more cuts, more waste, and a layout that looks visually off.
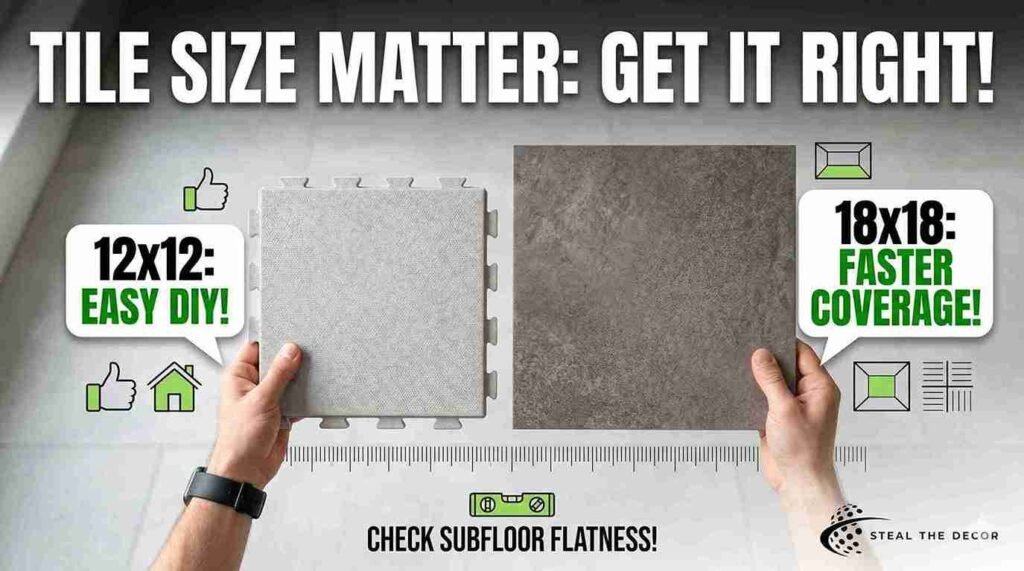
The most common size for interlocking floor tiles in residential spaces is 12×12 inches. That’s the sweet spot — easy to handle alone, simple math for square footage, and they produce minimal waste on standard room sizes. Some brands offer 18×18 or 24×24 tiles, which cover ground faster but become a pain to cut around doorways, vents, and awkward corners.
For small living rooms — say, under 200 square feet — I’d stick with 12×12. For larger open-plan spaces, 18×18 tiles reduce your seam count and can make the floor look a bit more continuous. One thing nobody mentions: bigger tiles require a flatter subfloor. Any dip or bump that’s easy to hide under smaller tiles becomes very obvious under a large-format tile. Check your floor with a level before committing to anything larger than 12×12.
Seasonal Considerations: How Temperature Affects Your Interlocking Tiles
This is something I didn’t think about until my second winter with interlocking tiles — and it caught me off guard.
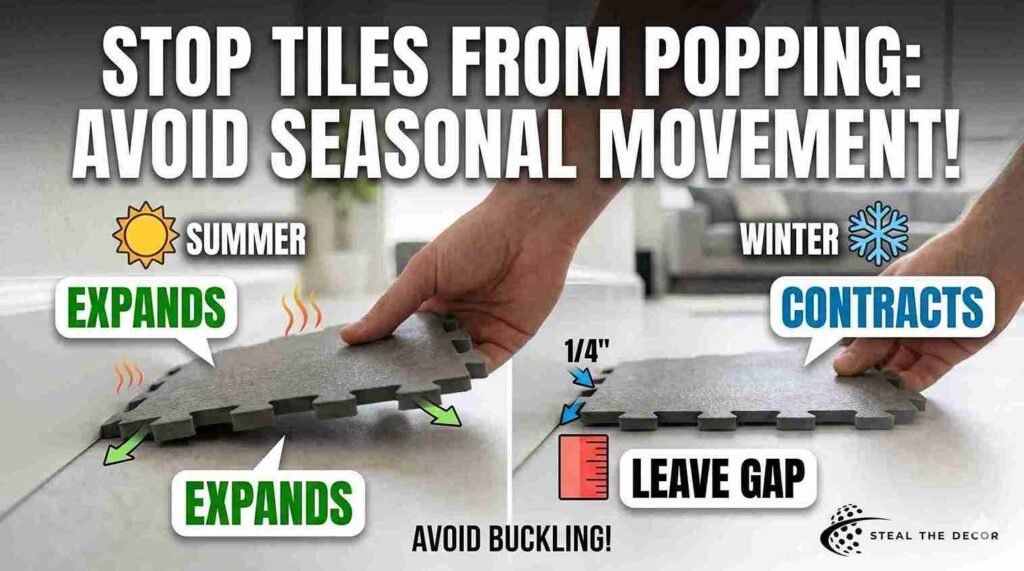
Rigid PVC and plastic tiles expand and contract with temperature changes. In a climate-controlled apartment, this is barely noticeable. But if you’re laying tiles in a room that gets cold in winter — a drafty apartment, a ground-floor unit, or a room above an unheated garage — the tiles can shift slightly as temperatures drop. The snap connections stay intact, but you might notice tiny gaps along the edges in January that weren’t there in August.
The fix is simple: don’t butt the tiles flush against the baseboards. Leave a small 1/4 inch expansion gap around the room’s perimeter. Most transition strips and baseboards will cover this gap, and it gives the tiles room to breathe through seasonal changes. Rubber and foam tiles are more forgiving here — they’re naturally flexible — but rigid tiles definitely benefit from that extra quarter inch of breathing room.

What Competitors Don’t Tell You: The “Meh” Zone of Interlocking Tiles
Here’s a thing most flooring articles won’t say: some interlocking tiles are just… fine. Not great. Not bad. Somewhere in the middle.
I tried a generic brand from a third-party Amazon seller — no notable brand name, just “Wood Look Floor Tiles” in a listing with 200 reviews. They cost about $1.20 per square foot, looked decent in photos, and arrived in two days with Prime. The snap system worked. The finish looked okay. But the color faded after about four months of sunlight through my south-facing window. Not dramatically — just enough that tiles near the window looked slightly different from tiles near the wall.
I didn’t return them. I didn’t love them. They sat in my living room for eight months until I moved. That’s the “meh” product experience no one writes about — and it’s a valid data point. Sometimes you just need something to cover the floor, and it doesn’t have to be life-changing.
Frequently Asked Questions
Can you put interlocking tiles over carpet?
Yes, you can install interlocking tiles over carpet — but with some important caveats. Rigid PVC or polypropylene tiles work best because they bridge the soft surface and create a stable platform. Foam tiles over carpet tend to feel spongy and unstable, especially under furniture. The carpet should also be low-pile; thick plush carpet makes tiles rock and shift. I’d recommend laying a thin sheet of plywood or a hard underlayment first if your carpet has any give to it.
Are interlocking floor tiles safe for hardwood floors underneath?
They are, as long as you’re not using adhesive. The whole point of snap-together tiles is that nothing sticks to the subfloor. However, one thing to watch: rubber-backed tiles left on hardwood for extended periods can sometimes cause discoloration. If your existing floor is hardwood, use a breathable underlayment between the tile base and the wood — it takes five extra minutes and protects your deposit.
How long do temporary interlocking tiles last?
Quality rigid PVC or vinyl-top tiles typically last 5–10 years with normal residential use. Foam tiles have a shorter lifespan — usually 2–4 years before the surface starts degrading. The big variable is sunlight exposure and whether heavy furniture sits on them for extended periods. I’ve had my IncStores tiles for about 14 months, and they still look the same as day one
What’s the Cheapest Way to Cover a Living Room Floor Without Permanent Installation?
Honestly? Carpet squares from a discount bin at Home Depot or Target. You can find them for under $1 per square foot. They don’t look as polished as vinyl-top tiles, but they cover a floor quickly, require zero cutting for basic layouts, and peel up in minutes. If you’re on a tight budget and just need something functional, carpet tiles get the job done. For a more put-together look, budget rigid PVC tiles at $1.50–$2.00 per square foot are the sweet spot.
Do interlocking tiles make noise when you walk on them?
Some do, some don’t. Rigid plastic tiles can click or clack slightly as they flex underfoot, especially if the subfloor underneath isn’t perfectly level. Foam and rubber tiles are significantly quieter. For living rooms where noise matters, choose rubber-top or foam-core tiles, or place a thin rubber underlayment beneath your rigid tiles to dampen the sound.
Conclusion
Finding the right temporary flooring for your living room isn’t as simple as grabbing whatever pops up first on Amazon — I found that out the hard way with a pack of foam tiles that looked like a daycare floor. The real answer depends on your budget, your subfloor situation, how long you’re staying, and how much you care about aesthetics. For most renters, rigid PVC or wood-top vinyl interlocking tiles hit the sweet spot of durable, good-looking, and deposit-safe. They snap together in an afternoon, come up clean when you leave, and can follow you to your next place. That’s a better return than almost anything else you’ll spend $60 on this year.
What kind of floor are you working with — carpet, concrete, or something else? Drop a comment below. I’m genuinely curious what you’re dealing with, because the solution really does change based on what’s underneath.
About the Author: Ali Ahmad is a serial renter who has lived in five different apartments across the US since 2018 and somehow became the go-to person in his friend group for “how do I fix this without losing my deposit” questions. He owns three identical utility knives because he always thinks he lost the last one. He hasn’t. He writes about renter-friendly home improvements from his apartment in Austin, Texas, where the living room floor now actually looks intentional.