
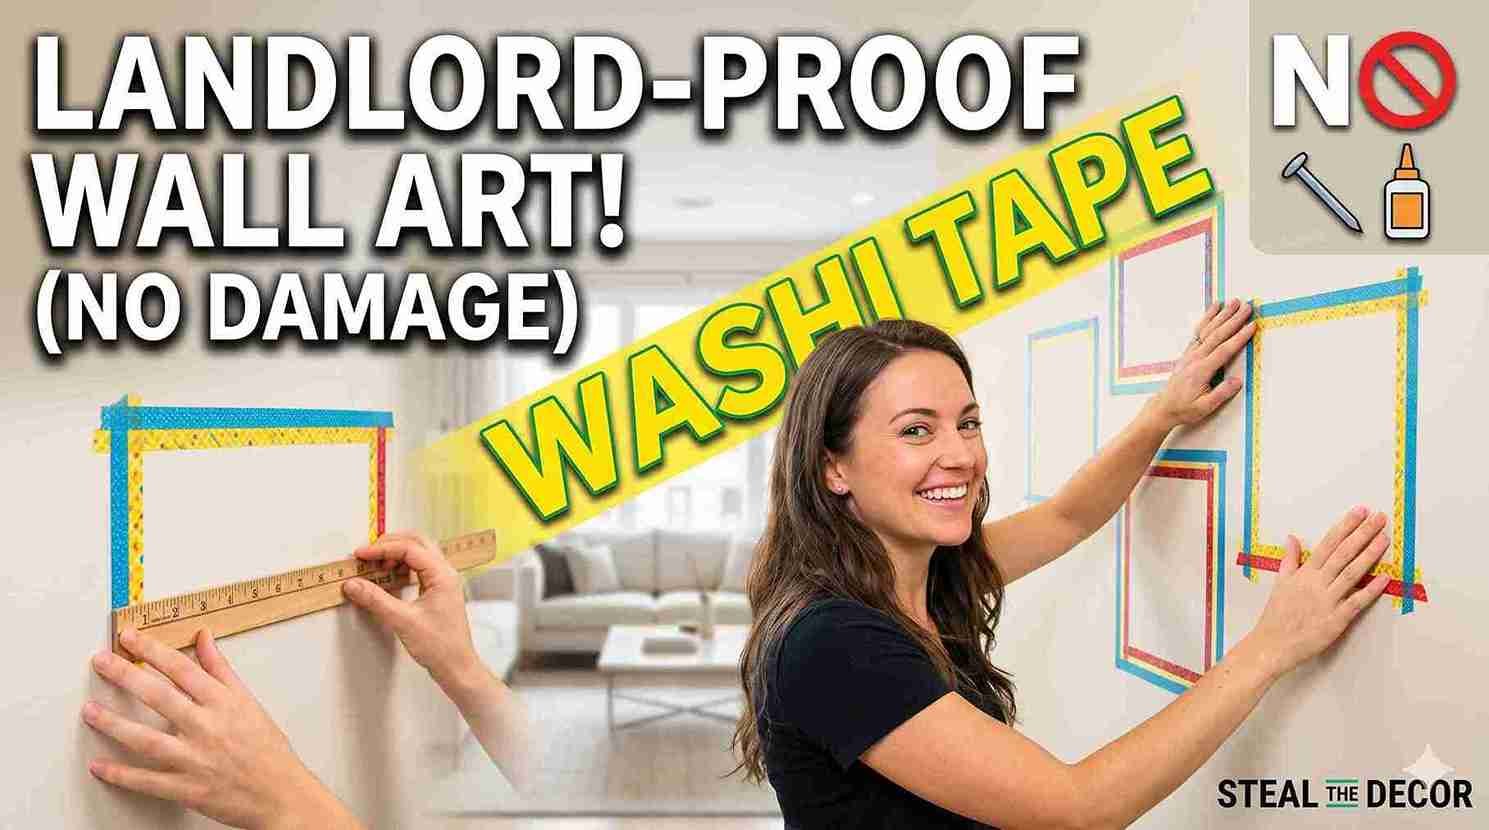
My landlord’s move-in inspection took eleven minutes. He handed me a two-page list of things I couldn’t touch — walls included. No nails. No adhesive strips. Definitely no paint. I looked at my bare beige walls and felt something between frustration and a challenge.
That’s when I found out how to use washi tape to create faux wall frames, and honestly? My living room looks like something out of an apartment makeover video now. No holes. No landlord drama. Just tape, a ruler, and about forty minutes on a Saturday afternoon.
This guide covers everything — from choosing the right tape to nailing clean corners to avoiding the mistakes I made on my first (very crooked) attempt.
Why Choose Washi Tape to Create Faux Wall Frames?
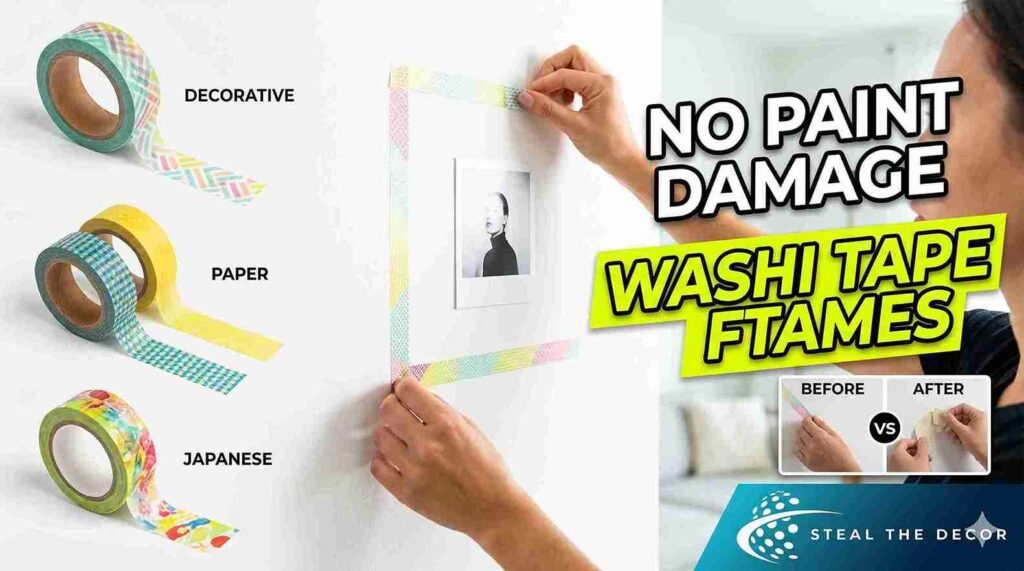
Washi tape is a decorative, paper-based masking tape that originated in Japan. It’s semi-transparent, slightly textured, and comes in hundreds of patterns and colors. Most importantly, it has a low-tack adhesive that sticks firmly to walls but peels off cleanly without damaging paint, which makes it genuinely perfect for renters, dorm dwellers, and anyone who changes their mind about decor every three months.
Unlike regular masking tape or painter’s tape, washi tape is designed to be decorative. That means you’re not covering it up — you’re showing it off. The tape itself becomes the frame outline. When applied in straight lines around a photo or piece of art, it mimics the border of a real picture frame, minus the glass, hardware, or commitment.
One thing worth knowing: not all washi tape behaves the same way on walls. I tested three brands before I found one that stayed put and still peeled off cleanly after four months.
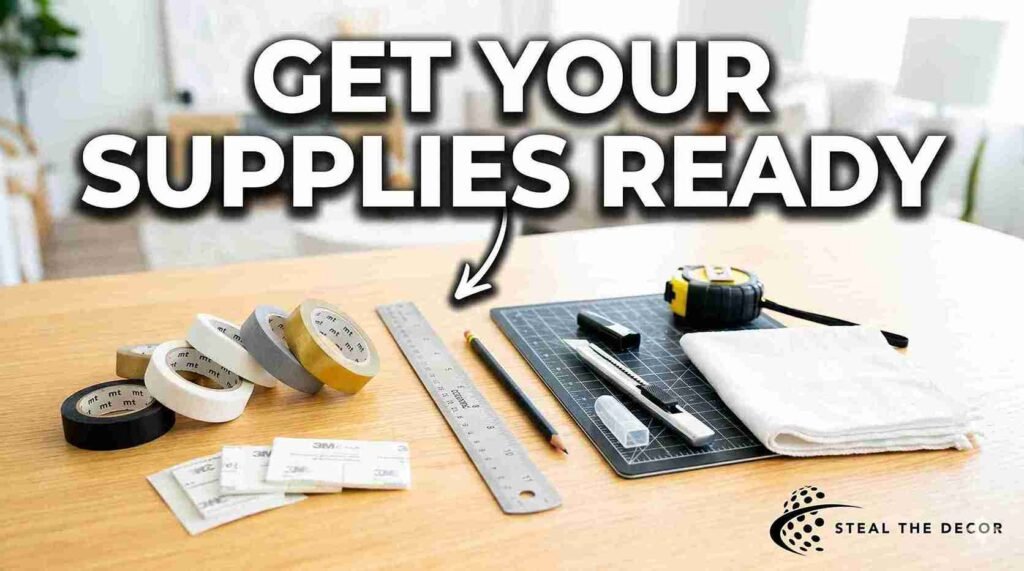
What You’ll Need Before You Start
Getting your supplies ready before you tape anything saves you the annoying mid-project Target run. Here’s what I use every time:
- Washi tape (at least 2 widths — I’ll explain why below)
- A metal ruler or long level
- A pencil (light marks, easily erased)
- Scissors or a craft knife + cutting mat
- A measuring tape
- Double-sided tape or removable mounting squares (for the art itself)
- A clean, dry cloth for wall prep
For tape, I grabbed the MT Casa Slim Washi Tape Solid Color Set for around $14 on Amazon — six rolls in neutral tones, including black, white, gray, and two metallics. The black is the one I use most for faux frames because it reads as a real frame border from across the room. The metallic gold one is beautiful but tricky — it catches light unevenly if your lines aren’t perfectly straight, which, fair warning, mine were not the first time.
The double-sided tape is for holding your actual art or photo to the wall — the washi tape forms the frame around it, not behind it.
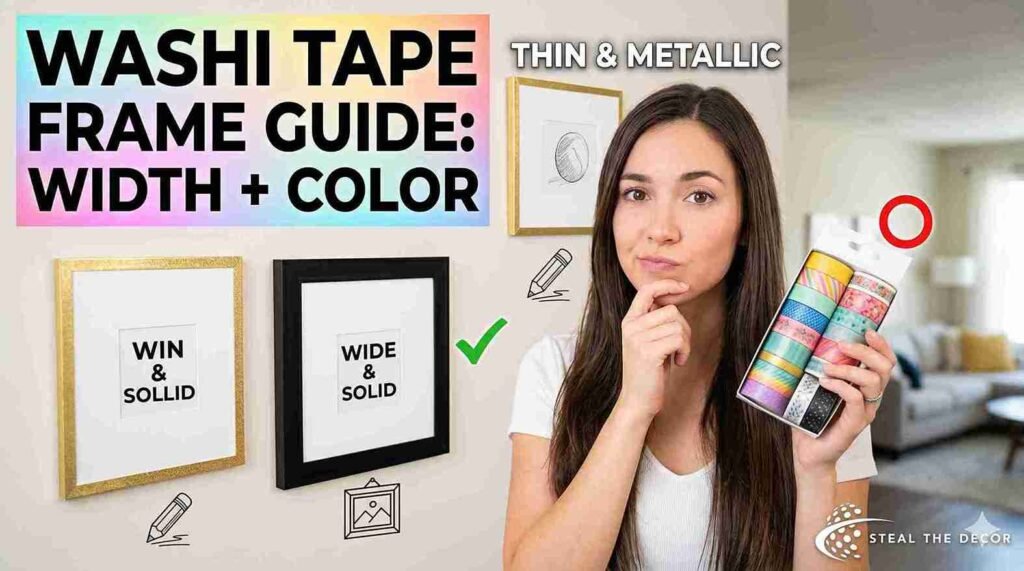
How to Choose the Right Washi Tape Width and Color
This part matters more than most tutorials admit. Width and color are the two decisions that determine whether your faux frames look intentional or just… taped.
Tape Width
For clean, frame-like borders, use tape in the 3mm to 15mm range. Thinner tape (3–6mm) gives you a delicate, minimalist look — almost like a pencil sketch around your art. Thicker tape (10–15mm) reads more like an actual frame border and has more visual weight. I use 10mm black washi tape for standard 5×7 and 8×10 prints, and it looks genuinely convincing from across the room.
Avoid anything wider than 25mm for frames — it starts looking chunky and loses that clean frame aesthetic.
Tape Color and Pattern
Solid colors work best for the classic faux frame look. Black is the most versatile. Gold and silver metallics look elegant but demand cleaner lines. White on a white wall can create a nice, subtle tonal effect.
Patterned washi tape — florals, geometric, stripes — is a different vibe entirely. It works beautifully for a more eclectic, maximalist gallery wall. Just know that the pattern adds complexity, and small pattern errors at corners are more visible than with solid tape.
If you’re new to this, start with one solid color. You can always layer a patterned tape over it later for more character.
Step-by-Step: How to Create Faux Wall Frames with Washi Tape
This is the part you actually came for. Let me walk you through the process exactly the way I do it — including the step I skipped the first time, which led to a very lopsided frame situation that my roommate still brings up.
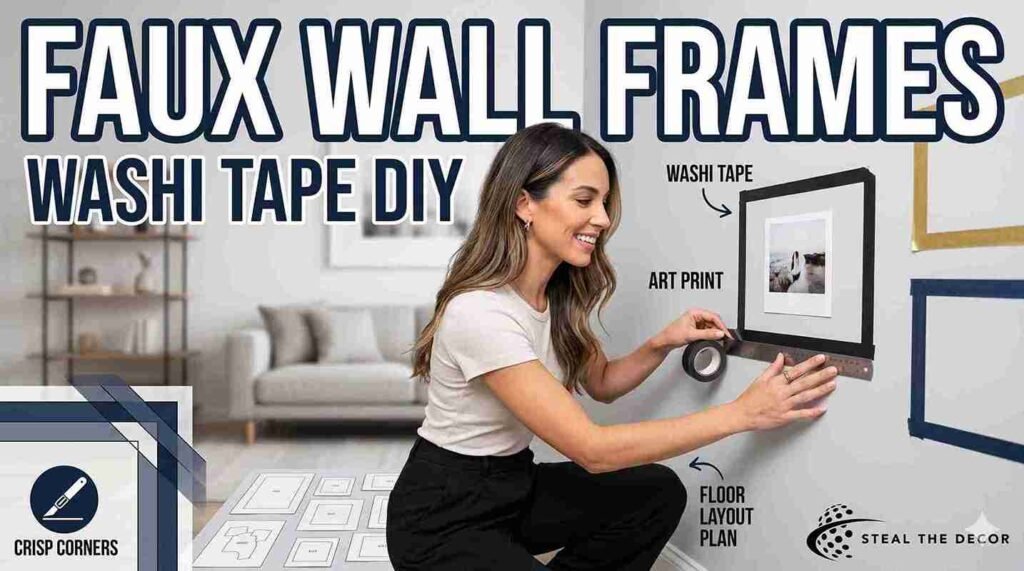
Step 1: Plan Your Layout First
Before any tape touches the wall, figure out where everything goes. Hold your art up to the wall and use painter’s tape to mark the corners lightly. Step back. Check proportions. The most common mistake is placing frames too high — at eye level means the center of the piece sits at about 57–60 inches from the floor.
For a gallery wall, I map the whole thing out on the floor first, using cut paper the same size as each piece. Once the arrangement looks right on the floor, I transfer the general positions to the wall.
Step 2: Clean the Wall
Wipe down the wall with a dry cloth — or if there’s any grime, a barely damp cloth with a small drop of dish soap. Let it dry completely. I skipped this on my very first attempt because the wall looked clean. It wasn’t. The tape started peeling at the corners within two days. Embarrassing, honestly.
Also, if you’ve recently painted your walls, wait at least 14 days before applying washi tape. Fresh paint isn’t fully cured, and adhesive — even light adhesive — can lift it.
Step 3: Measure and Mark
Use your measuring tape to determine the exact dimensions of your frame. Leave at least ½ inch to 1 inch of space between the edge of your art and where the tape goes — this gives the visual appearance of a mat.
Mark the four corners of your frame outline lightly with a pencil. Use a level to make sure your horizontal marks are actually horizontal — walls and floors are not always perfectly aligned, which I learned the hard way.
Step 4: Apply the Tape
Start with one long side — either the top or bottom. Pull the tape off the roll slowly, pressing it gently as you go. Don’t stretch it. Stretched washi tape warps slightly and won’t lie flat.
Use your ruler or level as a guide, holding it parallel to your pencil mark as you lay the tape. Press down firmly with your fingertip once the strip is placed.
For corners, the cleanest method is the overlap-and-cut technique:
- Run your horizontal strip slightly past the corner (about ½ inch extra)
- Run your vertical strip over it, overlapping at the corner
- Use a craft knife and ruler to cut a clean 45-degree miter through both layers
- Remove the two small waste pieces
- Press both edges down firmly
This gives you a crisp mitered corner that looks intentional. It takes a little practice — my first mitered corner looked fine; my second was better; my fourth was perfect.
Step 5: Hang Your Art Inside the Frame
Use removable mounting squares or double-sided tape to position your photo or art print inside the washi tape frame. Center it visually, not just mathematically. Sometimes the eye wants it slightly higher than center.
Press the art firmly and check alignment from a few feet away before fully committing.
Creative Variations Beyond the Basic Rectangle
Once you’ve got basic frames down, there’s a lot of room to experiment. This is where the project gets genuinely fun.
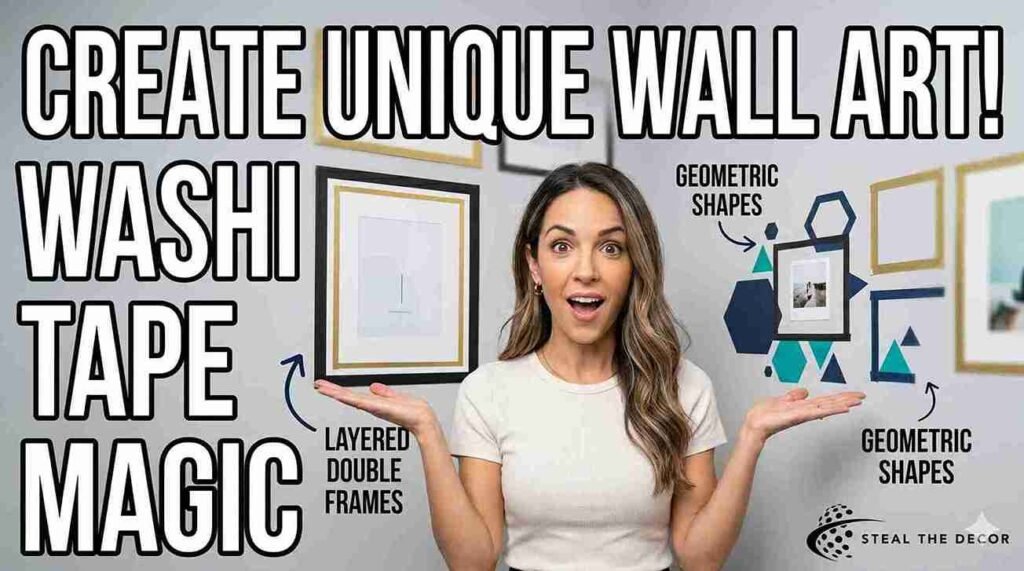
Layered Double Frames
Apply a thin inner frame in one color, then a slightly larger outer frame in a second color or the same color with a gap between the two lines. This mimics the look of a mat inside a frame and adds visual depth. I did this with black and gold on my living room wall, and it honestly looks like I spent money on actual frames.
Geometric and Abstract Frame Shapes
Washi tape isn’t limited to rectangles. Hexagons, triangles, or irregular geometric shapes work beautifully for creating an artistic gallery arrangement without any conventional framing. This works best with solid-colored tape in one consistent color so the shapes read clearly.
Floor-to-Ceiling Panel Frames
This is the faux wall panel you’ve probably seen all over Pinterest. Instead of framing individual pieces of art, you tape large rectangular panels directly onto the wall — usually from about 12 inches from the floor to about 12 inches from the ceiling. It creates the look of architectural wall molding at a fraction of the cost.
For this look, use wider tape (15–25mm) in a color that contrasts slightly with your wall. Matte white tape on an off-white wall is subtle and sophisticated. Black tape on a warm gray wall is graphic and bold.
Common Mistakes and How to Avoid Them
I made most of these. You don’t have to.
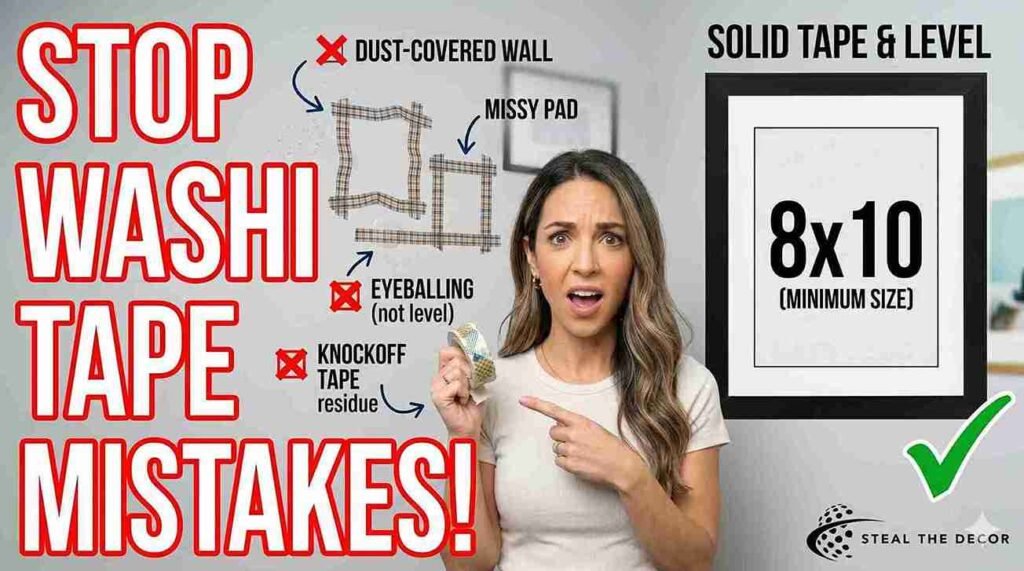
Skipping wall prep — Already covered this, but it’s worth repeating. Dirty walls mean peeling tape. Clean first.
Eyeballing straight lines — You cannot freehand a straight washi tape line on a wall. You will think you can. You cannot. Always use a level.
Using knockoff “decorative tape” instead of actual washi tape — This is a real problem. Some crafting tapes look identical to washi tape in the packaging but have a stronger, less removable adhesive. I ordered a bulk set once that left adhesive residue on my walls for weeks. Domino Magazine actually warns about this: if you accidentally buy decorative tape instead of washi, it can stick permanently. Check that the label specifically says “washi tape” or “Japanese paper tape.”
Choosing pattern tape for your first project — Pattern tape is beautiful but unforgiving. Off-center corners are invisible with solid black tape. With a plaid pattern, every misalignment is obvious. Start solid.
Making frames too small — Small frames disappear on a wall. For single prints, I recommend a minimum of 8×10 as the art size, with a frame border that extends at least ½ inch beyond the print.
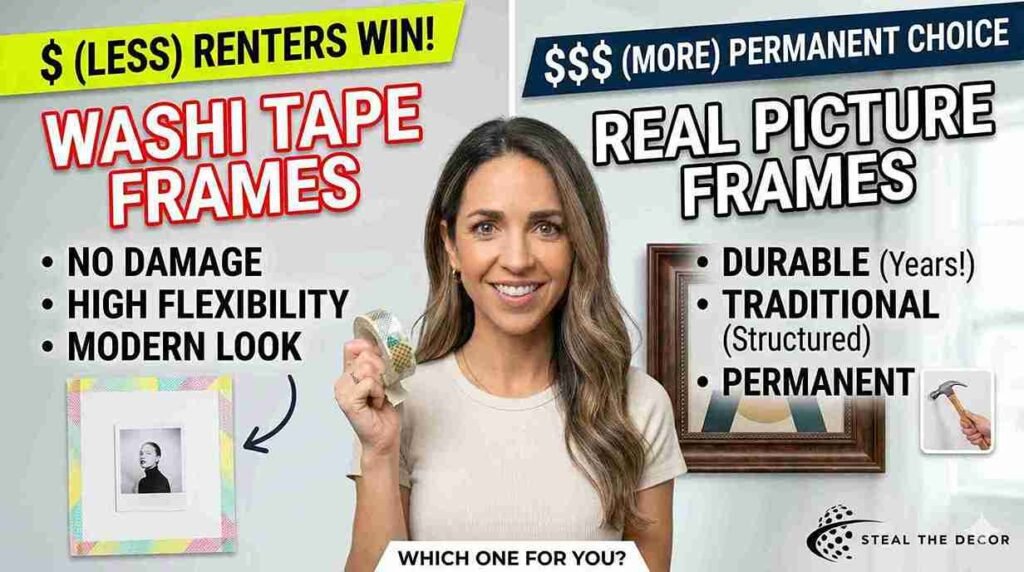
Washi Tape Faux Frames vs. Real Frames: Honest Comparison
Look, I’m not going to pretend washi tape frames are the same as real frames. They’re not. But for certain situations, they’re genuinely the better choice.
| Factor | Washi Tape Frames | Real Picture Frames |
| Cost | $5–$20 total | $15–$80+ per frame |
| Installation | 30–60 minutes | Per frame, plus tools |
| Wall damage | None (with proper tape) | Nail holes required |
| Flexibility | Completely changeable | Permanent holes stay |
| Visual weight | Light, modern, minimal | Traditional, structured |
| Durability | Months to years | Years to indefinitely |
| Best for | Renters, galleries, dorms | Permanent decor |
For renters and people who rearrange often, washi tape frames win on every practical point. For framing something truly irreplaceable or heavily sentimental, use a real frame. Both things can be true.
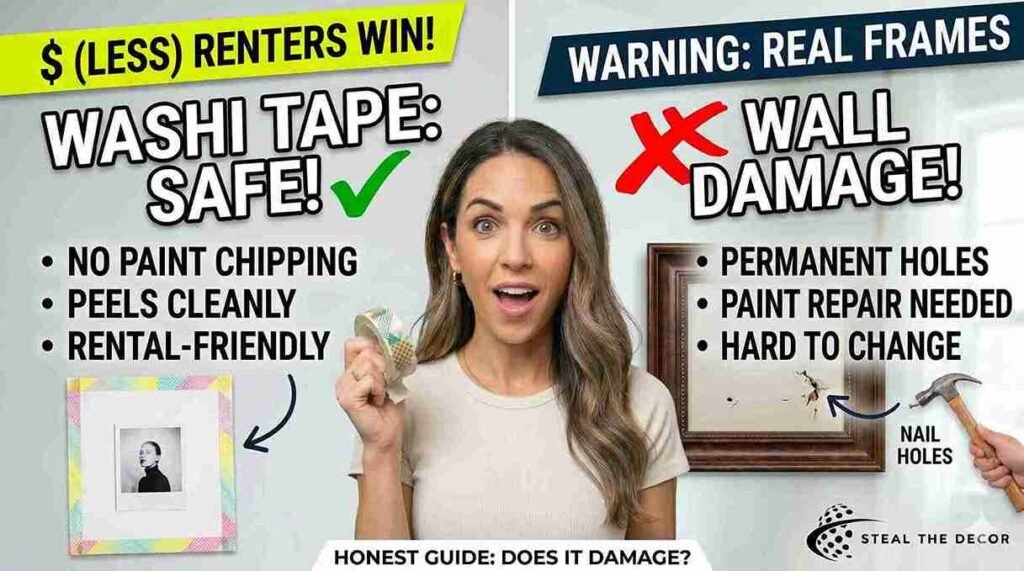
Does Washi Tape Actually Damage Walls?
Washi tape is one of the safest options for temporary wall decoration. Unlike regular masking tape or standard double-sided tape, it has a low-tack adhesive that releases cleanly from most painted surfaces. For the most part, it won’t chip your paint or leave residue behind.
That said, a few things can cause problems. Walls that receive direct sunlight may show faint discoloration where the tape blocked UV rays — not damage exactly, but a visible difference once the tape comes off. Also, tape left on walls for extremely long periods (over a year) may become harder to remove cleanly, depending on the brand and wall paint type. A 2023 field study noted that several popular washi tape brands left detectable residue on flat paint finishes after two weeks of continuous use, though most premium brands performed much better.
To remove cleanly: peel at a 45-degree angle, slowly, from one corner. If any residue remains, a small amount of Goo Gone or even olive oil on a soft cloth takes it off without touching the paint underneath.
Frequently Asked Questions
Does washi tape stick well enough to hold photos on the wall?
Washi tape alone is typically not strong enough to hold the weight of a photo or art print against a wall. You need double-sided tape or removable mounting squares to secure the art itself. The washi tape creates the decorative frame border around it — two different jobs, two different adhesives.
Can I use washi tape on textured walls?
Textured walls are tricky. The tape doesn’t adhere evenly on bumpy surfaces, which means edges lift faster and lines look uneven. For lightly textured walls (like standard orange peel texture), you can get decent results if you press firmly. For heavily textured walls like rough brick or deep stucco, washi tape faux frames won’t work well. Smooth walls are ideal.
How long does washi tape last on walls?
With proper application on a clean, smooth wall, good-quality washi tape holds for anywhere from several months to over a year. Some people report keeping their washi tape wall designs up for two years without issues. The main variables are tape quality, wall surface, sunlight exposure, and humidity. Bathrooms and kitchens — high humidity zones — are not ideal.
What’s the best washi tape for wall frames?
For faux frames, I recommend solid-colored tape in a 10–15mm width from a trusted brand. The MT Casa line (available on Amazon) is reliable and removes cleanly. For a budget option, Scotch Expressions Washi Tape is widely available at Target for around $4 a roll and performs well for indoor use.
Can I layer two washi tapes for a thicker-looking frame?
Yes, and it looks great. Apply one strip, then carefully place a second strip directly on top or slightly offset. The layered effect adds visual depth. Just make sure both strips are pressed down firmly at the corners so the edges don’t separate.
Conclusion
My apartment walls went from landlord-approved beige boredom to something I’m genuinely proud of — and I spent under $20 total on tape. No holes. No permission slips. No regrets. The washi tape faux wall frames took me one afternoon and maybe two episodes of a podcast to finish, and I’ve rearranged them twice since because that’s the best part: you can.
If you’re working in a rental, a dorm, or just a space that doesn’t feel like yours yet, this is one of the fastest ways to change that. The technique isn’t complicated. The materials are cheap. And the difference it makes to a bare wall is, genuinely, a little surprising.
Start with one frame. You’ll be taping a whole gallery wall by next weekend.
Have you tried washi tape frames before? I’d love to know what worked for you — or what didn’t. Drop your experience in the comments below.
About the Author Ali Ahmad is a DIY-obsessed renter currently living in a 640-square-foot apartment in Portland, Oregon, that he has redecorated at least four times without spending more than $200 total. He owns six rolls of washi tape he calls “essential” and one he calls “a mistake” (it was glittery). The mistake is his favorite.