
Table of Contents
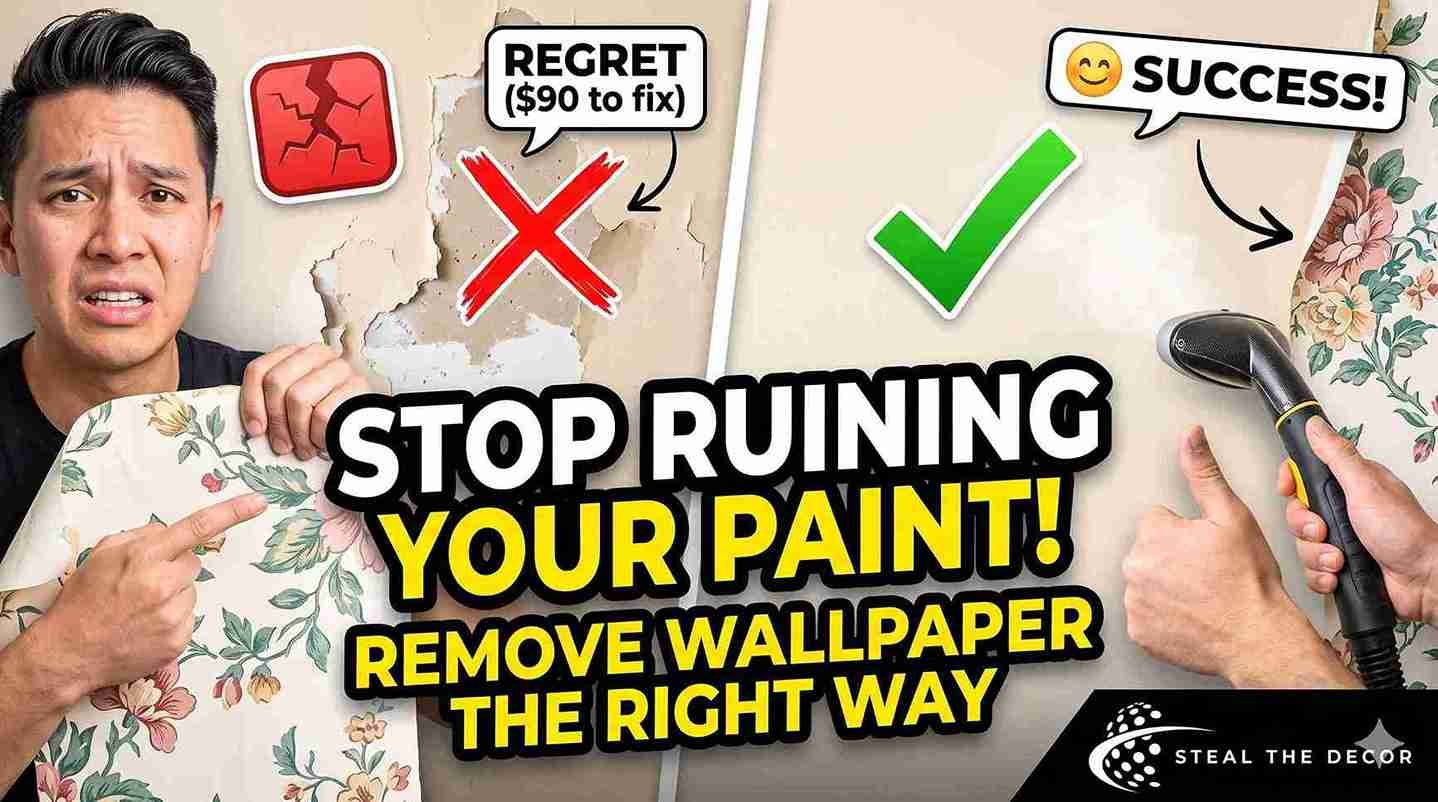
The wallpaper peeled off in one satisfying sheet. For about six seconds, I felt like a home improvement genius. Then I looked closer. Chunks of beige paint were stuck to the back of that floral nightmare, and my wall underneath looked like a topographic map of regret. That was the moment I realized nobody had ever shown me how to remove wallpaper without damaging paint — and now my security deposit was on the line. I stood there holding a $12 scraper, staring at damage that would eventually cost me $90 to fix. My landlord was going to love this.
I wish I could tell you that was the first and last time I dealt with wallpaper removal. It wasn’t. Three apartments, two rental agreements with very specific ‘do not destroy the walls’ clauses, and one very old house later, I’ve now tested four different methods for removing wallpaper without damaging paint. Some worked beautifully. One destroyed a section of drywall so badly that I had to learn spackling from a YouTube video at 11 p.m. on a Tuesday.
What follows is everything I learned the messy way — what actually protects painted walls, what absolutely doesn’t, and how to fix the damage if you’ve already made the mistakes I made.
Why Learning How to Remove Wallpaper Without Damaging Paint Took Me Years (And $90)
Most people assume peeling paint during wallpaper removal means they did something wrong. Sometimes that’s true. But often, the problem started years before you ever touched that corner seam.
The Science Behind Paint Peeling
Paint adhesion failure happens when moisture penetrates the wallpaper layer and weakens the bond between paint and primer or primer and drywall. Latex paint, the kind in most American homes since the 1990s, is water-based. It softens when wet for too long. Older oil-based paints resist moisture better, but they’re rare in modern construction.
The real troublemaker is what’s underneath the paint. Many builders skip primer entirely or use the cheapest contractor-grade option available. My 2004 apartment had exactly zero primer layers beneath its beige walls. I discovered this approximately thirty seconds after applying steam to the wallpaper border above the kitchen sink.
My $90 Mistake in a Rental Kitchen
I started with the steamer on full blast, holding it inches from the wallpaper as I’d seen in every YouTube tutorial ever made. The glue loosened fast. Too fast. When I scraped, the wallpaper came off clean — but the paint underneath had bubbled into soft, gummy wrinkles that peeled away with zero resistance.
I checked the damage afterward: roughly four square feet of exposed brown drywall paper. My landlord’s handyman charged $90 for the repair, which I paid out of pocket because my lease explicitly stated wallpaper removal was allowed only if walls remained undamaged. I still have the receipt somewhere in my filing cabinet, a permanent reminder to test before steaming.
Before You Learn How to Remove Wallpaper Without Damaging Paint, Test Your Walls First
Before you mix any solutions or rent any equipment, you need to figure out what you’re working with. I skipped this step entirely my first time. Do not be like first-attempt me.
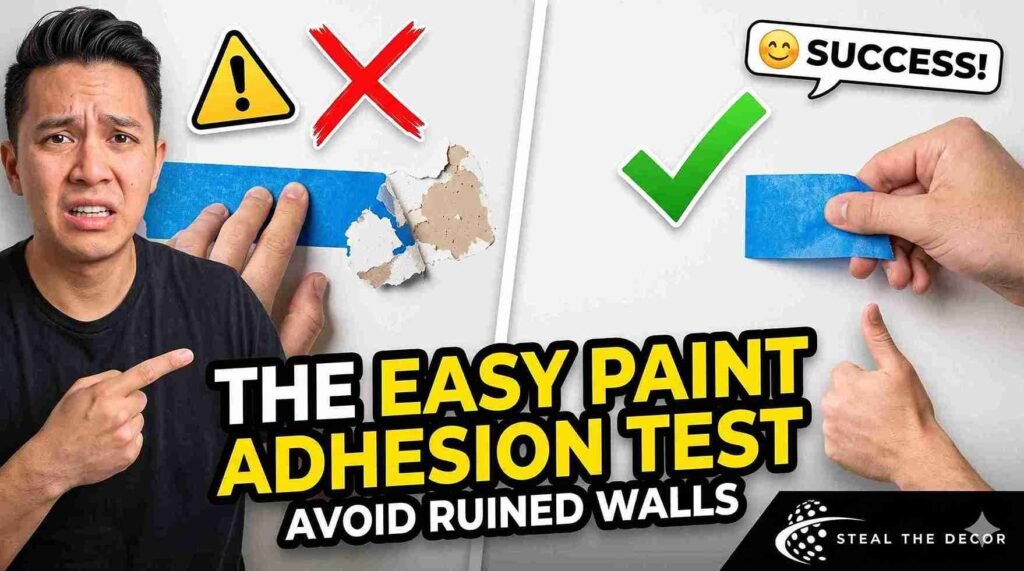
The Tape Test I Wish I’d Known About Sooner
Grab a roll of blue painter’s tape — the $6 roll of ScotchBlue from Target works fine. Press a two-inch strip firmly onto a painted area near the wallpaper edge. Wait thirty seconds, then rip it off like you’re waxing something.
If paint flakes come off with the tape, your paint bond is weak, and moisture-based methods will destroy it. If the tape comes up clean with only maybe a speck of color, your paint has decent adhesion and can handle a careful removal process. I now do this test in three different spots around every room before touching any wallpaper. Two out of three failing means you should proceed like you’re defusing a bomb.
Signs Your Paint Is Too Old or Too Cheap
Chalky residue when you run your hand across the wall screams old, degraded paint. Flat or matte finishes absorb moisture faster than satin or semi-gloss. If you can scratch the paint with your fingernail and leave a visible mark, it’s too soft to survive any wet removal method.
Builder-grade beige and off-white paints are the worst offenders. Apartment complexes buy them in 55-gallon drums for a reason — they’re cheap, not durable. If your walls have that exact shade of “landlord special” tan, assume the paint will lift unless you’re extremely careful with moisture control.
What You Need to Remove Wallpaper Without Damaging Paint (Skip the Rest)
Big-box hardware store aisles will convince you to buy $200 worth of specialized equipment. You don’t need most of it. Here’s exactly what earned its place in my toolbox, plus what I regret purchasing.
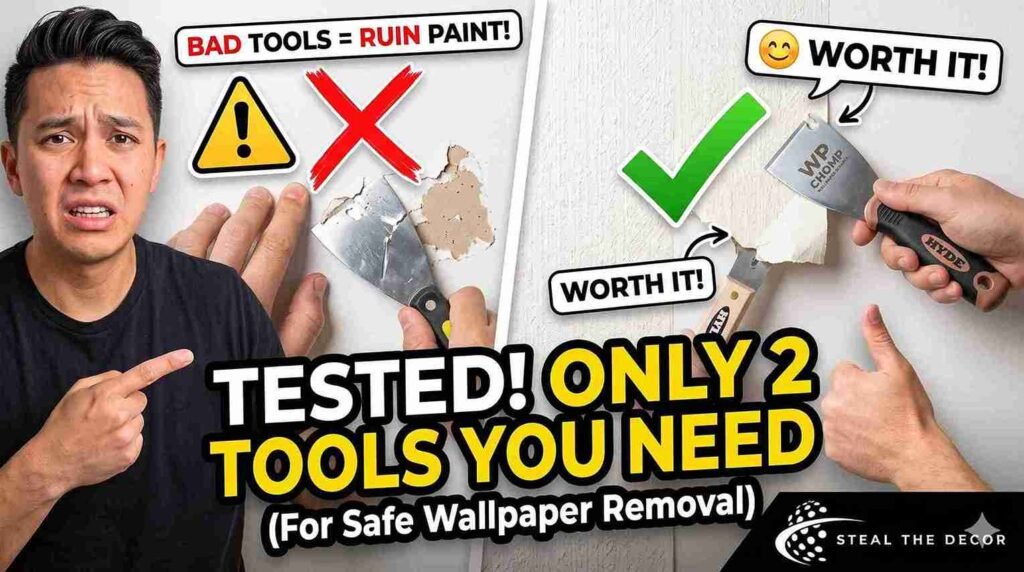
The Scoring Tool I Bought on Amazon for $14
The WP Chomp Wallpaper Scraper costs $13.99 on Amazon and has teeth that perforate wallpaper without gouging the drywall underneath. This is the scoring tool I trust after trying two others that left scratch marks I had to spackle over. The key is the rotating head — it follows the wall surface instead of digging in at weird angles.
Pair this with a decent 6-in-1 painter’s tool — the Hyde Tools one from Home Depot runs about $9 — and you’ve got your scraping setup covered. Avoid metal scrapers with sharp corners. They will gouge paint even when you’re being careful. I learned this on a corner seam near my bathroom vanity. That mark is still there.
| Tool | Approximate Price | Where to Buy | Actually Worth It? |
| WP Chomp Wallpaper Scraper | $13.99 | Amazon | Yes |
| Hyde 6-in-1 Painter’s Tool | $9.47 | Home Depot | Yes |
| Wagner Steamer 715 | $54.99 | Home Depot rental ($25/day) | Only for multi-room jobs |
| Zinsser DIF Gel Concentrate | $11.98 | Amazon | Meh — fabric softener worked better |
| Plastic Drop Cloths (3-pack) | $6.99 | Walmart | Yes |
| Spray Bottle (32 oz) | $4.99 | Target | Yes |
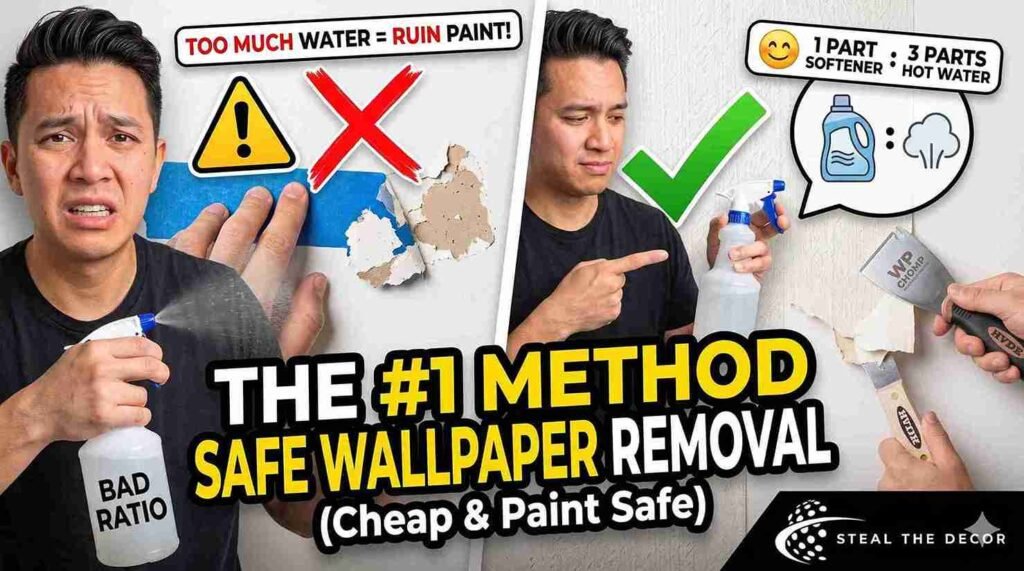
Method 1: Remove Wallpaper Without Damaging Paint Using Fabric Softener
Here’s the method I now recommend to every friend dealing with paint-safe wallpaper removal. It’s cheap, smells oddly pleasant, and most importantly, it works without saturating the drywall beneath.
Mixing the Solution — My Exact Ratio
One part liquid fabric softener to three parts hot water. I use Suavitel from the gallon jug — it’s around $8 at Walmart and works identically to Downy for this purpose. Mix it in a 32-ounce spray bottle. The hot water dissolves the starch-like adhesive most older wallpapers used, while the fabric softener’s surfactant properties help it penetrate the paper backing without soaking through to the paint layer.
Shake the bottle before every application. The solution separates if it sits. I forgot this once and basically sprayed water onto my hallway wall for three minutes before realizing the softener was all at the bottom. That section peeled. Lesson learned.
Step-by-Step Application Process
Score the wallpaper first using the WP Chomp tool. Go in a circular motion, covering every three inches. Don’t press hard enough to hear tearing — that sound means you’re cutting drywall paper.
Spray a three-foot-wide section until it’s visibly damp but not dripping. Water running down the wall means you’re using too much. Wait exactly fifteen minutes. Set a timer on your phone. Less time, and the glue hasn’t dissolved. More time and you risk paint saturation.
Start peeling from a corner using your painter’s tool. Work slowly, keeping the tool nearly flat against the wall. If the wallpaper tears, spray that spot again and wait five more minutes. Patience protects paint more than any tool.
When This Method Won’t Work
Some wallpapers have a vinyl coating that fabric softener simply cannot penetrate. I discovered this in my current home’s half-bathroom. The wallpaper was this wipe-clean vinyl monstrosity from the 1980s, and the fabric softener solution beaded up on its surface like water on a waxed car. I wasted three hours before accepting defeat and moving to Method 4.
Old wallpaper with multiple paint layers over it also resists this approach. If someone painted over the wallpaper before you arrived, the fabric softener can’t reach the adhesive. You’ll need scoring so aggressive that it might damage the wall anyway.
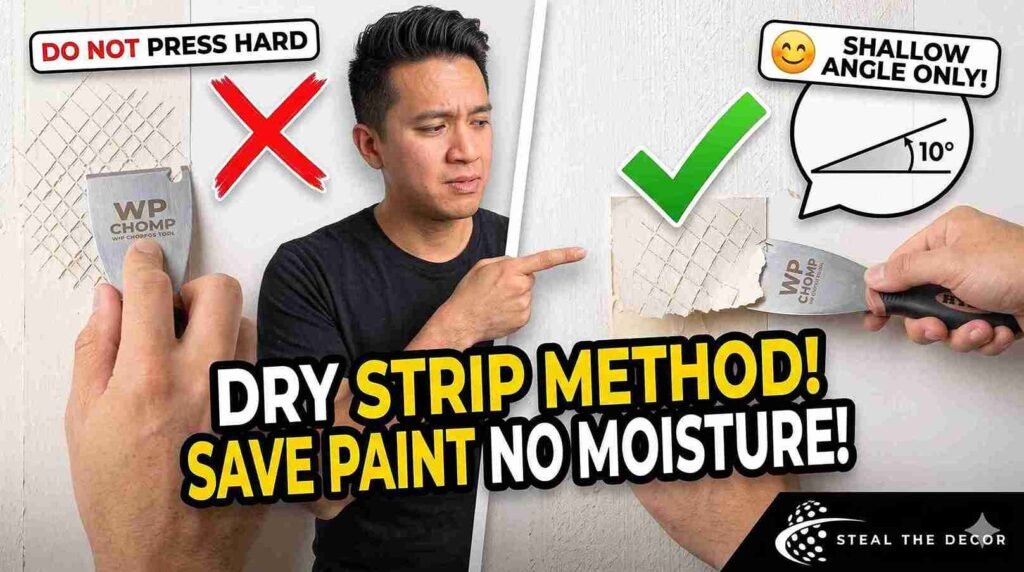
Method 2: How to Remove Wallpaper Without Damaging Paint — The Dry Scoring Technique
Sometimes the best way to remove wallpaper without peeling paint involves no moisture at all. Dry stripping works on wallpapers designed to be peelable — the kind with a vinyl top layer that separates from a paper backing.
How to Score Without Going Too Deep
The goal of scoring is penetration, not destruction. You want tiny holes in the wallpaper surface, not scratches in the drywall paper beneath. Hold your scoring tool flat against the wall and roll with light to medium pressure. I aim for a sound like light sandpaper, not like someone keying a car.
Score in a crosshatch pattern — vertical lines, then horizontal. This creates small squares of wallpaper that release individually rather than in long strips that can pull paint with them. On my second attempt at wallpaper removal in my dining room, this technique saved a section of paint I was certain would lift.
The Pull Technique That Protects Paint
Pull wallpaper at a sharp angle — roughly 10 to 15 degrees from the wall surface, never straight back at 90 degrees. A shallow pull distributes tension across more wallpaper, reducing the focused force that can lift paint. Think of peeling a sticker off a laptop, not ripping off a bandage.
Work in small sections, about the size of a sheet of printer paper. Larger sections mean more force concentrated on the point where the wallpaper still meets the wall. I start at seams whenever possible. Seams are natural weak points where adhesive is already partially compromised.
If you hear a crackling sound while pulling, stop immediately. That sound is paint separating from the drywall. Spray that spot with warm water — just that spot — and wait ten minutes before trying again at an even shallower angle.
Method 3: Can You Remove Wallpaper Without Damaging Paint Using a Steamer?
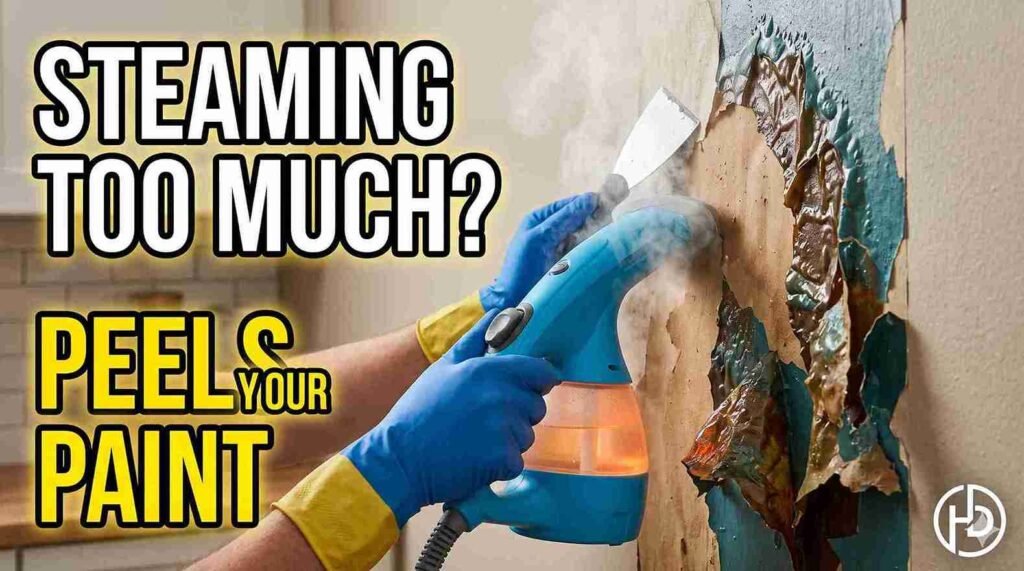
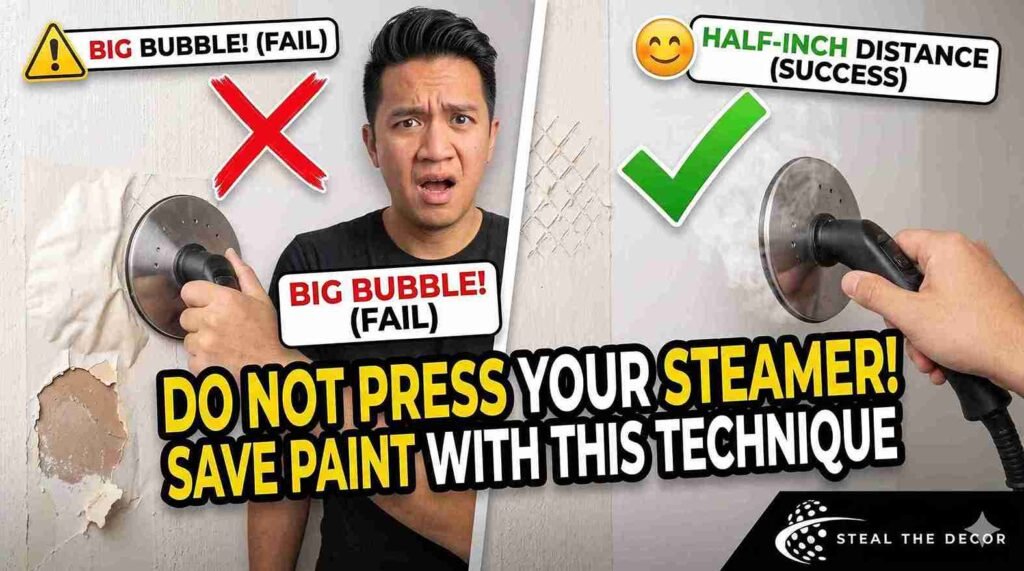
Steaming is the method every home improvement show makes look effortless. What they don’t show is the part where you hold the steamer in one spot for forty-five seconds too long and create a paint bubble the size of a dinner plate.
Why I Bubbled My Paint the First Time
Wallpaper steamers work by injecting hot moisture into the adhesive layer. The heat melts the glue while the moisture helps it release. The problem is that drywall absorbs moisture like a sponge. The paper facing on drywall is literally paper — the same material as the wallpaper backing. Moisture doesn’t know to stop at the paint line.
My first attempt involved holding the Wagner steamer plate against one section while I scraped another. I thought I was saving time. Instead, I was pressure-cooking the paint off my wall. By the time I noticed the bubbling, a section of paint roughly eighteen inches across had separated from the drywall. I had to cut it away, spackle, sand, and repaint. The spackle patch is still faintly visible if you look closely in the afternoon light.
The Right Distance and Timing
Hold the steamer plate half an inch from the wallpaper surface, not pressed against it. Steam for ten seconds, then move to an adjacent spot. Scrape the previously steamed area while the current spot heats. This rotational approach — steam, move, scrape, repeat — keeps moisture exposure brief enough that the paint underneath stays intact.
Work in vertical columns no wider than two feet. This forces you to be deliberate about pacing. The moment you notice steam condensing on nearby unpainted surfaces or running down the wall, stop. Wipe the wall dry with a microfiber cloth and let it air out for ten minutes. Wet drywall is exactly what you’re trying to avoid.
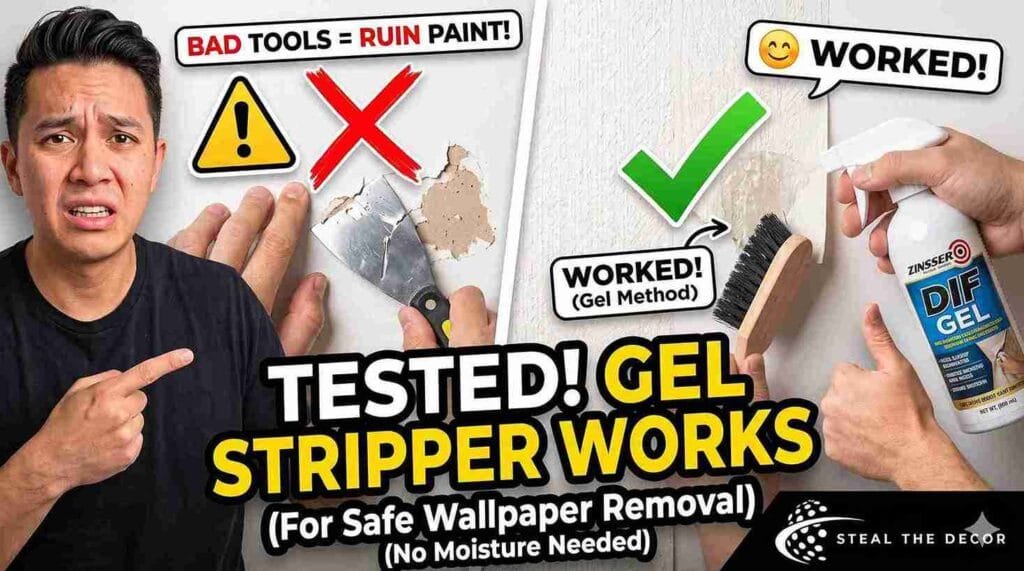
Method 4: How to Remove Wallpaper Without Damaging Paint Using a Chemical Gel
Sometimes the wallpaper adhesive has bonded so thoroughly with the paint that mechanical methods won’t work, and moisture methods are too risky. That’s when chemical gel strippers enter the picture.
The Low-Odor Gel I Used (And Mostly Liked)
I picked up Zinsser DIF Wallpaper Stripper Concentrate for $11.98 on Amazon after the fabric softener method failed in my bathroom. It’s an enzyme-based gel that dissolves wallpaper paste chemically rather than relying on moisture. The gel consistency means it stays where you apply it instead of running down the wall.
It worked. The wallpaper in my bathroom released in large, satisfying sheets after a thirty-minute dwell time. The paint underneath stayed intact. What I didn’t love was the smell — it’s described as “low odor,” but that’s being generous. It smells like a science classroom. You need ventilation, which is exactly what my windowless half-bathroom lacked.
Ventilation and Safety Nobody Talks About
Open every window in the room. Run a box fan pointed outward. Wear the chemical-resistant gloves you can grab from the cleaning aisle at Target — not thin dishwashing gloves, which these chemicals will degrade. I used the Playtex Living gloves that cost $4.99, and they survived one use before becoming weirdly tacky.
Keep a bucket of clean water nearby. If any gel gets on your skin, rinse it immediately. I got a quarter-sized dollop on my forearm and ignored it for ten minutes because I was focused on a stubborn seam. The resulting chemical irritation looked like a mild sunburn for three days. Not dangerous, but dumb and avoidable.
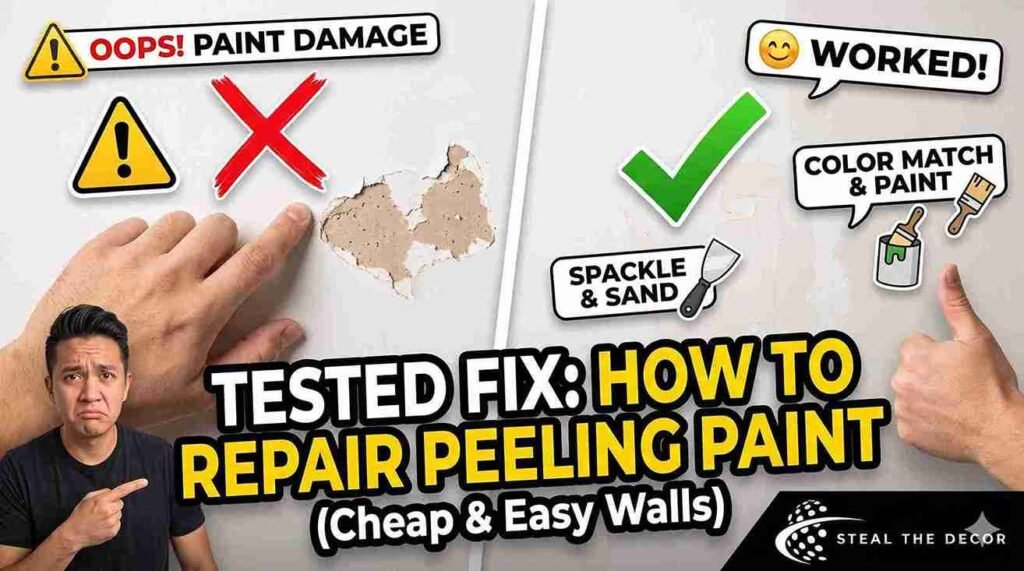
How to Repair Paint If You Messed Up (I Did, Here’s the Fix)
Even with perfect technique, paint damage happens. Seams near outlets, corners where adhesive was applied too thickly, sections where previous residents already compromised the paint — these spots will lift. Here’s the repair process I’ve now done enough times to do in my sleep.
Small Patches vs. Whole Walls
For damage smaller than a dollar bill, you need spackle, not joint compound. DAP DryDex Spackling costs $6.78 at Home Depot and goes on pink then dries white — which is genuinely helpful, not gimmicky. Apply it with a flexible putty knife, feathering the edges so the patch blends into the surrounding wall. Sand with 220-grit sandpaper after it dries.
Larger damage requires joint compound, a wider taping knife, and more patience. I had to patch an area roughly the size of a legal pad in my living room. That took three coats of joint compound — apply, dry 24 hours, sand, repeat — before it looked seamless. The whole process took a weekend.
Matching Paint Without the Original Can
Take a quarter-sized chip of the undamaged paint to Home Depot or Sherwin-Williams. Their color-matching scanners are surprisingly accurate now. A sample-sized container costs around $5 and covers small patches easily.
The tricky part is matching paint sheen. Flat, eggshell, satin, semi-gloss — even the same color looks completely different across sheens. If you can’t identify yours, buy flat. Flat paint hides imperfections better and blends with existing walls more forgivingly than anything with shine. I learned this after buying satin for a flat-paint wall and creating a visible, shiny rectangle that caught light at every angle.
Frequently Asked Questions
Can you remove wallpaper without damaging the paint underneath?
Yes, but it depends entirely on your paint’s condition and your removal technique. Paint with good adhesion that was properly primed can survive wallpaper removal when you use gentle methods like fabric softener solution or dry scoring and stripping. Old, unprimed, or flat-finish paint will likely sustain some damage regardless of your approach.
What is the best solution for removing wallpaper without damaging paint?
A fabric softener and hot water mixture — one part Suavitel or Downy to three parts hot water — works best for most painted walls. It dissolves adhesive gradually without saturating the drywall. If that fails, enzyme-based gel strippers like Zinsser DIF are the next safest option. I reserve steaming for large jobs where I’ve confirmed the paint bond is strong.
Does fabric softener really remove wallpaper?
It does, and surprisingly well on older paper-based wallpapers with starch adhesives. The fabric softener acts as a surfactant, breaking down the glue’s surface tension and allowing water to penetrate the wallpaper backing. It won’t work on vinyl-coated wallpapers or wallpapers that have been painted over, but for standard residential wallpaper from the 1990s and earlier, it’s genuinely effective.
Is it better to remove wallpaper dry or wet?
Dry removal — scoring and peeling — is safer for your paint because it introduces zero moisture to the wall. Wet methods, including fabric softener solutions and steaming, are faster but carry a higher risk of paint damage. I always attempt dry removal first in a corner section. If the wallpaper releases cleanly, I continue dry. If it tears or the backing stays stuck, I switch to a wet method cautiously.
How do you repair paint after wallpaper removal?
Small damaged areas under the size of a dollar bill can be repaired with spackle, light sanding, and touch-up paint matched at a hardware store. Larger sections need joint compound applied in thin coats, sanded smooth, primed, and repainted. Matching paint sheen is just as important as matching the color — buying a sample pot saves you from repainting an entire wall.
Can I paint over wallpaper instead of removing it?
Technically, yes, but I wouldn’t recommend it. Paint adds moisture and weight to wallpaper, which can cause it to bubble or peel at the seams. The wallpaper texture will show through unless you skim-coat with joint compound first — at which point you might as well have removed it. The only exception is unpainted, perfectly adhered wallpaper that you seal with an oil-based primer before painting. Even then, results vary.
About the Author
Marcus Chen has moved seven times in eleven years across four U.S. states, which means he’s removed wallpaper in more rental kitchens than anyone should have to. He now owns a 1940s bungalow in Ohio, where every single room had wallpaper when he bought it. The last room still has a stubborn floral border he pretends doesn’t exist. Marcus owns five identical putty knives because he keeps losing them in the middle of projects and buying replacements. The originals are almost certainly behind his workbench.
What About You?
Have you tackled wallpaper removal in your home? Did your paint survive, or do you have your own drywall disaster story? I’d genuinely love to hear what worked and what absolutely didn’t — drop your experience in the comments. And if you’ve found a method I haven’t tried yet, tell me. My bathroom might need it someday.