
Table of Contents
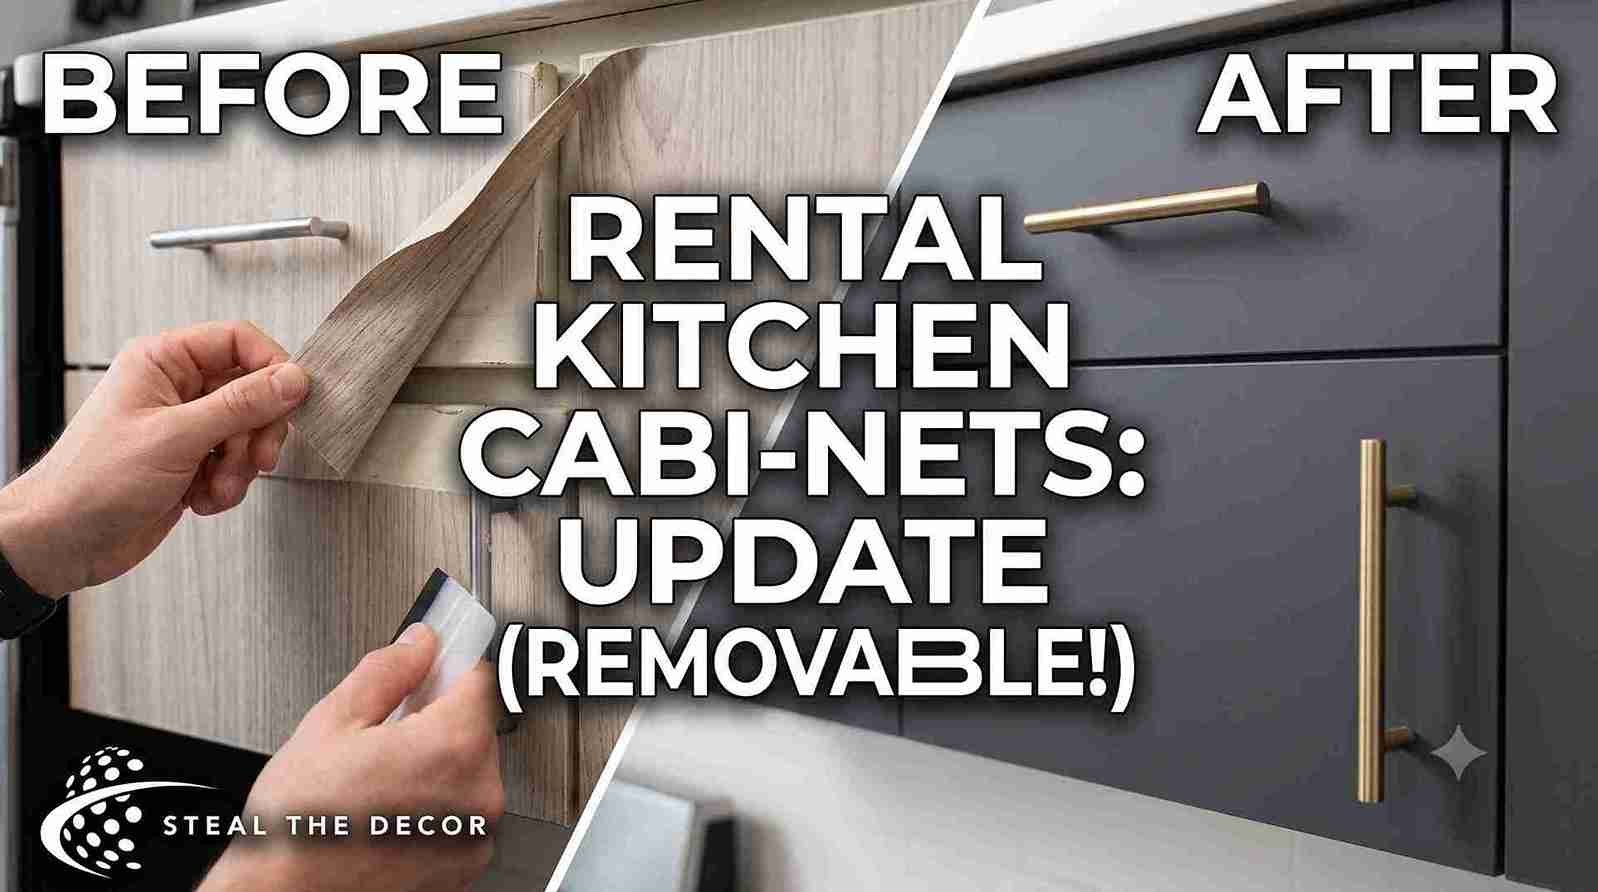
I stared at my rental kitchen cabinets for six months before I touched them.
They were that sad 1990s honey oak — the shade that swallows light and makes your apartment feel like a basement even at noon. Pinterest was full of people slapping navy paint on their shaker doors and calling it a weekend project. My lease said “no alterations.” Violating that meant watching a chunk of my security deposit vanish.
Paint was never an option. I needed stuff I could undo completely.
This is what I’ve tested across four rentals to update rental kitchen cabinets without paint: vinyl wraps, hardware changes, peel-and-stick backsplash, lighting hacks, all of it. But the thing nobody covers? Reversal. Every method here includes exactly how to undo it before move-out. Including the screw-ups.
That $22 mistake I keep mentioning? It was a single drawer front. I wrapped it badly, alignment completely off, got frustrated, and peeled the vinyl off in one angry rip. The adhesive pulled the varnish clean off with it. One drawer. Twenty-two bucks for a near-match replacement door at a salvage shop in Austin. The rest of the kitchen turned out fine. But that drawer taught me what happens when you rush removal on old cabinetry.

Why Renters Get This Wrong (The Deposit-Risk Reality Check)
Most content about kitchen upgrades online comes from homeowners. They own the cabinets. They can paint, sand, drill, and demolish. Nobody’s holding an $1,800 deposit over their head. Renters don’t have that luxury — and lease language is deliberately vague enough to bite you.
I’ve sat through two move-out walkthroughs where the property manager ran their fingers along cabinet edges, looking for residue I couldn’t see from three feet away. Both times, my heart was pounding.
What Your Lease Actually Says About Cabinet Changes
Standard US leases include language about “fixtures” and “alterations.” The typical clause: no alterations without written landlord consent. Cabinets count as fixtures. Even removable changes can violate this if they cause damage.
The key distinction that’s saved me: using existing screw holes versus creating new ones. Hardware swaps through pre-existing holes aren’t alterations—you’re not modifying the structure. Vinyl wraps occupy a legal gray area. No court’s going to fight over contact paper. But a landlord can absolutely deduct from your deposit for adhesive damage. One Austin property manager charged me $75 for residue I genuinely couldn’t see until she pointed it out under her phone flashlight.
The 3 Things to Document Before You Touch Anything
I photograph every cabinet surface now—close-ups of door faces, drawer edges, and the seam where laminate meets the frame. I shot a slow video with the date stamp visible. Takes four minutes.
Then I email my landlord. Even for hardware swaps. The paper trail matters. Verbal permission evaporates. I’ll give you the exact script in Method 6 — the same one I’ve used successfully in my last two places.
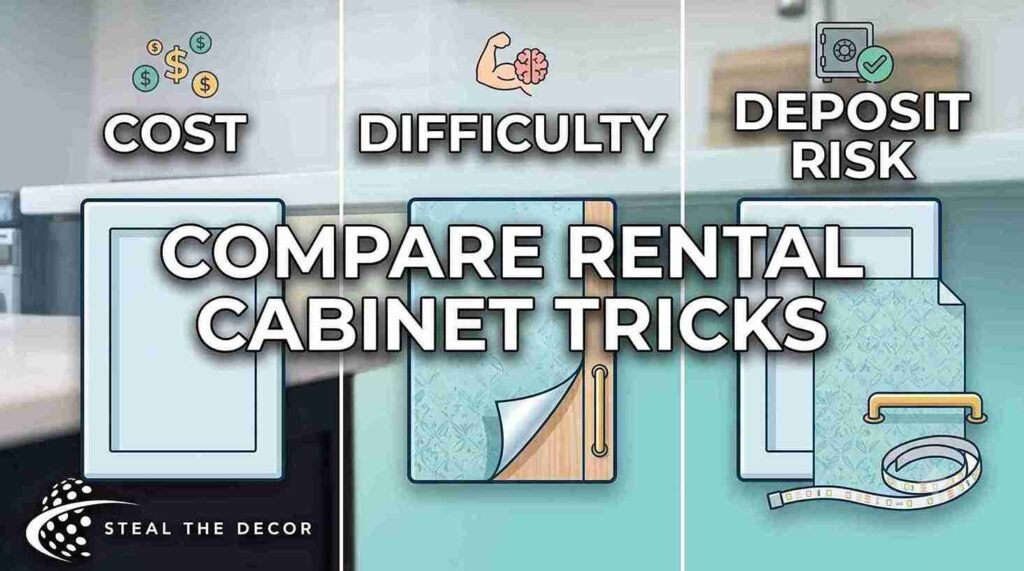
Method Comparison Table: How to Update Rental Kitchen Cabinets Without Paint
Decision paralysis ate two of my weekends before I finally just picked a method and started. A table would’ve saved me that time. Here’s the honest breakdown after actually living with each of these.
| Method | Approximate Cost | Difficulty | Reversibility | Deposit Risk |
| Vinyl Wrap / Contact Paper | $30–$80 | Medium | Good (with heat) | Low–Medium |
| Hardware Swap (existing holes) | $12–$60 | Easy | Perfect | Zero |
| Peel-and-Stick Backsplash | $25–$100 | Medium | Fair | Medium |
| Open Shelving Inserts | $20–$50 | Easy | Perfect | Zero |
| Under-Cabinet LED Lighting | $15–$40 | Easy | Perfect | Zero |
| Cabinet Door Replacement | $100–$300 | Hard | Perfect (store originals) | Low (with approval) |
The door replacement route genuinely surprised me. My landlord said yes. More on that below.
Method 1 — Vinyl Wrap / Contact Paper (The Big One)
This is the method everyone asks about first. I’ve wrapped cabinets in three different kitchens using peel-and-stick vinyl. When it works, the transformation feels almost dishonest—like you’re getting away with something. When it doesn’t, you’re standing in your kitchen at 11 p.m. with a hair dryer and a bottle of adhesive remover, wondering where your evening went.
I picked up a roll of DC-fix vinyl for $32 on Amazon the first time. Covered eight doors in a galley kitchen. I didn’t measure correctly, ran out on door nine, and the second order was a slightly different production batch. The color mismatch was subtle, but I caught it every morning while making coffee.
What Actually Works vs. What Bubbles and Peels
Brand matters. I tried Con-Tact paper first—the adhesive was too weak; edges started curling within six weeks. The cheetah wrap gripped better, but removal left more residue behind. d-c-fix sits in the middle: it has a decent hold and peels off clean with heat.
Surface prep trumps everything. I wipe doors down with rubbing alcohol now and let them dry fully. The one time I got impatient and skipped this step, the vinyl started separating at the corners in three days. Invisible grease film was the culprit. I couldn’t even see it.
Step-by-Step Application (With the Mistakes I Made)
I remove cabinet doors and lay them flat on my dining table, with an old sheet underneath. Measure each door and add two inches of overhang on every side. That extra margin is non-negotiable after what happened with my salvage-shop drawer—I’d cut too close to the edge, alignment went crooked, and my angry peel-off took the finish with it. Now I’m generous with overhangs.
I cut with a craft knife and a metal ruler. Scissors leave wobbly edges you’ll notice forever. Peel four inches of backing, align the top, and press from the center out. Work downward slowly, using a squeegee or old credit card to push bubbles to the edges. Trim the excess carefully around corners. Re-poke hardware holes with an awl.
A full kitchen took me five hours. My lower back hated me. The result was worth it.
How to Remove It Without Leaving a Mess
Hair dryer on medium, six inches from the surface, in slow circles. This loosens the adhesive. Peel at a 45-degree angle—straight up is exactly how I wrecked that drawer. If residue stays behind, Goo Gone (about $6 at Target) handles it. Test a hidden spot first. I didn’t once notice the older cabinetry, and the product dulled the original varnish slightly. The landlord never caught it. I still think about it.
Method 2 — Cabinet Hardware Swap
I did this on a Sunday afternoon, and the kitchen looked different by dinner. Removed 12 brass knobs and replaced them with matte black pulls. Twenty minutes, $24 at Home Depot. The original hardware lives in a labeled Ziploc in my utensil drawer.
A simple cabinet hardware swap changes the room’s personality faster than anything else I’ve tried. Something about new metal catches light differently, and suddenly the cabinets themselves look more intentional.
Using Existing Holes vs. No-Drill Options
Measure before you shop. Most US rental cabinets use a 3-inch hole spacing for pulls. I once bought 5-inch pulls without checking and had to make a return trip. Annoying but free to fix.
Smooth-front cabinets with no existing hardware need a different approach. Command makes adhesive-backed pulls rated for three pounds. I used these on a bathroom vanity for about a year—they held fine and removed cleanly. But in a kitchen where drawers get yanked open repeatedly, that weight rating makes me nervous. It’s probably fine. I just don’t fully trust it.
The Hardware Styles That Make the Most Visual Impact
Matte black on light cabinets. Brushed gold against dark wood. These two combinations punch above their weight visually. I’ve tested chrome (forgettable), oil-rubbed bronze (elegant but costs more), and acrylic (looks plastic up close). My current matte black pulls—Amerock brand, $4 each at Lowe’s—get comments from guests.
Storing Originals + Reinstalling Before Move-Out
Labeled bag. Always. I write the room, the date I removed them, and which drawer takes the longer screws. Cabinet pulls and drawer pulls look identical sometimes, but use different screw lengths. Mixing them turns move-out day into a puzzle you didn’t sign up for. Figured that out the messy way in apartment number two.
Method 3 — Peel-and-Stick Backsplash Tile
I added peel-and-stick backsplash tile behind my stove using Smart Tiles — $42 for six tiles at Home Depot. They’re thick vinyl decals printed to look like subway tile. From across the room, people assume it’s real. Up close, the “grout” is just printed texture. It doesn’t fool anyone who gets within arm’s reach.
Which Surfaces It Sticks To (And Which It Destroys)
Glossy, smooth walls accept these tiles beautifully — the painted drywall behind most rental stoves is ideal. Textured walls or matte paint is trouble. I tried one tile on a slightly rough patch, and it fell off within two days.
Removal is where this gets risky. On glossy paint, my tiles peeled off clean after eight months. On a satin-finished section, one tile ripped a palm-sized strip of paint away with it. I spent $8 on a sample jar at Lowe’s, color-matched as best I could, and did a patch job before my walkthrough. The shade was close but not exact. The inspector squinted at it. Then moved on. I exhaled.
The Grout Line Problem Nobody Mentions
Real tile has recessed grout. Peel-and-stick doesn’t; the grout pattern sits flush with the tile surface. Under the LED lights beneath my cabinets, the flatness is obvious. Light hits it wrong. Your eye registers something off even if your brain can’t name it. It bugged me for weeks, and then I stopped noticing. Visitors never pointed it out.
Method 4 — Open Shelving Inserts (No Permanent Removal)
I unscrewed two upper cabinet doors in my second apartment and slid them under my bed. Instant open shelving rental kitchen—the hinges stayed on the frame, and the screws went into a labeled bag. Zero tools beyond a screwdriver.
The catch was my dishware. Thrift store plates in five different patterns looked chaotic on display instead of curated. I grabbed four matching white dish sets at IKEA for $34. Suddenly, the shelves looked like a design choice instead of evidence I’d given up on cabinet doors.
Tension Rod + Shelf Systems That Require Zero Drilling
Inside the cabinet boxes, I installed a small tension rod—$12 at Target—to hang measuring cups and a dish towel. Didn’t change the exterior but made the interior feel organized. Reversible in thirty seconds. These tiny wins compound over time.
When This Makes Sense vs. When It Backfires
Open shelving needs decent cabinet interiors. Mine in the first apartment was raw particle board with mystery stains from a previous tenant. Exposing that made things worse. I lined the backs with leftover wallpaper as a patch job.
Dust is the other problem. Dishes on open shelves collect a film faster than you expect. If you’re not using those plates daily, you’re rinsing them before every meal. Now I only display what I actually reach for regularly.
Method 5 — Under-Cabinet LED Lighting
I bought a set of adhesive LED strip lights from Govee—$19 on Amazon—and stuck them under my upper cabinets. They plug into the outlet above the microwave. The kitchen went from cave-dim to actually usable for cooking. It’s the best nineteen dollars I’ve spent on any rental.
Adhesive Strip Lights That Don’t Damage Paint
The 3M backing on Govee strips has been removed cleanly for me in two different apartments—slow peel, warm surface, no issues. I can’t promise that for every paint type. A friend in a 1950s building tried the same strips and lost a layer of original paint when removing them. The adhesive had bonded for over a year in a humid kitchen.
Test a one-inch piece somewhere hidden. Wait a week. Peel. If paint comes with it, plan for a patch or choose a different method.
Plug-In vs. Battery: Which Is Actually Renter-Friendly
Plug-in strips cost less and stay brighter. Battery-powered options—Lepotec sells one for about $16—avoid cord clutter but eat AAs every three to four weeks with daily use. I started with batteries and got tired of replacing them, so I switched to a plug-in. The white cord against a white wall barely registers visually.
Method 6 — Cabinet Door Replacement (The Ask-First Method)
This is the most dramatic option and requires landlord approval. In my current place, I proposed swapping eight dated oak doors for flat-panel white ones from IKEA—roughly $20 each. I offered to store the originals in the unit’s storage closet and reinstall them before vacating.
The landlord agreed. I paid for everything. He just had to say yes. A cabinet door replacement rental situation is rare but possible with the right approach.
How to Propose This to Your Landlord (Copy-Paste Script)
Here’s what I sent, almost word for word:
“Hi [Landlord Name], I’ve been looking at some reversible improvements I could make to the kitchen at my own expense. One possibility: swapping the existing cabinet doors for new ones temporarily. I’d store the originals safely and reinstall them before moving out. No changes to the cabinet boxes, hinges, or structure. Would you be open to discussing this?”
Short. Respectful. It worked twice.
Who Pays, Who Keeps the Doors, and What to Put in Writing
I paid. The new doors belong to me—they leave when I do. The originals go back on the cabinets. Get the approval in writing, even just a reply email. That email counts as written consent. Without it, you’re gambling on memory and goodwill.
The $0–$300 Budget Tier Breakdown
I’ve done full kitchen makeovers for under $50 and others closer to $300. The difference comes down to how many elements you stack. Here’s how I’d group it.
Under $50 — Hardware + Contact Paper Only
Swap hardware first—$12 to $24—then wrap the most visible doors in contact paper for about $30. Skip backsplash and lighting. This single combo changes roughly eighty percent of what your eye registers in a kitchen. My first rental cost $46 total and took one Saturday.
$50–$150 — Add Backsplash + Lighting
Hardware plus wrap plus peel-and-stick backsplash behind the stove area ($40–$60) plus one set of LED strips. You’re covering every visual zone now—cabinets, hardware, backsplash, and light—and the cumulative effect is substantial. This range is where I think the value peaks for a renter-friendly kitchen makeover.
$150–$300 — Full Visual Transformation
Everything above, plus open shelving inserts, nicer hardware like brushed brass, and maybe two backsplash packs instead of one. My current kitchen sits at around $260 in this tier. I don’t regret spending any of it, though I’d probably skip the second backsplash pack if I did it again.
What I Tried That Failed (Honest Mistakes + What They Cost)
Not everything worked. Some of it failed in ways that cost me real money. These two mistakes were the most instructive.
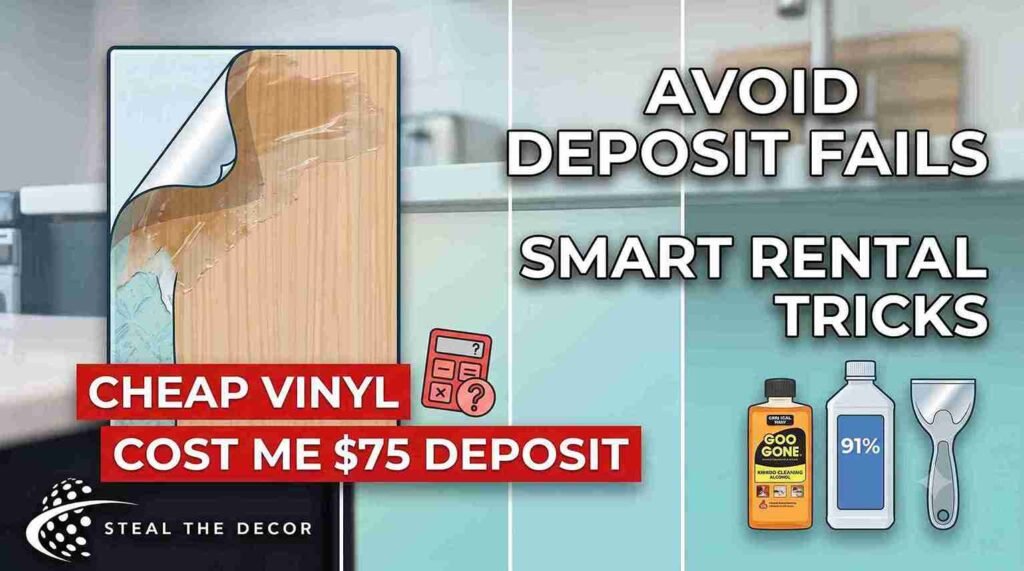
The Budget Contact Paper That Left Residue Everywhere
No-name brand from Amazon, $14 a roll. Applied it to every cabinet in my second rental. Looked decent for eight months, then summer humidity hit. The adhesive softened, edges curled, and when I peeled it off before move-out, it left a sticky film across every door. Goo Gone and three hours of scrubbing got most of it. The landlord still docked me $75 for “cabinet cleaning.” The $14 I saved on cheaper vinyl cost me five times that in deposit deductions. That math finally broke my bargain-hunting habit on adhesive products.
The Hardware Screw That Stripped the Hole
Replacement pulls came with screws slightly thicker than the original holes. I forced one instead of pre-checking. The wood around the screw stripped—the threads had nothing to grip. I had to buy wood filler ($7, Home Depot), patch the hole, let it dry, drill a new pilot hole, and reinstall the original hardware. It worked. The repair was invisible. But I spent forty minutes in mild panic first, convinced I’d permanently damaged a cabinet I didn’t own.
The Move-Out Reversal Checklist
This section is the reason I wrote this article. Nobody in the search results covers the undoing part — and undoing is the whole point of damage-free kitchen update methods. Here’s my process.
Method-by-Method Removal Instructions
Vinyl wrap: hair dryer, medium heat, 45-degree peel angle, Goo Gone for any residue. Hardware: Original pulls go back in their labeled bags, and screws are matched to the right drawers. Backsplash tiles: slow peel with heat if they resist; paint touch-up jar ready for surprises. Shelf inserts: tension rods down, original doors reattached. LED strips: carefully peel the plastic scraper for adhesive spots. None of this requires professional help.
Products to Have on Hand for Adhesive Cleanup
Goo Gone—$6 at Target. Rubbing alcohol—91% concentration from any drugstore. A plastic scraper, never metal. A hair dryer with a nozzle attachment. These four items have protected more of my deposit money than any clever installation technique.
Final Photo Documentation Before Handing Back Keys
I photograph every surface I modified—same angles as the “before” shots—and email them to myself for the timestamp. If a landlord ever questions a mark, I have dated evidence of the condition I left. I’ve never needed to use these photos in a dispute. But the three minutes it takes gives me peace of mind that’s worth more than the time cost.
Frequently Asked Questions
Can you update kitchen cabinets in a rental without losing your deposit?
Yes—vinyl wraps, contact paper, and hardware swaps using existing screw holes all work. Keep adhesives off raw wood surfaces and photograph everything before starting. Methods that rely on original mounting points or pressure-fit installation carry essentially zero deposit risk when reversed properly. Across four rentals, I’ve only lost money once—cheap contact paper that left residue I couldn’t fully remove.
What is the easiest way to cover ugly rental kitchen cabinets?
Contact paper. Specifically, d-c-fix or Cheetah peel-and-stick vinyl. No tools needed beyond scissors and something flat to smooth bubbles. No drilling. Fully removable. A standard kitchen runs $30–$80 in materials. The real requirement is patience during application — rushing creates bubbles and misalignment that haunt you later.
Can I change cabinet hardware in a rental apartment?
Almost always yes, as long as you use the existing holes. I’ve done this in every place I’ve rented. Keep the original hardware bagged and labeled. Reinstall before moving out. If no holes exist, adhesive-backed pulls from Command work, but check the weight rating against your cabinet doors.
How do you make rental kitchen cabinets look more modern without painting?
Five approaches I’ve actually used: wrap doors in vinyl, swap hardware to matte black or brushed gold, add peel-and-stick backsplash tile behind the stove, mount under-cabinet LED strips with adhesive backing, and convert a couple of upper cabinets to open shelving by removing the doors. Each method costs under $100. Stacking two or three creates a cumulative effect that feels like a different kitchen
Does contact paper damage kitchen cabinets when removed?
It can, especially on raw wood or older painted surfaces where the finish has weakened. Factors that increase risk: leaving it on longer than a year, removing it in cold temperatures, and using cheap brands with aggressive adhesive. My routine now: heat the surface, peel slowly at an angle, and clean residue immediately. And always test a hidden area before committing to the whole kitchen.
Conclusion
The whole point of updating rental cabinets without paint isn’t impressing your landlord. It’s walking into your kitchen and feeling like the space belongs to you, even temporarily. I’ve spent about $260 across my current setup—matte black hardware, D-C-Fix wrap, peel-and-stick backsplash, and LED strips—and I can reverse every piece of it in an afternoon.
Some of it will bubble at the edges next August. The backsplash might leave a paint patch you need to touch up with an $8 sample jar. A screw might not seat perfectly. That’s renting. Nothing’s permanent, and nothing’s flawless.
What matters is that I actually like being in my kitchen now. Coffee tastes identical. But the light lands differently on the counters. And when I move out, everything goes back—close enough that nobody’s pulling out a flashlight during the walkthrough.
About the Author: Ali Ahmad has rented four apartments across Texas and Colorado and still owns the same spatula from his college dorm. He once spent three hours applying vinyl wrap to a single drawer because he refused to admit he’d measured it wrong. The spatula is fine. The drawer looked okay.
What’s one kitchen upgrade you tried in a rental that either held up beautifully or went sideways? Tell me in the comments—I genuinely want to know what worked and what your landlord said when they saw it.