
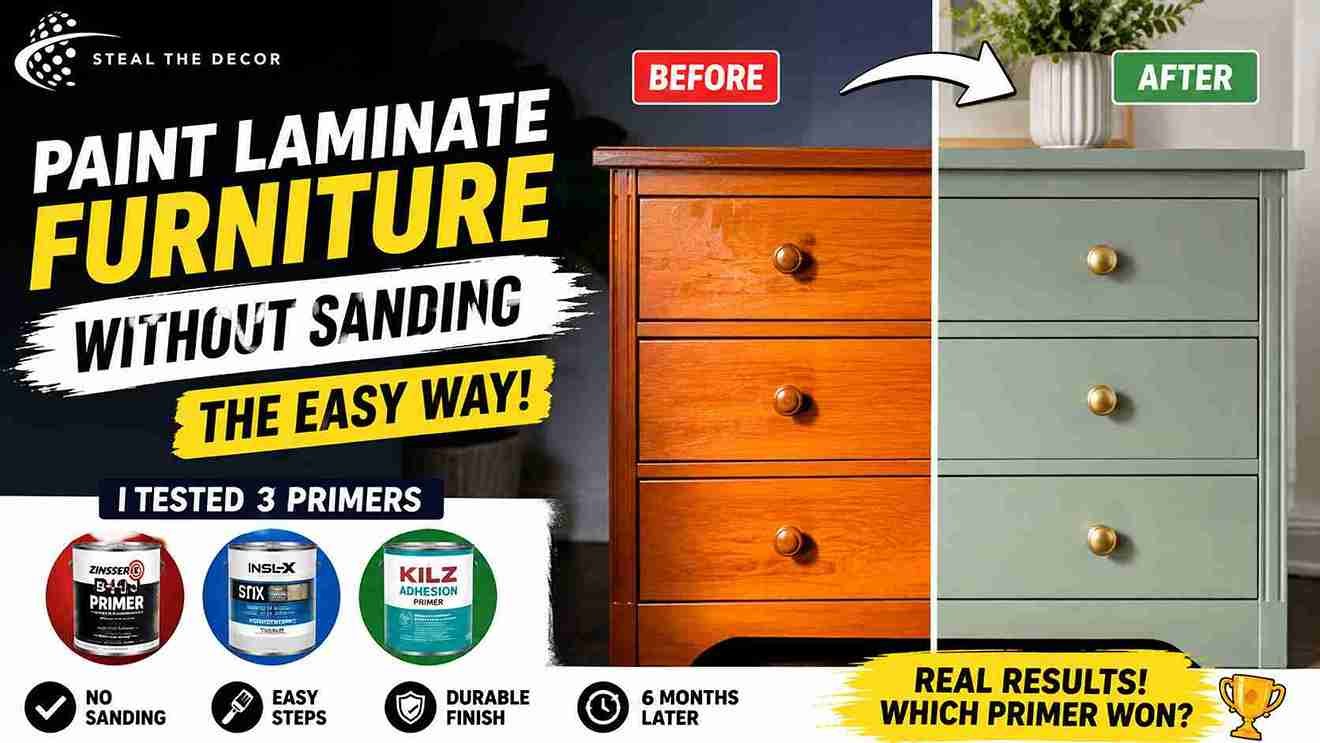
The dresser had been the same shiny, orange-toned laminate since the day I moved in. The kind of finish that makes an apartment feel like a corporate rental. I wanted it painted, but I’d already ruined one bookshelf trying to sand melamine in a 650-square-foot apartment with no balcony—and a very unhappy neighbor downstairs.
So this time I actually sat down and figured out how to paint laminate furniture without sanding, and I tested three different bonding primers on the same piece to see which one held up. Not gonna lie — I expected at least one of them to fail. This guide walks through the exact no-sand method that worked, the products that didn’t, and what the finish actually looks like six months later—plus what to do if you’ve got a similar dresser or desk that’s a little too difficult to paint the normal way.
The Short Version: Yes, you can paint laminate furniture without sanding. The trick is a bonding primer (also called an adhesion primer), not sandpaper. Clean and degrease the surface, apply a shellac-based or high-adhesion primer like Zinsser B-I-N, INSL-X Stix, or KILZ Adhesion, let it cure, and then topcoat with your paint of choice. Skip the primer, and even the best paint will chip within weeks.
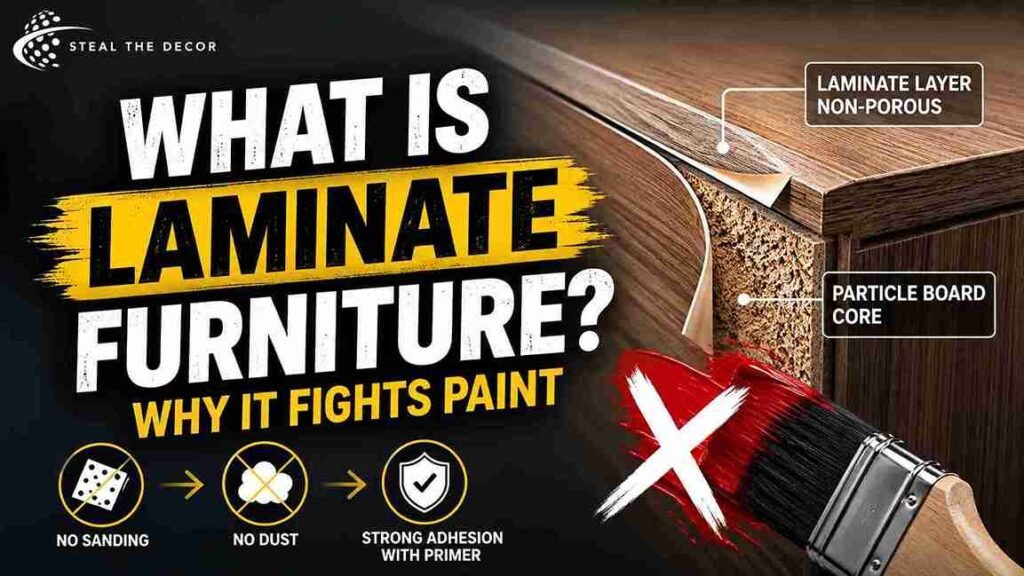
What Is Laminate Furniture (And Why It Fights Paint)
Laminate is a thin layer of plastic—usually melamine or a similar resin—fused onto particle board, MDF, or sometimes plywood to mimic the look of wood at a fraction of the cost. Most IKEA furniture, big-box dressers, and older kitchen cabinets are built this way. And here’s the actual problem: laminate is a non-porous surface, so regular paint has nothing to physically grip onto. Traditional advice says to sand it first so the paint has “tooth.”
But sanding laminate creates fine plastic dust, can chip the thin top layer, and is genuinely miserable to do indoors. A bonding primer solves the same adhesion problem chemically instead of mechanically. No sandpaper, no paintbrush full of dust, no chip-covered floor. Just a smooth finish once you’ve primed it right.
Does Painting Laminate Without Sanding Actually Work? (Skeptic Check)
Short answer: yes. But only if you respect the process.
I was skeptical too—really skeptical—because I’d already had a paint job peel off a laminate nightstand within a month. That failure happened because I used a regular latex primer, which is made for porous surfaces like drywall. It never had a chance.
The no-sand method works when you use a true bonding primer formulated for glossy, nonporous surfaces and when you degrease the laminate first. Kitchen grease, hand oils, and furniture polish all block adhesion just as much as a slick surface does. It tends to fail when people skip the degreasing step, grab the wrong primer, or don’t give it full cure time before topcoating. In my experience, the primer does 90% of the work. The paint on top is almost the easy part.
What You Need: The No-Sand Method Materials List
Here’s everything I used, roughly organized by step. Prices are US averages from Home Depot, Lowe’s, and Amazon, and they’ll shift over time. You don’t need every product here for every project—a heavily used kitchen cabinet benefits from the full lineup, while a lightly worn dresser might only need cleaner, primer, paint, and topcoat.
Cleaning:
- TSP cleaner (trisodium phosphate substitute) or Krud Kutter degreaser — $8–$14
- Microfiber cloths and a bucket of warm water
Optional deglossing:
- Liquid sandpaper / deglosser — $9–$13 (a chemical wipe-on product, not actual sandpaper — it slightly etches glossy surfaces without any dust)
Priming (pick one bonding primer — more on this below):
- Zinsser B-I-N shellac-based primer, INSL-X Stix, or KILZ Adhesion—$20–$45 per quart or gallon
Painting:
- Cabinet and furniture enamel, chalk paint, or milk paint, depending on the finish you want—a satin finish tends to hide brush marks better than a high-gloss one—$25–$45 per quart
- A foam roller, an angled paintbrush for edges, and a paint stick for mixing — $6–$10
Top coat:
- Polycrylic or water-based polyurethane — $12–$20
- A few damp paper towels on hand for wiping up drips before they dry
If you’re also updating a kitchen and want the full picture of what a rental-friendly kitchen refresh costs, I broke down every line item in my rental kitchen makeover on a budget.
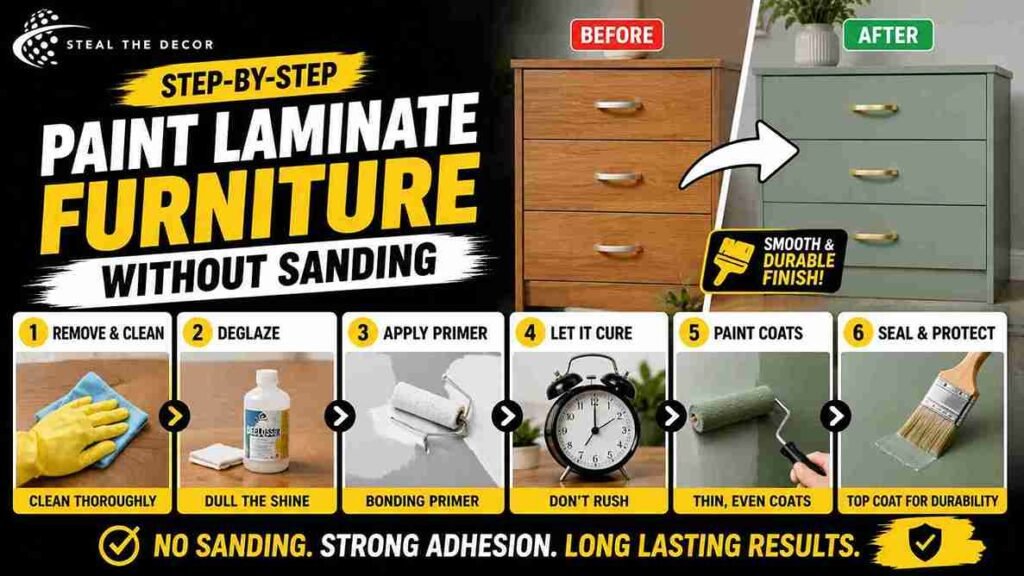
Step-by-Step: How to Paint Laminate Furniture
Step 1: Remove hardware and clean thoroughly. Take off any knobs, pulls, or hinges—you’ll get a cleaner edge, and flat pieces are just easier to paint. Wash the entire surface with a TSP or Krud Kutter solution to strip away grease, dust, and any furniture polish residue. Rinse with a damp cloth and let it dry completely. Skipping this step is the single most common reason a “no-sand” paint job peels.
Step 2: Deglaze glossy spots (optional but recommended). If your laminate is especially shiny—think factory-fresh IKEA Malm or Kallax—wipe it down with a liquid sandpaper or deglosser. This is not sanding. There’s no dust. Just a chemical pass with a rag that dulls the sheen slightly so primer actually bonds.
Step 3: Apply a bonding primer. This is the step that actually replaces sanding — and I mean actually. Apply a thin, even coat with a foam roller or brush, working in the direction of the panel. One coat is usually enough, but check the label. Some glossy surfaces do better with two thin coats than one thick one, which can pool at the edges.
Step 4: Let it cure. Don’t rush this. Most bonding primers are dry to the touch in 30–45 minutes, but “dry” and “cured” are not the same thing. Give it the full cure window listed on the can — often several hours, sometimes overnight — before painting. Painting too soon is the second most common cause of peeling.
Step 5: Paint in thin, even coats. Apply your cabinet enamel or chalk paint with a foam roller to get a smooth finish or a paintbrush if you want visible texture. Let each coat of paint dry fully before applying the next coat—rushing this is how brush marks and tackiness happen. Two thin coats beat one thick coat every time; thick paint takes longer to cure and is more prone to drips.
Step 6: Seal with a protective top coat. Once your final coat of paint is dry, apply a coat or two of polycrylic or water-based polyurethane, especially on high-touch pieces like dressers, cabinets, desks, or anything in a kitchen. If you’re doing multiple coats, lightly sand between coats with a fine-grit sanding sponge for the smoothest possible finish—this is the one spot where a very light scuff actually helps. This top coat is what actually protects your paint job from daily scuffs and keeps it “renter-approved” for the long haul.
Bottom line: the no-sand method isn’t a shortcut that skips prep. It just replaces mechanical prep (sanding) with chemical prep (a bonding primer). Get the primer step right, and the rest is standard furniture painting.
Pro Tips for Renters:
- Test your primer and paint combo on the inside of a drawer or the back panel first—laminate quality varies even within the same piece of furniture.
- Work in a well-ventilated room and crack a window. Shellac-based primers have a strong odor even though they dry fast.
- If a corner or edge is peeling on the original laminate (common on older IKEA pieces), glue it down with wood glue and clamp it before priming—paint won’t fix loose laminate.
- Remove drawers and doors and lay them flat to paint. Vertical painting on cabinet fronts is where most drips happen.
- Label your hardware with painter’s tape before removing it, or reassembly turns into a puzzle. Trust me on this one.
No-Sand Method vs. Traditional Sanding: Cost & Time Comparison
I get asked whether skipping sanding is actually worth it. So here’s the honest math from my own project on a six-drawer dresser.
| No-Sand (Bonding Primer) Method | Traditional Sanding Method | |
|---|---|---|
| Time | About 4–5 hours active work over 2 days (mostly waiting on cure time) | 6–8 hours active work, plus dust cleanup |
| Mess | Minimal — no dust, easy indoor cleanup | Significant — fine plastic dust gets everywhere |
| Cost | $45–$70 total (cleaner, primer, paint, topcoat) | $35–$55 total (sandpaper is cheap, but you still need primer and paint) |
| Best for | Apartments, no outdoor workspace, sensitive lungs/allergies | Garages, patios, or pieces with heavily damaged laminate |
The no-sand method costs a little more upfront, since bonding primers run higher than a basic latex primer. But it saves hours of sanding and cleanup — which matters a lot more than $15–$20 if you’re doing this in a living room.
Best Primers for Laminate Furniture Without Sanding (Head-to-Head)
I tested three bonding primers on identical sections of the same laminate dresser to compare adhesion, smell, and dry time. Here’s what I found:
- Zinsser B-I-N Shellac-Based Primer — Strongest adhesion of the three, and it’s specifically labeled for cabinets and furniture. This is the special primer I’d reach for on a piece that’s genuinely difficult to paint—think factory-glossy laminate that laughs off everything else. The tradeoff? A noticeably strong solvent odor. Ventilation matters here.
- INSL-X Stix Waterborne Bonding Primer, made by Benjamin Moore—A close second on adhesion and water-based, so cleanup and odor were much easier to live with in a small apartment. This is the one I’d hand to a first-timer who just wants to learn how to paint laminate without a headache.
- KILZ Adhesion Primer — Also water-based and easy to apply, with slightly softer adhesion than Stix on the glossiest section I tested. Still solid on moderately glossy surfaces, though. Between all three, only the Zinsser is oil/shellac-based—Stix and KILZ are both water-based, which is why they clean up so much easier.
| Product | Price Range | Ease of Use (1–5) | Damage/Peeling Risk | Best For | Our Rating |
|---|---|---|---|---|---|
| Zinsser B-I-N Shellac-Base Primer | $20–$35/qt | 3/5 | None (after full cure) | Glossy factory laminate, kitchen cabinets | 5/5 |
| INSL-X Stix Waterborne Bonding Primer | $25–$45/gal | 5/5 | None | First-time DIYers, apartments | 4.5/5 |
| KILZ Adhesion Primer | $22–$38/gal | 4/5 | Low (on ultra-glossy spots) | Moderately glossy laminate, dressers | 4/5 |
Chalk Paint, Spray Paint, or Brush: Which Application Method Wins?
Chalk paint is popular because it’s marketed as needing “no prep.” That’s not fully true for laminate—it still needs a bonding primer underneath on a slick, non-porous surface, or it’ll scratch off with a fingernail a few months in. Once primed, though, chalk paint gives a soft, matte finish that forgives brush strokes.
Spray paint—rattle-can or HVLP—gives the smoothest, most factory-like finish, and it’s genuinely fast. But it needs more ventilation and overspray control than apartment life usually allows. Do it outdoors or in a garage if you go this route and still prime first. Spray paint doesn’t adhere to bare laminate any better than brushed paint does.
A brush or foam roller is the most apartment-friendly option. And a foam roller in particular gives a nearly spray-smooth finish without the overspray risk—which is why it’s what I reach for on most furniture pieces indoors.
Does the application method actually change how well the primer holds? Not really. Adhesion comes from the primer, not from how you apply the topcoat. What changes is finish quality and mess.
Common Mistakes Renters Make With Laminate Furniture Painting
Skipping the degreasing step. Even furniture that looks clean usually has a thin layer of hand oil, dust, and polish sitting on it. Paint—and even primer—will slide right off eventually. Wipe down with TSP or Krud Kutter every single time. No exceptions.
Using a regular primer instead of a bonding primer. This was my original mistake on that nightstand. Standard latex primers are made for porous surfaces like drywall—they don’t grip glossy laminate any better than paint alone would, and no amount of extra coats of paint fixes a primer that was wrong from the start.
Not letting the primer fully cure. Dry to the touch isn’t the same as cured. Painting over a primer that hasn’t finished curing traps moisture and weakens the bond, which shows up as peeling weeks later, not immediately.
Applying paint too thick. Thick coats feel faster, but they take longer to dry properly and are more likely to stay tacky or show brush marks. Two thin coats beat one heavy coat every time.
Skipping the topcoat. Paint alone scuffs and chips with daily use, especially on drawer fronts and cabinet doors. A polycrylic or water-based polyurethane topcoat is what actually makes the finish durable.
Painting over damaged laminate without repairing it first. Bubbled, peeling, or chipped laminate needs to be glued down or filled before you prime. Paint will not hide or fix structural damage to the laminate itself.
Special Cases: IKEA Malm/Kallax, Cabinets, Fireplaces & Damaged Laminate
IKEA Malm, Kallax, and Billy pieces tend to have an especially slick, factory-fresh laminate coating, so I always degrease these with liquid sandpaper before priming—even though the pieces are brand new. New can actually mean glossier and harder to bond to than an older, slightly worn piece. Counterintuitive, I know.
Kitchen cabinets see daily wear, grease, and moisture, so I’d lean toward Zinsser B-I-N for adhesion and always add two coats of topcoat, not one. If you’re weighing a full cabinet repaint against smaller updates, my guide on how to update rental kitchen cabinets without paint covers lower-commitment options—and swapping hardware afterward makes a bigger visual difference than people expect. I cover that in replacing kitchen handles.
Laminate fireplace surrounds need a heat-safe topcoat rated for the temperatures near your specific fireplace. Check the topcoat label—standard polycrylic isn’t rated for high heat exposure.
Damaged or bubbled laminate needs to be dealt with before you touch a primer. Lift and re-glue any loose edges with wood glue, then clamp them flat for a few hours. Or fill small chips with paintable wood filler, sanding just that spot smooth—this is the one place a little sanding is genuinely unavoidable—before priming the whole piece.
Thrifted laminate furniture—the kind you find at a thrift store or scrolling Facebook Marketplace—usually needs a longer degreasing pass than new IKEA pieces. Years of hand oils, kitchen grease, or furniture polish build up in ways a quick wipe just won’t remove. So I go over secondhand pieces with TSP twice before priming.
And if you’re staring at a secondhand desk or table, wondering whether it’s even worth saving—I feel you. Most of them are. It’s usually just grease.
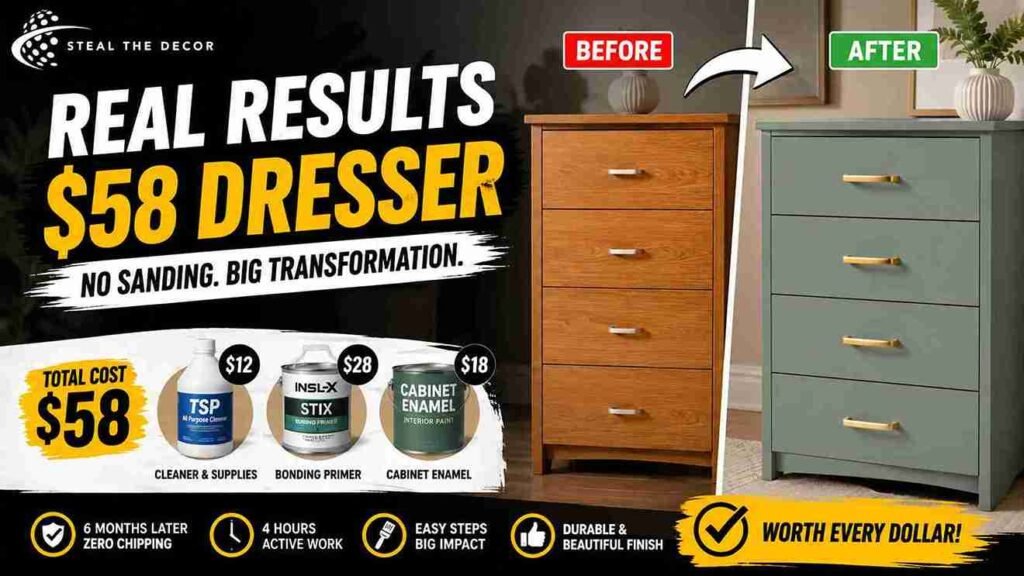
Real Results: What I Got for $58 on My Laminate Dresser
Total cost for the dresser project: about $58. Roughly $12 for TSP cleaner and rags, $28 for a quart of INSL-X Stix primer, and $18 for a quart of cabinet enamel in my favorite paint color—I already had leftover top coat on hand. Active work time was about four hours spread across two days, mostly because of primer cure time. It’s a handful of easy steps once you know the order, but skipping a step is exactly how a piece of laminate furniture ends up peeling six months in instead of holding up.
What worked: the Stix primer held up cleanly with zero chipping at the six-month mark, even on the drawer fronts that get opened daily. Honestly? That surprised me more than anything else in this whole project.
What didn’t work as well: I underestimated how long the shellac-based Zinsser sample needed to off-gas, and I had to leave a window cracked overnight—something I hadn’t planned for in a smaller apartment. I also learned the hard way that the corner where I skipped a second coat of topcoat is now showing faint scuff marks, while the rest of the piece looks untouched. Proof that the topcoat step isn’t optional if you actually use the furniture daily.
If I did this again, I’d start with the water-based Stix primer from day one instead of testing the stronger-smelling option first. And I’d budget an extra topcoat pass on every edge and corner, since those take the most day-to-day contact.
Key Takeaways
- A bonding primer such as Zinsser B-I-N Shellac-Base Primer, INSL-X Stix, or KILZ Adhesion is the key ingredient that lets you paint laminate furniture without sanding.
- Degreasing the surface with TSP cleaner or Krud Kutter before priming is the single step most failed laminate paint jobs skip.
- Water-based bonding primers like INSL-X Stix and KILZ Adhesion have a milder odor than shellac-based Zinsser B-I-N, making them better suited to small apartments.
- A topcoat of polycrylic or water-based polyurethane is what makes a painted laminate finish durable enough for daily use — not the paint alone.
- IKEA pieces like the Malm and Kallax often need extra deglazing with liquid sandpaper, since their factory laminate is unusually glossy.
- Damaged or bubbled laminate must be glued or filled before priming — paint cannot fix structural issues in the laminate itself.
- A full no-sand laminate furniture makeover typically costs $45–$75 and takes 4–5 hours of active work spread across two days for primer cure time.
Conclusion
Painting laminate furniture without sanding really does work. I’ve now done it on a dresser, a nightstand redo, and a set of cabinet doors, and the pieces that got a proper bonding primer and topcoat are still holding up months later. The pieces that failed were the ones where I rushed the prep — not the ones where I skipped sanding. If you’re weighing a bigger kitchen refresh at the same time, my guide to a rental kitchen makeover on a budget walks through how I sequenced projects like this without overspending in one month.
Have you tried painting laminate furniture in your rental? I’d genuinely like to hear what happened—tell me in the comments below, especially if you tried a primer I haven’t gotten to yet.
FAQ: Painting Laminate Furniture for Renters
Can you really paint laminate furniture without sanding?
Yes. A bonding primer chemically etches into glossy, non-porous laminate the way sandpaper would mechanically. Skip sanding, but don’t skip the primer—that step is what makes the no-sand method actually work long-term.
How do you paint laminate cabinets without sanding?
Clean and degrease the cabinet fronts; apply a bonding primer like Zinsser B-I-N or INSL-X Stix in thin coats; let it fully cure; then apply two coats of cabinet-grade enamel and a protective topcoat for durability against daily kitchen use.
Is this method safe for a rental with a security deposit on the line?
Painting furniture you own is generally safe for your deposit, since it’s not attached to the unit. If the piece was provided by your landlord, check your lease first—painting furniture that isn’t yours is a different situation than painting your own dresser.
Does painted laminate leave residue or damage the original surface?
No. As long as you’re painting furniture you own, there’s no residue concern the way there is with wall treatments. Want the finish gone later? That takes actual stripping or sanding — the paint itself doesn’t damage the laminate underneath.
How much does it typically cost to paint a laminate dresser?
Expect $45–$75 for a standard four- to six-drawer dresser, covering degreaser, bonding primer, paint, and topcoat, depending on the brands you choose and how much leftover product you already have on hand.
What’s the best primer brand for laminate furniture?
INSL-X Stix and Zinsser B-I-N both tested well for adhesion. Stix is water-based with a milder odor, making it more apartment-friendly. Zinsser B-I-N offers slightly stronger adhesion on very glossy surfaces, but with a stronger smell.
Is painting laminate furniture different from painting wood furniture?
Yes. Wood furniture is porous, so paint and primer soak in and grip naturally. Laminate furniture is made from a nonporous plastic layer, so it needs a bonding primer to create that same grip—an enamel paint or regular primer that works fine on wood furniture usually won’t hold on laminate.
What do I do if my paint job is already peeling?
Peeling almost always means the surface wasn’t degreased or primed properly the first time. Sand or scrape off the peeling section, clean thoroughly, apply a bonding primer to that spot, and repaint. You don’t need to strip the entire piece unless the peeling is widespread.