
Table of Contents
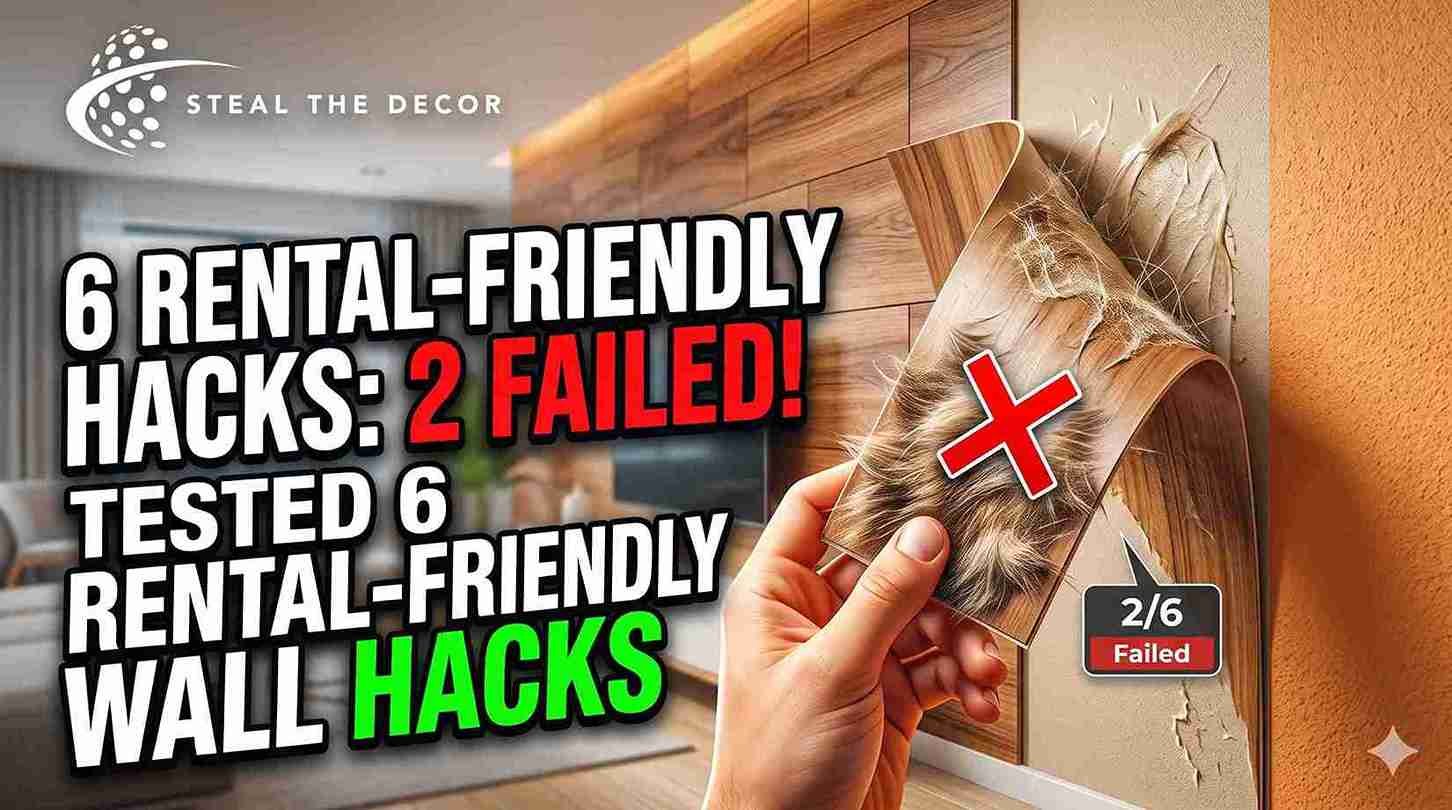
The first panel fell off at 2 a.m.
I woke up to a loud slap. There it was—my brand-new peel-and-stick wood panel, face-down on the floor, adhesive side covered in cat hair. I just stared at it. Three hours of measuring, leveling, pressing, and smoothing. Gone. That was my introduction to rental-friendly wall paneling, and honestly, I needed that failure. It taught me more than any YouTube tutorial ever could.
I live in a 620-square-foot apartment in Portland, Oregon. The walls are textured—that awful orange-peel finish landlords love because it hides decades of bad paint jobs. My lease says “no permanent alterations.” No drilling, no nails, no paint without permission. But I wanted an accent wall. Something that made the space feel less like a beige box and more like home. So I went deep into the world of temporary wall paneling. Six methods were tested. Two failed. Three stayed up. One actually made my landlord smile during an inspection. I’m going to walk you through every single one—what worked, what didn’t, what cost $12, and what cost me a chunk of my security deposit anxiety.
This isn’t a Pinterest-perfect roundup. I scuffed walls, wasted money, and learned that “damage-free” sometimes means “damage you discover six months later.” If you’re renting and want rental-friendly wall paneling that won’t cost you your deposit, stick with me. I made the mistakes so you don’t have to.
What Exactly Is Rental-Friendly Wall Paneling?
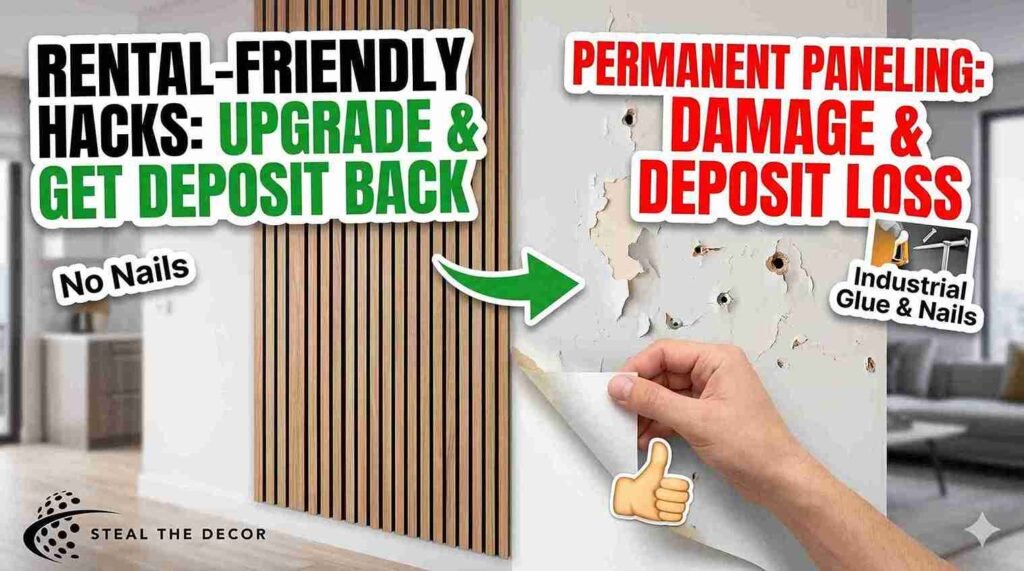
Rental-friendly wall paneling is any wall treatment that adds texture, pattern, or dimension to a wall without permanent installation — meaning no nails, no construction adhesive, no drilling into studs, and most importantly, full removability when your lease ends. The goal is simple: upgrade your space and get your deposit back.
I didn’t fully understand this distinction when I started. I thought “temporary” just meant “not glued down with industrial adhesive. ” Turns out, even some products labeled “removable” can destroy paint if the wall underneath isn’t prepped right or if you leave them up too long. The category covers everything from peel-and-stick foam panels to fabric stretched over lightweight frames, removable wallpaper with wood-grain textures, and even real wood slats held up by heavy-duty Command strips. Some methods work beautifully on smooth drywall. Others are nightmares on textured walls. Knowing the difference before you open your wallet saves a lot of regret.
The Difference Between Permanent and Temporary Wall Paneling
Permanent paneling uses nails, construction adhesive, or tongue-and-groove locking systems. It’s designed to stay up for years. Temporary or rental-friendly wall paneling uses removable adhesives, tension rods, hook-and-loop strips, or lightweight materials that hang like picture frames. The keyword is “reversible.” If you can’t undo it on a Sunday afternoon without a putty knife and a trip to Home Depot for spackle, it’s not rental-friendly. I learned this the hard way when a “low-tack” adhesive strip ripped a 4-inch patch of paint clean off my wall.
What “Damage-Free” Actually Means in a Rental
Damage-free doesn’t mean zero risk. It means zero expected damage when installed and removed correctly. I’ve found three factors matter most: wall texture, paint age, and how long the paneling stays up. Orange-peel walls have less surface contact area, so adhesives grip unevenly. Old paint — especially cheap landlord-grade Flat paint lifts easily. And leaving paneling up for two years in direct sunlight? The adhesive bonds harder over time. “Damage-free” is a promise with fine print. Read it before you peel.
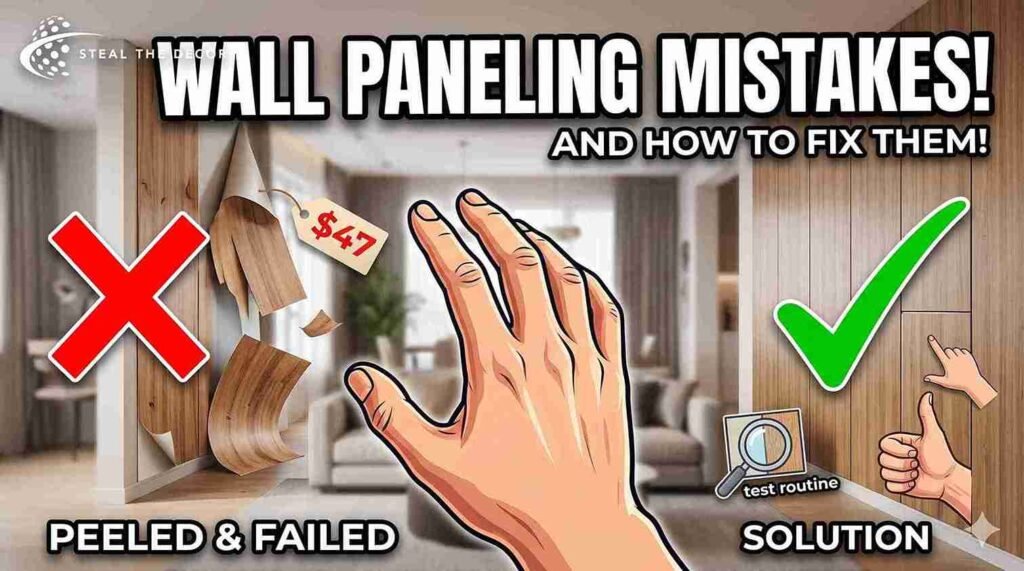
Why Most Renters Get Wall Paneling Wrong (My $47 Mistake)
I wasted $47 on a single box of peel-and-stick panels that refused to stay up. The panels themselves were fine. The problem was me. I didn’t test my wall first. Every rental wall behaves differently—humidity, texture, paint type, and even how much cooking grease has settled on the surface change how adhesives perform. I slapped a panel onto my kitchen-adjacent wall without cleaning it first. It held for six hours. Then gravity won.
That $47 wasn’t the panels’ fault. It was impatience. Renters—myself included—tend to rush into projects on a Saturday afternoon, excited to transform a space before the weekend ends. But wall paneling rewards preparation and punishes shortcuts. I’ve now developed a test routine: clean the wall with isopropyl alcohol, let it dry completely, apply one small test strip, and wait 24 hours. If it’s still firmly attached the next morning, I proceed. If it peels, I know that wall needs a different approach.
The Mistake I Made With Adhesive Strength
Not all adhesives are created equal. Some are so strong they bond permanently. Others are so weak that they fail in humidity. The panels I bought used a medium-tack adhesive that claimed to be “removable up to two years.” What the packaging didn’t say: that rating assumes smooth, primed drywall in a climate-controlled room. My apartment has radiant heating, which creates temperature swings. Adhesives expand and contract. By week two, corners started lifting. My mistake was trusting the marketing instead of testing the reality.
Wall Texture Matters More Than You’d Think
Smooth walls are easy mode. Textured walls are where most rental-friendly wall paneling products struggle. The bumps reduce surface contact, which means less grip. On my orange-peel walls, I found that foam-based panels with a thicker adhesive layer worked better than thin vinyl panels. If you have knockdown texture or popcorn walls, fabric-based methods or tension-mounted solutions might be your only real options. I wish someone had told me that before I spent hours pressing panels onto a wall that was never going to hold them.
Peel and Stick Wall Paneling — The Easiest Starting Point
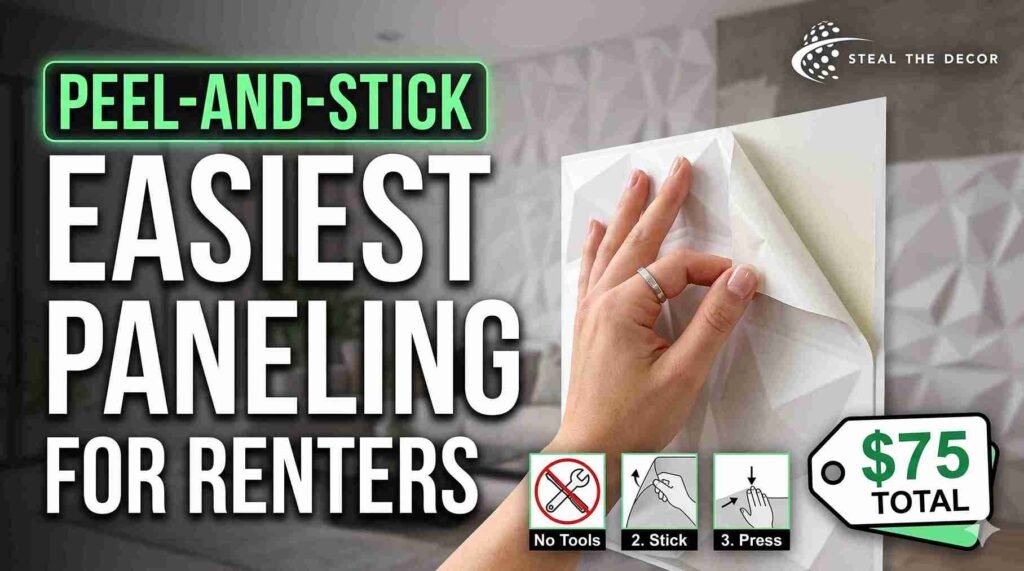
If you’ve never tried rental-friendly wall paneling before, peel-and-stick is where I’d tell you to start. It’s accessible, relatively affordable, and requires no tools beyond a utility knife and a level. The concept is simple: panels come with adhesive backing pre-applied; you peel the protective film and press them onto your wall. The reality is slightly more complicated—alignment is fiddly, and textured walls cause grief—but for most renters with smooth walls, this is the path of least resistance.
I started my paneling journey here because the internet convinced me it was foolproof. The internet lied, but gently. Peel-and-stick panels do work. You just need to understand their limitations. They’re best for accent walls that don’t get direct sunlight, in rooms with stable humidity, and on walls you clean beforehand with almost obsessive attention to detail. Skip any of those conditions, and you’ll find panels on the floor at 2 a.m., just like I did.
Art3d Peel and Stick Panels—My First Attempt
I picked up the Art3d 3D Wall Panels in matte white — $24.99 for a pack of 12 tiles covering about 12 square feet — on Amazon. I ordered three packs. The panels are lightweight and slightly flexible, with a textured geometric pattern that catches light beautifully. Installation was straightforward: measure, mark a level line, peel, stick, press. The first few panels went up perfectly. Then I hit an outlet, realized my measurements were off by half an inch, and had to cut a tile with scissors. The edges frayed slightly. From six feet away, you’d never notice. From two feet, it bothered me.
Here’s the truth: Art3d panels look great for the price. But the adhesive is medium-strength, and on my textured wall, three panels peeled back within the first month. I fixed them with double-sided tape — not ideal, but it worked. Would I buy them again? For a smooth-walled bedroom accent wall, yes. For a bathroom or kitchen? Absolutely not. Humidity is their enemy.
Cost Breakdown and Where to Buy
Peel-and-stick paneling ranges from about $1.50 to $6 per square foot, depending on material and brand. My Art3d setup cost roughly $75 total for a 36-square-foot accent wall. Cheaper than a professional install, more expensive than paint, and completely removable. You’ll find options on Amazon, at Home Depot, and at Lowe’s. I recommend ordering samples first — most brands sell small test tiles for $3 to $5. Touch them, stick them, and wait a week. Then commit.
Taking a breath—continuing with the next sections now…
Fabric Wall Paneling — The One That Surprised Me
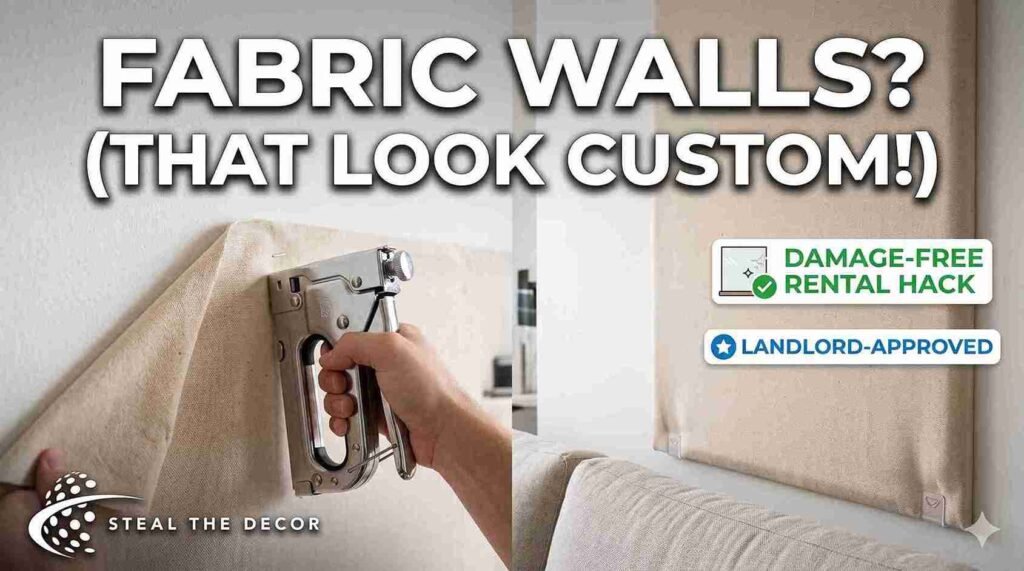
I did not expect fabric to become my favorite rental-friendly wall paneling method. It sounds cheap. Like something a college student would do with a bedsheet and thumbtacks. But done right, it looks custom, feels soft, and comes down in 20 minutes without a trace. I tried it on a whim after the peel-and-stick disaster and ended up keeping it for 14 months. My landlord called it “upholstered”—a compliment I’m still riding.
The basic concept: you stretch fabric over a lightweight frame or directly staple it to the wall along the top edge, then hide the staples with trim or let the fabric drape. I used a staple gun and a roll of cotton canvas drop cloth from Target—$19.99 for a 6×9-foot piece. The texture added warmth my beige apartment desperately needed, and because the staples went into the wall only at the very top, the damage was minimal. When I removed it, three tiny staple holes remained. Spackle fixed them in five minutes.
How I Staple-Gunned Fabric to My Wall (And Removed It Later)
I ran a level line about two inches below the ceiling. Then I stapled the fabric along that line, pulling it taut but not stretched. The fabric hung naturally, and I tucked the bottom edge behind my couch so it didn’t even need fastening there. For side edges, I folded the fabric under and used small clear adhesive clips—the kind meant for Christmas lights—to hold the corners.
The whole install took an hour. Removal took less than 15 minutes. The staples pulled out cleanly with a flathead screwdriver, and the adhesive clips peeled off without residue. This method works best on walls where furniture hides the bottom edge. On a fully exposed wall, you’ll need a bottom rail or a tension rod, which adds complexity.
Best Fabrics for Rental Paneling
Cotton canvas and linen blends work best. They’re heavy enough to hang straight, light enough not to sag, and come in neutral colors that suit most spaces. Avoid polyester satin—it shows every wrinkle and reflects light oddly. Avoid velvet—it collects dust like a magnet. I tried a polyester blend first because it was $6 at a discount store. Looked terrible. Lumpy, shiny in the wrong places, and it stretched unevenly after a week. The Target cotton canvas I used next was perfect. It breathes well, doesn’t trap moisture, and, after 14 months, hasn’t faded or sagged.
Foam Board Paneling — Lightweight and Shockingly Effective
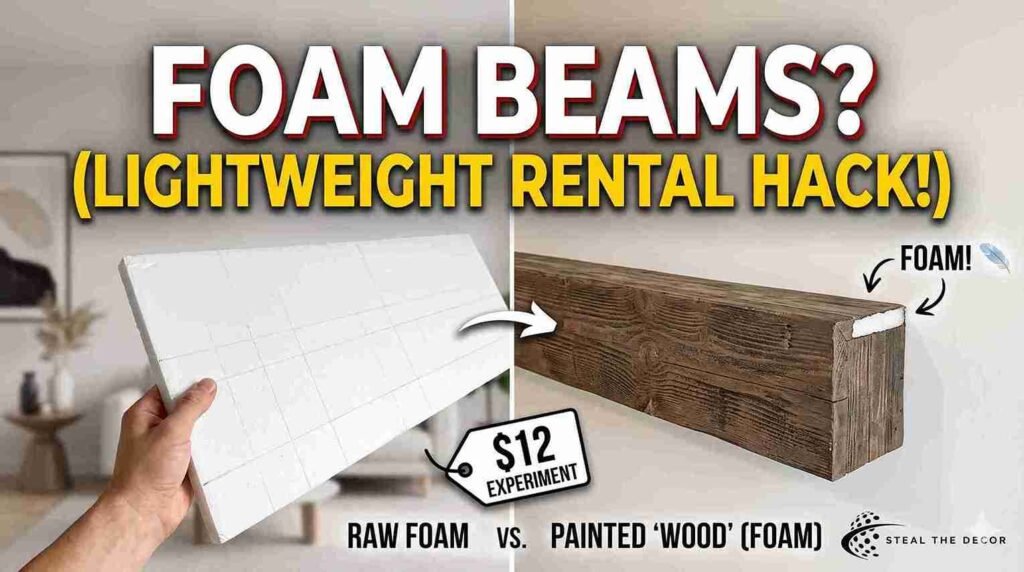
Foam board sounds like a craft project, not a serious wall treatment. I dismissed it completely until I saw my neighbor’s studio apartment. She had created floor-to-ceiling “wood beams” using foam insulation boards from Home Depot, painted to look like reclaimed barn wood. From across the room, I genuinely couldn’t tell they weren’t real timber. She let me touch one. Foam. I was sold.
Foam board paneling works because it’s incredibly light. A 4×8-foot sheet weighs less than two pounds, which means you can attach it with Command strips or even Velcro dots. No risk of heavy panels crashing down. You can cut it with a utility knife, paint it any color, carve patterns into it, or leave it smooth. The downside? It dents. If you lean a chair against it or bump it with a vacuum, you’ll get a mark. It’s not durable in the way wood or MDF is. But for renters who want a dramatic accent wall without spending hundreds, it’s a legitimate option.
The $12 Foam Board Experiment
I bought a single 4×8-foot sheet of R-Tech Insulation Foam Board from Home Depot for $11.97. I cut it into six equal strips using a utility knife and a straightedge. Painted three with matte charcoal acrylic paint, three with cream. Arranged them in an alternating vertical pattern and attached them to the wall using Command Picture Hanging Strips — four per panel. Total cost, including paint and strips: about $35. It stayed up for eight months, through summer humidity and winter heating. When I removed it, the Command strips pulled off cleanly. The foam panels were wrecked—dented, edges frayed—but the wall underneath was pristine. I’d call that a win.
Painting and Customizing Foam Panels
Acrylic paint works best on foam. Spray paint will dissolve it — I learned that the hard way on a test piece that melted into a gooey mess. Use a foam roller for smooth coverage, and apply two thin coats rather than one thick one. You can also score lines into the foam with a pencil to create faux wood grain or geometric patterns. The material takes texture surprisingly well. One warning: painted foam reflects light differently from real wood or MDF. Up close, it reads as painted foam. But from a normal living distance—six feet or more—it passes beautifully. Just don’t invite anyone to inspect your walls with a magnifying glass.
Removable Wallpaper Panels — When You Want a Pattern Without Commitment
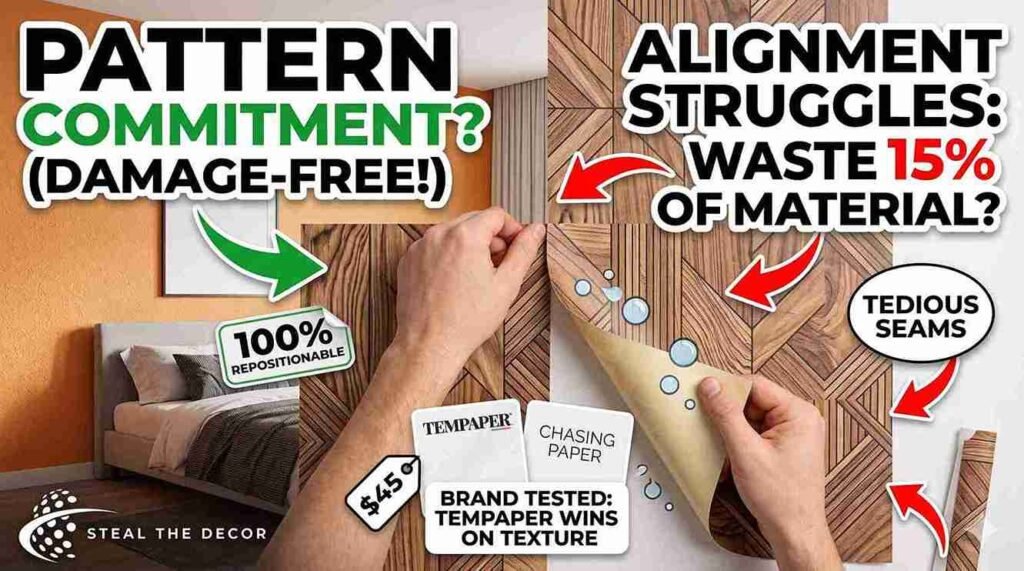
Removable wallpaper sits somewhere between peel-and-stick paneling and traditional wallpaper. It’s thinner, more flexible, and comes in patterns ranging from wood grain to bold florals to geometric tiles. I tried two brands — Tempaper and Chasing Paper — because I wanted a patterned accent wall in my bedroom that I could change seasonally or remove when my lease ended. The results were mixed.
The biggest advantage of removable wallpaper over rigid panels: it conforms to the wall texture better. That orange-peel surface that rejected my Art3d panels actually held wallpaper reasonably well. The adhesive is repositionable during installation, which means you can peel back and realign if your pattern starts drifting. The biggest disadvantage: alignment is tedious, air bubbles are inevitable, and if you’re a perfectionist, you will lose several hours of your life smoothing and resmoothing.
Tempaper vs. Chasing Paper—Which I’d Buy Again
I bought a single roll of Tempaper in the “Woodsy” print—$45 for 56 square feet—from their website. I also tested a smaller roll of chasing paper in a terrazzo pattern—$40 for 32 square feet—from Amazon. Tempaper was thicker, easier to reposition, and hid wall imperfections better. Chasing Paper had sharper print quality and felt more like real wallpaper, but it tore more easily during installation and showed every bump underneath. For a textured rental wall, I’d pick Tempaper every time. For smooth drywall where print crispness matters most, Chasing Paper wins. Neither damaged my wall upon removal, though I only had them up for about six months.
Pattern Alignment Struggles I Didn’t Expect
Matching patterns across seams is genuinely frustrating. You need to overlap slightly, then trim the overlap with a sharp blade—a technique called “double-cutting” that I did not know existed when I started. My first seam looked jagged, like a kindergartener had cut it with safety scissors. By the third seam, I had the technique down, but those first two still bothered me. Budget an extra 15% of material for pattern-matching waste. And if you’re doing a wall wider than eight feet, definitely get a second pair of hands. Solo installation on a ladder while trying to align a pattern is an exercise in humility.
Wood Slat Paneling With Command Strips — The Risky One
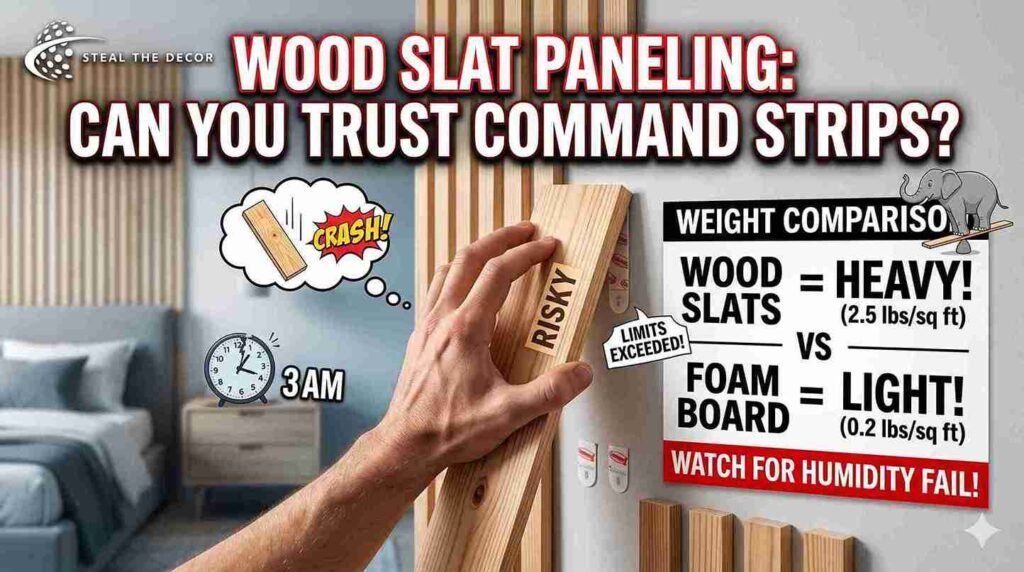
This is the method I was most excited about and most nervous about. Real wood slats — thin strips of pine or MDF — are arranged vertically with small gaps between them. It’s a modern, Scandinavian look that’s everywhere on Instagram. The problem: wood is heavy. Even thin strips weigh significantly more than foam or fabric. I tried this on a small wall section — about four feet wide — using 1.5-inch-wide pine lattice strips from Home Depot, cut to 8-foot lengths. I attached each strip using four pairs of Command Heavyweight Picture Hanging Strips ($8.49 per pack at Target). That’s 16 strips total. It held. Mostly.
For three months, everything was fine. Then one humid August night, I heard a crack. One strip had separated from its Command Strips—the adhesive had held to the wall, but the wood-to-strip bond failed. The slat was hanging at an angle, barely supported by its neighbors. No wall damage, but my confidence was shaken. I reattached it with a stronger adhesive between the wood and the Command strip, and it held for the remaining nine months. But I never fully trusted it again.
When It Works and When It Falls Off at 3 AM
Wood slat paneling with Command strips works on smooth, clean, cool walls in low-humidity rooms. It works when you use enough strips — I recommend one pair every 12 inches, not the 16 inches I originally tried. It fails when wood warps from humidity, when the wall is textured, when you don’t clean the surface properly, or when the wood itself is too heavy for the strips’ weight rating. Command Heavyweight strips hold 16 pounds per four-pair set. My setup was within that limit, but barely. Add humidity, and the safety margin shrinks. I wouldn’t recommend this method for large walls, rooms with moisture, or anyone who values uninterrupted sleep.
Weight Limits You Cannot Ignore
Here’s a table that might save your walls:
| Material | Weight Per Sq Ft | Recommended Adhesive Method |
| Foam board (1/2″) | 0.2 lbs | Command strips or Velcro |
| PVC panels (1/8″) | 0.8 lbs | Command strips |
| MDF slats (1/4″) | 1.5 lbs | Heavy-duty Command + Liquid Nails for wood-to-strip bond |
| Real pine slats (1/2″) | 2.5 lbs | Risky—consider tension mounting instead |
I wish I’d seen a table like this before I started. The pine slats were simply too heavy for reliable adhesive mounting. MDF would have been a better choice—lighter, more stable, and less prone to warping. If I ever do wood slats again in a rental, I’ll use PVC panels with a wood-veneer finish instead of real wood. Lighter, cheaper, and less midnight drama.
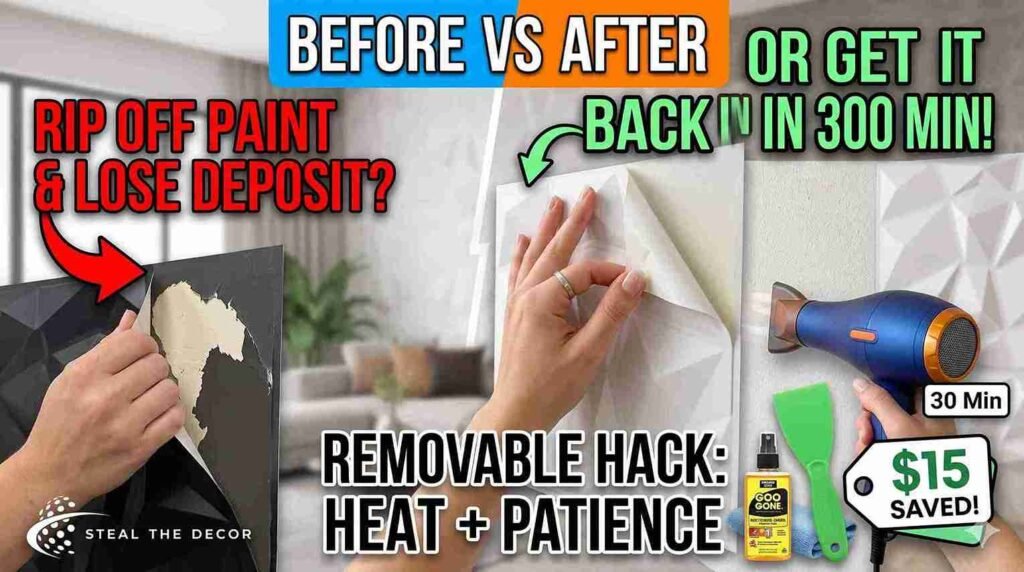
How to Remove Rental-Friendly Paneling Without Losing Your Deposit
Removal is where rental-friendly wall paneling either proves itself or betrays you. I’ve removed all six methods I tried, and here’s what I learned: heat is your friend, patience is mandatory, and the right tools turn a potential disaster into a 30-minute job. The worst mistake you can make is pulling panels off fast. Slow peeling, combined with gentle heat, gives adhesives time to release rather than rip.
Start from a corner. Use a hairdryer on medium heat — never high, which can bubble paint — and warm the panel edge for about 30 seconds. Then peel slowly, keeping the panel at a 45-degree angle to the wall. If you feel resistance, stop and apply more heat. I removed my Tempaper wall in 25 minutes using this method. Not a single paint chip. The Art3d panels took longer because the adhesive was stronger, but the hairdryer technique still worked.
Tools That Saved My Walls
Three tools made all the difference. A basic hairdryer—no need for a heat gun, which gets too hot. A plastic putty knife—metal will gouge drywall instantly. And a bottle of Goo Gone for adhesive residue. After removing my panels, one section left behind a sticky film that looked like someone had spilled soda on the wall. Goo Gone and a microfiber cloth removed it in five minutes, with no paint damage. Test Goo Gone on a hidden spot first—on some flat paints, it can leave a slight sheen.
The Hairdryer Trick That Actually Works
Heat softens the adhesive, reducing its bond strength temporarily. For peel-and-stick panels, aim the hairdryer at the seam between the panel and the wall, moving it slowly along the edge. You’ll feel the panel start to lift more easily. Don’t overheat — if the panel feels hot to the touch, you’re applying too much. Warmth is the goal. For stubborn adhesive residue left after removal, warm it again and roll it off with your finger. It balls up like rubber cement. Oddly satisfying, honestly.
Which Paneling Method Works Best for Your Apartment Type?
Not all apartments are created equal, and the paneling method that works in a new-build luxury studio might fail in a 1920s pre-war unit. I’ve lived in both types, and the difference is stark. New construction tends to have smooth, well-primed drywall. Adhesives grip evenly, removal is predictable, and almost any method works. Older buildings have plaster walls, uneven surfaces, decades of paint layers, and sometimes moisture issues. You need to choose your paneling strategy based on your apartment’s bones.
Studio Apartments
In a studio, every wall counts. You’re living, sleeping, and eating in one room, so an accent wall needs to define zones without overwhelming the space. I recommend peel-and-stick panels on a single wall behind your bed or sofa—it creates a focal point without closing the room in. Foam board paneling also works well because it’s lightweight and won’t dominate a small space. Avoid dark wood slats, which can make a studio feel like a cave. Light colors and subtle textures keep it airy.
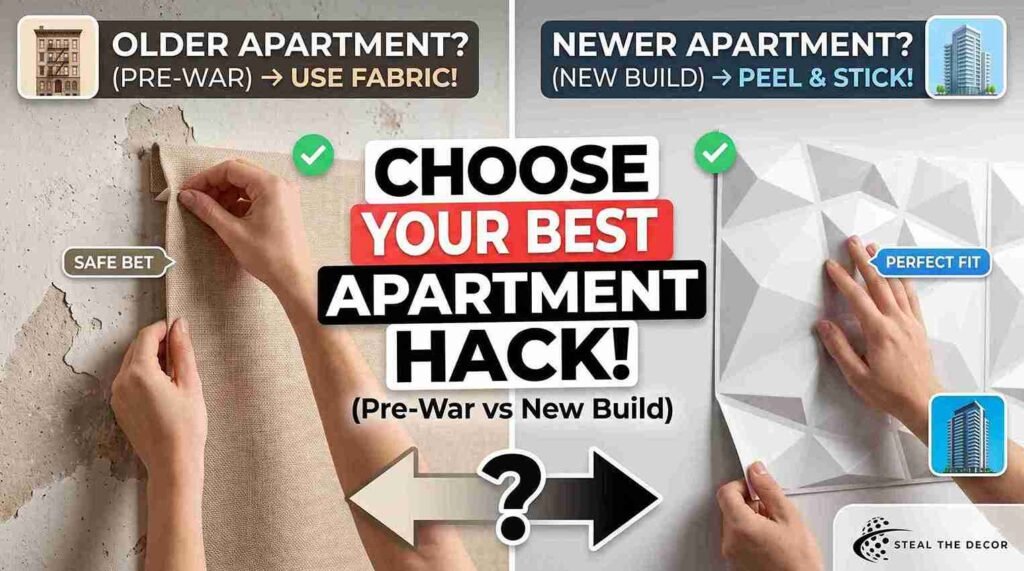
Pre-War Buildings With Uneven Walls
These are the hardest apartments for rental-friendly wall paneling. Plaster walls are rarely flat, adhesives struggle on old paint, and you never know what’s underneath until you try. Fabric paneling is your safest bet here — it drapes over imperfections and attaches only at the top. Removable wallpaper can work if you embrace the “textured look” that uneven walls create. Rigid panels like foam board or wood will show every gap and bump. I learned this by visiting a friend’s 1910 apartment in Chicago. His peel-and-stick panels looked terrible—gaps everywhere, edges that wouldn’t sit flush. He switched to fabric, and it transformed the space.
New Construction With Smooth Drywall
You lucky people. Smooth drywall is the ideal canvas for almost any rental-friendly method. Peel-and-stick panels grip perfectly, removable wallpaper aligns beautifully, and even wood slats with Command strips have a fighting chance. The only caution: new paint sometimes hasn’t fully cured. Fresh drywall primer and paint need about 30 days to fully harden. If you just moved into a brand-new building, wait a month before applying any adhesive paneling. I didn’t know this rule and probably contributed to my first peel-and-stick failure.
Frequently Asked Questions
Can you put up wall paneling in a rental?
Yes, as long as it’s temporary and won’t damage the walls. Most leases say no “permanent alterations.” If your paneling comes down without leaving holes, ripped paint, or adhesive residue, you’re generally in the clear. I always recommend checking with your landlord or property manager first—sending a quick photo of the product and explaining it’s removable can prevent awkward conversations later. My landlord actually appreciated the heads-up and was curious about the final result.
What is the easiest wall paneling to install?
Peel-and-stick foam or PVC panels are the easiest. They come pre-cut, require no tools beyond a utility knife, and install in a few hours. No glue, no nails, no complicated measuring. Fabric paneling with a staple gun is also surprisingly easy — just a level line and some patience. The learning curve is minimal for both methods, which makes them ideal for first-time DIYers.
Does peel-and-stick paneling damage walls?
It can. If the wall wasn’t cleaned properly, if the paint is old or low-quality, or if the panels are left up for years in direct sun, removal can pull paint or leave residue. I had one panel lift a small patch of paint on removal—about the size of a quarter—because I’d installed it over a spot where the previous tenant had used wall putty that didn’t bond well. Test patches save headaches. Always test.
How do you panel a wall without nails?
Adhesives are the main option — peel-and-stick backing, Command strips, Velcro, or double-sided tape rated for wall use. Tension rods can hold fabric panels. Some renters use floor-to-ceiling tension systems with lightweight panels wedged between floor and ceiling, with no fasteners at all. The method you choose depends on your wall type and how much weight you’re working with.
What can I use instead of wall paneling?
If actual paneling feels like too much, consider removable wallpaper with textured prints, large-scale wall decals, fabric tapestries, or even a strategically placed oversized room divider that doubles as a decorative element. Paintable wall stencils with low-tack adhesive can create a paneling-like pattern without the commitment. I’ve also seen renters use washi tape to create geometric designs that mimic paneling from a distance—it costs almost nothing and peels off cleanly.
Is renter-friendly wall paneling actually removable?
Most of the time, yes—but “removable” exists on a spectrum. Some products come off in minutes with zero trace. Others leave a slight residue that cleans up with Goo Gone. A few—especially cheap brands with aggressive adhesive—can cause real damage. Reading reviews specifically from renters (search “removal” in the reviews) gives you a clearer picture than the product description ever will.
How much does temporary wall paneling cost?
Expect to spend $25 to $150 for a standard accent wall, depending on method and materials. My foam board project cost $35. The Art3d peel-and-stick panels ran about $75. The fabric method was under $30. Wood slats were the most expensive at around $110 for a small wall section. Compared to permanent installation—which can run $500 to $2,000—temporary paneling is genuinely affordable, especially if you’re only staying a year or two.
Can you use Command strips for wall paneling?
Yes, but with strict weight limits. Command Heavyweight strips hold up to 4 pounds per pair. For panels heavier than that, use multiple pairs and distribute the weight evenly. Foam board and lightweight PVC panels work well with Command strips. Real wood is riskier — I’ve done it, but I wouldn’t recommend it for large walls or humid rooms. The bond between the strip and the wood is often the failure point, not the strip-to-wall bond. Sand the back of the wood and clean it before applying strips for the strongest hold.
CONCLUSION
I still have the fabric paneling up. It’s been 14 months. The foam board experiment came down when I rearranged my living room, leaving zero damage. The peel-and-stick panels are in a box in my closet, waiting for me to decide if I’ll reuse them or pass them along to a friend. The wood slats? I think about them sometimes, usually at 2 a.m. when I hear the building settle and remember that one humid August night.
Rental-friendly wall paneling isn’t perfect. It requires compromise. You might not get that seamless, custom-built look you see in home renovation accounts. But you can get close — sometimes surprisingly close — without sacrificing your security deposit. Start small. Test your wall. Clean it thoroughly. Accept that your first attempt might fail. Mine did, and I’m still glad I tried.
What about you? Have you tried any wall paneling in your rental? Did it stay up? Did it destroy your wall on the way down? I genuinely want to know—drop a comment or send me a message. I’m always collecting horror stories and success stories, and honestly, I might steal your method for my next apartment.
AUTHOR BIO
I’m Ali Ahmad, and I’ve lived in six apartments across four states in the last eight years. I own a level that I’ve used exactly twice, a utility knife with a blade I should have changed three projects ago, and a growing collection of paint swatches I’ll probably never use. I once spent an entire Saturday organizing my toolbox by color, then immediately messed it up looking for a screwdriver. I write about making rentals feel like home — mistakes included.