
Table of Contents
Builder-grade brass handles had been mocking me from every cabinet door in my rental kitchen for two years—sticky, dented, and the exact shade of gold nobody has chosen on purpose since 1998. I hated them. Genuinely hated them. Replacing kitchen handles felt like the obvious fix, right up until I tried to do it without drilling a single new hole into cabinets that aren’t mine to wreck—because they’re not, and yours probably aren’t either.
Over three weekends, I tested nine different pulls and knobs, measured more screw holes than I’d like to admit, and spent exactly $96.41 figuring out which hardware would actually line up with what was already there. Not gonna lie — I assumed this would take one weekend, tops. It didn’t. This guide walks through every method I tried—what worked, what didn’t, and the renter-safe approach that finally made my kitchen look like I didn’t resent it.
⚡ The Short Version: Renters can replace kitchen handles without losing their deposit by matching the new hardware’s center-to-center measurement to the existing screw holes — no drilling required. Brands like Amerock and Liberty Hardware make pulls in the same common spacings (3″, 3.5″, and 4″) used on most builder-grade cabinets, so a direct swap is usually possible. Budget $25–$90 total, depending on how many cabinets you’re updating, and always keep your original hardware in a labeled bag to reinstall before move-out.
What Counts as “Renter-Safe” When Replacing Kitchen Handles
Renter-safe hardware swaps — whether you’re dealing with handles and knobs, knobs and pulls, or handles and pulls — follow one non-negotiable rule: the new pull or knob has to use the exact screw holes already drilled into your cabinet doors and drawers. One rule. That’s it. No new holes means no patching, no spackle, and nothing for your landlord to flag at move-out inspection.
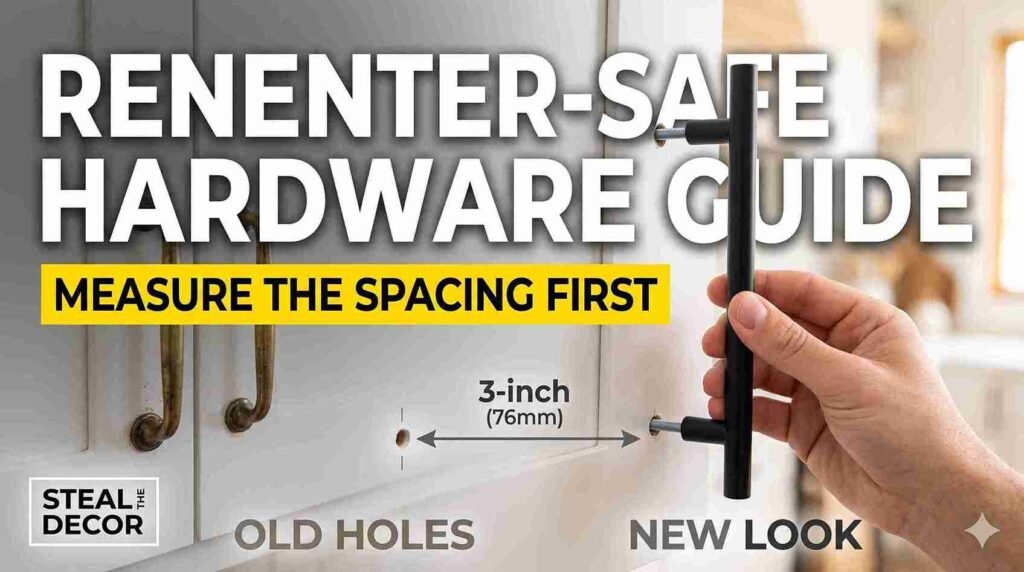
The number that makes or breaks this is the center-to-center measurement—the distance between the two screw holes on a bar-style pull, measured from the middle of one hole to the middle of the other. Most builder-grade rental kitchens use one of a few standard spacings: 3 inches (76mm), 3.5 inches (89mm), or 4 inches (96mm). If your current pulls match one of those, you have a huge selection of renter-friendly kitchen cabinet handles and cabinet knobs to choose from. If you’ve got single-hole knobs instead, you’re working with a completely different, simpler swap.
Once spacing is sorted, the rest comes down to look and feel: sleek matte black pulls read as modern and timeless, brushed brass adds personality without a permanent commitment, and a basic stainless steel knob is a cost-effective, ergonomic option that works across all cabinets regardless of finish. Even on plain white cabinets or darker cabinetry, the right new cabinet hardware can make a rental kitchen feel like a new kitchen without an actual renovation. (Cabinet hinges are a separate fix entirely — this guide sticks to knobs and pulls.)
Bottom line: always measure before you fall in love with any handle online — the spacing is the entire game.
Does Matching Your Existing Screw Holes Actually Work? (Skeptic Check)
Does it actually work? Yes — most of the time. Here’s exactly where it holds up and where it doesn’t.
It works if your current pulls measure out to 3″, 3.5″, or 4″ center-to-center—which covers the vast majority of apartment and IKEA-style kitchens built in the last 20 years. In that case, you can find a near-identical-spec replacement from almost any cabinet hardware brand on Amazon.
It doesn’t work if your unit has older, hand-drilled, or nonstandard cabinets where the spacing falls somewhere odd, like 2 13/16 inches. I ran into exactly this in one drawer of my own kitchen, and no off-the-shelf pull matched it. Not one. It also fails if you try to go from a single knob to a two-hole pull (or vice versa) without filling the old holes first—that’s the one swap that actually forces you to drill new holes.
Actually—scratch that. It’s not that it “fails,” exactly. It just stops being a no-drill project the moment you switch hole patterns. Worth knowing before you fall for a knob-to-pull upgrade online.
Bottom line: measure every single door and drawer individually. Don’t assume they all match. Mine didn’t.
9 Best Kitchen Handles and Pulls for Renters
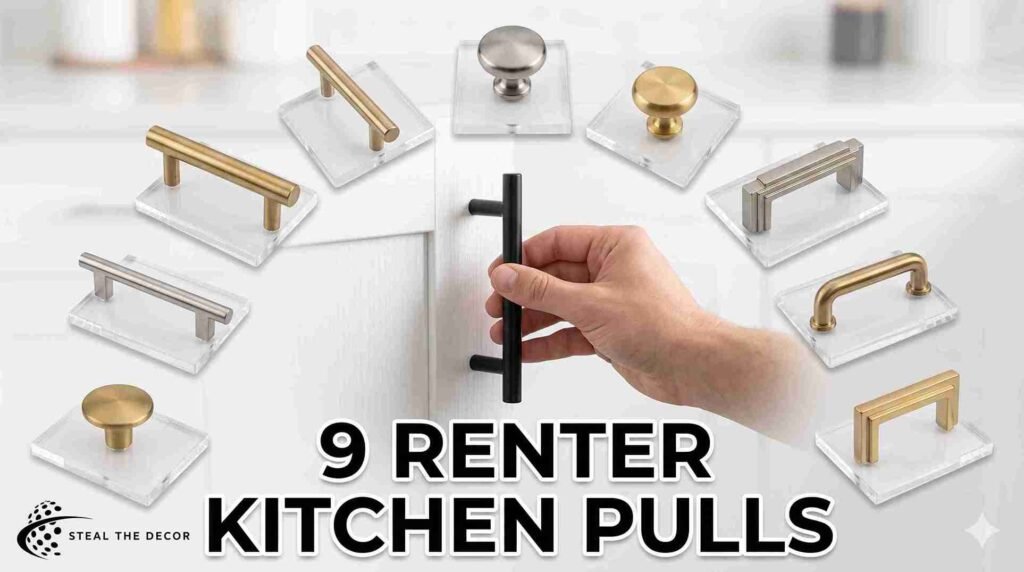
Shopping for new cabinet hardware can get overwhelming fast, especially once you realize door hardware and drawer hardware aren’t always interchangeable. I remember opening the third shipping box that week and thinking, “This is genuinely too many handles for one kitchen.” It was. But it meant I didn’t have to guess. After measuring everything in my kitchen, I ordered nine different options across doors and drawers—including a few dedicated drawer pulls—to test fit, finish, and feel. Here’s how they actually performed.
- Amerock Westerly Bar Pull — Available in 3″, 3.5″, and 4″ spacings, so it covers almost any standard rental cabinet. Comes in matte black and stainless steel finishes, both of which hold up well to daily use. (typically $4–$8 per pull)
- Liberty Hardware Forged Bar Pull — Slightly heavier feel, good for renters who want hardware that doesn’t feel cheap. Comes in brushed nickel and matte black. (typically $5–$9 per pull)
- Top Knobs Sanctuary Bar Pull — The closest I found to a true brushed brass without the price tag of solid brass. Slightly higher cost but worth it for the look. (typically $9–$14 per pull)
- GlideRite Hardware Cabinet Pulls — The most budget-friendly option I tested, sold in 10- and 25-packs, which made it the cheapest way to redo an entire kitchen at once. (typically $20–$35 for a 10-pack)
- Franklin Brass Step Bar Pull — A more architectural, squared-off profile if you want something less generic than a basic bar. (typically $6–$10 per pull)
- Hickory Hardware Studio Bar Pull — Good middle ground on price and finish options; available in enough spacings to match most standard cabinets. (typically $5–$9 per pull)
- Cosmas Cabinet Hardware Bar Pull — Lightweight and easy to install solo, which mattered on the weekend I did this without help. (typically $3–$6 per pull)
- IKEA Replacement Handles (Enerud/Similar Lines)—If your kitchen came with IKEA cabinets, IKEA’s own handles are sized to match without any guesswork—the simplest IKEA cabinet upgrade I tried. (typically $3–$10 per pull)
- Knobwell Solid Brass Knob — For cabinets with single-hole knobs instead of pulls; real solid brass, noticeably nicer in hand than the plated options. A quick polish every few months keeps it looking new instead of dull. (typically $4–$7 per knob)
Bottom line: if you only try one thing from this list, start with whichever brand offers your exact center-to-center spacing. Fit beats finish. Every time.
💡 Pro Tips for Renters:
- Buy one pull first and test-fit it before ordering a full set — return shipping on 20 mismatched pulls is its own kind of awful.
- Keep the original screws if the new hardware’s screws are too short for your cabinet door thickness; mismatched screw length is the #1 reason swaps wobble.
- Photograph your cabinets before you remove anything, in case you need to prove the original condition later.
- Drawer fronts and cabinet doors aren’t always the same thickness — measure both separately, not just one.
- A small parts organizer (or labeled sandwich bags) keeps every old screw and pull sorted by cabinet, so reinstalling at move-out takes 20 minutes instead of an afternoon.

Step-by-Step: How to Replace Kitchen Handles Without New Holes
If you’re replacing cabinet hardware across a whole kitchen, this is exactly how to install cabinet hardware without creating a single new hole. And if you’ve never used a tape measure for anything more important than hanging a picture, don’t worry. This is easier than it looks.
Tools and materials you’ll need: — A tape measure — A Phillips or flathead screwdriver — A pair of pliers, for any old, stuck screws — Painter’s tape, for marking spots before you measure and mark anything in pen — A simple paper template or installation jig, if you’re working across a lot of cabinets
That’s it. Nothing fancy, nothing you don’t already half-own.
Step 1: Measure and mark your current hardware’s center-to-center spacing. Use a tape measure or ruler to measure from the center of one screw hole to the center of the other on a bar pull, or note that you have a single-hole knob instead. Write the measurement down per cabinet—don’t trust your memory across nine drawers.
Step 2: Remove the old hardware. Unscrew from the inside of the cabinet door or drawer front using a Phillips or flathead screwdriver, holding the front of the pull steady so it doesn’t drop and scuff the cabinet face. If a screw is stuck, a pair of pliers on the shank from the back usually does the trick without stripping it. Keep a small towel underneath to catch dropped screws.
Step 3: Match new hardware to your exact spacing and check the width. Cross-reference your measurements against the spacing options listed for each product above before ordering anything, and double-check that a longer pull’s overall width won’t overhang a narrow cabinet door or drawer front. If you’re ever placing a pull on a drawer with no prior hardware, a good default is centering it 2 to 3 inches from the top edge or roughly 3 inches from the bottom on taller cabinet doors.
Step 4: Test-fit one piece before committing to the full set. Install a single pull or knob, align it so it sits level and flush against the door, and check that the screws thread cleanly.
Step 5: Install the rest, threading the mounting screws from the back. Use the included screws, or your original ones if the new ones are too short—cabinet doors and drawer fronts can differ in thickness even within the same kitchen, so don’t assume one screw length fits every spot. Some kits include breakaway screws designed to snap to length, which is handy if your doors vary. Tighten by hand until snug; a power drill on full speed is the fastest way to strip the threads.
Step 6: Bag and label your old hardware by cabinet location. This is the step renters skip and regret—you’ll want everything organized when it’s time to reinstall the originals before you move out.
Bottom line: installing new pulls is the fast part. Ninety minutes—cabinets—that’s all the actual installation took for a full kitchen once I’d already done the test fit. Measuring is what eats the time. Not installing.
Mistakes Renters Make When Swapping Cabinet Hardware
Buying before measuring. This is the mistake I made first — I ordered eight pulls based on a “standard” 3″ spacing assumption, and three of my cabinets turned out to be 3.5″. Measure every door or drawer individually, not a sample.
Assuming all “modern-looking” pulls use the same spacing. Style and spacing are unrelated; two knobs and pulls that look nearly identical can have completely different hole spacing.
Tossing the old hardware. It’s tempting once it’s off, but most leases expect original fixtures back at move-out. Bag them immediately—don’t mix your old ones in with the new ones.
Using the wrong screw length. Too-short screws won’t grip; too-long screws can poke through a thin cabinet door. Always test one before installing the rest.
Skipping the test-fit on one cabinet. Ordering a full 10-pack of handles and pulls before confirming fit is how I ended up with three that I had to return.
Forgetting cabinets and drawers can differ in thickness. Even within one kitchen, drawer fronts are sometimes thinner than cabinet doors, which can change which screws actually work—whether you’re installing a knob or pull.

Kitchen Handles We Actually Recommend for Rentals
| Product / Method | Price Range | Ease of Use (1–5) | Damage Risk | Best For | Our Rating |
| Amerock Westerly Bar Pull | $4–$8 | ⭐⭐⭐⭐⭐ | ✅ None | Standard 3″/3.5″/4″ cabinets | 4.7/5 |
| Liberty Hardware Forged Bar Pull | $5–$9 | ⭐⭐⭐⭐ | ✅ None | Heavier, higher-end feel | 4.5/5 |
| Top Knobs Sanctuary Bar Pull | $9–$14 | ⭐⭐⭐⭐ | ✅ None | Brushed brass look on a budget | 4.6/5 |
| GlideRite Hardware Cabinet Pulls | $20–$35 (10-pack) | ⭐⭐⭐⭐⭐ | ✅ None | Whole-kitchen budget refresh | 4.4/5 |
| IKEA Replacement Handles | $3–$10 | ⭐⭐⭐⭐⭐ | ✅ None | IKEA-brand cabinets specifically | 4.8/5 |
| Knobwell Solid Brass Knob | $4–$7 | ⭐⭐⭐⭐ | ✅ None | Single-hole knob swaps | 4.5/5 |
Bottom line: for most renters, start with whichever option matches your exact spacing and budget—every product on this table is a no-drill, reversible swap when installed correctly.
What to Check With Your Landlord Before Swapping Hardware
- Re-read your lease for any clause specifically addressing cosmetic changes to fixtures or cabinetry.
- Confirm hardware swaps fall under “easily reversible” changes most leases already allow, rather than “alterations” that need written approval—since you won’t have to patch anything afterward.
- Take dated photos of the original hardware before removing anything.
- Ask your landlord or property manager directly if you’re unsure — a two-line email creates a paper trail either way.
- Keep every original screw and pull, not just the ones that look reusable.
- Check your move-out inspection checklist (if your building provides one) for any specific hardware requirements.
- When in doubt, do a quick search for tenant rights resources in your state—cosmetic, reversible changes are treated differently from structural ones almost everywhere.
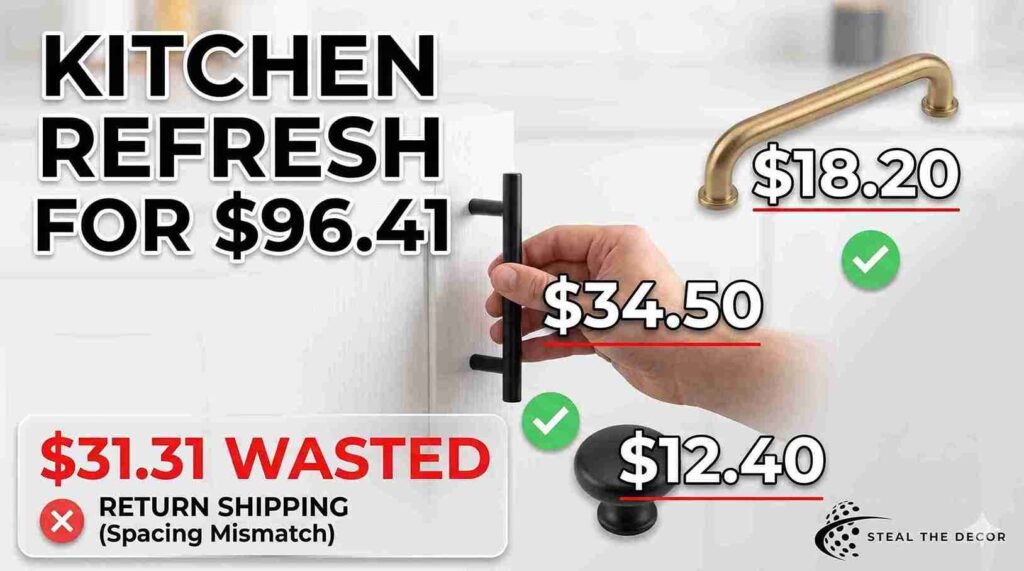
Real Results: What I Got for $96.41
Across nine cabinets and drawers, here’s exactly where the money went: $34.50 on the Amerock Westerly pulls for the main run of cabinets, $18.20 on Top Knobs Sanctuary pulls for two statement drawers, $12.40 on a single Knobwell knob for the lazy Susan cabinet, and $31.31 on shipping and the one return I had to make after a spacing mismatch. Total: $96.41, plus about 90 minutes of install time once I’d done my measuring homework.
What worked: matching center-to-center spacing exactly, every time, with zero new holes. What didn’t: assuming spacing based on how a pull looked online—that single bad guess accounted for nearly a third of my total spend in return shipping.
FAQ: Replacing Kitchen Handles for Renters
What size are most kitchen cabinet handles?
Most builder-grade rental kitchens use bar pulls spaced 3″, 3.5″, or 4″ center-to-center or single-hole knobs. Measuring your current hardware is the only reliable way to know which size you have
How do I measure center-to-center spacing?
Measure from the center of one screw hole to the center of the other on your current pull, in inches or millimeters. For single knobs, you only need to confirm it’s a one-hole design rather than a spacing measurement
Is replacing kitchen handles safe for a rental?
Yes, as long as the new hardware uses your existing screw holes. It’s one of the most reversible kitchen updates available, since you can reinstall the originals before move-out with no patching required.
Does swapping cabinet hardware leave holes or residue?
No, when the new hardware matches your existing spacing exactly. The only risk of new holes comes from switching hole patterns entirely, like going from a knob to a two-hole pull.
How much does it cost to replace kitchen handles?
Budget roughly $25–$90 for a full rental kitchen, depending on the number of cabinets and the brand you choose. Multi-packs from brands like GlideRite Hardware bring the per-pull cost down significantly.
What’s the best brand for renter-friendly kitchen pulls?
Amerock and IKEA’s own replacement lines were the most consistent fits across standard spacings in my testing, with Top Knobs as the best brushed-brass option for a slightly higher price.
What if the new handles don’t line up with my screw holes?
Return them and remeasure — don’t force it. Mismatched spacing is the single most common (and most avoidable) mistake renters make with this swap.
🔑 Key Takeaways
- Amerock and Liberty Hardware both manufacture bar pulls in the standard 3″, 3.5″, and 4″ center-to-center spacings found on most builder-grade rental kitchen cabinets.
- Matching your existing screw holes exactly is what makes a kitchen hardware swap fully reversible and renter-safe, with no drilling or patching required.
- IKEA sells its own replacement handles sized specifically for IKEA cabinetry, making it the most straightforward upgrade path for IKEA-brand rental kitchens.
- A full nine-cabinet kitchen hardware swap costs roughly $25–$90 and takes about 90 minutes once the correct spacing has been measured and confirmed.
- The single most common, most expensive mistake in this project is ordering hardware before measuring center-to-center spacing on every individual cabinet and drawer.
- Original cabinet hardware should be bagged, labeled by location, and kept for reinstallation before move-out to satisfy most rental lease requirements.
Final Thoughts
If there’s one thing this project taught me, it’s that the unglamorous step—measuring every single screw hole before buying anything—is the entire difference between a clean, reversible kitchen refresh and a pile of returns. Once I had my actual spacing nailed down, the swap itself took less time than scrolling through hardware listings. Out of all the ways to update the look of a rental kitchen, this is one of the simplest, most stylish, and most cost-effective DIY moves available — a real kitchen renovation move you can finish in a weekend, not one that needs a contractor.
Have you tried replacing kitchen handles in your own rental? I’d love to hear what spacing your cabinets turned out to be and whether you ran into the same mismatch I did. If you’re tackling the rest of the kitchen next, my full rental kitchen makeover on a budget breaks down everything else I changed without losing a single dollar of my deposit.
All the hardware I tested and recommend is linked above—I’ve installed every single one of these myself.
This post contains affiliate links. If you buy through them, I may earn a small commission at no extra cost to you — it’s how I keep testing this stuff so you don’t have to guess. I only recommend hardware I’ve actually installed and lived with in my own rental kitchen.