
Table of Contents
My landlord has a “no painting” clause that’s written in bold, underlined, and probably screamed at me from the lease agreement. I still wanted exposed brick. Not the real kind—I’m not drilling into studs or mortaring anything in a place I don’t own. The fake kind. The renter-friendly kind. The kind that peels off when you move out, hopefully without taking half the drywall with it. I tried it. It worked. Mostly.
Here’s the thing nobody mentions in those Pinterest-perfect tutorials: faux brick walls in rentals are 30% materials and 70% patience. You’re not just slapping something on the wall. You’re negotiating with your wall texture, your ceiling height, your outlet placement, and your own dwindling attention span. I learned this over a Saturday that turned into a Sunday that turned into me ordering pizza at 11 p.m. while staring at a crooked brick panel I’d already stuck down. Let me walk you through everything—what I used, where I messed up, what I’d do differently, and whether it was even worth it.
Why I Decided My Rental Needed a Brick Wall
It started with a blank wall and too much time on Instagram. My apartment in Austin has what real estate listings call “character” and what I call beige. Beige walls, beige carpet, beige blinds. After two years of staring at the same neutral nothing, I needed texture. Something with depth. Something that didn’t scream “corporate housing.”
I fixated on the exposed brick look. Real brick wasn’t happening—I’d need a mason, a permit, and probably a new landlord. Faux brick panels from big box stores looked promising, but half of them seemed designed for permanent installation. Construction adhesive isn’t exactly lease-friendly. So I dove into the world of peel and stick brick wallpaper, removable brick veneer, and every renter hack forum I could find. What I discovered was a mess of conflicting advice. Some people swore by a certain Amazon brand. Others said it destroyed their walls. Nobody gave a straight answer about textured walls. I decided to figure it out myself.
The goal was simple: a brick accent wall behind my bed that looked decent in photos, cost under $150, and came off clean whenever I moved out. I achieved two of those three. The third one? We’ll get there.
What Is a Faux Brick Wall?
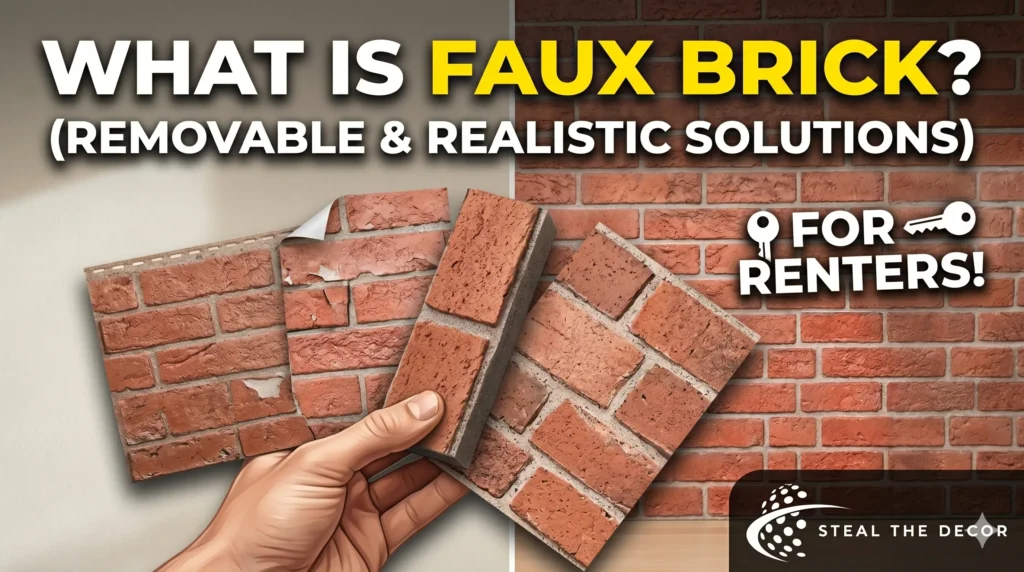
Faux brick wall is a wall treatment designed to replicate the appearance of genuine exposed brick using materials like vinyl panels, peel-and-stick wallpaper, textured wallpaper, or lightweight brick veneer. It creates the visual texture and warmth of real brick without the structural requirements, permanence, or cost.
For renters, this distinction matters enormously. Real brick installation involves mortar, masonry, and permanent structural changes—things that violate pretty much every standard lease agreement. Faux brick solutions are designed to be surface-level, removable, and non-destructive when applied and removed correctly. The key phrase there is “when applied and removed correctly.” I’ve seen Reddit threads where people peeled off their wallpaper and took chunks of drywall with it. That’s not the wallpaper’s fault—it’s usually a prep issue, an adhesive issue, or a “I left this up for seven years in direct sunlight” issue.
The market has exploded with options in the last few years. You can find brick-patterned peel-and-stick rolls at Target, foam brick panels on Amazon, textured wallpaper at Home Depot, and even lightweight brick veneer sheets at Lowe’s. Each has different price points, installation methods, and risk levels for your security deposit. Understanding these distinctions before you buy is what separates a successful renter DIY from a very awkward conversation with your landlord.
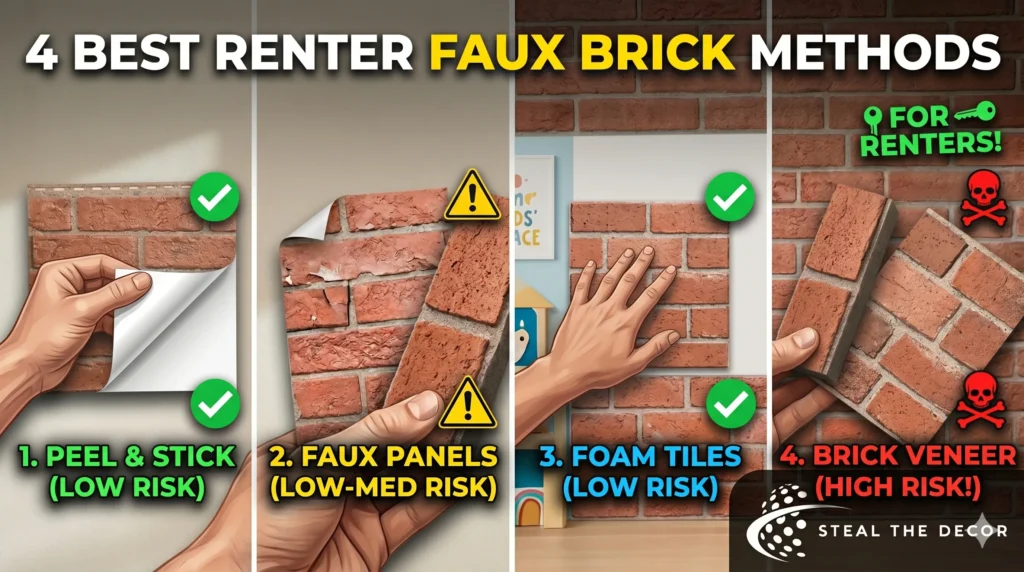
The 4 Best Methods for Renters (Ranked by Damage Risk)
| Method | Damage Risk | Cost Range | Realism | Best For |
| Peel and Stick Wallpaper | Low | $30–$80 | Moderate | Beginners, small walls |
| Faux Brick Panels (PVC/Vinyl) | Low–Medium | $60–$150 | High | Feature walls, living rooms |
| Foam Brick Tiles | Low | $25–$60 | Low–Moderate | Kids’ rooms, temporary setups |
| Brick Veneer Sheets | High | $100–$300 | Very High | Advanced DIYers, longer stays |
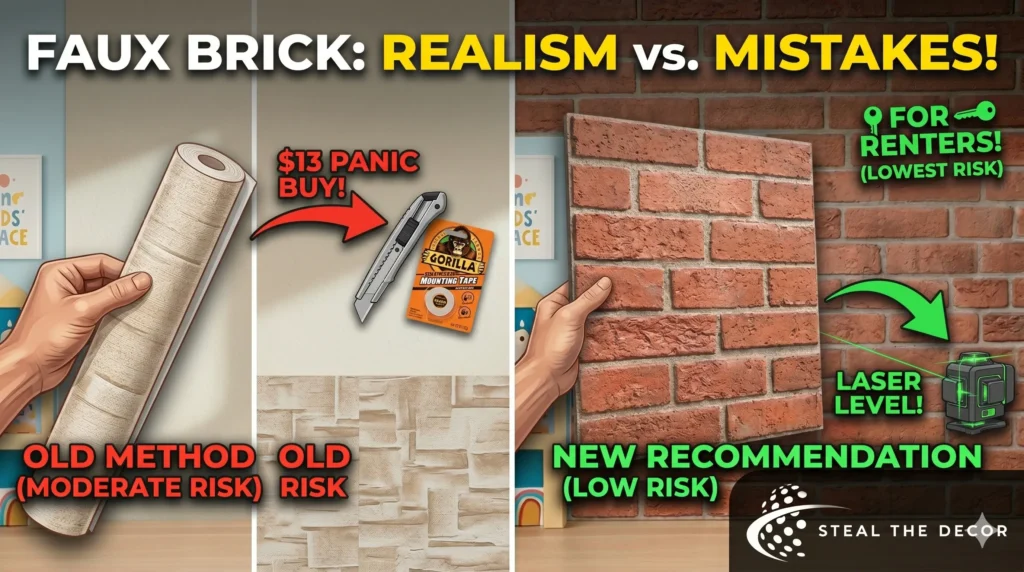
Peel and stick wallpaper is the entry point. It’s forgiving, cheap, and surprisingly realistic if you pick the right brand. Faux brick panels made from PVC or vinyl look more three-dimensional but require more precision during installation. Foam brick tiles are lightweight and easy to cut but often look, well, like foam. Brick veneer sheets look incredible—they’re essentially thin slices of real brick—but they’re heavy, expensive, and often require adhesive that landlords will not appreciate.
I went with peel and stick wallpaper for my first attempt. Specifically, the RoomMates Brick Peel and Stick Wallpaper I grabbed at Target for $34.99 a roll. Two rolls covered my queen-bed-sized accent wall with some leftover. It’s a decent product. Not perfect. The texture is printed rather than embossed, so up close it’s clearly a print job. But from three feet away? It reads as brick. Most guests never noticed it was fake until I pointed it out, which I invariably did because I have no chill about my DIY projects.
A friend of mine used the foam brick tiles in her dorm room and they looked exactly like what they cost—about $22 on Amazon. Fine for a temporary setup. Not what I’d choose for a living space where adults might visit.
The Materials I Actually Used (And What I’d Swap)
My shopping list was embarrassingly simple. I walked into Target on a Saturday morning with a latte and zero plan, grabbed two rolls of the RoomMates wallpaper, a plastic smoothing tool from the same aisle ($6.99), and a utility knife I already owned. Total pre-tax spend: about $77. I didn’t buy a level. That was my first mistake.
What I should have bought—and what I’d recommend to anyone attempting this—includes a few things I overlooked. A laser level would have saved me forty minutes of repositioning. The Command Large Picture Hanging Strips I later used to mount a lightweight frame on top of the wallpaper (about $8 at Walmart) worked perfectly and came off clean. A Fiskars rotary cutter would have been cleaner than my utility knife for trimming edges, especially around outlets.
One product I bought and genuinely regret: a Gorilla Heavy Duty Mounting Tape from Home Depot, $12.97. I thought I’d need it for corner adhesion where the wallpaper kept lifting. It worked—technically. But when I tested removal on a small section, it peeled off the paint layer underneath. I stopped using it immediately and returned the unused portion. That was my $13 panic buy that nearly cost me part of my security deposit.
The product I didn’t buy but now recommend after helping a neighbor with her kitchen backsplash is the Art3d Peel and Stick Brick Wall Panels from Amazon, around $59.99 for a 10-pack. They have actual 3D texture—raised brick edges, grooves, the whole thing. If I redo this project or move to a new place, I’m using those instead. They’re more expensive upfront but the realism is night-and-day different.
Step-by-Step: How I Installed My Removable Brick Wall
Prep the wall first. I wiped down my entire accent wall with a damp microfiber cloth and let it dry completely. No cleaner, no vinegar—just water. The goal is dust removal, not chemical residue that might interfere with adhesion. If your wall has texture, you need to test adhesion on a small hidden patch first. More on that in the FAQ section.
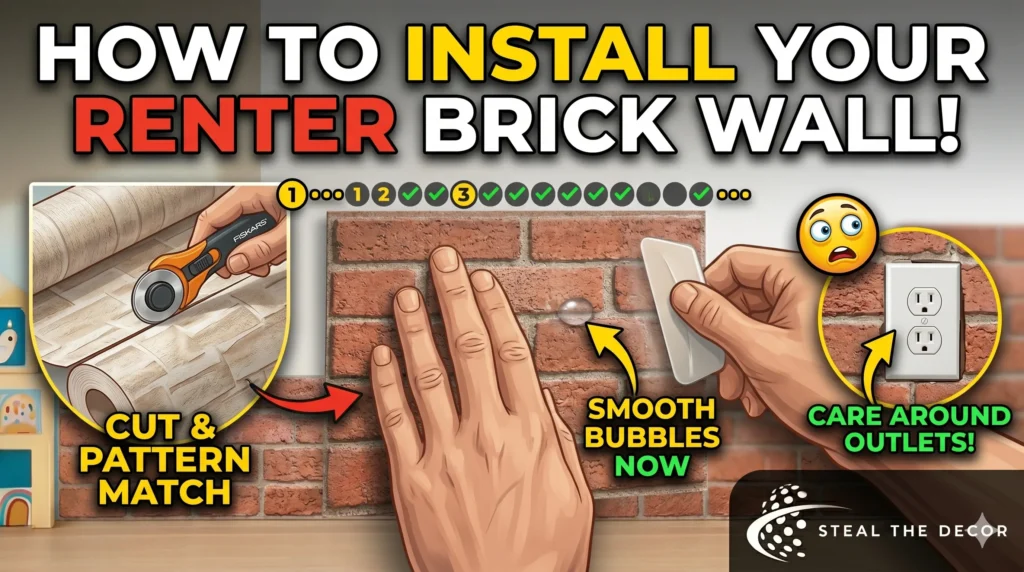
Measure and cut before peeling. I measured my wall height—standard 8 feet—and cut my first strip to 8 feet plus 2 extra inches for trimming. This extra length saved me when I realized my ceiling isn’t perfectly level. It never is in apartments. Cut all your strips first, dry-fit them on the floor, and match the brick pattern seams before you remove any backing. I learned this the hard way on strip three.
Peel and apply from the top. Starting at the ceiling, I peeled about six inches of backing, aligned the top edge with the ceiling line, and pressed firmly. Then I peeled more backing in stages, smoothing downward with the plastic tool as I went. Small sections. Six inches at a time. If you peel the entire backing at once, the adhesive attracts dust, folds onto itself, and you’ll end up with a sticky wrinkled mess. Ask me how I know.
Smooth out air bubbles immediately. The smoothing tool is not optional. I tried using a credit card for the first few feet and ended up with bubbles I couldn’t push out later. The tool costs seven dollars. Buy the tool.
Cut around outlets carefully. Turn off power to the room at the breaker first. I pressed the wallpaper over the outlet plate, felt the edges, and cut with my utility knife. Then I unscrewed the plate, fed it through the hole I’d cut, and screwed it back on. This took me twenty minutes per outlet because I was paranoid about cutting wrong. The result was clean. The process was tedious.
Trim excess at the baseboard. Once the strip was fully applied and smoothed, I ran my utility knife along the top edge of the baseboard and peeled away the excess. A sharp blade matters here. Dull blades tear the vinyl and leave jagged edges.
The Biggest Mistake I Made (Learn From My $40 Loss)
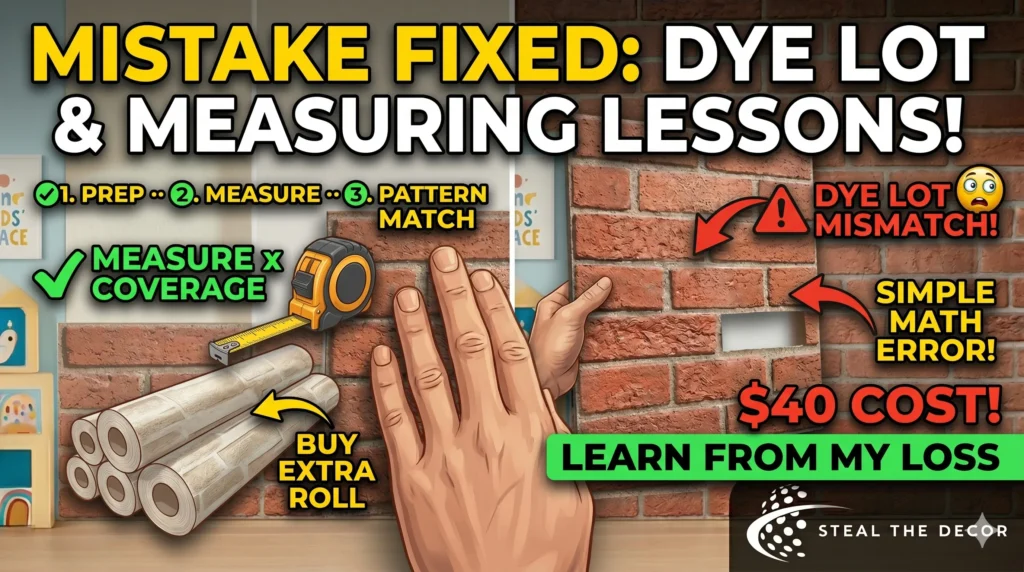
I didn’t buy enough wallpaper. Simple math error. I measured my wall at 10 feet wide by 8 feet tall. Two rolls, each covering 28.18 square feet according to the package. That’s 56 square feet total. My wall was 80 square feet. I somehow convinced myself “it’ll stretch.” Wallpaper does not stretch.
Halfway through installation, I ran out. The pattern was sold out at my Target. I drove to another Target twenty minutes away. They had one roll left. That roll was from a different dye lot. The brick color was slightly warmer than my first two rolls. It’s subtle—nobody notices unless I point it out—but I see it every single day. The left third of my accent wall is a half-shade warmer than the rest.
That third roll cost me $34.99 plus gas and stress. If I’d done the math properly, I’d have bought all three from the same store, same shipment, same dye lot. Total unnecessary cost: about $40 when you factor in the extra driving. This is the mistake I’d fix in a heartbeat if I could do it over.
The lesson isn’t just “measure properly.” It’s “measure, multiply by the coverage per unit, round up, and check dye lots before you leave the store.” I now treat wallpaper shopping like yarn shopping. Buy it all at once. Same batch. Extra roll.
How Much Does a Faux Brick Wall Actually Cost?
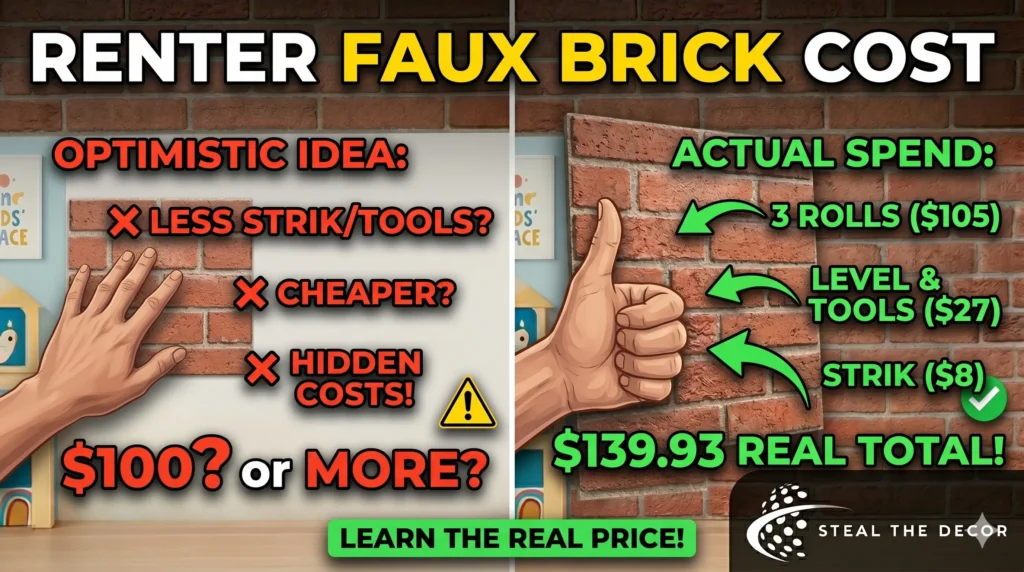
Here’s what I actually spent, not what the optimistic tutorials suggest:
| Item | Brand/Store | Cost |
| Peel and Stick Wallpaper (3 rolls) | RoomMates / Target | $104.97 |
| Plastic Smoothing Tool | Target | $6.99 |
| Utility Knife | Already owned | $0 |
| Laser Level (bought mid-project) | Amazon Basics | $19.99 |
| Command Strips (for frames) | Walmart | $7.98 |
| Total | $139.93 |
Could I have done it cheaper? Yes. Skip the laser level and use a pencil line. Buy a cheaper smoothing tool. But I’d argue the laser level paid for itself in saved frustration. The smoothing tool prevented bubbles that would have annoyed me daily.
For context, hiring someone to install faux brick panels professionally runs $300–$800 depending on wall size and material. My DIY approach landed somewhere between budget and “I value my sanity.” The Art3d panels I mentioned would push the total closer to $180 for the same wall size but deliver a more realistic 3D finish. If I were planning to stay in this apartment for more than two years, I’d spend the extra $40 for better realism.
How to Remove It Without Losing Your Security Deposit
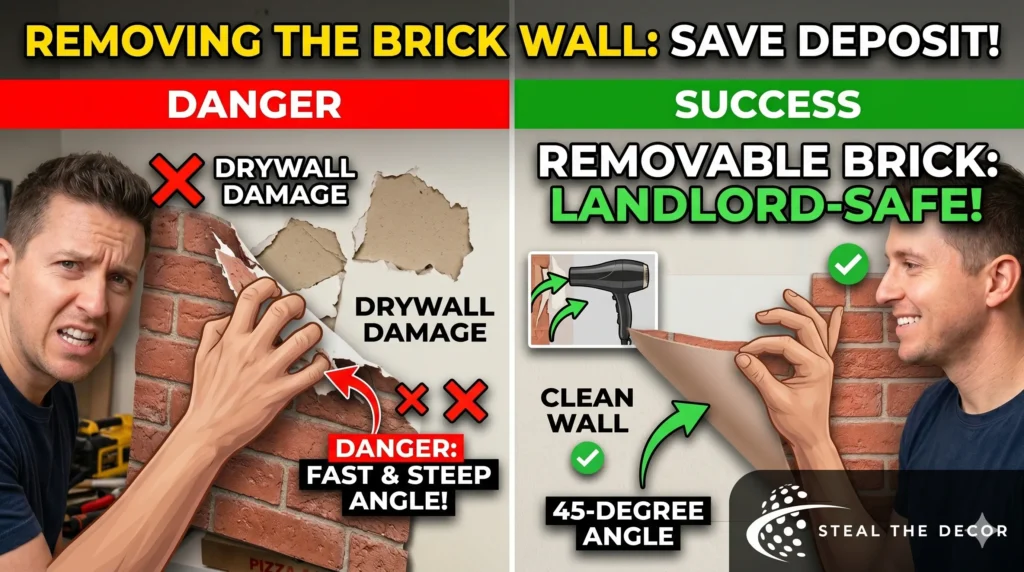
Removal is where renter-friendly upgrades earn their name or betray you entirely. I tested removal on a small corner section after two months. The RoomMates wallpaper came off clean—slowly, deliberately, at a 45-degree angle. No residue. No drywall damage. The paint underneath was exactly as I’d left it.
The technique matters more than the product. Pull at a sharp angle, not straight out. Go slowly. If you feel resistance, stop and apply low heat from a hairdryer to loosen the adhesive. I pulled one section too fast and heard a tiny ripping sound. It was just the wallpaper tearing, not the wall, but my heart stopped for a second.
That Gorilla tape I mentioned? I removed it carefully with a hairdryer and goof-off. The paint underneath lifted slightly at one edge. I touched it up with a sample-size paint I’d matched to my wall color at Home Depot ($4.97). Problem solved, but it shouldn’t have been a problem in the first place. Don’t use heavy-duty mounting tape on rental walls. Just don’t.
Most peel and stick products claim to be residue-free. In my experience, this holds true if you remove them within two years and your walls were properly primed before painting. If your landlord used cheap flat paint directly on unprimed drywall, removal gets riskier. Test a small patch before committing to the full wall.
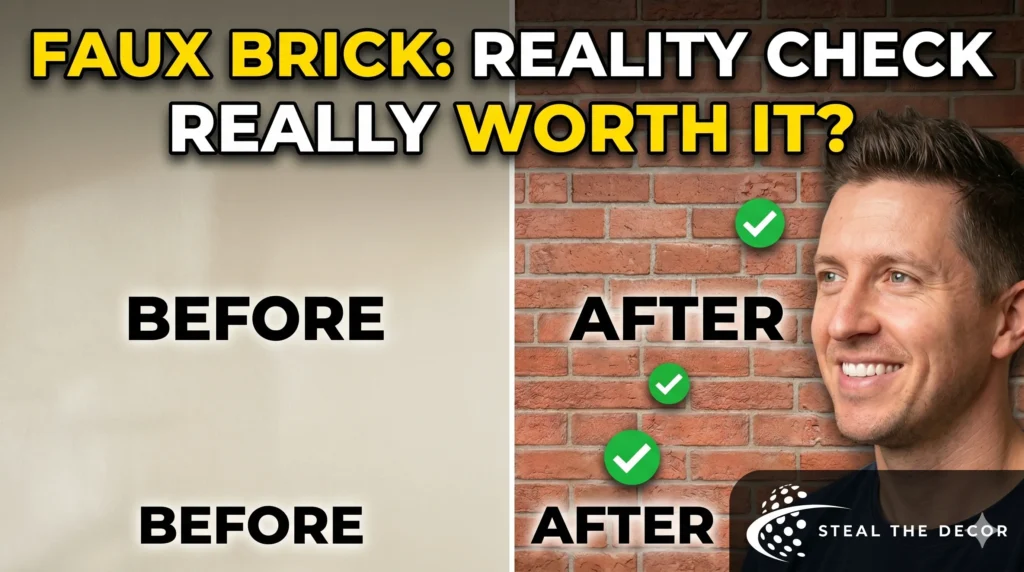
Before and After: Did It Actually Look Real?
Honest answer: from across the room, yes. From up close, no. The printed texture reads as real brick in photos and dim lighting. In bright daylight, you can tell it’s flat. The seam where the dye lot changed is visible if you know where to look. My mom visited and didn’t notice until I pointed it out. My friend who renovates houses clocked it immediately.
Here’s what I didn’t expect: the psychological effect. That wall changed how the whole room felt. Warmer. More intentional. Less like a temporary apartment and more like a home I’d chosen. Even knowing it’s fake, even seeing the seams, I still prefer it to the beige nothing that was there before. Is it perfect? No. Would I do it again? Absolutely, with better math and the 3D panels next time.
The accent wall now serves as my video call backdrop. Multiple coworkers have asked if I moved to a “cool industrial loft.” I tell them it’s wallpaper. The reaction is always some version of “wait, really?” That alone was worth the $140 and the Saturday I’ll never get back.
Frequently Asked Questions
Can you put faux brick on rental walls?
Yes, using peel and stick wallpaper, removable brick panels, or lightweight foam tiles designed for temporary application. The key is choosing products labeled “removable” or “renter-friendly” and testing adhesion on a small hidden patch first. Avoid anything requiring construction adhesive, nails, or permanent mounting hardware. Always check your lease—some landlords have specific clauses about wall coverings even if they’re technically removable.
I cleared mine with my landlord via email before starting. I sent them the product link and emphasized the “removable” and “residue-free” claims. They approved it. Get it in writing. A five-minute email saves a potential security deposit dispute.
How do you make a fake brick wall in an apartment?
Clean the wall surface thoroughly, measure and cut your chosen material (peel and stick wallpaper is easiest), apply from top to bottom in small sections, smooth out air bubbles as you go, and trim edges around outlets and baseboards with a sharp utility knife. Work in stages—don’t peel all the backing at once. Use a plastic smoothing tool, not a credit card. Budget a full day for a standard accent wall, especially if you have outlets to cut around or textured walls to navigate.
The simplest answer: peel and stick brick wallpaper is the most accessible fake brick wall method for apartments. It requires no tools beyond a utility knife and a smoothing tool, takes an afternoon, and removes cleanly when done correctly.
Does peel and stick brick wallpaper damage walls?
It shouldn’t, provided your walls are properly primed and painted with quality paint, and you remove the wallpaper within the manufacturer’s recommended timeframe (typically 2-3 years). Damage occurs when: the wallpaper is left on too long, the wall paint was cheap or unprimed, or removal is done aggressively by pulling straight out instead of at a 45-degree angle with slow, steady pressure.
I tested removal on a small corner after two months and experienced zero damage. The paint underneath looked exactly as it did before installation. A friend removed hers after four years in a sun-facing room and had minor adhesive residue that cleaned up with warm water and a sponge. No drywall repair needed.
What is the cheapest way to do a faux brick wall?
Foam brick tiles from Amazon or Walmart are typically the lowest-cost option, with some packs starting around $22 for a small wall coverage. Peel and stick brick wallpaper runs $30–$40 per roll and covers roughly 28 square feet per roll. For a standard 8×10-foot accent wall, expect to spend $60–$120 total on materials. Skip branded smoothing tools and use a clean edge you already own if you’re truly optimizing for minimum spend.
The absolute cheapest method I’ve seen work: buy one roll of clearance peel and stick wallpaper for a small accent area rather than a full wall. A 4×6-foot section behind a bed or desk costs under $40 and gives you the texture without the full project cost
How long does peel and stick brick wallpaper last?
Most manufacturers claim 2 to 5 years, depending on the brand, wall surface, humidity levels, and sunlight exposure. In practice, corners and edges may start lifting after 1–2 years in high-humidity rooms like bathrooms or kitchens. In dry, climate-controlled bedrooms and living rooms, it can last the full 5 years with proper initial application.
My installation is going on eight months now. One corner near the window started lifting slightly this month. I pressed it back down with a warm iron over a thin cloth (a trick I found on a DIY forum) and it’s held since. I expect to get at least two years out of mine before considering replacement or removal.
Can you put peel and stick wallpaper on textured walls?
It depends on the texture depth. Light orange-peel texture (common in apartments built after 1990) usually works if you press firmly and use a smoothing tool aggressively. Heavy knockdown texture or popcorn walls will prevent proper adhesion and leave visible bumps. For textured walls, test a small sample section first. If the wallpaper doesn’t stick evenly across the texture peaks and valleys within 24 hours, it’s not going to work long-term.
My apartment walls have light orange peel texture. The wallpaper adhered fine overall, but I can see subtle texture underneath in bright side-lighting. The 3D foam panels would have hidden it better. If I had heavy texture, I’d either skip this project entirely or use a smoothing primer (with landlord permission) before applying anything.
About the Author: I’m Sam Rivera, and I’ve lived in five rentals across three states in the last eight years. I’ve painted walls that weren’t supposed to be painted, installed shelving that left holes I had to spackle at 2 a.m. before a move-out inspection, and once hung curtains so poorly the entire rod collapsed during a Zoom call. I now test every renter-friendly hack on my own walls before recommending it to anyone else. I also own four different types of measuring tape because I keep losing them and finding them in the same drawer.
Did you try a faux brick wall in your rental? Or did you find a completely different accent wall solution that worked better? I genuinely want to know—drop a comment or send me a message. Especially if you found a brand I haven’t tried yet.