
Table of Contents
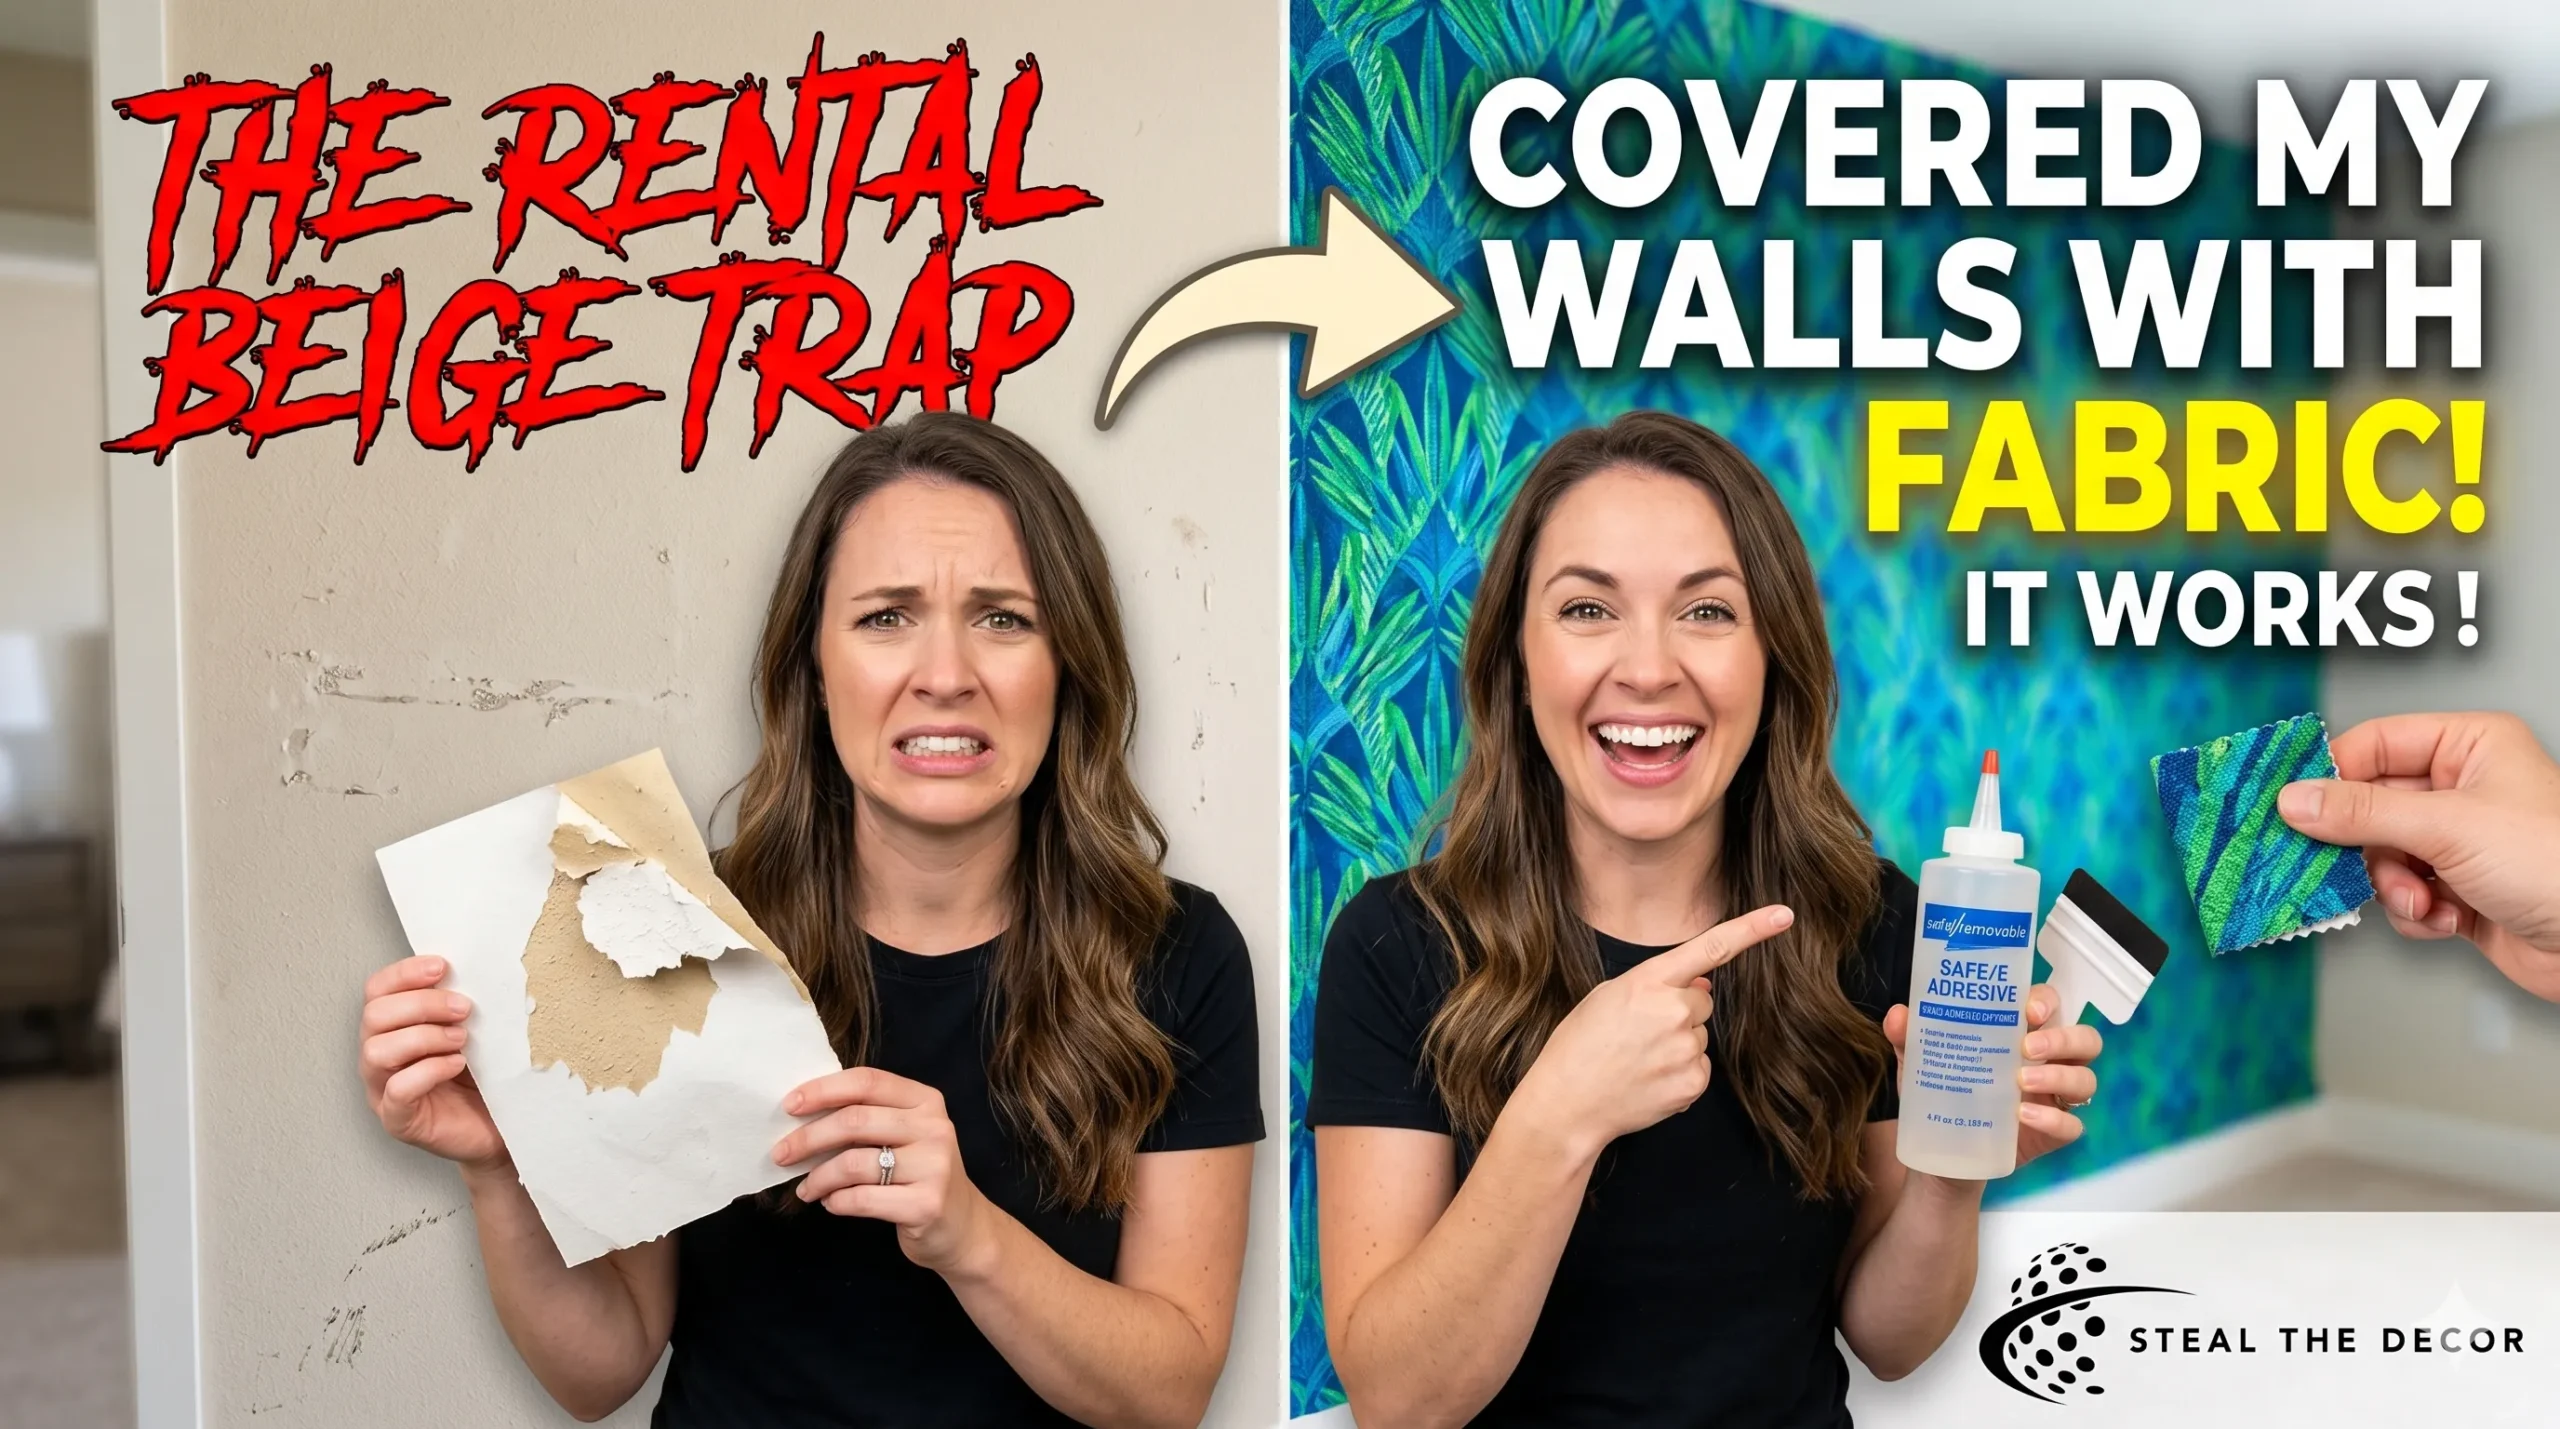
I stared at the beige wall for three months before I snapped.
It wasn’t even a nice beige. It was that sad, landlord-special beige that somehow looks dirty even when it’s clean. My lease said no paint. Peel-and-stick wallpaper had burned me before—$80 worth of “removable” paper that peeled off half the drywall when I moved out of my last place in Austin. So when a friend mentioned she’d used fabric as wallpaper in her Brooklyn studio, I laughed. Fabric? On walls? That sounded like something a Pinterest mom with too much time would attempt. But rent was cheap at my new place in Denver, the beige walls were crushing my soul, and honestly, I was desperate enough to try anything once.
That decision led to one of the most frustrating, sticky, surprisingly rewarding DIY weekends of my life. I’m going to walk you through everything—the mistakes I made, the one product I wish I’d never bought, the corners that still don’t look right, and the genuine “wait, this actually worked?” moments I had along the way. If you’re sitting in a rental with ugly walls and a lease that threatens financial ruin over a coat of paint, this one’s for you.
Why I Even Considered Fabric as Wallpaper in the First Place
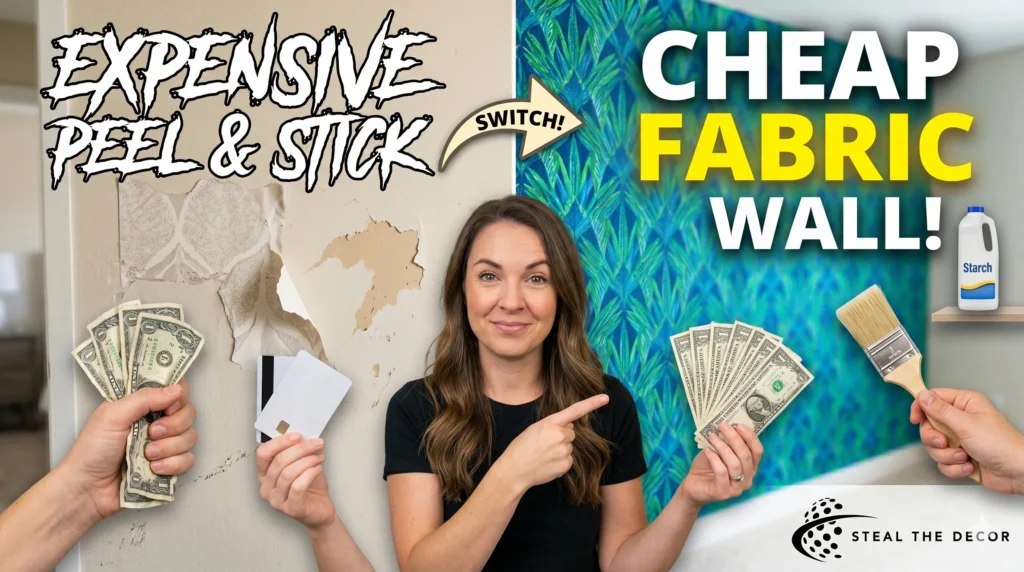
The math was simple. I couldn’t paint. Peel-and-stick wallpaper was expensive — the decent stuff runs $30 to $50 per roll, and I needed four rolls for one accent wall in my 10×12 bedroom. That’s $120 to $200 before I even bought a smoothing tool. The cheap stuff? Already learned that lesson the hard way. Drywall repair cost me $400 out of my security deposit.
I needed something that was genuinely removable, wouldn’t eat my entire paycheck, and didn’t require me to beg my landlord for permission. I also have this thing where I get bored with rooms quickly. Committing to a permanent wall treatment felt like a relationship I wasn’t ready for. Fabric as wallpaper promised a weird middle ground—temporary enough for a rental, permanent enough to not fall while I slept. At least, that’s what the YouTube tutorials claimed. I should’ve been more skeptical.
What Exactly Is Fabric as Wallpaper?
Fabric as wallpaper is a temporary wall-covering method where you use fabric—typically cotton, linen, or polyester blends—applied to walls using liquid starch, tacks, staples, or adhesive strips instead of traditional wallpaper paste. Unlike peel-and-stick wallpaper, fabric can be removed without heat guns or chemical strippers, and when done correctly, it shouldn’t damage the paint or drywall beneath it.
The technique has existed for decades in theater set design and temporary installations, but it gained traction among renters around 2019 when DIY TikTok discovered liquid starch. The basic idea: you treat fabric like wallpaper panels, adhering them with a water-soluble starch solution that hardens as it dries. When you want to remove it, you just peel it off and wipe the walls with warm water. At least, that’s the theory. The reality is messier. Literally.
The Real Cost Breakdown — Is It Actually Cheaper Than Paint?
Here’s what I actually spent. Not the “I already had most of this” version you see on blogs. Real numbers from my first attempt.
Fabric Costs vs. Traditional Wallpaper vs. Paint
| Method | Material Cost (One Accent Wall, ~10×12) | Time | Damage Risk | Removal Difficulty |
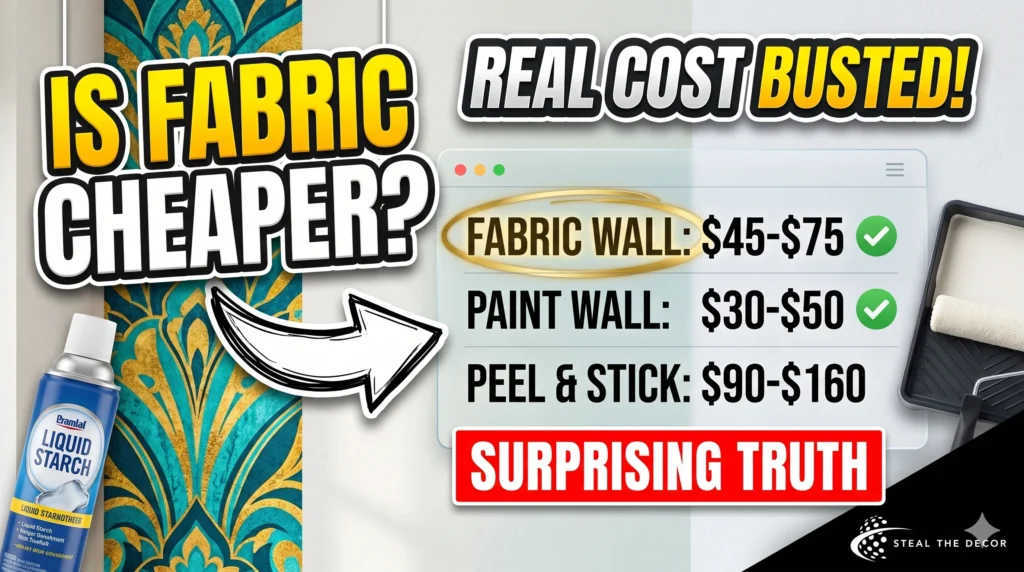
| Fabric + Liquid Starch | $45-$75 | 4-6 hours | Very Low | Easy — warm water wipe |
| Peel-and-Stick Wallpaper (Mid-Range) | $90-$160 | 2-3 hours | Medium | Moderate — may pull paint |
| Traditional Wallpaper (Pasted) | $70-$130 | 5-8 hours | High | Very Hard—steaming required |
| Paint (One Accent Wall) | $30-$50 | 3-4 hours | Permanent without repainting | N/A (requires repainting) |
| Fabric + Staples (My Second Attempt) | $35-$55 | 2-3 hours | Low (tiny holes) | Easy—remove staples, spackle |
I bought six yards of 45-inch-wide cotton broadcloth from JoAnn Fabrics for $38 (on sale, with a coupon—never pay full price at JoAnn; they run sales every other week). The liquid starch was Linit Starch from Target, $12 for two big bottles. I already owned a paint roller tray, but I bought a cheap roller and a foam brush for $8 total at Home Depot. Total: $58 plus tax.
Compare that to the $120 I’d have spent on decent peel-and-stick wallpaper, and yeah, it’s cheaper. But “cheaper” and “better” aren’t the same thing. Keep reading.
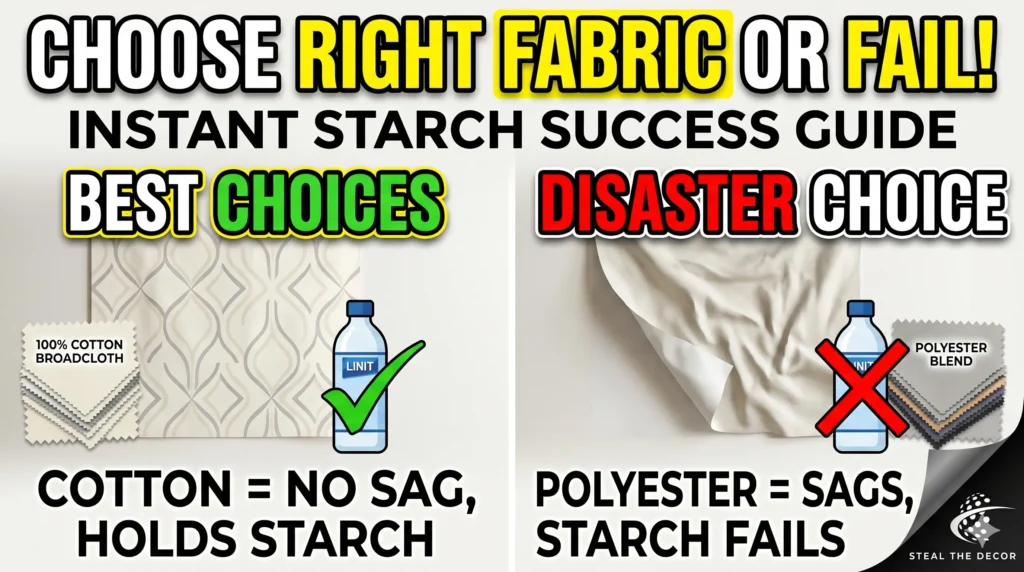
Choosing the Right Fabric — What Works and What’s a Disaster
I learned this the expensive way. The first fabric I bought — a polyester blend with a slight stretch — was a complete disaster. It sagged within 48 hours. The starch couldn’t hold the weight, and the fabric’s natural elasticity meant it never fully adhered to the wall. I peeled it down, threw it in a donation bag, and started over.
Cotton, Linen, and Polyester Compared
Cotton broadcloth is the sweet spot. It’s lightweight, has zero stretch, absorbs starch evenly, and doesn’t sag after drying. It also costs about $6 to $8 per yard at JoAnn Fabrics. I used a simple cream-and-gray geometric pattern that looked like something you’d find on West Elm’s clearance rack. Flat sheets — the kind you’d put on a bed — work too. I almost used a king-sized flat sheet from Target ($14, Threshold brand) for a second wall, but ran out of motivation.
Linen-look fabrics photograph beautifully but weigh more. I tried a small section of linen blend on my closet wall, and it peeled away from the top corner within three weeks. The weight just dragged it down. If you’re dead set on linen, use the staple method, not starch. Polyester is the worst choice for starch—it resists water, which means the starch never fully penetrates the fibers. Stay away.
The pattern matters more than you’d think. Small, busy patterns hide wrinkles and seam lines. Solid dark colors show every single imperfection, every dust particle, every wrinkle. My geometric print saved me from myself.
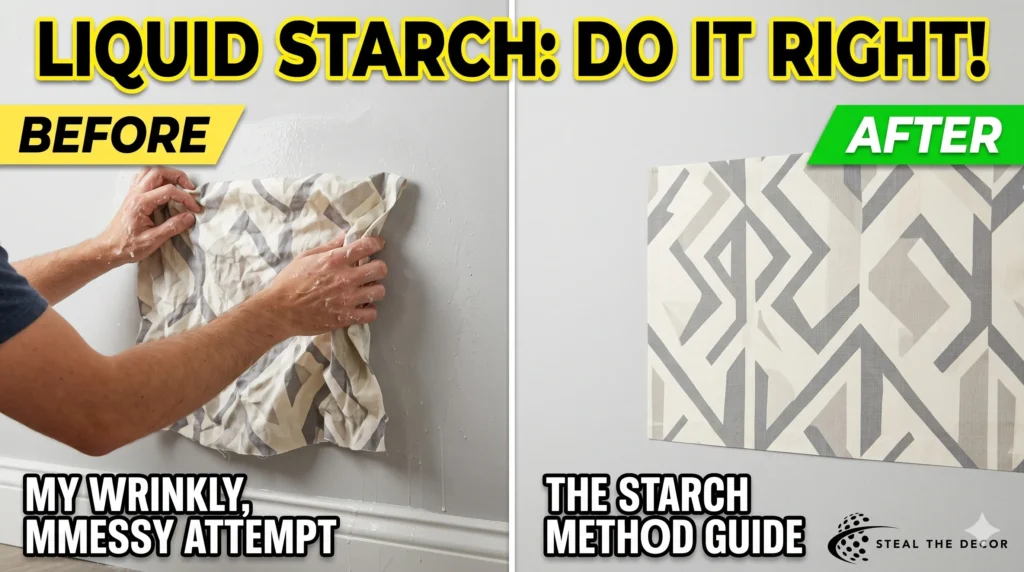
The Liquid Starch Method — My First Attempt and Everything That Went Wrong
I want to be honest here. My first wall looked awful.
The tutorials made it look so simple. Roll starch onto the wall, press fabric into it, and roll more starch on top. The fabric soaks it up, dries stiff and flat, and you have a gorgeous wall. What they don’t show is the part where the fabric slides down while you’re smoothing it. Or the part where starch drips onto your baseboards and dries into a crusty white mess. Or the part where you’re standing on a step stool at 11 p.m., hands sticky, questioning every decision that brought you here.
Here’s how it actually works, step by step—the version I wish I’d had before I started.
You prep the wall first. Wipe it down with a damp cloth to remove dust. Let it dry completely. This matters more than the tutorials admit. Dust is the enemy of adhesion. I skipped this step on my first go and paid for it.
Measure your wall. Add three inches to the top and bottom of each fabric panel—the extra gets trimmed after it dries. I didn’t do this. I measured exactly to the wall height, which meant my fabric was a quarter-inch too short after it settled. The gap at the top haunted me for six months.
Pour the undiluted liquid starch into a paint tray. Use a paint roller to apply a thick, even coat to the wall—not the fabric. Work in sections slightly wider than your fabric panel. Press the fabric into the wet starch, starting at the top. Use a foam brush or a clean, dry roller to smooth downward, pushing out air bubbles and excess starch.
Here’s where I messed up. I worked too fast. The starch started drying before I got the fabric fully smoothed, which created permanent wrinkles in two panels. I thought the starch would “relax” them as it dried. It didn’t. Those wrinkles stayed until the day I took the fabric down.
Work slowly. One panel at a time. Don’t rush. The starch gives you maybe 10 to 15 minutes of working time before it starts getting tacky. Once the fabric is smooth, roll another thin layer of starch directly onto the fabric surface. This top coat seals it and stiffens it as it dries.
Trim the excess with a sharp utility knife once everything is dry—usually overnight. The edges will be slightly stiff, which actually helps with clean cuts. I used a cheap box cutter from Home Depot that cost $6. It worked better than the fancy Olfa craft knife I’d bought on Amazon for $18. Go figure.
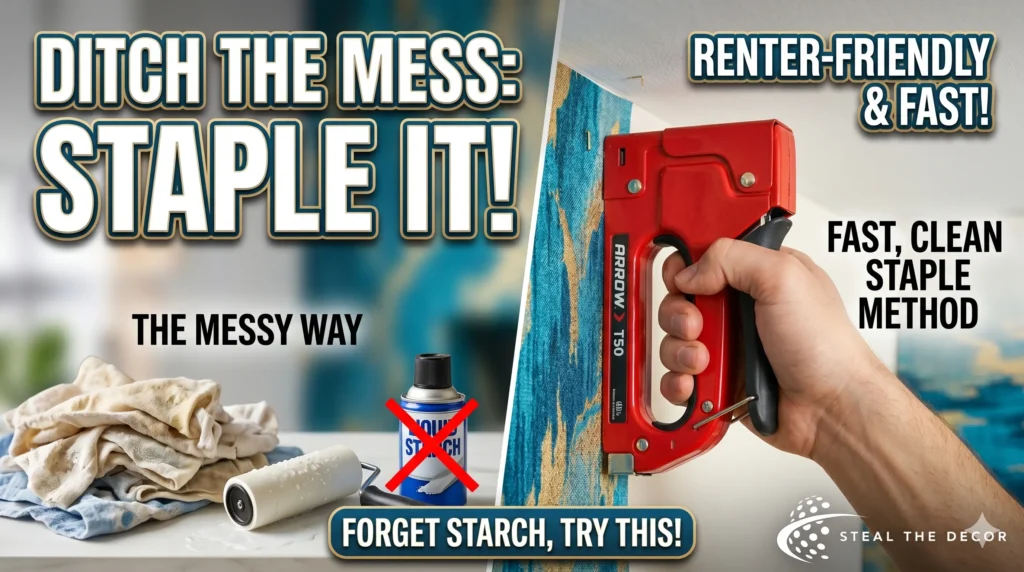
The Stapling and Tacking Method — Better for True Renters
After my liquid starch adventure, I tried something simpler on a smaller wall in my hallway. Staples.
This method is underrated. You stretch the fabric tight across the wall, staple it along the top edge where the wall meets the ceiling, and then staple the bottom edge behind where the baseboard hides it. The sides get tucked or stapled into corners. The result is a taut, smooth fabric panel that looks intentional, almost like an upholstered wall.
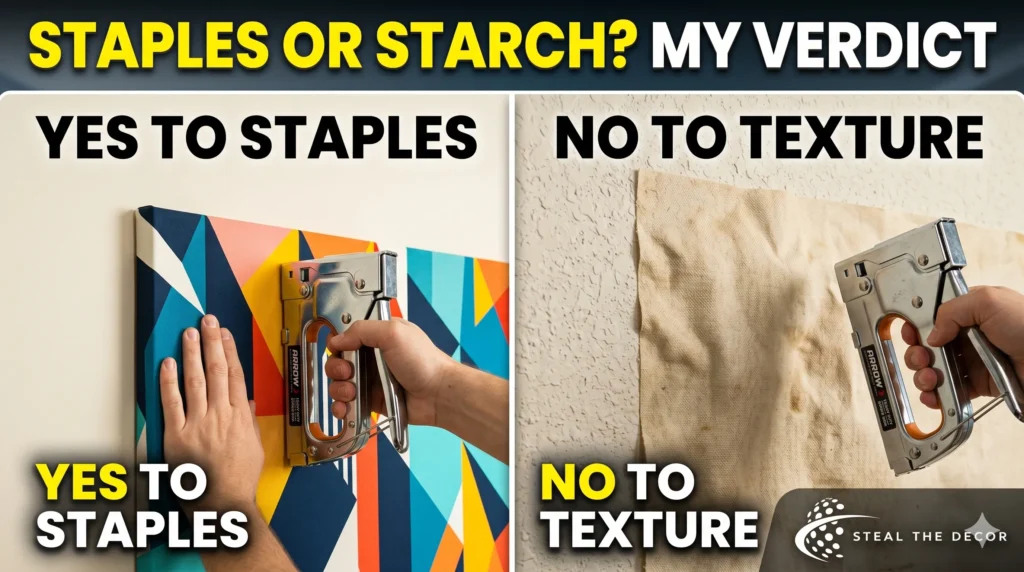
I used an Arrow T50 staple gun from Amazon—$22, bright red, and it works perfectly. The staples are tiny. When you remove them, they leave holes so small you can fill them with a dab of spackle, and your landlord will never notice. I’ve done it. It works.
The downside? The fabric can billow slightly in the middle if your wall is wide and you only staple the top and bottom. To fix this, I ran a tiny bead of hot glue (clear, Gorilla Glue brand) along the wall’s midpoint and pressed the fabric into it. It held fine. Removed cleanly. Total game-changer.
This method took me two hours instead of six. It required zero drying time. If I had to start from scratch tomorrow, I’d staple every time and skip the starch entirely.
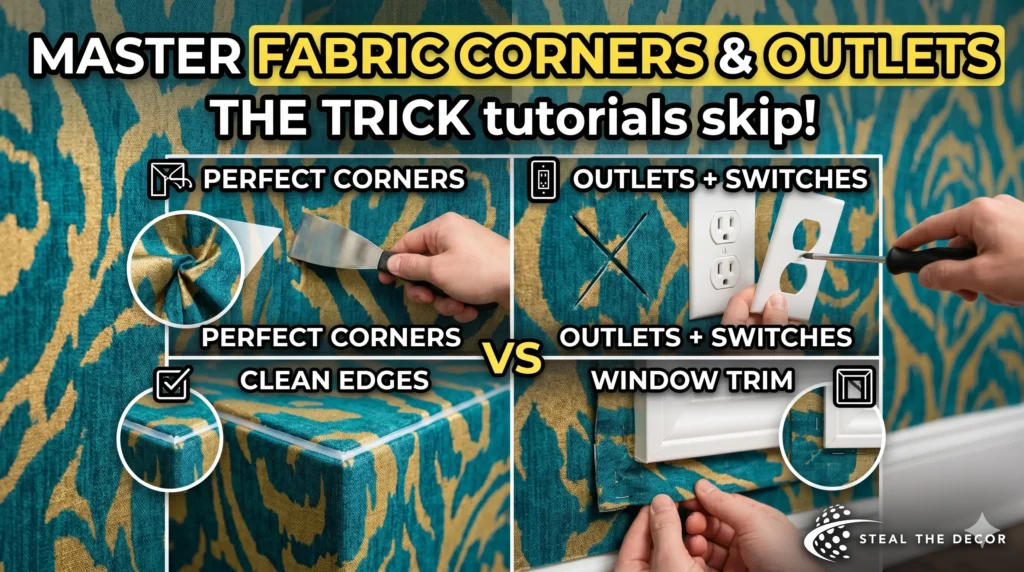
Corners, Outlets, and Windows — The Stuff Tutorials Skip
Nobody makes videos about corners. They’re boring. But corners are where most fabric wall treatments fail.
Internal corners—where two walls meet—are actually forgiving. You fold the fabric like wrapping paper on a gift, pressing it tight into the corner with a putty knife. The starch or staples hold the fold. It won’t look perfect, but interior corners are shadowed, so the imperfections hide.
External corners are brutal. The fabric wants to lift away from the wall at the edge. I tried folding it around the corner, but my hallway has a rounded bullnose edge, and the fabric just looked lumpy and sad. I ended up cutting a clean vertical line with the utility knife right at the edge, then using a thin bead of clear caulk to seal the raw fabric edge to the wall. It wasn’t ideal. It held for six months.
Outlet covers and light switches are tedious but simple. Shut off the power at the breaker box. Remove the cover plate. Staple the fabric over the outlet hole, then use a sharp blade to cut an X over the opening. Press the excess fabric back into the hole, screw the cover plate back on, and the plate hides the raw edges. It looks clean. It just takes forever if you have nine outlets on one wall, as I did.
Windows require patience. I trimmed the fabric to leave an inch of overhang around the window frame, then folded that excess inward and stapled it behind the trim. It held fine. The trim covers the staples. Nobody’s ever going to find them unless they start dismantling the window casing, and if that’s happening, I have bigger problems than my security deposit.
How It Held Up After 6 Months—The Good, The Bad, The Wrinkly
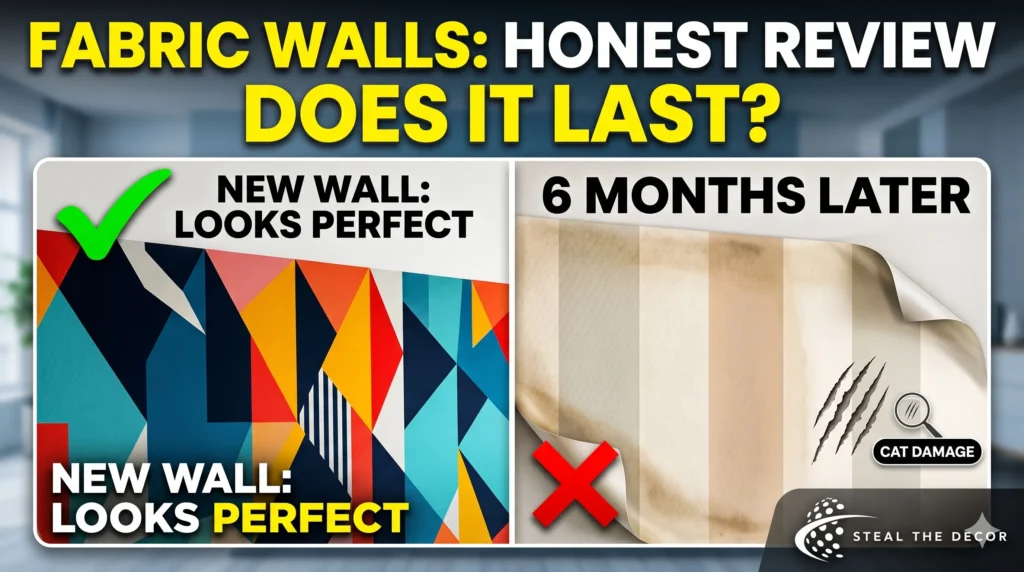
After six months, my starched accent wall looked… okay. Not great. Okay.
The good: it stayed on the wall. No peeling edges, no sagging panels. The pattern still looked sharp. Multiple guests asked if it was real wallpaper, which felt like a win. The fabric didn’t attract dust more than a painted wall would—something I’d worried about. A quick once-over with my vacuum’s brush attachment cleaned it fine.
Humidity, Pets, and Sunlight Damage
The bad started around month four. I live in Denver, which is dry, so humidity wasn’t my main issue. But the wall I covered gets direct morning sun through a south-facing window. By month five, the fabric along the sunniest edge had noticeably faded. The gray in my geometric pattern had turned almost beige in a vertical stripe about six inches wide. There’s no fixing that. You live with it, or you replace the panel.
If you have a humid bathroom or live somewhere like Houston or Miami, I genuinely don’t recommend the starch method. Moisture reactivates the starch, the fabric loosens, and you’ll find it puddled on your bathroom floor. The staple method holds up better in humidity, but even then, cotton fabric in a damp room starts smelling musty eventually.
My cat scratched the bottom corner of the fabric about a month in. Not aggressively — just one of those casual “I’m stretching, and my claws happened to catch” incidents. It left four tiny snags. They’re still there. Fabric doesn’t heal.
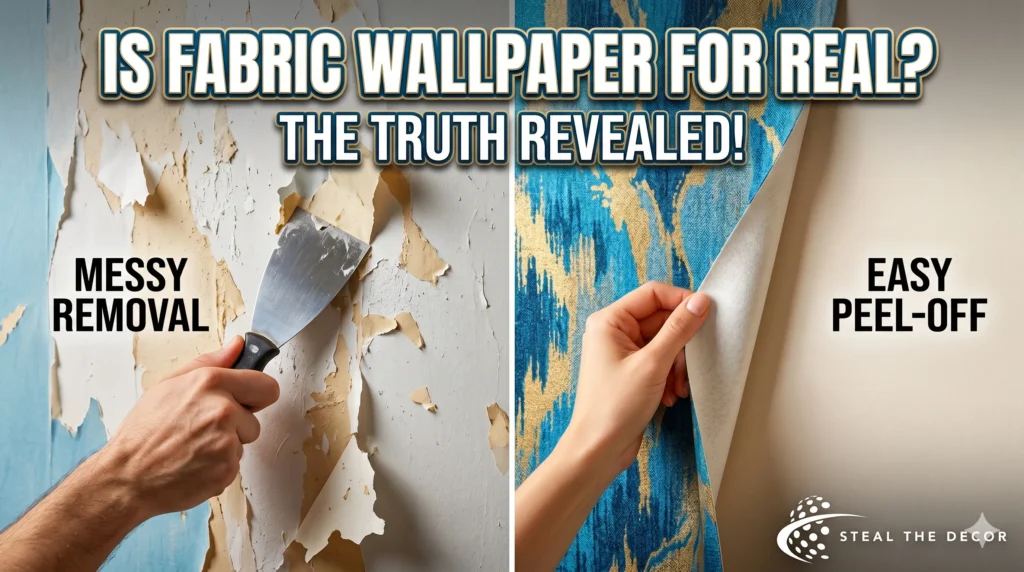
Removing Fabric from Walls — Does It Actually Leave No Trace?
Here’s the moment everyone cares about. Does it come off clean?
Yes and no.
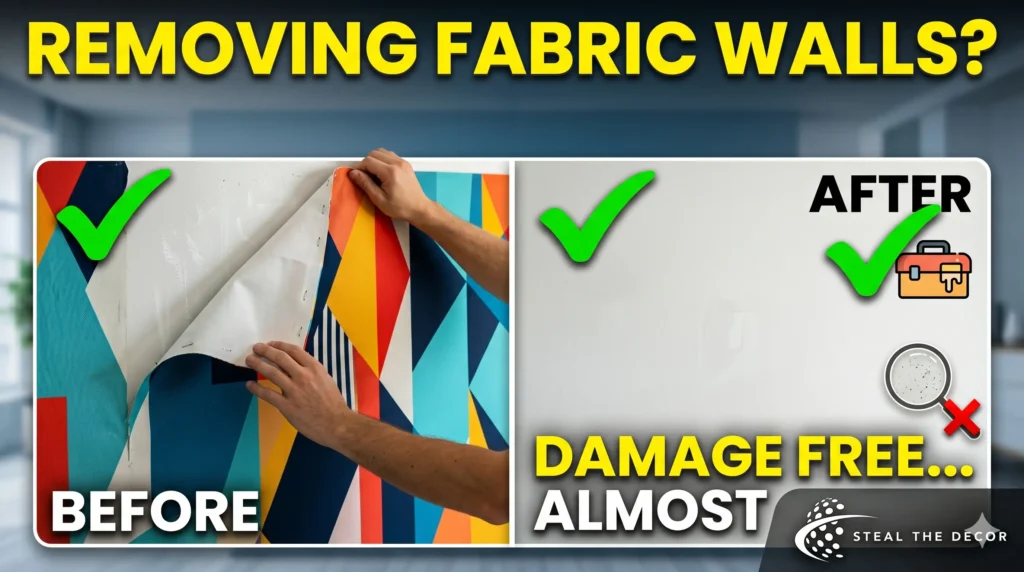
The starched fabric peeled away easily. I found a loose corner, pulled slowly, and the entire panel released in one satisfying sheet. It felt like peeling a giant sunburn—gross but satisfying. The wall underneath had a faint, chalky white residue from the starch. I wiped it with a warm, damp sponge, and it came off in two passes. The paint underneath was completely intact. Zero damage.
The staple holes were genuinely tiny. Three or four per linear foot along the top and bottom. I spent $6 on a small tub of DAP DryDex spackle from Home Depot, filled each hole with my finger, let it dry, and sanded lightly. The whole repair took 20 minutes. When I moved out, my landlord did the final walkthrough, ran his hand over the walls, and said nothing. Full deposit returned.
Here’s the “but.” If your rental has cheap matte paint—the kind builders spray on in one coat—the starch can pull up tiny flecks of paint as it dries. I had this happen on a small section near my baseboard. The paint wasn’t primed well underneath. It left a rough patch about the size of a quarter. I covered it with a dab of paint I’d color-matched at Home Depot for $7. The landlord never noticed. But it happened. Don’t assume zero damage. Assume “minimal and fixable with a trip to Home Depot.”
Would I Do It Again? (And When You Shouldn’t Bother)
Honestly? Yes, with a giant asterisk.
I’d never starch a full wall again. It’s too much work for a result that looks 85% good. But the staple method? I’ve already done it in two rooms. It’s fast, it’s clean, and the removal is genuinely easy. For accent walls in dry rooms with decent paint, it’s a solid renter-friendly option.
When you shouldn’t bother: If your walls are textured—like knockdown or orange-peel texture—the fabric won’t sit flush. Air pockets form behind it, especially with the staple method. It looks lumpy. Don’t do it. If your rental has existing moisture issues, don’t do it. If you want a perfect, seamless finish that looks indistinguishable from real wallpaper, don’t do it. This hack is a compromise. It looks good from five feet away. It looks handmade from six inches away. I made peace with that.
The product I’d genuinely recommend if you want to try this is the Arrow T50 Heavy Duty Staple Gun—$22 on Amazon. It’s the one I used; it’s lasted through three moves, and it’s never jammed on me once. I bought mine three years ago at a Home Depot in Austin, and it’s one of those tools I didn’t know I’d use as much as I do. For fabric, grab 100% cotton broadcloth from JoAnn Fabrics—the 45-inch width is ideal for most apartment ceiling heights, and it runs about $6 to $8 per yard depending on sales. Don’t buy polyester. Don’t buy anything stretchy. Learn from my $38 mistake.
Frequently Asked Questions
Can you really use fabric as wallpaper?
Yes, you can. The two main methods are liquid starch and staples—both work, but they have different trade-offs. Liquid starch gives you a smoother, more wallpaper-like finish, but takes longer and requires drying time. Stapling is faster, cleaner, and genuinely easier to remove, but leaves tiny pinholes that need spackling when you move out. I’ve tried both, and I’d pick Staples every time for a rental situation. The learning curve is shorter, and the stakes are lower if something goes wrong.
How long does fabric wallpaper last on walls?
My starched wall looked good for about four months before fading, and minor edge lift began to show up. The stapled walls have lasted over a year with no issues. How long yours lasts depends on sunlight exposure, humidity levels, whether you have pets, and how well you prepped the wall. In a low-traffic, dry room with minimal direct sunlight, I think you could get two to three years out of a staple-mounted fabric wall before it starts to look tired. The starch method ages faster because starch can yellow slightly over time, especially on white or light fabrics.
What kind of fabric is best for a fabric wallpaper project?
Lightweight, non-stretchy cotton is the best fabric for walls. Cotton broadcloth hits the sweet spot — it’s cheap, easy to find, absorbs starch evenly, and doesn’t sag under its own weight. Quilting cotton works too. Avoid polyester because it resists water, and the starch won’t penetrate the fibers properly. Avoid anything with spandex or elastane — stretchy fabric will sag no matter how much starch you use. I also recommend avoiding heavy linens unless you’re using the staple method exclusively, because the weight makes adhesion unreliable with starch.
Does fabric wallpaper damage walls when you remove it?
In most cases, fabric wallpaper causes very little damage. With the starch method, you might see a slight chalky residue that wipes off with warm water, and occasionally, tiny flecks of paint can lift if your walls have cheap, poorly primed paint. With the staple method, you’ll have small staple holes that need filling with spackle—a 20-minute repair job. I removed both types in my Denver apartment and got my full security deposit back. The key is testing a small, hidden area first before committing to a full wall.
Is fabric wallpaper cheaper than traditional wallpaper or paint?
Fabric wallpaper is generally cheaper than mid-range peel-and-stick wallpaper and comparable to a paint job for one accent wall. My fabric accent wall cost $58 total—$38 for cotton broadcloth, $12 for liquid starch, and $8 for tools. A comparable peel-and-stick wallpaper job would have been $90 to $160. Paint would have been $30 to $50, but it is permanent without repainting, which violates most rental leases. The real savings come from not losing your security deposit and not paying for drywall repair.
Can you wash fabric wallpaper after it’s installed?
Not really. You can lightly vacuum it with a brush attachment to remove dust, but you can’t scrub it or use any kind of liquid cleaner. The starch will soften if it gets wet, and even stapled fabric can absorb moisture and develop water stains or mildew. This is the biggest practical downside of fabric walls — they’re not cleanable in any meaningful way. If you have kids, pets, or a habit of spilling coffee near walls, fabric wallpaper is probably a bad fit for your life.
What is the best method for applying fabric to walls in a rental?
For most renters, the staple method wins. It’s faster, cleaner, and more secure, and the holes it leaves are trivial to repair. Staple the fabric along the very top edge of the wall where it meets the ceiling, pull it taut, and staple along the bottom where the baseboard hides the line. Use a hot glue gun for the middle if you need extra hold. If your lease explicitly forbids even pinholes—some corporate apartment complexes are like this—then liquid starch is your only option. But I’d test a swatch first, because starch can be unpredictable on poorly primed rental paint.
Final Thoughts (And a Question for You)
I walked into this project thinking I’d found a magic loophole. I walked out with one decent-looking wall, one slightly faded wall, a cat-clawed corner, and a strong opinion about liquid starch. That’s the reality of DIY rental upgrades. They’re compromises. They work until they don’t. They look good in photos and a little handmade in person.
But here’s the thing — every time I walked into my bedroom and saw that geometric fabric wall instead of sad beige paint, I felt something. Relief, maybe. Control over a space that wasn’t technically mine. That’s worth something, even if the edges weren’t perfect.
Have you tried any rental-friendly wall hacks that actually held up? Or did you attempt something that failed spectacularly? I want to hear the messy truth—drop a comment. I read every single one, mostly because I’m still hunting for better ideas than the ones I’ve already tried.
About the Author: Sam Rivera has moved seven times in nine years across four states—Texas, Colorado, Oregon, and New Mexico—and has an ongoing feud with landlord-grade beige paint. They currently live in a Denver apartment where every wall covering is technically reversible. Sam owns three identical tape measures because they keep losing them behind furniture, and buying new ones instead of moving the couch.