
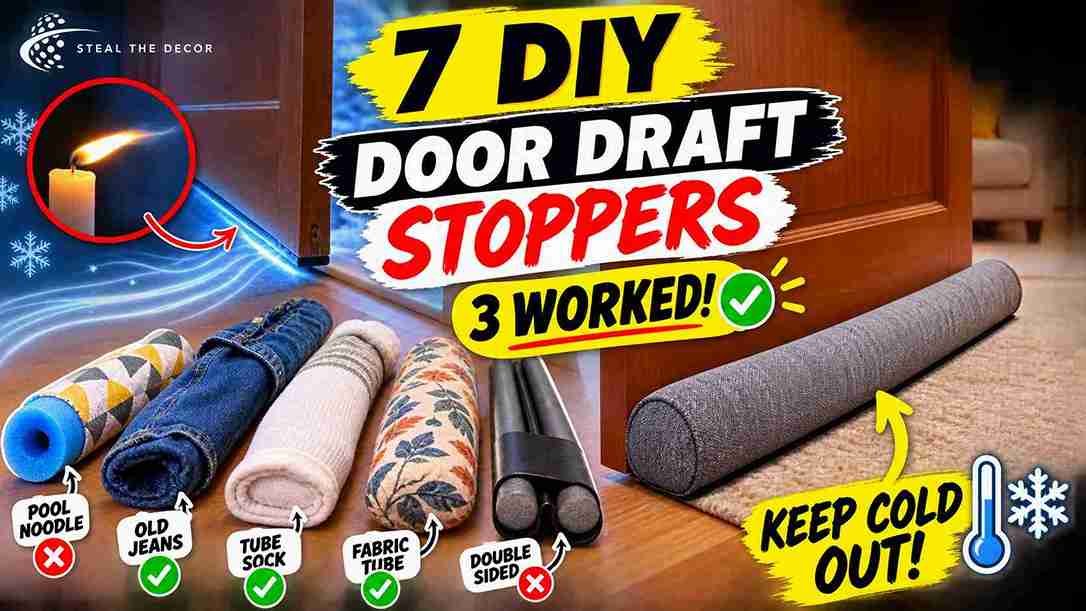
The candle flame bent sideways. Not flickered. Bent like something was blowing on it and the only thing near it was the bottom of my front door on a 28-degree January night in a 1974 walk-up. My roommate had been sleeping in a hoodie for two weeks and blaming the radiator.
Renting means you don’t get to fix the actual problem. No caulk gun. No new threshold no screwing a metal sweep into a door that isn’t yours. So I did what most renters do first rolled up an old bath towel shoved it against the gap and watched it get kicked three feet down the hallway every single time someone came home. That’s when I started building a proper DIY door draft stopper instead.
Over about three weekends I made seven versions. Different fabric different filler different weights one with a pool noodle one from an old pair of jeans one I sewed badly at 11 p.m. Three of them genuinely stopped the cold air. Two were fine. Two wasted an afternoon and roughly $14.
Here’s every version what each one cost and the honest reason the pretty ones usually lose.
The Short Version: The most effective homemade door draft stopper is a weighted fabric tube a sleeve of heavy fabric (denim canvas or fleece) cut about two inches wider than your door and filled with dried rice dried beans or cheap clay cat litter for weight with poly fill only at the ends. It takes about 45 minutes and costs $6–$12 if you use fabric scraps you already own. If you don’t sew a long tube sock filled the same way and knotted works immediately and a double sided door draft stopper like the Suptikes Door Draft Stopper (typically $12–$18 on Amazon) slides onto the door and moves with it no adhesive no drilling no deposit risk.
What a Door Draft Stopper Actually Is (and Why Renters Need One More Than Homeowners)
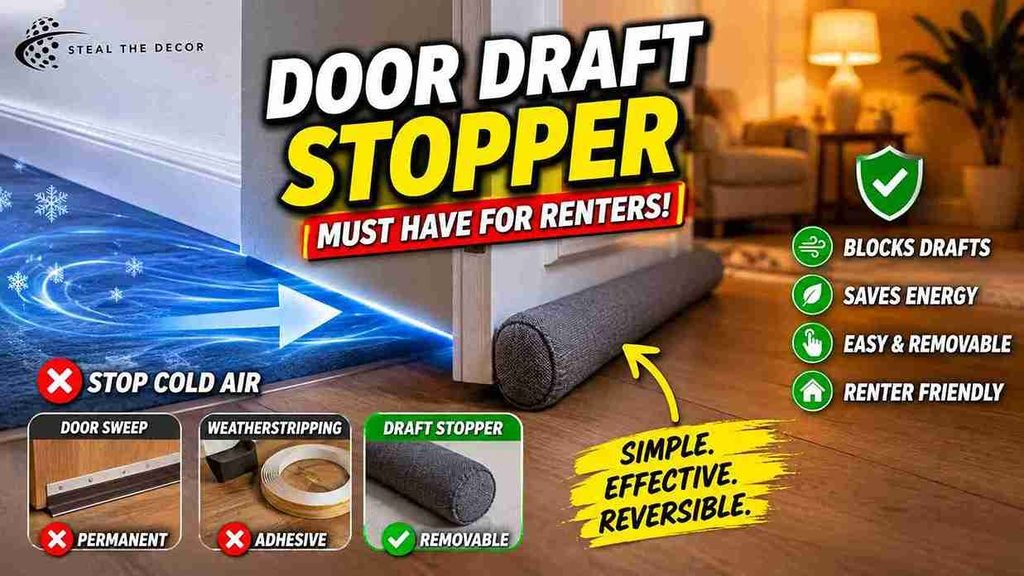
A door draft stopper is a weighted or foam-filled tube that sits against the gap under the door and blocks the cold air moving through it. That’s the whole mechanism. It doesn’t seal anything permanently it doesn’t attach to the building and it comes with you when you move.
The confusion is that three different products get called the same thing. A draft stopper (also known as a draft snake draft dodger draft excluder or draft guard) just sits on the floor. A door sweep screws or sticks to the bottom of the door itself. Weatherstripping is adhesive foam or vinyl applied around the door frame. Those last two modify the unit which is exactly the category of “improvement” that turns into a deposit deduction when the adhesive lifts paint off a hollow-core rental door.
And that distinction matters more than it sounds. The U.S. Department of Energy notes that sealing cracks and openings reduces drafts and cold spots and improves comfort but the DIY methods it recommends are caulk and weatherstripping neither of which a renter can freely use. A fabric door draft stopper is the renter’s version of the same idea. Same physics zero permanence. If you’re building out a whole apartment on this logic my full guide to how I decorate a rental without damage covers the rest of the reversible-fix playbook.
One more thing renters deal with that owners don’t: shared hallways. Cooking smells cigarette smoke dust and hallway noise all ride the same air current through that gap under the door.
Bottom line: a draft stopper is the only draft fix that’s fully reversible which makes it the only one worth doing in a rental.
Does a DIY Draft Stopper Actually Work? My Honest Skeptic Check
Yes but only for the specific gap it covers and only if it’s heavy enough to stay put.
Honestly? I was skeptical. Really skeptical. Here’s the limitation nobody puts in their tutorial: a draft stopper blocks the gap under the door and nothing else. It does nothing for air coming in around the door frame sides through an old mail slot through the deadbolt hole or off a single-pane window ten feet away. When I tested mine with an incense stick roughly half the airflow in my entryway turned out to be coming from the top corner of the frame. Not the floor. My beautiful $11 denim snake was solving half my problem and I’d spent three weeks furious at it.
Actually scratch that. I need to walk something back. I said it “does nothing” for the frame and that’s true for the snake itself but a heavy curtain hung across the doorway does catch that air. More on that below.
So before you make anything do the test. Light a candle or an incense stick hold it slowly along the entire door bottom both sides top latch and watch which way the smoke pulls. Two minutes. That’s all it takes to learn whether you need a draft stopper a thermal door curtain for drafts or a maintenance request.
It works if your gap is under about an inch the door isn’t opened constantly and you use heavier filling rather than pure stuffing. It doesn’t work when the door is warped the threshold is missing the gap is over an inch or the real leak is somewhere else entirely.
Does it cut your heating bill? Honestly I couldn’t prove it did. What changed was comfort the cold ribbon across the entryway floor stopped and the room held a more even temperature. Anyone promising you a specific percentage off your energy costs from one fabric tube is guessing.
Bottom line: test the airflow first because a draft stopper that’s solving the wrong leak will always feel like a failure.
7 DIY Door Draft Stopper Ideas I Tested (Ranked by What Actually Held Up)
Every version below is something I built and lived with for at least a week. Costs are what I actually paid. Prices move so treat them as ranges.
1. The Weighted Denim Snake Best Overall (~$4 sewing required)
An old pair of jeans is the single best material for this. Denim is heavy it doesn’t slide on hardwood it takes abuse from a door dragging over it and it already matches almost any entryway. I cut one leg off a dead pair of Levi’s sewed the narrow end shut filled it with a two-pound bag of dried pinto beans and closed the other end.
The best filling is the part everyone gets wrong. Pure poly fill is warm but weightless it drifts. Dried rice or beans aquarium gravel or clay cat litter give you a weighted door draft stopper that stays where you put it. My winning build used beans through the middle with a handful of stuffing at each end so the tips still looked finished.
2. The No-Sew Tube Sock Fastest Win (~$0 10 minutes)
Long socks are the reason nobody needs to buy anything to start. Take the longest sock you own use a funnel to pour in dry rice or kitty litter knot the open end and lay two of them end to end if one doesn’t cover the width of the door. It’s ugly. It works in ten minutes. This is the easy DIY draft stopper I still keep under the bedroom door.
3. The Pool Noodle Slide-On Best for a Door That Opens Constantly (~$5)
Pool noodles are the cheat code for a double sided door draft stopper. Cut one to the width of your door slice it lengthwise most of the way through and slide it onto the bottom of the door so half sits on each side. Because it rides on the door it moves with the door instead of getting shoved aside.
This one surprised me more than anything else on the list. Wrap it in a piece of fabric if you can’t stand the look. Downside: on thick carpet it drags and on a door with less than a half-inch clearance it won’t fit at all.
4. The Upcycled Sweater Draft Snake Coziest Look (~$3)
Old sweaters and old pillowcases are a great way to use textiles you were going to donate anyway. A sweater sleeve is already a fabric tube sew the cuff shut fill it close the top. Chunky knit reads intentional rather than improvised which matters if this thing lives at your front door where guests see it. Same rule applies. Heavier filling not just stuffing.
5. The Tailored Canvas Stopper Most Polished (~$12)
Want a decorative door draft stopper that looks bought? Half a yard of fabric from Joann or Michaels in canvas or velvet gets you there. Cut the fabric to twice the finished width plus seam allowance fold the fabric in half with right sides together sew the long side of the fabric and one end turn it right side out fill close. This is where a stylish door draft stopper earns its place in an entryway. If you like sewing your decor I went much further down that road when I tried fabric as wallpaper in my rental.
6. The Thermal Door Curtain Best for a Severely Drafty Entry Door ($28–$55)
When the leak is around the whole door frame and not just the floor a stylish heavy door curtain hung on a tension rod inside the doorway beats any snake. A single thermal blackout panel (Deconovo and NICETOWN both sell them typically $18–$35 per panel) on a tension-mounted rod gives you a full-height air barrier with no drilling.
I almost skipped this method entirely. Glad I didn’t it turned out to be my biggest comfort upgrade and also my most expensive. If you want it to read as decor rather than insulation the same tension-and-fabric logic I use to hang a tapestry without damage applies here.
7. The Plastic Bag Filler Version The One I’d Skip (~$1)
Stuffing a pillow case with plastic grocery bags is all over Pinterest as a free fix. It’s genuinely free and genuinely bad. Bags weigh nothing they compress into a lumpy mass within days and mine rustled every time the door moved. Eleven days and I pulled it apart. It’s here because honest failure disclosure is the whole point of this blog.
Bottom line: pick your filler for weight first and looks second a gorgeous stopper that slides out of place blocks nothing.
Pro Tips for Renters:
- Seal the filler in an inner sleeve. Pour your rice or litter into a knotted sock or a zip bag first then slide that inside the decorative cover. Now the cover is washable and you can re-stuff it in thirty seconds instead of rebuilding the whole thing.
- Cut two inches wider than your door not exact. Measure the width of your door and add two inches. A finished draft stopper cut to the exact width leaves both corners open and corners are where most of the cold air actually gets in.
- Skip rice if your building has a pest history. In older walk-ups rice and beans can attract pantry pests. Clay cat litter and aquarium gravel are inert heavier and cost about the same.
- Use a funnel and fill it in the bathtub. I remember kneeling on the living room rug with a pound of dry lentils and a wide-mouth jar thinking I had it under control. I did not. I was still finding lentils behind the radiator in April.
- Never put adhesive on a rental door face. Stick-on sweeps and adhesive foam strips are the number one way this project turns into a deposit deduction on a hollow-core or veneer door.
Step-by-Step: How to Make a Door Draft Stopper Without Damaging Your Rental
This is the sewn fabric door draft stopper with the no-sew alternative called out at every step. Total time: about 45 minutes. Total cost with scrap fabric: $4–$9.
Step 1 Measure the width and the actual gap. Measure the width of your door at the bottom then add two inches. Then measure the gap under the door itself by sliding a ruler under it. Under an inch is ideal for a snake. Over an inch and you’ll want a door draft blocker DIY with more bulk or a curtain instead. Common mistake: measuring the door frame instead of the door it’s usually an inch wider and your stopper will bunch.
Step 2 Choose your fabric and filler. You need a rectangle of fabric your finished length by about nine inches tall. Denim canvas corduroy fleece and old sweaters all work. Thin cotton wears through where the door drags. For filler use dried rice dried beans clay cat litter or aquarium gravel for weight plus a little poly fill for the ends. No-sew version: skip to a long tube sock or a cut pant leg secured with fabric glue or hem tape.
Step 3 Cut and pin. Lay the side of the fabric you want visible facing in fold the fabric in half lengthwise right sides together and pin along the long edge. Leave a half-inch seam allowance. Trim any frayed edges before you sew. Common mistake: forgetting the fabric needs to be twice the finished width once folded.
Step 4 Sew the tube. Sew the long side and one short end leaving one narrow end open. A machine takes four minutes. A needle and thread backstitch takes about twenty. Turn the fabric tube right side out. No-sew version: fabric glue along the long edge clamped with binder clips dried for the full cure time on the bottle usually 24 hours.
Step 5 Fill it and weight it properly. Use a funnel and pour your weighted filler down the tube stopping about three inches from each end. Pack it firm but not rigid it should still flex and sit on top of an uneven floor. Add stuffing at the tips so the ends hold their shape. Common mistake: filling it so tight it can’t conform to the floor which leaves air channels at both ends.
Step 6 Close it and fit it. Fold the open end in and stitch or glue it shut. Set it against the closed door and press it into the gap. It should look like a snake lying flush against the bottom not standing away from it. Common mistake: mounting anything permanent no screws no adhesive no staples into the door or the threshold.
Step 7 Re-test with the candle. Hold the flame back at the same spot. If it’s still bending your leak is elsewhere. Check the sides and the top of the frame before you blame the stopper.
Bottom line: the whole project succeeds or fails on Step 5 weight beats stuffing every single time.
6 Common Mistakes Renters Make With DIY Draft Stoppers
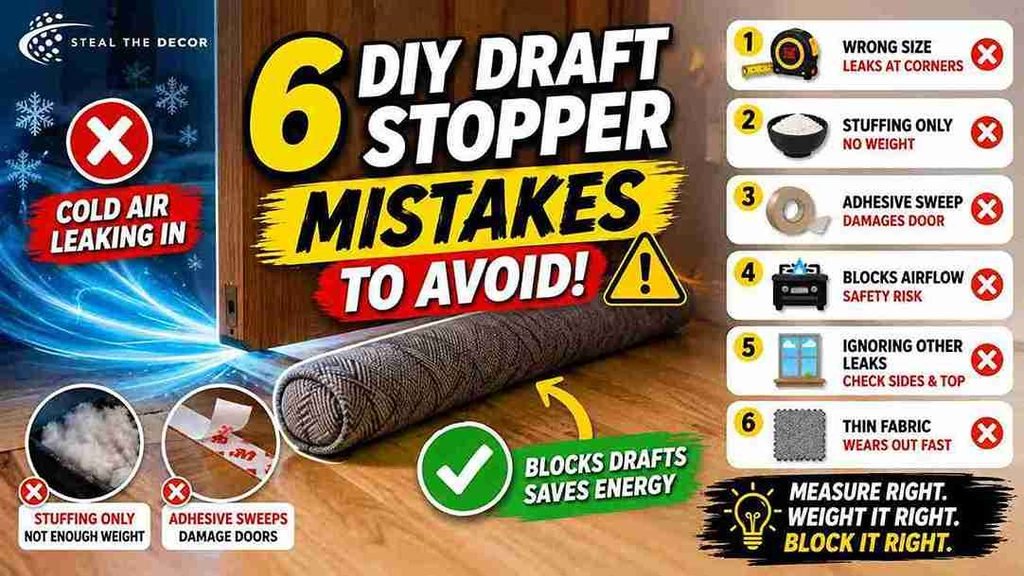
Mistake 1: Making it the exact width of the door. A stopper cut flush leaves both corners exposed and corners leak. Cut it two inches wider so it overlaps at each side.
Mistake 2: Filling it with stuffing only. Poly fill is warm and weightless so the door pushes it aside on the first open. Use rice beans gravel or litter through the body and save the stuffing for the ends.
Mistake 3: Using an adhesive-backed sweep on a rental door. This is the expensive one. Trust me on this skip it. Stick-on sweeps and foam tape bond hard to painted hollow-core doors and take the finish with them. Use a slide-on double sided draft stopper instead which grips by friction and leaves nothing behind.
Mistake 4: Blocking a door that needs airflow. If you have a gas water heater gas furnace or gas range in a closet or a small kitchen that appliance may rely on combustion air moving under the door. Don’t seal that particular door without checking.
Mistake 5: Ignoring the sides and the top. My own and the reason I wasted three weeks. Half my draft came from the top hinge corner while I kept building heavier snakes for the floor. Do the smoke test on the whole perimeter including doors and windows in the same room a window draft stopper on a leaky window sill often does more than another one at the door.
Mistake 6: Choosing thin decorative fabric. Quilting cotton looks lovely and wears through in a month where the door drags across it. Heavy fabric or a washable cover over the working tube solves it.
Bottom line: most “my draft stopper doesn’t work” complaints are actually a measuring problem a weight problem or a wrong-leak problem.
Renter-Safe Draft Stopper Products I Actually Recommend
Not everyone wants a sewing project and a couple of the store-bought options genuinely beat the homemade ones on convenience.
Suptikes Door Draft Stopper (typically $12–$18) is the slide-on double sided door draft stopper I keep on my front door. It grips the bottom of the door with a silicone channel moves with the door and needs no adhesive at all. It’s the one I’d hand a renter who has never made anything. Downside: it can drag on thick carpet.
Holikme Twin Door Draft Stopper (typically $10–$16) is the fabric-covered twin-tube style that sits on both sides of the door. Softer look than the silicone versions and it works well on hard floors. Downside: it slides on smooth tile.
Duck Brand Double Draft Seal (typically $9–$15) is a foam-core version in a fabric sleeve. Cheap effective and the sleeve comes off for washing. Downside: the foam compresses over a season or two.
Deconovo Thermal Blackout Curtain Panel (typically $18–$35 per panel) plus a tension rod is my pick when the whole entry door leaks not just the floor. It doubles as sound damping in a loud hallway. Downside: cost and it’s overkill for a mild interior draft.
And if you’re renting a ground-floor unit with cold coming up through the floor as much as under the door I feel you. That’s a different fix. A thick rug or a foam base helps far more than another snake and I broke both approaches down in my guides to area rug over carpet and temporary flooring for rentals.
| Product / Method | Price Range | Ease of Use (1–5) | Damage Risk | Best For | Our Rating |
|---|---|---|---|---|---|
| DIY weighted denim snake | $0–$6 | 3 | None | Best all-round performance hard floors | 5/5 |
| DIY no-sew tube sock | $0–$3 | 5 | None | Fastest possible fix interior doors | 4/5 |
| DIY pool noodle slide-on | $3–$7 | 4 | None | Doors opened many times a day | 4/5 |
| Suptikes Door Draft Stopper | $12–$18 | 5 | None | Renters who don’t want to make anything | 5/5 |
| Holikme Twin Door Draft Stopper | $10–$16 | 4 | None | A softer look on hardwood | 4/5 |
| Duck Brand Double Draft Seal | $9–$15 | 4 | None | Budget pick with a washable sleeve | 3.5/5 |
| Deconovo thermal curtain + tension rod | $28–$55 | 3 | None | Severe drafts around the whole frame | 4.5/5 |
| Adhesive-backed door sweep | $8–$20 | 4 | High | Homeowners only skip in a rental | 1/5 |
Bottom line: if you buy one thing buy the slide-on style it’s the only store-bought option that moves with the door and still leaves zero residue.
What to Check With Your Landlord Before You Start
A draft stopper needs no permission. The things people bolt on around it sometimes do. Run this list first:
- Nothing adhesive on the door face. No stick-on sweeps no foam tape no mounting squares on a painted or veneer door.
- No screws no drilling into the door the threshold or the frame.
- Check for a fire-rated door. Many apartment entry doors are fire-rated and altering them can violate your lease and local code. A loose stopper on the floor is fine. Anything attached is not.
- Check combustion air. Gas appliances in closets often need airflow under the door.
- Confirm nothing blocks egress. A curtain over an entry door shouldn’t slow you down opening it in an emergency.
- Ask whether this is a repair not a project. A warped door a missing threshold or crumbling weatherstripping is usually the landlord’s job. Most states require landlords to keep a unit habitable and HUD’s own guidance on what rights you have as a tenant or renter is a reasonable place to start before you check your state’s tenant handbook.
- Put the request in writing. Email creates a record. A hallway conversation doesn’t.
Bottom line: submit the maintenance request first then make the draft stopper for the gap that’s still left.
Real Results: What I Got for $23.40 and Two Weekends
The full accounting because vague “it was cheap!” claims help nobody.
- Dried pinto beans two pounds $2.19
- Clay cat litter small bag $4.29
- Denim: free (dead jeans)
- Half yard of canvas from Joann $6.50
- Pool noodle $1.29
- Thread and a pack of needles $3.14
- Fabric glue for the no-sew test $5.99
- Total: $23.40 across all seven builds
What worked: the denim bean snake and the pool noodle slide-on. My entryway lost its cold zone at floor level and the hallway cooking smell that used to arrive around 7 p.m. mostly stopped arriving.
What failed: the plastic bag version and my first canvas attempt. I cut that one to the exact door width and then watched it leak at both corners like it had been designed to. Not gonna lie that stung more than the plastic bags did. Re-cut it two inches wider and it was fine.
But the biggest single improvement wasn’t a stopper at all. It was the thermal curtain on a tension rod because most of my air was coming around the frame I’d spent three weeks optimizing the wrong variable. Same lesson I learned the hard way when I tried to hide ugly wall vents before checking where the airflow actually went.
Bottom line: $23 and two weekends bought me a warmer entryway and one clear conclusion diagnose before you build.
FAQ: DIY Door Draft Stoppers for Renters
What is the best filling for a homemade door draft stopper?
Dried rice dried beans aquarium gravel or clay cat litter. All four add the weight that keeps the stopper against the door instead of sliding away. Poly fill alone is too light. In buildings with pantry pests choose gravel or litter over rice and beans.
How do I make a door draft stopper without sewing?
Fill a long tube sock or a cut-off pant leg with dried rice or cat litter using a funnel then knot or glue the open end. Lay two end to end if one doesn’t span the door. It takes about ten minutes and costs almost nothing.
Is a DIY draft stopper safe for a rental door?
Yes. A floor-resting draft stopper touches nothing attaches to nothing and leaves no residue which makes it fully deposit-safe. The risk comes from adhesive-backed sweeps and foam weatherstripping which can pull paint or veneer off a rental door when removed.
Will a draft stopper leave marks on hardwood or carpet?
It shouldn’t. Fabric stoppers rest on the surface without adhesive. The only real issue is trapped moisture if your entry gets wet from snow or rain lift the stopper occasionally so the floor dries and nothing discolors underneath.
How much does it cost to make a door draft stopper?
Between $0 and about $12. Using an old pair of jeans an old sweater or a sock with rice you already own costs nothing. Buying half a yard of canvas plus filler runs roughly $8–$12. Store-bought versions typically cost $9–$18.
What’s the best store-bought draft stopper for renters?
The Suptikes Door Draft Stopper (typically $12–$18) is the strongest renter pick because it slides onto the door with a silicone grip moves with the door and uses no adhesive. The Holikme Twin Door Draft Stopper is a good fabric-covered alternative on hard floors.
What do I do if my draft stopper isn’t working?
Run a candle or incense test along the whole door bottom sides top and latch. If the flame bends anywhere other than the floor the leak isn’t at the gap and a thermal door curtain on a tension rod or a landlord repair request will do more than a heavier snake.
Key Takeaways
- A DIY door draft stopper is a weighted fabric tube that rests against the gap under a door to block cold air and it is fully removable which makes it the only draft fix that carries no deposit risk in a rental.
- The best filling for a homemade door draft stopper is dried rice dried beans aquarium gravel or clay cat litter because weight rather than stuffing volume is what keeps the stopper in position when the door opens.
- A door draft stopper should be cut roughly two inches wider than the door since a stopper cut to the exact door width leaves both corners open to airflow.
- Adhesive-backed door sweeps and foam weatherstripping are the highest damage risk in this category for renters because they can lift paint or veneer from hollow-core apartment doors on removal.
- The Suptikes Door Draft Stopper and the Holikme Twin Door Draft Stopper are slide-on double-sided models that move with the door and require no adhesive or drilling typically costing $10–$18.
- A thermal blackout curtain panel from a brand such as Deconovo or NICETOWN hung on a tension rod addresses drafts around the entire door frame rather than only the floor gap and typically costs $18–$35 per panel.
- The U.S. Department of Energy identifies air leakage around doors and windows as a significant source of heat loss but a floor-level draft stopper only addresses the under-door portion of that leakage.
Before You Cut Up Those Jeans
If you take one thing from three weekends of this: hold a candle along the whole door before you build anything. Half the people who think their draft stopper failed were never leaking at the floor to begin with. And when you do build it load it with beans or litter rather than fluff. That one choice separates the version that stays put from the one you’ll be kicking back into place all winter.
Have you made a draft stopper for your rental? Did the rice attract anything it shouldn’t have? Tell me in the comments I want to know whether the cat litter trick holds up in a humid apartment because mine is bone dry.
Every product named above is one I actually bought and used in my own place including the ones I didn’t love. You don’t need a landlord’s permission to be warm.