
Table of Contents
The tapestry hit the floor at 1 a.m. Three months into my lease, right after I’d finally gotten the fold marks to relax. A single thumbtack gave out, and I stood there at midnight with a roll of painter’s tape, doing the math on whether a strip of fabric that cost less than dinner was about to cost me part of my security deposit. That night sent me down a two-month rabbit hole of testing how to hang a tapestry without damage—every method I could find, across three different wall types in two different apartments.
Not gonna lie — I expected one method to just win. It didn’t work that way.
I tested six methods total on smooth drywall, on a textured popcorn wall in a dorm-style studio, and on the exposed brick accent wall in my current place. Some held for months. One failed in under 48 hours. This guide is how to hang a tapestry without damage, broken down by exactly how heavy your tapestry is and what your walls are actually made of—so you’re not guessing with your deposit on the line.
⚡ The Short Version: For lightweight cotton or polyester tapestries on smooth drywall, Command Picture Hanging Strips by 3M hold securely and remove cleanly. For medium-weight woven or jacquard tapestries, hook-and-loop Velcro strips distribute weight better than a single point of contact. For heavyweight or rug-weight tapestries, a wooden dowel batten takes the strain off any single adhesive point. If your walls are textured or brick, skip adhesive strips entirely and use a hidden neodymium magnet or a hardwall hanger instead.
What Counts as “Damage-Free” When Hanging a Tapestry?
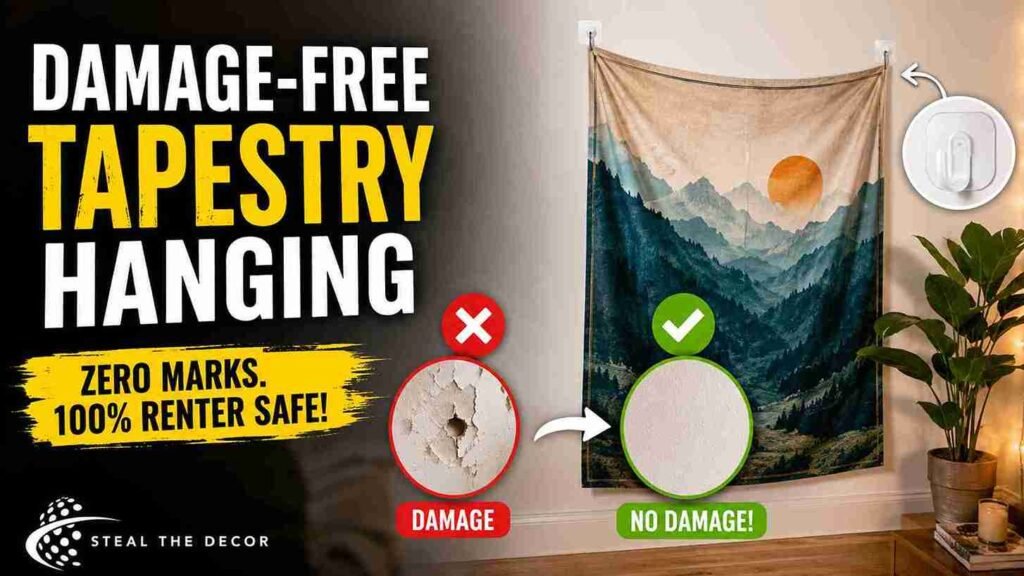
“Damage-free” doesn’t mean zero contact with your wall—it means zero permanent marks after removal. A method qualifies as renter-safe if it leaves no holes, no paint peeling, and no adhesive residue once you take it down. Most standard leases call out nail holes and adhesive residue specifically as chargeable damage. That’s exactly why so many renters just lean tapestries against furniture instead of actually hanging them.
And here’s the part most people don’t realize: damage-free hanging has gotten a lot more reliable in the last few years. Command-brand strips now rate for up to 20 pounds on the heaviest line, according to 3M’s own weight limit guide, and reversible hook-and-loop tape has closed the gap with traditional nails for anything under a few pounds. What works for you comes down to two things—how heavy your tapestry actually is and what your wall is made of. We’ll cover both.
Bottom line: “damage-free” is a removal test, not a hanging test—if it comes off clean, it counts.
Do Command Strips / Adhesive Tape Actually Hold a Tapestry? (Skeptic Check)
Yes—but only within specific weight and surface conditions, and I learned that the hard way. My first attempt used a single row of generic dollar-store adhesive strips on a lightweight polyester tapestry. It held for exactly two days before sliding down the wall in a slow, sad droop.
Here’s the nuance. Command Picture Hanging Strips by 3M (typically $8–$14 for a multipack) work reliably when the fabric weighs under two pounds and the wall is smooth, painted drywall—not satin, not freshly painted within 30 days, and not textured. When I switched to genuine Command strips, spread enough of them along the top edge instead of clustering at the corners, and let them cure the full hour before hanging any weight, the same tapestry held for four months without budging.
Where it doesn’t work: textured walls, humid bathrooms, cold exterior walls in winter, and anything over roughly three pounds. If your tapestry is heavier or your wall isn’t smooth, skip ahead—you’ll want the Velcro or dowel method instead.
Bottom line: adhesive strips are reliable for light fabric on smooth walls, not a universal fix.
The Fabric Weight Matrix: 6 Damage-Free Ways to Hang a Tapestry by Weight
Not every tapestry is the same job. A thin cotton flag-style tapestry and a heavyweight woven rug-style wall hanging need completely different hardware, and using the wrong one is the single biggest reason these methods fail. I sorted this by weight class because that’s what actually decides what holds it.
Lightweight (polyester or thin cotton, under 2 lbs):
- Command Picture Hanging Strips by 3M (around $8–$14) — the most reliable no-drill option for smooth drywall. Apply three to four strips evenly along the top edge rather than clustering them at the corners.
- Double-sided mounting tape (around $6–$10)—a cheaper backup option, but it holds weaker and can leave a faint residue if left up for longer than a few months.
Medium weight (woven or jacquard fabric, 2–5 lbs):
- Hook-and-loop Velcro strips (around $10–$18) — this is what finally solved my drooping problem. Because the fabric attaches along a full continuous strip instead of a few adhesive points, the weight distributes evenly instead of pulling on one spot.
- Bulldog clips plus adhesive hooks (around $12–$20 combined) — clip the tapestry’s top edge, then hang the clips from small Command-brand hooks. Adds a bit more of a “gallery” look, if you don’t mind visible hardware.
Heavyweight or rug-weight (over 5 lbs):
- Wooden dowel batten setup (around $8–$15 for the dowel plus curtain rings or a fabric sleeve) — sew or clip a sleeve along the top edge, slide a wooden dowel through, and rest the dowel on two small Command hooks. This is the only method I’ve tested that reliably holds heavier tapestries without stressing the fabric itself.
- Heavy-duty magnet method — covered in full below. Honestly, the one that surprised me most.
If your walls are textured or made of brick, skip the adhesive-based options above entirely. Check the wall texture section further down before you commit to a method.
💡 Pro Tips for Renters:
- Test your wall’s paint age before committing. Adhesive strips bond poorly to paint under 30 days old—if you just moved in, wait it out or use Velcro instead.
- Wipe the wall with rubbing alcohol before applying any adhesive. Dust and oil are the number one reason strips fail early. This single step doubled how long mine held.
- Weigh your tapestry on a kitchen scale before choosing a method. Guessing “it feels light” is exactly how my first attempt fell.
- Hang two horizontal rows of strips instead of one for anything wider than four feet. Wide fabric sags in the middle without a second line of support.
- Never mount directly over a heating vent or window. Temperature swings soften the adhesive bond over time.
This guide pairs well with my full breakdown on gallery walls without nails if you’re mixing framed art with your tapestry, and the same weight-matching logic applies if you’re also working on large-scale wall art for apartments. If you’re hanging anything on the heavier end, my guide to hanging mirrors without drilling covers a lot of the same weight-distribution principles.
Step-by-Step: How to Hang a Tapestry Without Damaging Walls
A step-by-step guide for renters on how to hang a tapestry without damaging walls, covering adhesive strips, velcro, dowel batten, and hidden magnet methods.
30
How to Hang a Tapestry Without Damage
A step-by-step guide for renters on how to hang a tapestry without damaging walls, covering adhesive strips, velcro, dowel batten, and hidden magnet methods.
Supply:
- Adhesive strips or velcro fasteners or dowel + hooks or neodymium magnets (depending on method chosen)
Tools:
- Rubbing alcohol, painter's tape, kitchen scale, Command Picture Hanging Strips or chosen hardware
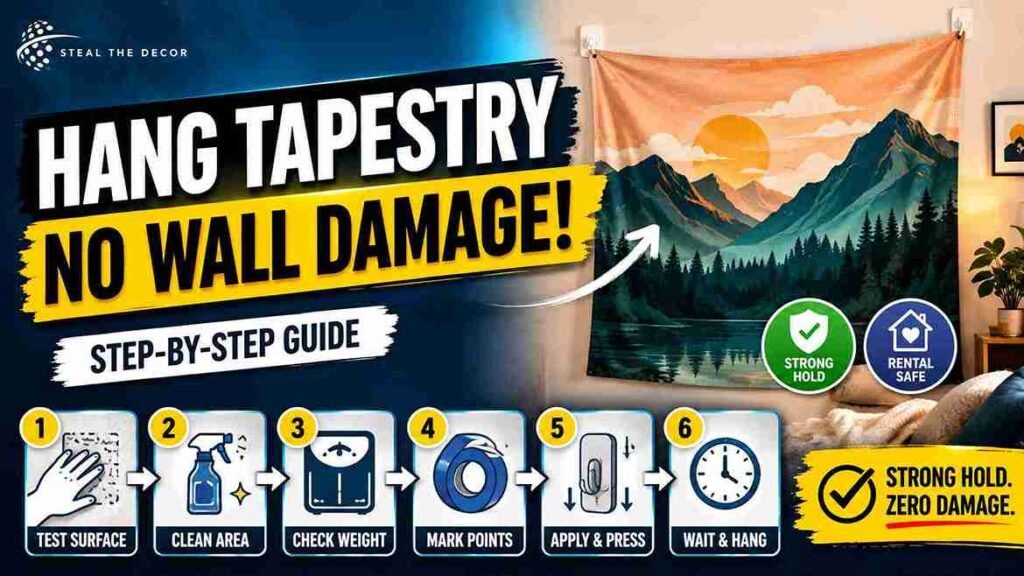
Step 1: Test your wall surface. Run your fingers across the mounting area. Smooth and painted means adhesive strips or velcro are fair game. Any texture, bumps, or exposed brick means you need the magnet or hard wall hanger method instead.
Step 2: Clean the surface with rubbing alcohol. Wipe the exact mounting area and let it dry fully for at least 60 seconds. Skipping this step is the most common reason adhesive fails early.
Step 3: Weigh your tapestry and choose your method from the weight matrix above. Don’t eyeball it. A bathroom scale takes ten seconds and saves you a midnight floor incident like mine.
Step 4: Mark your mounting points with painter’s tape, not pencil. This keeps you from having to touch up paint later if your placement is off.
Step 5: Apply your chosen hardware and press firmly for 30 seconds per point. For adhesive strips specifically, let them cure a full hour before adding the tapestry’s weight—this is the step almost everyone rushes.
Step 6: Hang the tapestry and check the load after 24 hours. Most failures happen in the first day, not months later. If it’s holding a full day in, it’s usually holding for good.
Bottom line: the curing time you skip is the failure you’ll deal with two days later.
Wall Texture Troubleshooting: Popcorn, Plaster, and Brick Walls
Standard adhesive strips fail on textured surfaces because they need full, flat contact to bond—and textured walls simply don’t offer that. This is the gap most big-box guides skip entirely, and it’s exactly where my dorm-room testing went sideways the first time.
I was skeptical anything would hold on that wall. Really skeptical.
Textured drywall or popcorn ceilings: standard Command strips won’t hold reliably here — the surface contact area is too inconsistent. Use a Velcro adhesive block designed for textured surfaces instead, and give it extended curing time, closer to 24 hours instead of one, before adding any weight. I got a full semester out of a dorm tapestry this way, after two failed attempts with regular strips.
Brick or concrete walls: adhesive of any kind is a losing battle on masonry. Hardwall hangers made for brick and concrete grip into mortar lines without leaving a visible hole. Or suspend the tapestry from a ceiling suspension hook near the crown molding instead of mounting into the brick face directly.
And if you’re in a rental with textured walls—I feel you. This section exists because of that dorm room.
Bottom line: if your walls are textured or masonry, skip adhesive strips entirely. They’re the wrong tool for the surface, not a weaker version of the right one.
The Invisible Magnet Hack: The No-Hardware Tapestry Trick
The hidden magnet method is the only approach I tested that leaves zero visible hardware on the front of the tapestry. I found this one buried in a Reddit thread from a fellow renter, and it turned out to be the single most requested tip when I shared it with friends.
Here’s how it works. Stick a small 3M adhesive strip to the wall, then attach a strong neodymium magnet to it. Drape the tapestry over the mounting area, then press a matching magnet against the fabric from the front, directly over the hidden one behind it. The two magnets clamp the fabric between them—no clip, no hook, no visible hardware. Just a clean edge.
I remember standing there the first time, pretty sure the magnets were going to be too weak to hold real fabric weight. Pressed them on anyway. Four months later, still there, no marks.
I used four magnet pairs (about $14 for a full set) along the top edge of a medium-weight jacquard tapestry, and it held through an entire humid summer without a single slip. One catch: this method depends on the wall behind the fabric being smooth enough for the adhesive strip to bond, so it’s not a fix for brick or heavy texture. Pair it with the wall troubleshooting section above. If you’re already down the no-drill rabbit hole, the same logic carries over to hanging plants without drilling—different object, same weight-and-surface math.
Bottom line: if you hate visible hooks and clips, the magnet method is the closest thing to invisible mounting you’ll find.
Common Mistakes Renters Make Hanging a Tapestry
Here’s what trips up most people—including me, the first time around.
Skipping the rubbing alcohol wipe-down. Dust and oils from your hands are invisible, but they wreck adhesion. Wipe the wall before you mount anything. Every time.
Guessing the fabric weight instead of checking it. I assumed my first tapestry was “basically nothing” and used a single strip. It weighed closer to three pounds. Weigh it—it takes ten seconds.
Clustering adhesive at the corners only. Corners concentrate stress on two tiny points. Spread strips or velcro evenly along the entire top edge instead.
Hanging immediately after applying adhesive. Most command-style products need close to an hour of cure time before they can hold real weight. Rushing this is the fastest way to a midnight floor incident.
Using adhesive on textured or newly painted walls. Fresh paint under 30 days and popcorn texture both compromise the bond. Wait it out, or switch to velcro or magnets.
Forgetting to check with the landlord about lease language. Some leases restrict adhesive products even when they’re removable. Always confirm before you mount anything semi-permanent.
Renter-Safe Tapestry Hooks, Clips & Adhesives We Actually Recommend
These are the products that actually earned a spot on my wall after testing. Not a generic Amazon dump.
Command Picture Hanging Strips by 3M (typically $8–$14) — the most consistent option for lightweight tapestries on smooth drywall. Removes completely clean.
VELCRO Brand Heavy Duty Fasteners (typically $10–$18) — best for medium-weight woven tapestries. Spreads weight along a full strip rather than a single point.
3M Command Wire Hooks (typically $6–$10) — useful for the bulldog-clip method, rated for a few pounds each.
Wooden dowel + curtain ring set (typically $8–$15) — the go-to for heavyweight, rug-style tapestries. Distributes weight along the entire top edge through the dowel.
Neodymium magnet set (typically $12–$18 for eight magnets)—the hidden-hardware option, best on smooth walls only.
Hardwall picture hangers for brick/concrete (typically $9–$16) — the only reliable no-adhesive option for masonry walls.
There are really only three things that matter when you’re picking between these: — Your tapestry’s actual weight — Your wall’s surface (smooth, textured, or masonry) — How much visible hardware you’re okay with Get those three right, and the rest is just picking a price point.
| Product / Method | Price Range | Ease of Use (1–5) | Damage Risk | Best For | Our Rating |
|---|---|---|---|---|---|
| Command Picture Hanging Strips by 3M | $8–$14 | ⭐⭐⭐⭐⭐ | ✅ None | Lightweight tapestries, smooth drywall | 5/5 |
| VELCRO Brand Heavy Duty Fasteners | $10–$18 | ⭐⭐⭐⭐ | ✅ None | Medium-weight woven tapestries | 4.5/5 |
| 3M Command Wire Hooks + clips | $12–$20 combined | ⭐⭐⭐⭐ | ✅ None | Gallery-style visible hardware look | 4/5 |
| Wooden dowel + curtain rings | $8–$15 | ⭐⭐⭐ | ✅ None | Heavyweight or rug-style tapestries | 4.5/5 |
| Neodymium magnet set | $12–$18 | ⭐⭐⭐ | ✅ None | Hidden, hardware-free mounting | 5/5 |
| Hardwall hangers | $9–$16 | ⭐⭐⭐ | ⚠️ Minor residue | Brick and concrete walls | 4/5 |
What to Check With Your Landlord Before You Start
- Confirm whether your lease explicitly restricts adhesive products, even removable ones.
- Ask if there’s a documented exception process for textured or popcorn walls.
- Check your move-in condition report for existing wall damage so you’re not held responsible later.
- Get any verbal approval for hanging methods in writing, even a text message.
- Ask specifically about brick or masonry walls if your unit has an exposed accent wall — some leases treat these differently.
- Review your local tenant rights resources for what actually counts as “damage” versus normal wear. Justia’s security deposit rights overview is a solid starting point before you dispute any deduction.
Real Results: What I Got for $34
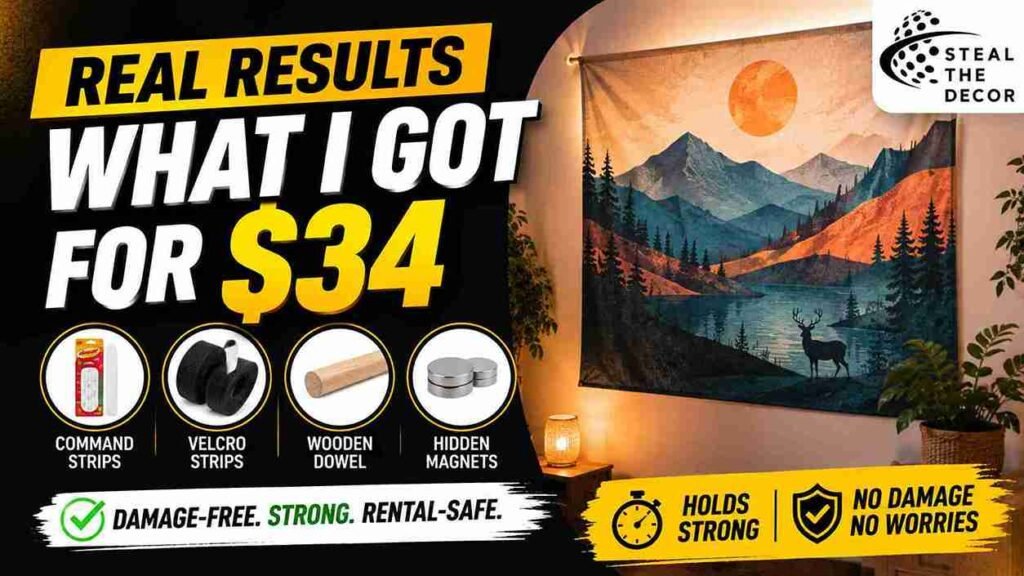
I spent $34.72 total across the two methods I ended up keeping: Velcro strips for a jacquard tapestry in my bedroom and the magnet method for a lighter cotton one in the living room. The Velcro held through six months without a single droop. The magnet method looked cleaner but took longer to set up the first time—closer to 20 minutes versus five for the Velcro.
But the one failure taught me more than either success. I tried the basic double-sided tape method on my dorm’s popcorn-textured wall out of laziness, and it lasted less than 48 hours before sliding down mid-afternoon. Texture always wins over convenience.
🔑 Key Takeaways
- Command Picture Hanging Strips by 3M hold reliably on smooth drywall for tapestries under roughly two pounds and remove without paint damage.
- Velcro-style hook-and-loop fasteners distribute weight more evenly than point-adhesive strips, making them better suited to medium-weight woven or jacquard tapestries.
- Wooden dowel battens are the most reliable damage-free method for heavyweight or rug-style tapestries because they spread the load across the entire top edge.
- Textured surfaces like popcorn walls and brick require different hardware—Velcro adhesive blocks with extended curing time for texture, hardwall hangers, or ceiling suspension hooks for masonry.
- The hidden neodymium magnet method allows a tapestry to be mounted with zero visible hardware by clamping fabric between two magnets on either side of the wall.
- Wiping the wall with rubbing alcohol before applying any adhesive product significantly extends how long the bond holds.
- Most damage-free hanging failures happen within the first 48 hours, usually from skipped adhesive curing time or mismatched fabric weight.
Conclusion
Six methods, three wall types, and one 1 a.m. floor incident later—here’s where that leaves you: there’s no single best way to hang a tapestry without damage. There’s just the right method for your specific fabric and wall. Match the weight to the hardware, respect your wall’s texture, and give adhesive the time it actually needs to cure, and you’ll skip the wake-up call I had.
Have you tried hanging a tapestry in your rental? Tell me what happened below—I’m always curious which method held up longest in different climates. If you’re tackling more of your walls next, my guide on rental-friendly accent wall ideas is a natural next step. All the products I tested and recommend are linked above—I’ve tried every single one myself.
🧰 Want the Full Damage-Free Rental Playbook?
This lamp cord fix is just one piece of the puzzle. For everything else — walls, vents, mirrors, shelves, and more — here’s my Ultimate Damage-Free Home Styling Guide (2026 Edition). Click here to grab the full guide →
FAQ: how to hang a tapestry without damage
What is the best way to hang a tapestry without damaging walls?
For lightweight tapestries on smooth drywall, Command Picture Hanging Strips by 3M are the most reliable damage-free option. For heavier or textured-wall situations, velcro, a wooden dowel, or the hidden magnet method works better.
How do you hang a heavy tapestry without damaging walls?
Use a wooden dowel batten through a fabric sleeve or curtain rings, then rest the dowel on two small Command™ hooks. This spreads the weight along the entire top edge instead of concentrating it on a single adhesive point.
Are Command Strips safe for rental walls?
Yes, when used on smooth, painted drywall that’s more than 30 days old. They’re built to remove cleanly without pulling off paint, as long as you follow 3M’s official removal instructions—the key detail is pulling the strip straight down, never outward.
Does hanging a tapestry leave residue or damage?
Adhesive-based methods can leave faint residue if left up for over a year or removed incorrectly. Removing strips slowly, straight down rather than outward, prevents most paint damage.
How much does it cost to hang a tapestry without damage?
Expect to spend roughly $15–$35 depending on your tapestry’s weight and wall type. Adhesive strips and Velcro sit on the cheaper end, while magnet sets and dowel setups cost slightly more upfront.
What’s the best brand for damage-free tapestry hooks?
Command by 3M is the most consistently reliable brand for lightweight to medium tapestries. For heavier or textured-wall situations, VELCRO® Brand fasteners and neodymium magnet sets perform best.
What do I do if my tapestry falls or the adhesive fails?
Remove any leftover adhesive residue with rubbing alcohol, let the wall dry fully, and switch methods based on weight. Most failures happen because the original method didn’t match the tapestry’s actual weight or the wall’s texture.