
Table of Contents
The panel fell off at 2 a.m. A loud slap against the hardwood floor woke me up—three hours of Saturday work, undone in one second. That was attempt number two at figuring out how to style a blank wall behind a TV in an apartment where drilling isn’t an option. And it taught me the most important rule of this whole project: whatever goes on that wall has to survive gravity, a curious cat, and a move-out inspection.
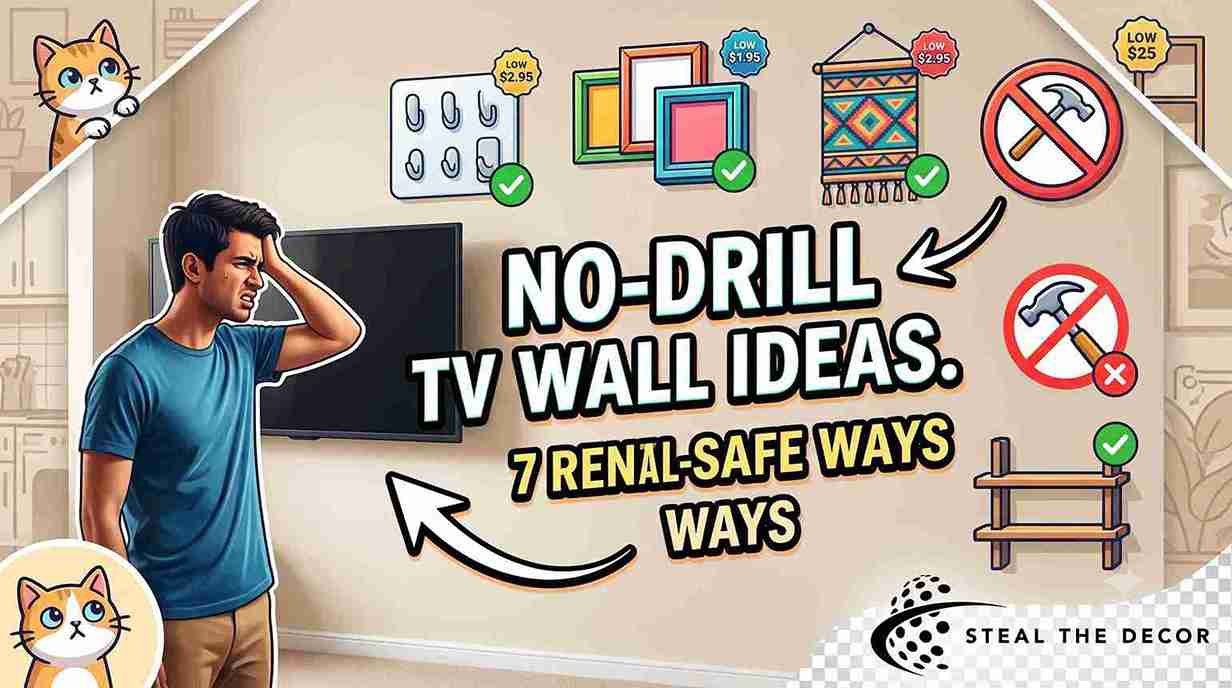
I live in a 700-square-foot one-bedroom with a strict no-nail-holes clause in my lease. My TV sits mounted on a plain white wall with nothing around it—just a black rectangle floating in beige nothingness. I tested seven different ways to style that wall over three weekends and spent just under $180 total. Two products got returned. Not gonna lie — one of them was a genuine disaster. This guide covers how to decorate a large wall with a TV using only damage-free, deposit-safe methods, including the two that failed, so you don’t waste your money on them.
Quick Answer: To style a blank wall behind a TV without drilling, anchor the space with a media console wider than the screen; flank it with asymmetrical floating shelves mounted using tension brackets or heavy-duty Command Strips; and surround the TV with a curated gallery of matte-framed prints, leaving 4–6 inches of negative space around the screen itself. Add texture with peel-and-stick wood slat panels or removable wallpaper, then soften the whole setup with trailing plants like pothos on the shelves or console. Every product mentioned below has been tested for rental safety — meaning it removes cleanly and won’t cost you your deposit.
Understanding Visual Balance: The Rules of Scale Around a Screen
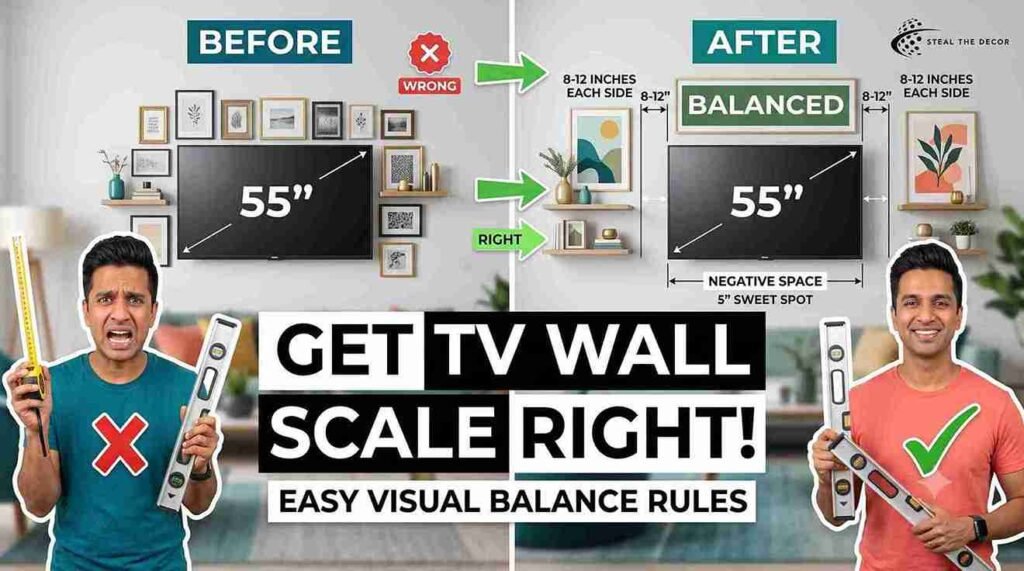
Scale is the difference between a TV wall that looks intentional and one that looks like a computer store display. The general rule: your shelves, console, or gallery wall should extend 8–12 inches beyond each side of the TV to visually “hold” it in place, instead of leaving it stranded in the middle of a blank field.
Here’s how that breaks down by common TV sizes, based on what I measured against my own 55-inch set and a friend’s 65-inch setup:
| TV Size | Recommended Console/Shelf Width | Recommended Art Cluster Size | Suggested Negative Space Around TV |
|---|---|---|---|
| 43″ | 48–55″ | 36–40″ total spread | 4 inches |
| 55″ | 60–70″ | 48–55″ total spread | 5 inches |
| 65″ | 72–84″ | 58–65″ total spread | 6 inches |
Negative space — the breathing room between your TV and the surrounding decor — matters more than most people think. Too little, and the wall looks cluttered the second the screen goes dark. Too much, and the TV looks like an afterthought stuck onto a finished gallery. I found 5 inches was the sweet spot on my own 55-inch screen. Anything tighter made the frames look like they were fighting the bezel for space.
Measure your TV width first. Build your shelf or art layout around that number — not the other way around.
Rental-Friendly Ways to Decorate Your TV Wall (Damage-Free)
Most decorating advice for TV walls assumes you can drill, paint, or install permanent paneling. None of that helps if you want your security deposit back. Here are the five methods I actually tested in my rental, ranked by how well they held up.
- Command Picture Hanging Strips by 3M were my most reliable pick. Rated for up to 16 pounds per set, they held four framed prints around my TV for three months with zero slippage and peeled off the painted drywall without a mark (around $8–$14 for a multi-pack on Amazon).
- Peel-and-stick wood slat panels gave the wall real texture without a single screw. I used a set from Art3d, and it took about 90 minutes to apply around a 6-foot section (typically $40–$70 per pack). One panel edge lifted after a humid week—I fixed it with a dab of removable mounting putty.
- Freestanding, tension-mounted shelving units—a ladder shelf that wedges between floor and ceiling—gave me open shelving with zero wall contact at all. Genuinely the safest option if your lease bans adhesive products entirely (around $60–$120).
- Removable wallpaper, specifically NuWallpaper by Brewster Home Fashions, created an accent-wall effect behind my TV without touching my landlord’s paint job. Up in an afternoon. Down cleanly eighteen months later (typically $25–$45 per roll).
- Adhesive floating ledges rated for lighter loads (under 5 lbs) worked for small plants and photo frames, but I wouldn’t trust them with anything heavier—more on that failure below. ($15–$25 each).
Not everything I tried made the cut. A foam-backed adhesive shelf failed within a week on my slightly textured “orange peel” wall—the adhesive never got full contact with the surface. That’s the panel that fell at 2 a.m. A second product, a bargain-brand adhesive ledge, started sagging within days even though I’d kept it well under its rated weight, so that one went back too. If your walls are textured rather than smooth, skip foam-backed adhesive products entirely and go with a tension-mounted or freestanding option instead.
For more no-drill wall coverage beyond the TV zone, I’ve also written a full breakdown of rental-friendly accent wall ideas, a step-by-step guide to peel-and-stick wood plank walls, and — if wood paneling isn’t quite your style — a look at rental-friendly wall paneling options that install the same damage-free way. If your TV happens to hang above a console you’re also using for mirrors or extra reflective decor, my guide on hanging mirrors without drilling covers weight ratings you’ll want to know before adding anything heavier to the same wall.
💡 Pro Tips for Renters:
- Always test adhesive strips on a hidden patch of wall for 24 hours before committing—some builder-grade paint reacts differently than standard latex.
- Check the maximum weight rating on your Command Strips and subtract 20% as a safety buffer. Manufacturer numbers assume ideal wall conditions — you can check the official Command weight limits guide before you buy.
- Keep the original adhesive packaging until move-out. Some landlords ask for proof of the exact product used if there’s any concern about residue.
- Apply adhesive products at room temperature — I learned the hard way that cold walls in winter weaken the bond significantly.
- Photograph your wall before and after removal. It’s saved me from a deposit dispute once already.
If your walls are textured, skip the foam-backed panels. Go straight to the tension-mounted or freestanding options.
Step-by-Step: Designing a Curated Gallery Wall Around a TV
Measure your wall and mark the TV’s boundaries
Use painter’s tape to outline the exact width and height of your mounted TV. This becomes your reference point for everything else, so don’t skip it even if it feels tedious.
Choose your layout on the floor first
Lay your frames out on the floor in the arrangement you’re considering before a single strip touches the wall. Most people skip this step, which is exactly why so many gallery walls end up crooked or unbalanced.
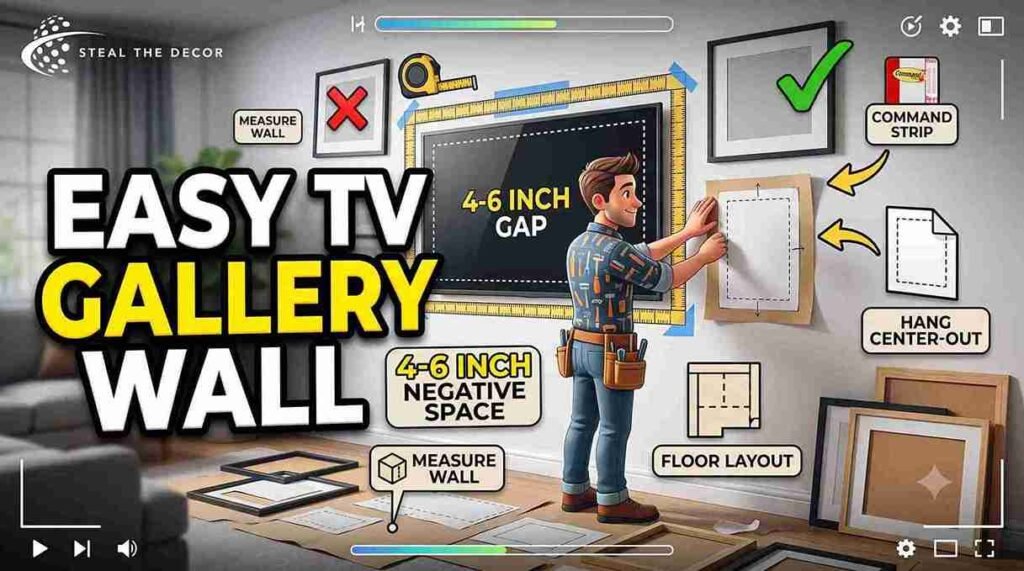
Step 1 — Measure your wall and mark the TV’s boundaries. Use painter’s tape to outline the exact width and height of your mounted TV. This becomes your reference point for everything else, so don’t skip it even if it feels tedious.
Step 2 — Choose your layout on the floor first. Lay your frames out on the floor in the arrangement you’re considering before a single strip touches the wall. Most people skip this. It’s exactly why so many gallery walls end up crooked or unbalanced.
Step 3 — Leave 4–6 inches of negative space around the TV itself. Use a tape measure, not your eye. I thought I’d left enough room on my first attempt and ended up with a frame practically touching the bezel.
Step 4 — Cut paper templates for each frame. Trace each frame onto craft paper, cut it out, and tape the templates to the wall using painter’s tape. Step back and look from across the room before committing to anything.
Step 5 — Apply Command Strips to the back of each frame, following the weight rating for the heaviest piece in your layout. Press firmly for 30 seconds per strip. This is the step people rush, and it’s the difference between a frame that holds and one that doesn’t.
Step 6 — Hang from the center outward, working asymmetrically. Starting at the TV and working out in both directions keeps your negative space consistent, which matters more for visual balance than perfect symmetry.
Here’s something most people miss: a TV gallery wall isn’t a standard gallery wall. The screen is a hard rectangle that dominates the eye, so asymmetrical framing—mixing one larger piece with two or three smaller ones—reads as more intentional than a rigid grid. If you’d rather skip frames altogether, my tutorial on using washi tape to create faux wall frames is a zero-cost variation on the same layout principle.
Template everything on paper before a single Command Strip touches your wall. That’s the whole trick.
Functional Styling: Using Floating Shelves and Media Consoles
A media console wider than your TV is the single fastest way to anchor a TV wall. Even a simple console gives the eye a solid base to rest on, which instantly makes a floating TV look grounded instead of stranded.
For floating shelves around a TV layout, tension-mounted brackets—the kind that wedge against the wall using pressure rather than screws—are the most rental-friendly option I found. Heavy-duty Command Strip shelf brackets rated for 5–7 lbs work fine too, for lightweight decor like small plants or picture frames. I used a set of asymmetrical shelves, one longer and one shorter, flanking the TV at slightly different heights. Added visual depth a matched pair never would have.
| Shelf/Console Type | Price Range | Ease of Install (1–5) | Damage Risk | Best For | Our Rating |
|---|---|---|---|---|---|
| Tension-mounted ladder shelf | $60–$120 | ⭐⭐⭐⭐⭐ | ✅ None | Heavier decor, books, plants | 5/5 |
| Command Strip shelf brackets | $20–$35 | ⭐⭐⭐⭐ | ✅ None (smooth walls) | Lightweight decor only | 4/5 |
| Freestanding media console | $90–$250 | ⭐⭐⭐⭐⭐ | ✅ None | Anchoring the whole wall | 5/5 |
| Adhesive foam-backed shelf | $15–$25 | ⭐⭐ | ⚠️ Minor residue on textured walls | Smooth drywall only | 2/5 |
For a full visual anchor option beyond shelving, check out my guide on large-scale wall art for apartments—a single oversized print above a console does the same grounding job as a full shelf setup, with even less installation effort.
Before you buy a single shelf, buy the console. It does more visual work per dollar than anything else on this list.
How to Hide Ugly TV Wires and Cables Seamlessly
Fabric wire covers are the fastest fix for visible cords running down a rental wall. Unlike paintable raceways, fabric sleeves need zero tools and can be color-matched to your wall in minutes, though they sit slightly more visibly than a painted channel.
For a cleaner look, paintable cord raceways mount with adhesive backing — not screws — and can be painted to disappear entirely into your wall color. Just confirm your landlord allows painting small strips first, since this technically alters a wall surface even temporarily. If your lease bans any wall alteration, the simplest workaround is routing cords behind your media console or a tall plant. That’s exactly what I ended up doing after my landlord flagged the raceway as a gray area.
A cord concealer clip strip running along the baseboard is another no-drill option. Most stick with adhesive pads rather than nails and hold a surprising amount of cable bulk.
And if your TV wall has an HVAC vent competing for attention along with the cords, I’ve got you covered — check out my breakdown on hiding ugly wall vents. The concealment principles overlap more than you’d think.
If your lease is strict, route cords behind furniture before you reach for anything adhesive or paintable.
Introduce Texture and Softness: Biophilic Touches
Indoor plants are the cheapest way to soften the harsh, electronic lines of a TV wall. A trailing pothos on a floating shelf or media console breaks up the rigid geometry of a screen in a way that flat decor alone can’t.
Beyond plants, warm-toned plug-in sconces — no hardwiring or drilling required — add ambient light that makes the whole wall feel finished after dark, rather than just lit by the TV’s glow. Textured elements, like a woven basket, a ceramic vase, or a canvas print with visible brushwork, all add tactile variety that keeps a TV wall from reading as flat and cold.
Want to go further with plants specifically? I have a full guide on hanging plants without drilling, covering tension rods and adhesive hooks rated for planter weight. And if you want texture that goes beyond wood slats, I’ve also tested faux brick wall panels and fabric as wallpaper—both hold up well as a backdrop for a TV nook, specifically.
One trailing plant and one warm light source will do more to soften a TV wall than another framed print ever will.
Mistakes to Avoid When Styling a TV Accent Wall
Ignoring negative space. Cropping frames right up to the TV bezel is the single most common mistake I see—and one I made myself on my first attempt. Leave that 4–6 inch buffer even if it feels like wasted space. It isn’t.
Mismatched art scale. A single small frame next to a 65-inch TV looks like an afterthought. Match your art cluster’s total width to at least 80% of your console or shelf width for real visual balance.
Exposed cords left as an afterthought. This is the fastest way to undercut an otherwise well-styled wall. Plan cord management before you hang a single frame, not after.
Overloading adhesive weight limits. Every Command Strip and tension bracket has a rated maximum, and manufacturer numbers assume ideal, smooth wall conditions. Build in a buffer, especially on textured walls.
Choosing permanent-feeling materials. Heavy wood paneling or paint changes might look incredible on Pinterest, but they’re a lease violation risk in most rental agreements. Stick to reversible, peel-and-stick, or freestanding options.
Forgetting to test on your actual wall texture. What holds on smooth drywall can fail on textured, orange-peel-style walls. Test everything on a small hidden patch first — my guide on peel-and-stick wallpaper on textured walls covers exactly which products handle texture well and which don’t.
Not planning for move-out day. Even damage-free products need a removal plan. If you go the wallpaper route, bookmark my guide on how to remove wallpaper without damaging paint before you ever apply it, not after.
Most TV wall mistakes come down to skipping a five-minute measuring or testing step in favor of just hanging things and hoping.
What to Check With Your Landlord Before You Start
- Confirm whether your lease explicitly restricts adhesive products, not just nails and screws.
- Ask about weight limits your building allows for wall-mounted items, especially in older plaster walls.
- Check if painting even a small raceway strip requires written permission.
- Clarify your building’s policy on wallpaper, even fully removable versions.
- Get any verbal approval for larger installs, like tension shelving units, in writing or email.
- Review your move-out inspection checklist so you know exactly what “damage-free” means to your specific landlord.
- If you want to double-check your baseline rights as a renter before raising anything with your landlord, HUD’s tenant rights overview is a solid, official starting point.
If frames and shelving still feel like too much commitment, removable wall decals are the lowest-risk way to test a TV wall layout before buying anything permanent-feeling.
Real Results: What I Got for $178.40
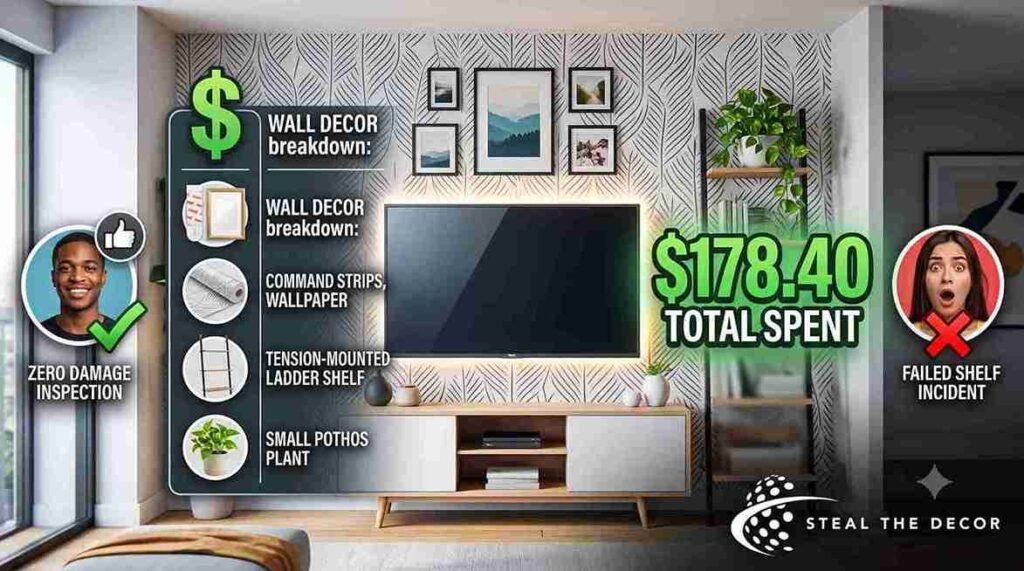
Here’s the actual breakdown from three weekends of testing: Command Strips and hardware ($34.72), removable wallpaper ($38.99), peel-and-stick wood slat panels ($54.00), the TV-wall portion of a tension-mounted ladder shelf split across two rooms, and a small pothos plant plus ceramic pot ($22.50). Total spent on the TV wall specifically: $178.40.
What worked: the gallery wall with Command Strips, the removable wallpaper accent, and the tension-mounted shelf all survived three months with zero damage at inspection. What failed: the foam-backed adhesive shelf, returned for a refund after the 2 a.m. incident. In my experience, spending slightly more on tension-mounted or Command-rated hardware upfront saved me money—and a hole in the wall—in the long run.
🔑 Key Takeaways
- Command Picture Hanging Strips by 3M hold up to 16 pounds and remove cleanly from painted drywall, making them one of the most deposit-safe options for gallery walls around a TV in rental apartments.
- Leaving 4–6 inches of negative space around a mounted TV prevents a styled wall from looking cluttered once the screen is on.
- Tension-mounted ladder shelving carries heavier decor loads than adhesive shelves and involves zero wall contact, making it the safest choice for textured or plaster walls.
- NuWallpaper by Brewster Home Fashions is a peel-and-stick wallpaper option that removed residue-free after eighteen months of use behind a TV wall.
- Foam-backed adhesive shelving isn’t reliable on textured “orange peel” walls and is a common cause of adhesive product failure in rentals.
- A media console wider than the TV screen is the fastest single upgrade for visually anchoring a blank TV wall.
- A full rental-friendly TV wall makeover, including shelving, art, texture, and plants, typically costs between $150 and $250.
Conclusion
A blank wall behind a TV doesn’t have to stay blank just because you can’t drill into it. Between tension-mounted shelving, Command Strips gallery walls, and peel-and-stick texture, I proved to myself over three exhausting, worth-it weekends that “renter-friendly” and “genuinely well-designed” aren’t opposites. If you’re weighing texture options beyond just the TV nook, my guide to rental-friendly accent wall ideas is a good next stop.
Have you tried styling your own TV wall without drilling? Tell me what happened below—especially if something failed, because that’s exactly the kind of detail that helps the next renter avoid the same 2 a.m. surprise I had. All the products I tested and recommend are linked throughout this post. I’ve tried every single one myself.
🧰 Want the Full Damage-Free Rental Playbook?
This lamp cord fix is just one piece of the puzzle. For everything else — walls, vents, mirrors, shelves, and more — here’s my Ultimate Damage-Free Home Styling Guide (2026 Edition). Click here to grab the full guide →
FAQ: how to style a blank wall behind a TV
What size art should I put around my TV?
Aim for your total art cluster or shelf width to reach at least 80% of your TV’s width, with 4–6 inches of negative space directly around the screen. For a 55-inch TV, that’s roughly a 48–55-inch total spread of frames or shelving.
How do I hide TV wires without drilling?
Use adhesive-backed fabric wire covers or paintable cord raceways that mount without screws, or route cords behind a media console or tall plant. Most cord concealer products rated for rentals use removable adhesive strips rather than nails.
Is decorating around a TV with Command Strips actually safe for my deposit?
Yes, when used within their weight rating on smooth painted drywall. Command Strips by 3M are built to remove cleanly without paint damage, though results can vary on textured or unpainted surfaces.
Does peel-and-stick wallpaper leave residue when removed?
Quality peel-and-stick wallpaper, like NuWallpaper by Brewster Home Fashions, is designed to remove residue-free from most painted walls. I removed mine after eighteen months with no marks, though very old or porous paint can react differently.
How much does it cost to style a blank wall behind a TV?
Based on my own testing, a full rental-friendly setup — shelving, art, texture, and plants — runs between $150 and $250 depending on wall size and how many products you combine.
What’s the best brand for no-drill TV wall shelving?
Tension-mounted ladder shelving units performed best in my testing for weight capacity and zero wall damage, while Command Strips shelf brackets worked well for lighter decor loads on smooth walls.
What should I do if an adhesive product fails or falls off the wall?
Remove any remaining adhesive residue with a hairdryer on low heat and a plastic scraper, then switch to a tension-mounted or freestanding alternative rather than reapplying the same adhesive to the same spot.