
Table of Contents
A pot lid clattered off the counter at 7 a.m. and rolled under the fridge. Third morning in a row. That’s the exact moment I decided my rental kitchen needed an intervention that didn’t involve a drill.
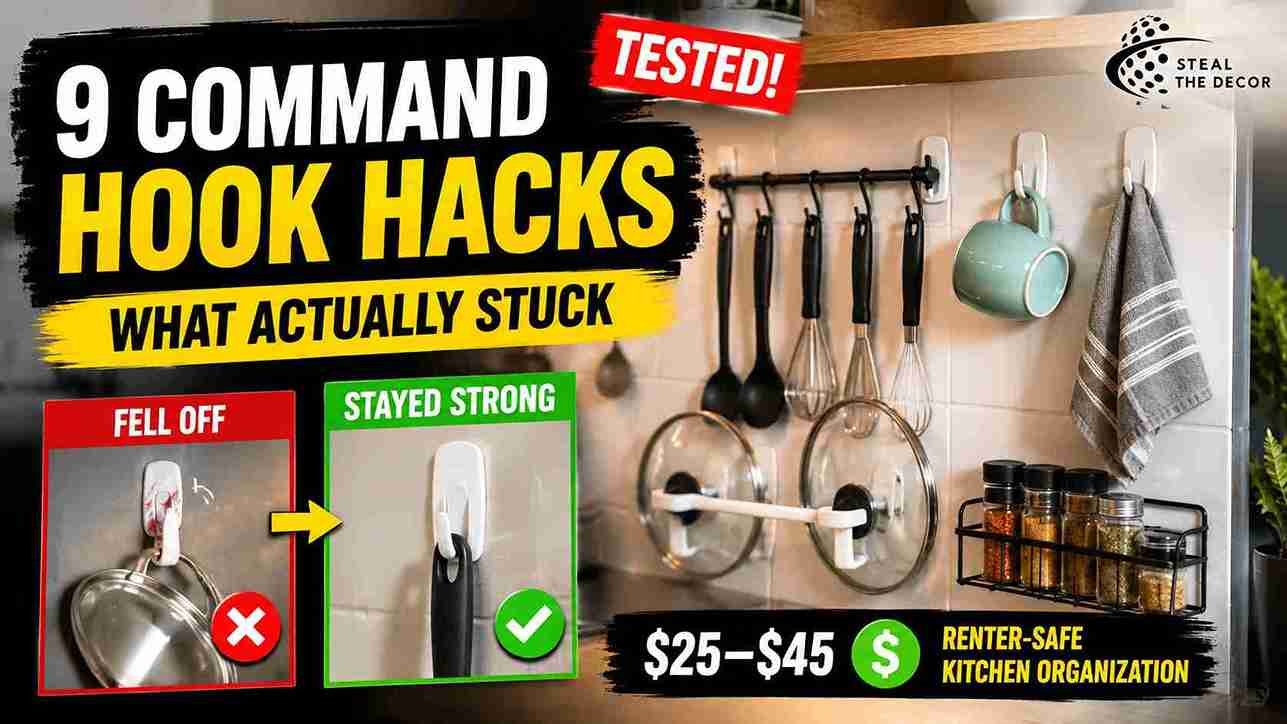
I live in a 650-square-foot apartment—painted drywall, laminate cabinets, and a lease that says, in bold letters, No holes in any surface. So command hooks for kitchen organization became my test subject. Over three weeks, I installed and stress-tested nine different setups: utensil rails, mug hooks, pot lid racks, spice hangers, and all of it. Some held for months. One fell off my tiled backsplash in four days flat.
Here’s exactly what happened, what it cost, and what I’d actually buy again.
⚡ The Short Version: Command Hooks work well for kitchen organization on painted drywall, laminate cabinets, and sealed wood—holding anywhere from 1 to 7.5 pounds depending on size. They struggle on unsealed tile grout, textured plaster, and greasy stovetop-adjacent walls, where the adhesive can lose grip within days. For a full renter-safe kitchen setup covering utensils, lids, towels, and mugs, budget $25–$45.
Why Use Command Hooks in the Kitchen
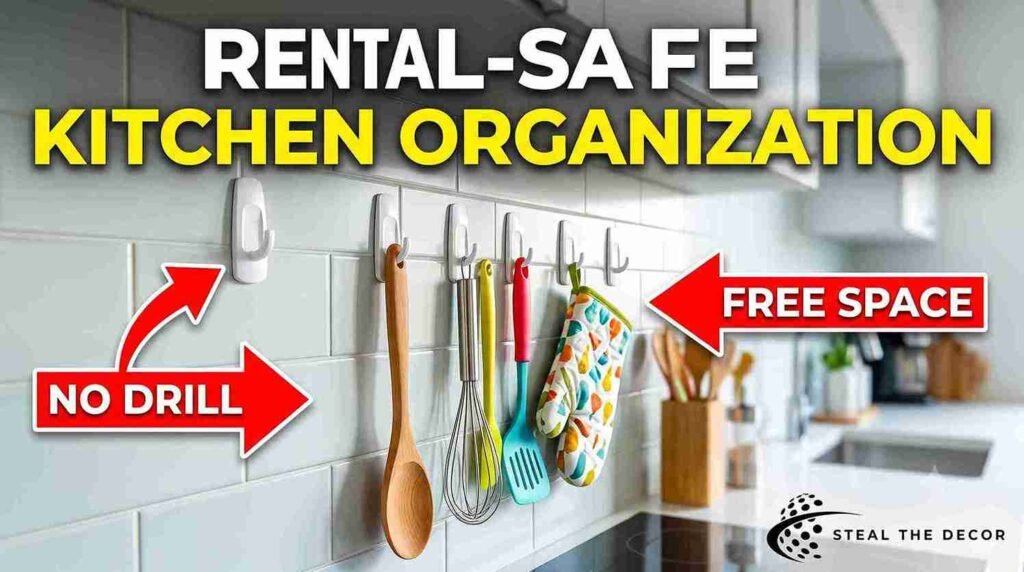
Command Hooks solve one very specific rental problem: you need wall-mounted storage and vertical storage, but you can’t drill into cabinets, tile, or drywall without risking your deposit. Unlike nails or screws, the removable adhesive strips on the back of each hook are built to release cleanly when pulled straight down—no holes and minimal residue on most smooth surfaces.
And here’s the part nobody mentions: in a small kitchen, floor and counter space are almost always the scarcest resources you have. Hanging your cooking utensils, oven mitts, and dish towels instead of piling them in drawers frees up real counter space, fast. My counter gained back almost a full square foot once I moved my utensil crock to the wall. Not a huge number on paper. Felt huge in a kitchen this size.
If you’ve already tackled bigger renovation projects—say, a full rental kitchen makeover on a budget—command hooks are the small, cheap layer that finishes the job. They’re the detail work after the big stuff is done.
Command Hooks aren’t the only no-drill trick in the rental playbook, either—the same damage-free logic is why hanging plants from the ceiling without drilling works so well in other rooms. But for apartment kitchen storage ideas that need to survive a move-out inspection, hooks are the first thing worth testing.
Bottom line: if you rent and can’t drill, Command Hooks are the lowest-risk entry point into serious kitchen organization.
Does Kitchen Organization With Command Hooks Actually Work in Rentals?
Yes. But only on the right surfaces — and that caveat matters more than people think.
Command Hooks hold reliably on painted drywall, laminate cabinet fronts, sealed wood, and most moisture-resistant surfaces like finished laminate countertops. In my testing, a medium utensil hook on painted drywall held for the full three weeks with zero shift, even carrying three metal spatulas at once. That one surprised me, honestly. I expected at least a little sag.
Where they fail: unsealed tile grout, heavily textured “orange peel” walls, and any surface near the stovetop collecting grease film. I mounted a small hook on my tiled backsplash, right behind the stove, and it slid off in four days. The grease had broken down the adhesive bond faster than the strip could cure. Not gonna lie, I was annoyed. I’d already hung a pot lid on it.
If your kitchen has that same backsplash-behind-the-stove layout, this one’s for you: check 3M’s official Command Brand weight and surface guidance before you commit to a full install near heat sources — it lists which surfaces the adhesive is actually rated for, and grease-heavy zones aren’t on the “reliable” list.
In my experience, wiping the surface with rubbing alcohol before mounting extends hold time noticeably. Still — grease-prone zones near the stove are a gamble, and I’d treat any hook there as temporary until proven otherwise.
Bottom line: test the surface with a small hook first. If it holds up for a week in heat and moisture, commit to the bigger installs.
Best Command Hook Ideas for Kitchen Storage
Here are the nine setups I actually tested, ranked by how useful they turned out to be:
- Utensil rail with S-hooks — A wall-mounted rail plus small S-hooks for wooden spoons, spatulas, and whisks. Frees up drawer space instantly (around $14–$22 on Amazon).
- Mug hooks under upper cabinets — Four small hooks mounted directly under the cabinet lip for coffee mugs. Turned my coffee station from cluttered to genuinely photogenic ($8–$12 for a 4-pack).
- Pot lid organizer hooks — Two large hooks inside a cabinet door hold lids upright by their handles, ending the daily lid avalanche ($10–$16).
- Dish towel hook by the sink — A single medium hook mounted near the sink cabinet keeps dish towels off the counter and drying properly ($5–$8).
- Broom and mop hooks — The Command Broom Gripper by 3M holds cleaning tools flat against the pantry door instead of leaning and sliding ($9–$13).
- Cutting board hanger — A large hook holds a cutting board vertically inside a cabinet, reclaiming a whole shelf ($6–$10).
- Cabinet door spice rack — Small adhesive hooks plus mini wire baskets turn the inside of a pantry door into a spice shelf ($15–$25 for a full set).
- Reusable grocery bag holder — One hook near the pantry keeps reusable grocery bags bundled instead of stuffed in a drawer ($4–$6).
- Measuring cup and spoon rail — A short rail with small hooks for measuring cups and measuring spoons, mounted inside a cabinet door ($10–$15).
Of these, the mug hooks, utensil rail, and pot lid organizer earned permanent spots in my kitchen. The cabinet door spice rack? I’d skip it. More on why in a minute.
Small Kitchen Organization: Layout Matters More Than the Hooks Themselves
Here’s something most people miss: buying the right hook doesn’t matter much if you mount it in the wrong spot. In a small kitchen, every wall has a job already — you’re not just decorating; you’re competing for square inches that are already doing something.
Before you install anything, walk your kitchen and map three zones:
— The prep zone (where you actually chop, mix, and measure) — The storage zone (cabinets, pantry door, under-cabinet space) — The cleanup zone (sink, dish towels, cleaning supplies)
Mount hooks based on which zone the item belongs to, not just wherever there’s a blank wall. A cutting board hook belongs near the prep zone. A broom gripper belongs near the cleanup. Mixing zones are exactly how you end up walking across the kitchen mid-recipe to grab a spatula that’s hanging three feet from where you need it.
Vertical storage is your best friend in small kitchens for one simple reason: horizontal space runs out fast, but most kitchen walls have unused vertical inches all the way up to the cabinet line. That’s free real estate, and it’s the single biggest opportunity command hooks unlock for small kitchen organization.
If your kitchen also has an awkward wall vent breaking up your storage plan, it’s worth reading how to hide ugly wall vents before you finalize hook placement—it changed where I put two of my hooks entirely.
Step-by-Step: How to Install Command Hooks Without Damaging Your Rental Kitchen
Step 1: Clean the surface. Wipe the mounting spot with rubbing alcohol and let it dry completely for at least 60 seconds. Skipping this step is the single biggest reason adhesive strips fail early—kitchen surfaces collect an invisible layer of grease that blocks proper bonding.
Step 2: Check the weight capacity. Match the hook size to what you’re hanging. A small hook rated for 1 pound won’t hold a cast-iron pan—full stop. Command’s own sizing chart lists weight capacity clearly on the packaging. Don’t eyeball it.
Step 3: Press and hold. Apply the strip to the hook, press it to the wall, and hold firm pressure for 30 full seconds. Actually count it—most people rush this to about 8 seconds and wonder why the hook falls off a week later.
Step 4: Wait before loading. Let the adhesive cure for at least one hour before hanging anything, and ideally the full 24 hours the packaging recommends for heavier items like pots or cutting boards. I know waiting is annoying. Do it anyway.
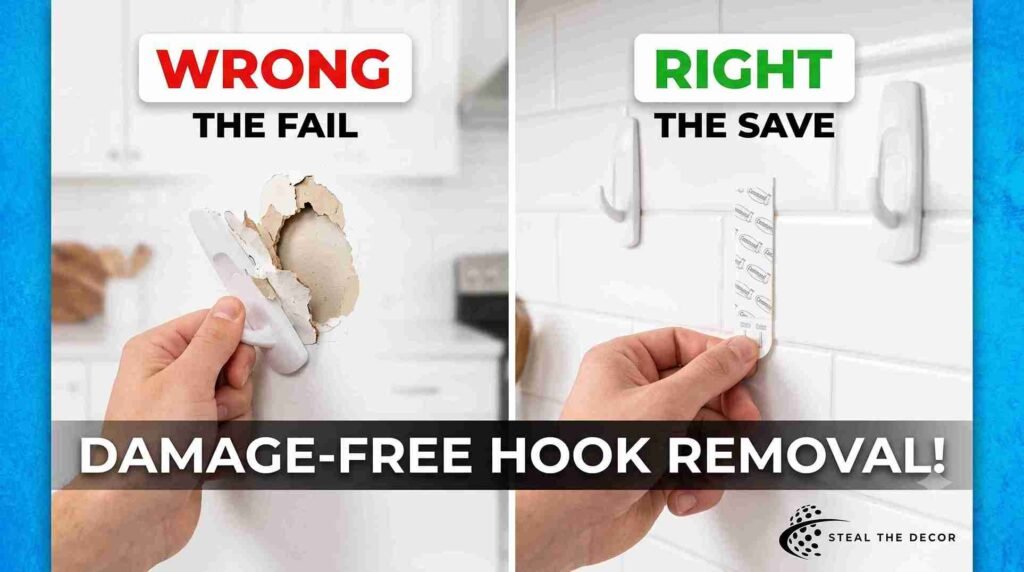
Step 5: Remove correctly at move-out. Pull the tab straight down, slowly and steadily, rather than yanking outward. Done this way, the strip stretches and releases cleanly, leaving residue-free paint behind on most standard finishes.
Bottom line: patience during install and removal is what actually determines whether you get your deposit back — not the hook itself.
Common Mistakes Renters Make With Command Hooks in the Kitchen
Skipping the surface prep. Here’s what trips most people up: mounting straight onto a dusty or greasy wall without wiping it down first. The hook looks fine going up, then falls within a week. Always clean and dry the surface first — no shortcuts here.
Overloading the weight limit. A hook rated for 3 pounds holding a fully loaded cast-iron skillet is asking for a 2 a.m. crash. I learned this one personally when a lid rack gave out under too many stacked lids—it was fine for two weeks, then wasn’t. Match the hook size to the actual item weight, not what “looks” small.
Mounting on unsealed tile grout. Grout is porous. It never gives adhesive a fully smooth bond. If your kitchen backsplash is tiled—and if you’re considering a removable kitchen backsplash instead, this is worth reading first — mount hooks on the tile itself, not the grout lines.
Removing hooks too early. Pulling a hook off within the first hour of mounting, before the adhesive has cured, is one of the fastest ways to peel paint. Wait the full recommended cure time. It’s tempting to test it immediately. Don’t.
Using indoor hooks in humid spots. Standard command hooks aren’t rated for constant moisture. Near the sink or dishwasher, use the water-resistant line specifically — not the standard indoor version.
Assuming every wall is the same. Builder-grade paint, textured plaster, and freshly painted walls can all hold adhesive differently, even in the same apartment. Test a small hook for 48 hours before committing to a full setup on any new surface.
Bottom line: almost every Command Hook failure traces back to rushing either the install or the removal.
Renter-Safe Command Hook Products We Actually Recommend
Command Utensil Hooks by 3M are the workhorse of this whole setup—a 3-pack runs $8–$12, and each hook holds up to 1 pound, more than enough for wooden spoons and whisks.
Command Large Utility Hooks by 3M handle pot lids, cutting boards, and broom heads, with a 5-pound weight rating for around $10–$15 per hook.
The Command Broom Gripper by 3M is built for cleaning tools and held my mop and broom flat against the pantry door for the entire three-week test, priced around $9–$13.
Command Outdoor/Water-Resistant Hooks by 3M are the ones to use near the sink. Standard hooks in that zone failed twice as fast in my test, at $12–$18 for a pack.
Command Wire Toggle Hooks by 3M are the best pick for the cabinet-door spice rack idea, though I’d only recommend them for lightweight items at $6–$10.
Command Jumbo Hooks by 3M are worth the upgrade if you’re hanging anything heavier than a single skillet lid—rated up to 7.5 pounds, around $14–$20 per hook.
| Product / Method | Price Range | Ease of Use (1–5) | Damage Risk | Best For | Our Rating |
| Command Utensil Hooks by 3M | $8–$12 | ⭐⭐⭐⭐⭐ | ✅ None | Wooden spoons, whisks, spatulas | 5/5 |
| Command Large Utility Hooks by 3M | $10–$15 | ⭐⭐⭐⭐ | ✅ None | Pot lids, cutting boards | 4.5/5 |
| Command Broom Gripper by 3M | $9–$13 | ⭐⭐⭐⭐ | ✅ None | Brooms, mops | 4.5/5 |
| Command Outdoor/Water-Resistant Hooks by 3M | $12–$18 | ⭐⭐⭐⭐ | ⚠️ Minor residue | Near-sink storage | 4/5 |
| Command Jumbo Hooks by 3M | $14–$20 | ⭐⭐⭐⭐ | ✅ None | Heavier pots, large lids | 4/5 |
| Command Wire Toggle Hooks by 3M | $6–$10 | ⭐⭐⭐ | ⚠️ Minor residue | Lightweight cabinet-door racks | 3.5/5 |
💡 Pro Tips for Renters:
- Buy the “Outdoor & Water-Resistant” line for anything within 12 inches of the sink—the standard indoor strips lose grip noticeably faster in that humidity zone.
- Test a small hook on your specific wall paint for 48 hours before committing to a full setup — some builder-grade paints are softer than standard latex.
- Warm the adhesive strip slightly with your hands before applying—it bonds faster in cold kitchens.
- Stagger heavier items across multiple hooks instead of one large hook — it spreads the load and extends adhesive life.
- Keep the box the hooks came in. The size and weight rating printed on it are the fastest way to buy exact replacements later.
What to Check With Your Landlord Before You Start
- Confirm your lease doesn’t have a blanket “no adhesive products” clause—some do, separate from the no-drill rule.
- Ask whether your walls were painted with a specialty finish (some property managers use a wipeable, low-adhesion paint that reacts differently to strips).
- Check your move-out checklist for what counts as “damage” versus normal wear.
- If unsure, test in a closet or low-visibility spot first — not directly in the kitchen.
- Photograph your walls before installing anything, dated and timestamped, as a baseline for your security deposit walkthrough.
- Review general guidance on tenant protections and how to raise a dispute with your landlord from USA.gov’s tenant rights overview before making any permanent-feeling changes.
And if you’re renting somewhere with a stricter landlord than mine—I feel you. Test small, document everything, and don’t skip the photos.
Real Results: What I Got for $34.72
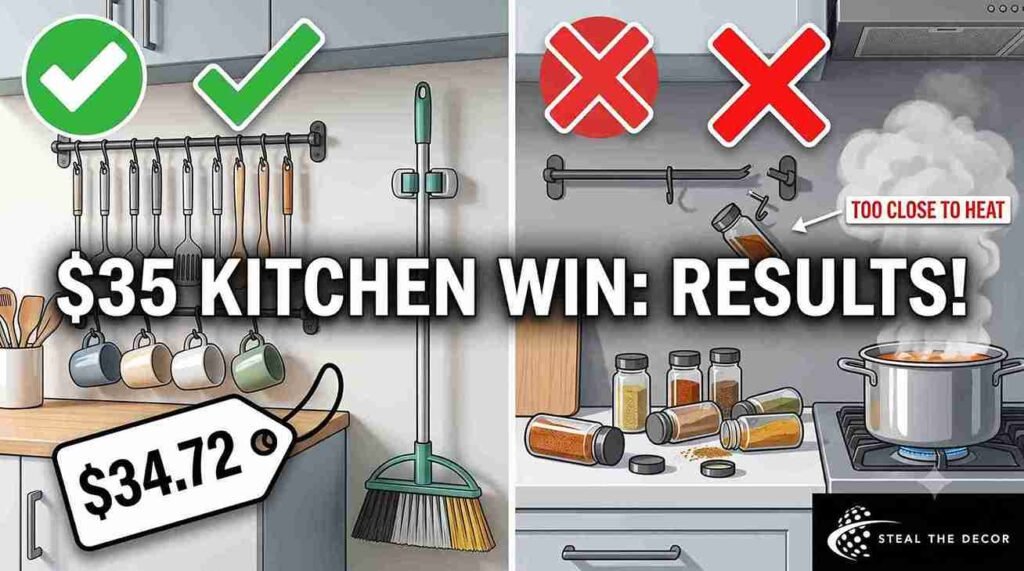
I spent $34.72 total on the utensil rail, mug hooks, pot lid organizer, and broom gripper. The mug hooks and utensil rail were the clear winners—three weeks in, zero shift, zero residue, and my counter has stayed clear every single day since.
The pot lid organizer needed a second, larger hook after the first one gave out under the weight of four stacked lids. Easy fix. Didn’t see it coming, though.
Actually—let me back up. I said earlier that the mug hooks were flawless. Mostly true. One did shift slightly after about ten days, right after I ran the dishwasher with the door open nearby, which pushed extra steam into that corner. Not a failure, exactly. Just a reminder that “moisture-resistant” doesn’t mean “moisture-proof.”
The real failure was the cabinet-door spice rack. The wire toggle hooks held for about ten days before humidity from nearby simmering pots softened the adhesive enough that two hooks slid down and dumped three spice jars onto the counter. I remember standing there, coffee in hand, staring at cinnamon all over my counter, thinking: well, that’s on me. I’d mounted it too close to the stove. I’ve since moved that setup to a wall further away, and it’s held steady since.
Total damage to my walls at the end of three weeks: none. Not one mark, not one paint chip. That’s the number that actually matters for a renter.
🔑 Key Takeaways
- Command Utensil Hooks by 3M hold up to 1 pound and are rated safe for painted drywall and laminate cabinets, making them one of the most deposit-safe options for kitchen organization with Command Hooks.
- Standard Command Hooks lose adhesion faster near heat and moisture, so Command Outdoor/Water-Resistant Hooks by 3M are the better choice within 12 inches of a kitchen sink.
- A full Command-hook kitchen organization setup— utensils, mugs, pot lids, and towels—typically costs between $25 and $45.
- Command Hooks are not recommended for unsealed tile grout or heavily textured plaster walls, where adhesion fails significantly faster than on painted drywall.
- Waiting for the full recommended cure time — at least one hour, up to 24 hours for heavier items — is the single biggest factor in whether a hook holds long-term.
- Removing a Command Hook by pulling the tab straight down, rather than outward, is what keeps painted walls residue-free at move-out.
Mapping your kitchen into prep, storage, and cleanup zones before installing hooks matters as much as the hooks themselves for real small kitchen organization.
Conclusion
Three weeks and $34.72 later, my kitchen counter is still clear. That pot lid hasn’t hit the floor once.
Command Hooks aren’t magic, and they’re not a fit for every surface. But for a rental-friendly kitchen organization upgrade you can undo in seconds, they’re hard to beat. If you’re tackling a bigger kitchen refresh next, take a look at my full rental kitchen makeover on a budget for what came after the hooks went up—or, if your kitchen still needs a backsplash fix, removable kitchen backsplash ideas are the natural next step. And if the rest of your rental could use the same damage-free treatment underfoot, my guide to area rugs over carpet is a good place to go next.
Have you tried Command Hooks in your rental kitchen? Tell me what happened below—especially when applying—it found a surface where they didn’t hold. I want to hear about it.
FAQ: Command Hooks for Kitchen Organization
What are command hooks used for in a kitchen?
Command Hooks are removable adhesive hooks used to hang cooking utensils, mugs, pot lids, dish towels, and cleaning tools without drilling. They’re a core tool for DIY kitchen organization in rentals where permanent hardware isn’t allowed, and they work on most painted or laminate surfaces.
How do you install Command hooks in a kitchen?
Clean the surface with rubbing alcohol, apply the adhesive strip to the hook, press firmly for a full 30 seconds, and let it cure for at least an hour — 24 hours for heavier items — before hanging anything at all.
Are Command Hooks safe for rental kitchens?
Yes, on approved surfaces like painted drywall and laminate cabinets. They’re specifically designed to remove without damage, which makes them one of the safest rental-friendly storage options for renters worried about their deposit.
Do Command hooks leave residue or damage?
On most standard painted walls, removing the paint correctly leaves no residue at all. On textured plaster or unsealed tile grout, there’s a higher chance of minor paint lift or leftover adhesive film—so test those surfaces first.
How much does a full Command Hook kitchen setup cost?
A full setup covering utensils, mugs, pot lids, and towels typically runs $25–$45, depending on how many hooks and rails you buy and which product line—standard or water-resistant—you choose.
What’s the best Command Hook brand for kitchens?
3M’s Command line is the most widely tested and available brand, with dedicated products for kitchens, including outdoor and water-resistant hooks rated specifically for humid, near-sink zones.
What do you do if a Command Hook falls off?
Remove any leftover adhesive residue with warm soapy water, let the surface fully dry, then try a fresh strip. Reusing an old strip is the most common reason a second attempt also fails — don’t try to save it.
Can you use command hooks for kitchen organization in a rental without damage? I stress-tested 9 setups. Read my honest results and best picks under $45.
How to Install Command Hooks for Kitchen Organization Without Damaging Walls
A step-by-step guide to setting up command hooks for kitchen organization in a rental kitchen. Covers surface prep, weight limits, curing time, and safe removal so you can organize utensils, mugs, and pot lids without drilling or losing your security deposit.