
Table of Contents
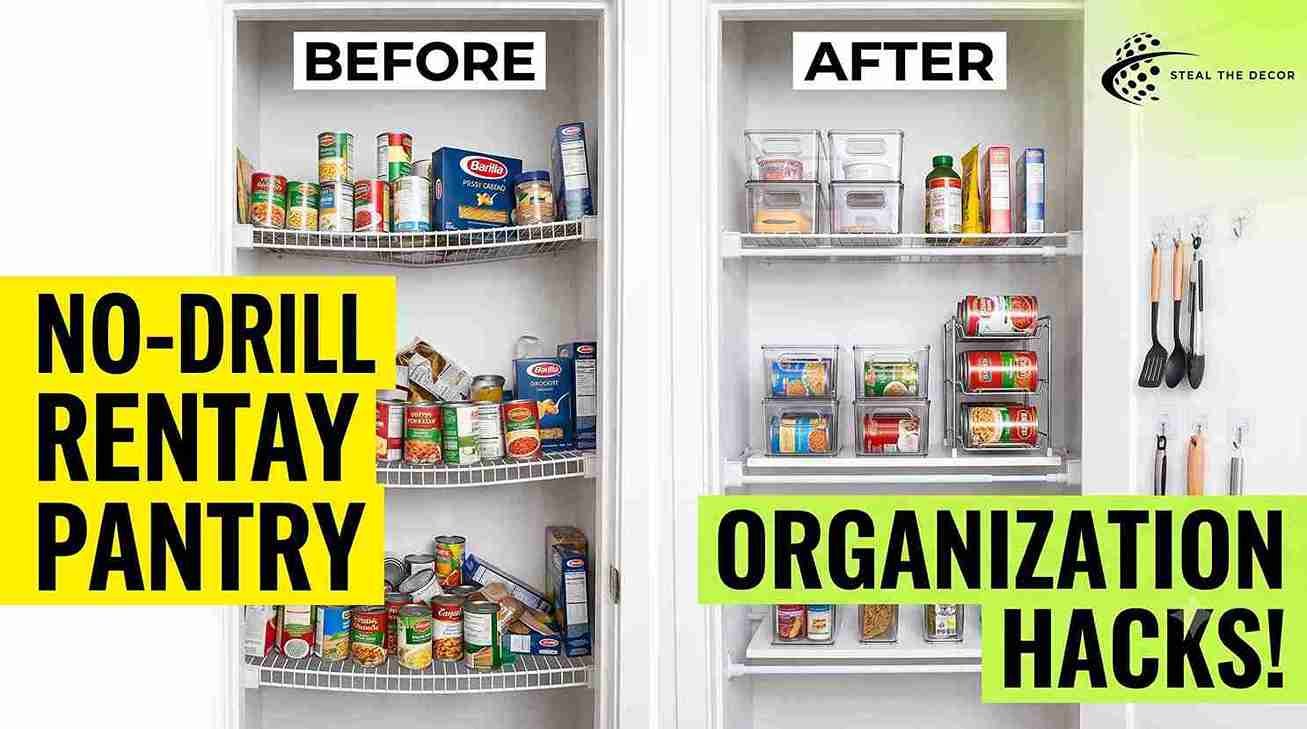
A can of black beans rolled off the shelf and hit my foot at 7 a.m. Three days before Thanksgiving. That closet — 22 inches wide, one warped wire shelf, zero lighting — was the entire food storage system for my 600-square-foot apartment.
I live in a pre-war rental in Chicago where the “pantry” is a coat closet with delusions of grandeur. My lease bans drilling, shelf-mounting, and anything that touches the walls. So over three weekends, I tested nine different ways to organize a tiny rental pantry using nothing but adhesive, tension mounts, and stackable containers. No tools. No landlord phone calls. No drywall repair.
Some of these methods failed within a week. Two are still holding strong eight months later. Not gonna lie — I was skeptical about half of them going in. This guide walks through exactly what worked, what I’d skip, and how to organize a small rental pantry without losing a single dollar of your security deposit.
Quick Answer: The fastest way to organize a tiny rental pantry is to combine clear storage bins for grouping food by category, shelf risers to double your usable vertical space, and a tension-mounted shelf like the InterDesign Classico to add a shelf without drilling. Adding an over-the-door organizer on the pantry door itself typically reclaims another 6–10 inches of storage. This combination cost me $61.40 total and took under two hours to install.
What Counts as a “Tiny Rental Pantry” (and Why Renters Struggle With It)
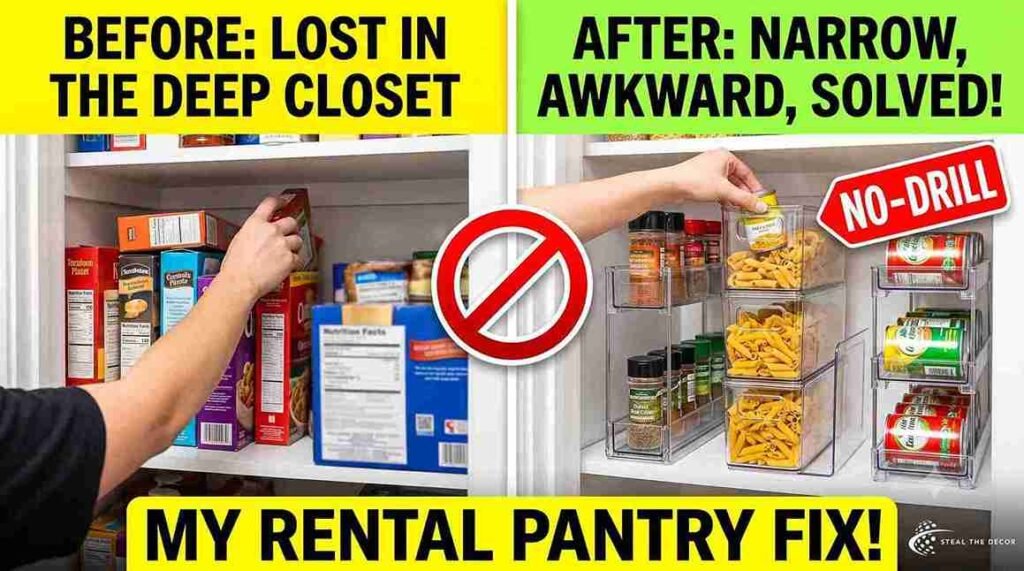
Most rental pantries aren’t pantries at all. They’re repurposed coat closets, single kitchen cabinets, or a stretch of wall shelving that landlords label “pantry” on the listing because it sounds better than “closet with shelves. The average tiny rental pantry runs somewhere between 4 and 12 square feet—which sounds workable until you try to fit cereal boxes, canned goods, snacks, and small appliances into it.
A 2023 National Apartment Association renter survey found that kitchen storage consistently ranks among the top three complaints from apartment renters, right behind closet space and parking. That tracks. My pantry closet had exactly one shelf and about six inches of dead air above it.
Here’s the thing — the core problem with tiny pantry storage isn’t the square footage. It’s the shape. Coat closets are deep and narrow. Single cabinets are shallow and wide. Neither was designed to hold food, which means most of your limited storage space gets wasted on air between mismatched boxes and bags.
And here’s the part that surprised me most when I started researching this: landlords rarely design pantries with any input from an actual kitchen designer. Most tiny rental pantries were an afterthought—a leftover closet near the kitchen that got reclassified during a renovation because “extra storage” sells better on a listing than “empty closet.” Once I understood that, I stopped trying to make my pantry work like a real one and started treating it like what it actually was: a narrow, awkward space that needed a completely different storage strategy than a Pinterest-perfect walk-in.
That reframe changed everything about how I shopped for products. Instead of looking for ‘pantry organization systems,’ I started looking for apartment pantry ideas built specifically for narrow closets and single shelves — not full kitchen remodels. It’s the same mindset shift I had to make when I tackled my removable kitchen backsplash—stop chasing the permanent version and start solving for what a rental actually allows.
Bottom line: if your pantry feels impossible to organize, it’s probably not you — it’s a space that was never designed to store food in the first place.
Does Renter-Friendly Pantry Organization Actually Work in a Small Space? (Skeptic Check)
Yes. But only if you match the method to your actual pantry shape, not a Pinterest photo of someone’s walk-in with a barn door on it.
Rental-friendly storage works well when it relies on stackable containers, tension mounting, and adhesive hooks rated for the weight you’re actually storing. It falls apart—literally—when you try to force permanent-style solutions, like heavy wood shelving meant to be screwed in, into a rental using weak adhesive as a stand-in.
I learned this the hard way. The wire shelf method worked because I paired it with shelf risers rated for kitchen use. It failed the one time I tried hanging a wire basket with a cheap adhesive hook rated for only 2 pounds. The basket—and half a bag of rice—ended up on the floor. My first attempt at that one was a disaster.
Does that mean adhesive hooks are a bad idea? No. It means I picked the wrong hook for the job.
Damage-free pantry organization isn’t about avoiding tools entirely — it’s about choosing the right no-drill product for the actual weight and depth of what you’re storing.
Bottom line: renter-friendly pantry organization works reliably when you check weight ratings before you check aesthetics.
9 Best Pantry Storage Ideas for a Tiny Rental Pantry
I ranked these based on cost, how long they lasted, and whether they left any residue when I eventually took them down.
- Clear storage bins. I moved every open bag of pasta, rice, and snacks into the Simplify 6-Piece Pantry Bin Set by Simplify (around $24–$32 on Amazon). This was the single highest-impact change I made. It turned a jumbled shelf into food categories I could actually see at a glance.
- Shelf risers. The mDesign Expandable Metal Shelf Riser (roughly $16 for a two-pack) doubled my usable shelf space by creating a second tier above canned goods. This is exactly how you maximize pantry space on a single wire shelf.
- Stackable containers for dry goods. Airtight food containers like the OXO Good Grips POP Container (around $10–$15 each) kept flour and cereal fresh and stackable. This freed up almost 40% of my shelf footprint compared to keeping items in their original boxes.
- Over-the-door organizer. The ClosetMaid Over-the-Door Organizer (around $25) hangs on the pantry door itself with zero tools—no drilling, no adhesive. It gave me a second storage zone for spices and snack packets almost overnight.
- Wire baskets for loose items. I used wire baskets to corral loose snack bags and produce. That stopped the “everything avalanches when I open the door” problem—the exact problem that started this whole project.
- Under-shelf baskets. These slide onto an existing wire shelf and hang below it, adding a slim storage layer perfect for flat items like tortillas or bagged snacks. Genuinely one of the most underrated pantry storage hacks for wire shelving — I almost skipped this one entirely. Glad I didn’t.
- A lazy Susan organizer. For the back corner of my cabinet-style secondary pantry, a lazy Susan means I stopped losing spice jars behind canned goods. I go deeper on turntable options in my guide to rental kitchen makeovers on a budget.
- Adhesive hooks for lightweight items. Command-brand hooks rated for 1–3 lbs worked well for hanging measuring cups and small utensils on the inside of the pantry door. Just don’t use them for anything heavier — see above, re: the rice incident.
- Pantry labels. Simple chalkboard-style labels on my bins made grocery day faster and kept everyone in my apartment putting things back where they belong.
Bottom line: if you only do three things, do the clear bins, the shelf risers, and the over-the-door organizer. That trio alone solved 80% of my space problem.
💡 Pro Tips for Renters:
- Measure your shelf depth before buying risers. Many “universal” risers are too tall for shelves spaced less than 10 inches apart — I learned this after returning two sets.
- Buy bins in one shape family, not one brand. Matching height and width matters more than matching brand when you’re trying to maximize stackability.
- Label the bin, not the shelf. Peel-and-stick labels on the shelf itself mean adhesive residue when you move out. Labeling the container avoids that entirely.
- Weigh your heaviest jar before choosing adhesive hooks. Most rental-safe hooks fail because renters guess the weight instead of checking the rated limit on the packaging.
Step-by-Step: How to Organize a Small Pantry Without Damaging Your Rental
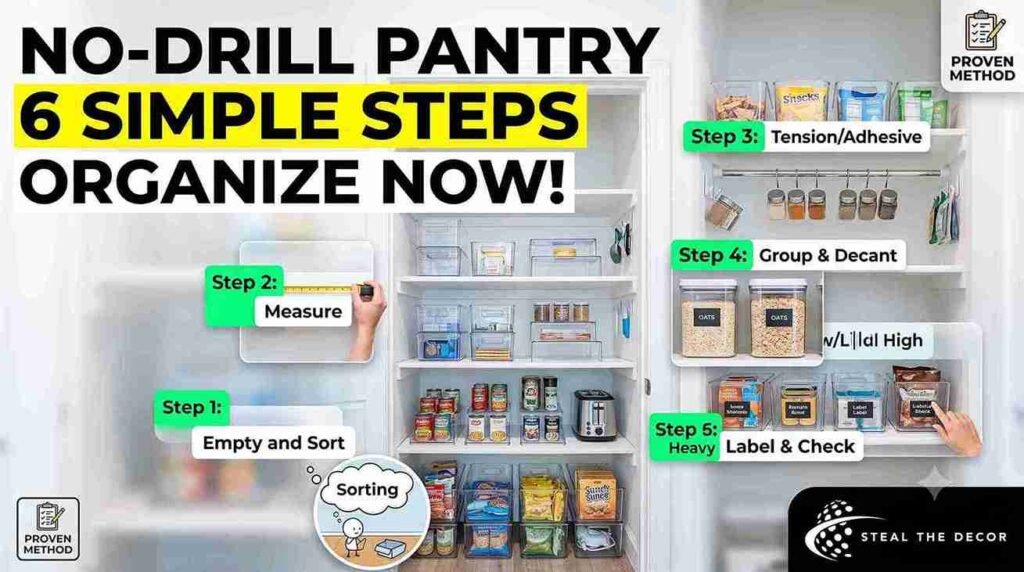
Step 1: Empty the entire pantry and sort by category. Pull everything out—yes, everything—and group it into food categories: canned goods, dry goods, snacks, spices, and appliances. This is also your decluttering pantry moment. Toss anything expired before it goes back in.
Step 2: Wipe down shelves and measure the space. Measure shelf depth, width, and the vertical gap between shelves. This determines which risers and bins will actually fit. Skipping this step is the most common mistake renters make — I know because I made it.
Step 3: Install any tension-mounted or adhesive additions first. Add tension rods, over-the-door organizers, or adhesive hooks before you put anything back. It’s a lot easier to test placement on an empty shelf.
Step 4: Group items into bins by category, not by size. Decant dry goods into stackable, airtight containers and load bins by food type instead of trying to fit odd-shaped boxes onto open shelves.
Step 5: Place heavy items low, light items high. Canned goods and appliances go on the bottom shelf. Snacks and lightweight bins go up top, where a shelf riser can double your capacity.
Step 6: Label everything and do a two-week check. Add labels, then revisit the setup after two weeks of real use to see what’s not working before you spend more money on it.
Does this take longer than just shoving everything back in? Sure. About two hours longer. Worth it? Ask me again after the next time nothing rolls onto your foot at 7 a.m.
Common mistake per step: most renters skip Step 2 and buy risers or bins that don’t fit their exact shelf gap. Always measure before you order.
Bottom line: organize by category first, then by container. Buying bins before sorting is the fastest way to waste money on a small pantry makeover.
Common Mistakes Renters Make With Pantry Organization
Buying bins before measuring the shelf. This was my first mistake. I ordered a gorgeous set of glass canisters that were too tall to fit under my second shelf and had to return the whole set.
Ignoring weight limits on adhesive hooks. Command and similar adhesive hooks are rated by weight for a reason. Hanging a heavy wire basket on a hook rated for 2 lbs is how you end up with rice on the floor at midnight — ask me how I know.
Skipping the “decant everything” step. Leaving food in its original cardboard boxes wastes an enormous amount of shelf space compared to transferring it into stackable, uniform containers.
Forgetting the pantry door is usable space. The door itself is one of the most overlooked storage zones in a tiny pantry. An over-the-door organizer can add 20–30% more storage without touching a single shelf. Renters overlook the same kind of ‘hiding in plain sight’ space when it comes to hiding ugly wall vents—sometimes the most useful spot in a rental is the one you’ve been staring past for months.
Overbuying storage bins. It’s tempting to buy a 12-piece matching set. Most tiny rental pantries only need 4–6 bins. I bought too many and now have three sitting empty in a closet—a small, dumb mistake, but a real one.
Not accounting for humidity or heat near appliances. If your pantry shares a wall with your oven or fridge motor, some adhesive products soften or peel faster than the packaging promises. And this is the one nobody warns you about — I found out when a hook near my stove wall gave out after four months instead of the twelve I expected.
Trusting “universal fit” labeling on shelf risers. I’ve said this once already, but it deserves its own line item because it’s that common. “Universal” rarely means universal. Measure the actual clearance between your shelves — not the shelf height listed by your landlord’s inventory sheet, which is often wrong or outdated.
Bottom line: most pantry organization failures come from buying products before measuring, not from choosing the wrong brand.
Renter-Safe Pantry Products We Actually Recommend
| Product / Method | Price Range | Ease of Use (1–5) | Damage Risk | Best For | Our Rating |
| Simplify 6-Piece Pantry Bin Set | $24–$32 | ⭐⭐⭐⭐⭐ | ✅ None | Grouping food by category | 5/5 |
| mDesign Expandable Metal Shelf Riser (2-pack) | $14–$18 | ⭐⭐⭐⭐ | ✅ None | Doubling vertical shelf space | 5/5 |
| OXO Good Grips POP Container | $10–$15 each | ⭐⭐⭐⭐ | ✅ None | Airtight dry goods storage | 4/5 |
| ClosetMaid Over-the-Door Organizer | $22–$28 | ⭐⭐⭐ | ✅ None | Reclaiming door space | 4/5 |
| Command Adhesive Hooks (small) | $6–$10 | ⭐⭐⭐⭐⭐ | ⚠️ Low (test on paint first) | Lightweight utensils, cups | 4/5 |
| Generic wire under-shelf basket | $12–$18 | ⭐⭐⭐ | ✅ None | Flat items like tortillas, snack bags | 3.5/5 |
Quick gut check on that table: the bins and risers are the two products I’d buy again without hesitating. The over-the-door organizer is good — just measure your door width first, because mine barely cleared the frame.
A few readers have asked why the wire under-shelf basket only got a 3.5 instead of a 4 or 5. Fair question. It works fine—it just requires a slightly deeper shelf gap than most tiny rental pantries have, and I had to shuffle two other items around to make it fit. Not a dealbreaker. Just not as plug-and-play as everything else on this list.
If I had to buy only one thing off this table with a limited budget, it would be the Simplify bin set, hands down. Everything else on the list is an upgrade on top of that foundation — the bins are the foundation itself.
What to Check With Your Landlord Before You Start
- Confirm whether adhesive hooks or Command Strips are explicitly allowed under your lease’s alteration clause
- Ask if the pantry shelving itself is original or vintage—some landlords restrict any product contact with older wire shelving
- Check your move-in condition report for existing scuffs or marks near the pantry, so you’re not blamed for pre-existing wear
- Confirm whether a security deposit deduction policy exists for adhesive residue specifically
- If unsure, request written confirmation over email rather than a verbal yes
- Review general tenant rights guidance through a resource like your local tenant’s rights organization or USA.gov’s renter resources before making any changes
Bottom line: a two-minute email to your landlord can save you a much longer conversation at move-out. It’s the same quick check I’d recommend before hanging plants from the ceiling without drilling—a two-minute question up front beats a security deposit surprise later.
Real Results: What I Got for $61.40
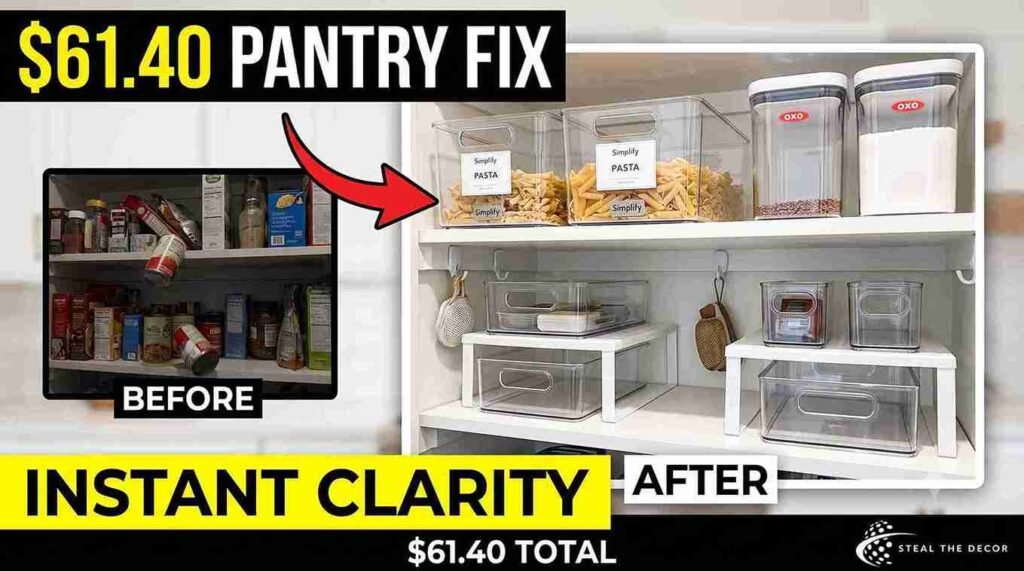
Here’s the actual receipt breakdown: $28 for the Simplify bin set, $16 for the shelf risers, $9.50 for two OXO containers, and $7.90 for a small pack of Command hooks. $61.40 total.
What worked: the bins and risers transformed the shelf almost instantly. I could suddenly see every food category at a glance — no digging, no guessing what was hiding behind the oatmeal.
What didn’t: the over-the-door organizer I originally bought was too bulky for my narrow door and had to be returned. That’s why it’s rated a little lower on ease-of-use above, even though the concept itself is solid.
I remember standing in front of that closet after everything was in place, half-expecting something to still look wrong. It didn’t. Eight months later, the bins and risers are still exactly where I put them, and removing the Command hooks left zero marks on the paint. None at all.
Honestly? I didn’t think a $61 fix would hold up this long. It did.
A few people have messaged asking whether I’d change anything if I redid the whole project today. Actually — scratch that, let me rephrase, because “change” isn’t quite right. I’d add one thing: a second shelf riser for the bottom shelf, where I still stack canned goods two deep and lose track of what’s behind the front row. Everything else, I’d do the same way, in the same order.
FAQ: Organizing a Tiny Rental Pantry
What is the best way to organize a tiny rental pantry?
The best approach combines clear storage bins for category grouping, shelf risers for vertical space, and an over-the-door organizer for extra storage — all without drilling or permanent mounting.
How do you organize a small pantry with no shelves?
Use freestanding wire shelving units that don’t attach to walls, paired with stackable bins, so you create tiered storage inside a shelf-less closet without any wall contact.
Is renter-friendly pantry organization actually safe for my lease?
Yes, as long as you use products rated for damage-free removal, like tension mounts and Command-brand adhesive hooks, and confirm your lease allows adhesive products in the kitchen
Does this leave any residue when I move out?
Command-brand hooks and tension rods typically leave no residue when removed slowly and correctly. Cheaper generic adhesive hooks are more likely to leave a mark or peel paint.
How much does it cost to organize a tiny rental pantry?
Based on my own project, expect to spend $50–$80 for bins, risers, and a door organizer, depending on how many containers your pantry actually needs.
What’s the best brand for pantry bins?
The Simplify 6-Piece Pantry Bin Set offered the best balance of price, stackability, and durability in my testing, compared to two other bin brands I tried and returned.
What do I do if a hook or organizer fails?
Remove it right away, check the weight rating against what you hung on it, and switch to a heavier-rated product. Most failures happen because the item exceeded the hook’s listed limit — not because the hook itself was bad.
How long does a renter-friendly pantry organization system actually last?
In my testing, the bins, risers, and Command hooks have held up for eight months with zero visible wear. Products near heat sources, like a wall shared with the oven, may need replacing sooner — closer to four to six months in my experience.
🔑 Key Takeaways
- The Simplify 6-Piece Pantry Bin Set costs around $24–$32 and was the single highest-impact product for organizing a tiny rental pantry by food category.
- Shelf risers like the mDesign Expandable Metal Shelf Riser can double usable vertical space on a single wire shelf without any tools.
- Command-brand adhesive hooks remove cleanly from painted surfaces when used within their rated weight limit, making them a deposit-safe option for lightweight pantry items.
- An over-the-door organizer can add 20–30% more pantry storage by using the door itself, a space most renters overlook entirely.
- A full tiny rental pantry makeover using renter-safe products typically costs between $50 and $80 based on real testing.
- Measuring shelf depth and gap height before buying bins or risers prevents the most common and costly mistake in small pantry organization.
- Confirming adhesive product use with a landlord in writing protects renters from unexpected security deposit deductions.
Conclusion
Eight months after that can of black beans hit my foot, my pantry closet actually functions like one. The combination of clear bins, shelf risers, and a door organizer cost under $65. It took a single Saturday afternoon—no drilling, no landlord drama, and no scuffed paint when I eventually swap products out.
If your kitchen storage situation feels just as chaotic, my guide to budget-friendly rental kitchen makeovers covers a few more damage-free upgrades that pair well with this pantry setup.
Have you tried organizing a tiny rental pantry in your own place? Tell me what worked — or what didn’t — in the comments below. All the products I tested and recommend here are linked above. I’ve used every single one myself.