
Table of Contents
I almost lost a $600 security deposit over a backsplash.
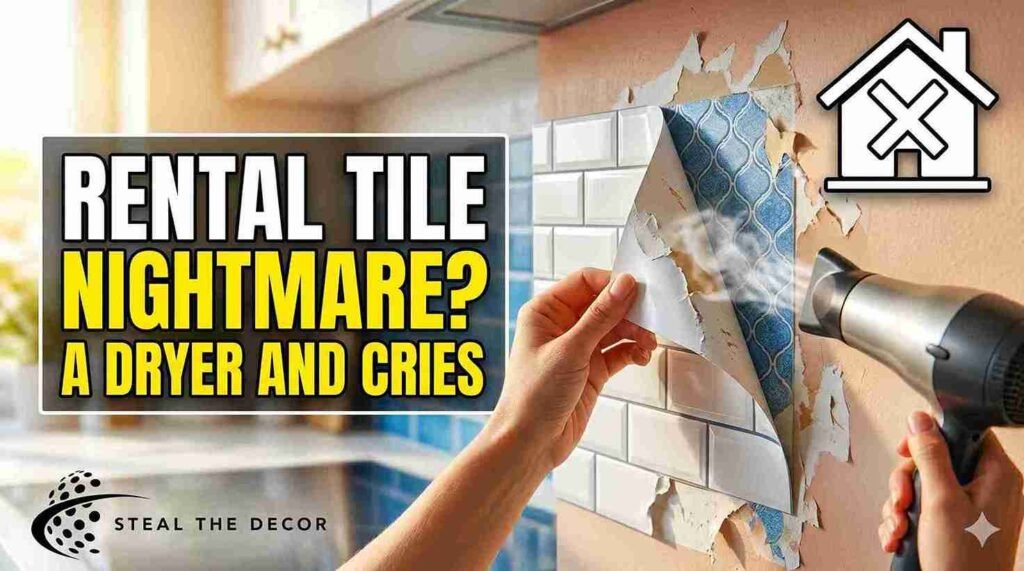
Not because I drilled holes. Not because I painted the walls neon green. I almost lost it because the “renter-friendly” peel-and-stick tiles I bought on a late-night Amazon scroll refused to peel off. They stuck. Hard. Like, “I’m part of this drywall now” stuck. I spent six hours with a hairdryer and a plastic scraper, sweating into a bucket, questioning every life decision that led me to that moment. The backsplash looked great for eleven months though. That’s the thing about removable kitchen backsplash ideas — they work beautifully until they don’t. And the difference between a smooth move-out and a panic attack at 11 p.m. is knowing which ones actually come off clean.
So I went down a rabbit hole. Over the last three years, across two apartments and one condo rental in Chicago, I’ve tried more temporary backsplashes than I care to admit. Some were genius. Some were disasters. A few were so aggressively mediocre I kept them purely out of laziness. This is everything I learned — the good, the ugly, and the one I literally attached with Velcro strips because I had lost all judgment by that point.
Why I Started Messing With Temporary Backsplashes (And The Mistake I Made First)
My first rental kitchen had a backsplash that looked like someone sneezed pasta sauce onto beige laminate and called it a design choice. Every time I cooked, I’d stare at those sad brown specks and feel my soul deflate a little. I knew I couldn’t change it permanently. The lease had that terrifying clause — “no alterations to walls, floors, or fixtures” — written in the kind of bold font that feels personally aggressive.
So I did what any reasonable person does at 1 a.m. I bought the cheapest peel-and-stick tiles I could find on Amazon. No research. No reviews deep-dive. Just clicked “Buy Now” on a $22 set of faux subway tiles that promised “easy removal” and “no residue.” They arrived in a box that smelled faintly of plastic regret. I installed them in two hours, felt like a home improvement genius, and posted a very satisfying before-and-after photo. Eleven months later, I was on my kitchen floor with a hairdryer, crying.
The adhesive had bonded to the matte paint like it had personal vengeance. I lost a small patch of drywall paper. My landlord noticed. I didn’t lose the full deposit — I negotiated it down to a $75 deduction — but I learned the hard way that “removable” is a spectrum, not a guarantee. That mistake shaped every temporary backsplash decision I’ve made since.
The One Question You Have to Ask Before Anything Else
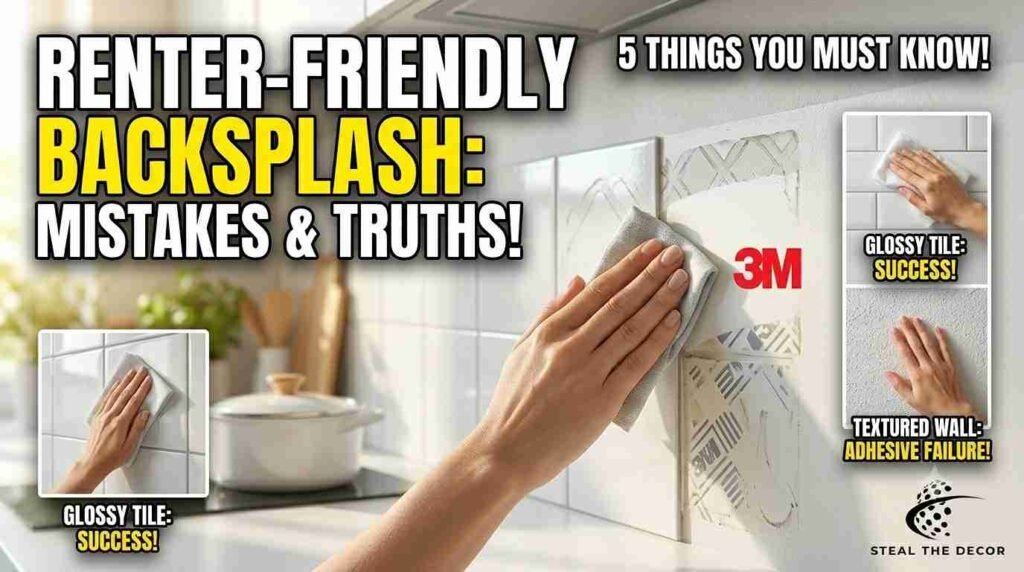
Before you even open a browser tab, ask yourself this: What kind of surface am I sticking this to? Because that single detail determines whether your removable kitchen backsplash ideas succeed or end in a security deposit deduction. Glossy ceramic tile? Almost anything sticks and unsticks clean. Flat painted drywall? Dangerous territory. Textured walls? Forget about adhesion entirely. I learned this the hard way. Now I check the surface first and shop second.
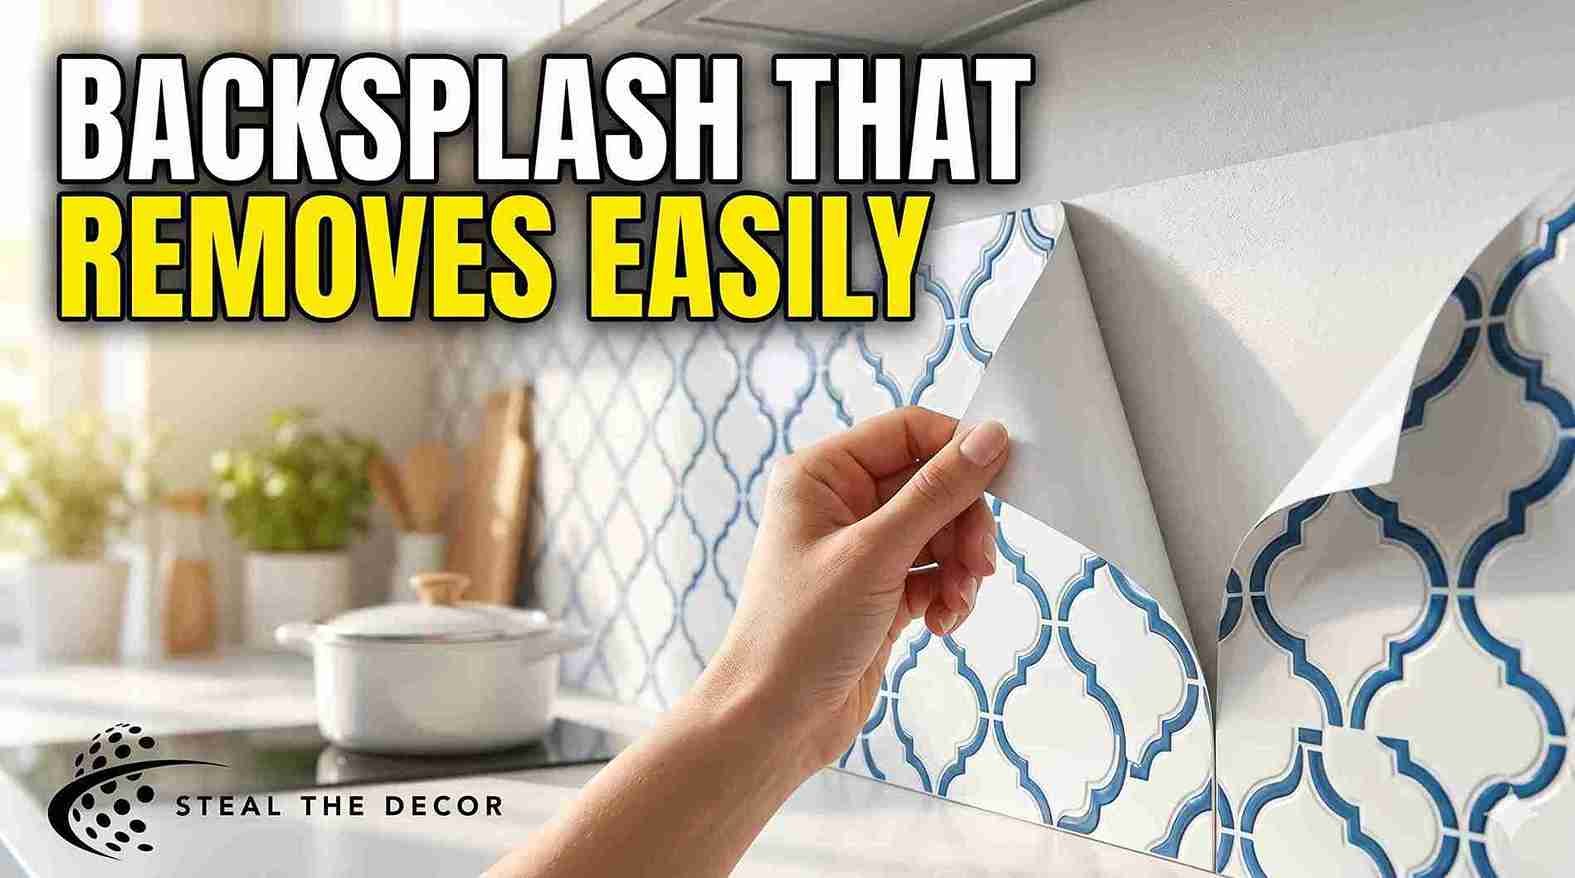
Peel-and-Stick Tile Backsplashes: The Most Popular Choice for a Reason
Peel-and-stick tiles dominate the removable backsplash conversation, and honestly, they should. I’ve used them in two apartments now, and when they work, they work. The variety is staggering — subway tile, Moroccan patterns, hexagon shapes, fake marble, even faux brick. You can walk into any Home Depot or browse Amazon and find fifty options before lunch.
I picked up the Art3d Peel and Stick Subway Tile backsplash panels from Amazon for around $28 per pack of 10 sheets. Each sheet covers roughly 3 square feet, so a standard kitchen backsplash area needs about 4 to 6 packs. The tiles have a slight 3D texture that catches light convincingly. From three feet away, guests thought I had installed real ceramic tile. One friend — a homeowner who actually knows things about grout — touched it before realizing it was vinyl. That’s the level of realism some of these products achieve now.
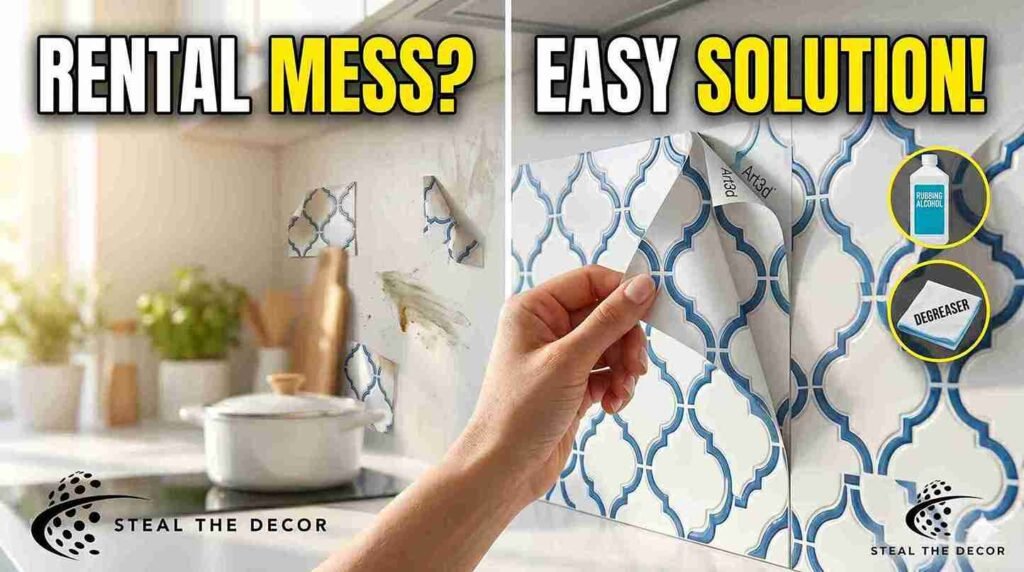
Installation is straightforward but not idiot-proof. You measure, you cut with scissors or a utility knife, you peel the backing, you stick. But here’s where I messed up the second time: I didn’t clean the wall properly. Grease residue from cooking — invisible to the eye — prevented the edges from fully adhering. Two weeks in, a corner near the stove started lifting. I had to peel that sheet off, scrub the wall with degreaser, and apply a fresh one. Lesson learned: wipe your walls with rubbing alcohol first. Not Windex. Not a damp cloth. Rubbing alcohol.
What Nobody Tells You About Heat and Peel-and-Stick Tiles
Behind a gas stove, these tiles face a real test. Most peel-and-stick vinyl tiles are rated for temperatures up to 120-140°F. A gas range pushing heat upward can absolutely exceed that near the back wall. I found this out when a tile directly behind my burner started warping slightly — not melting, not catching fire, just developing a subtle wave that caught the light wrong. I ended up installing a clear acrylic sheet over that section as a heat shield. It worked, but it added an extra step I hadn’t planned for.
Pros: Affordable, huge design variety, convincing 3D textures, easy to cut and install.
Cons: Adhesion issues on textured walls, heat sensitivity near stoves, some brands leave residue on matte paint.

Vinyl Decals and Stickers: The $12 Solution I Almost Skipped
I’ll be honest — I thought vinyl decals would look tacky. The word “sticker” doesn’t exactly scream “sophisticated kitchen design.” But I was broke after the peel-and-tile disaster, and I needed something fast for the apartment’s weird little backsplash area behind the sink. So I grabbed a pack of Smart Tiles Hexagon Stickers from Target for $12.99. No texture, just flat printed vinyl, each hexagon about 4 inches wide.
They surprised me. The print quality was sharp — the “grout lines” looked printed, not real, but the overall pattern read as intentional from standing height. Nobody crouches down to inspect your backsplash. Well, one person did: my mother-in-law. She squinted at it for four seconds and said, “That’s clever.” High praise from a woman who once criticized my choice of butter dish.
Application took twenty minutes. Removal was genuinely residue-free — they peeled off like a Post-it note, no hairdryer required. I wouldn’t use them behind a stove, but for a dry area like a sink backsplash or a coffee station wall, they’re a solid budget choice that doesn’t overpromise.
Pros: Extremely cheap, instant application, truly residue-free removal, good for small areas.
Cons: Flat appearance, no texture, limited heat resistance, edges can lift in humid kitchens.
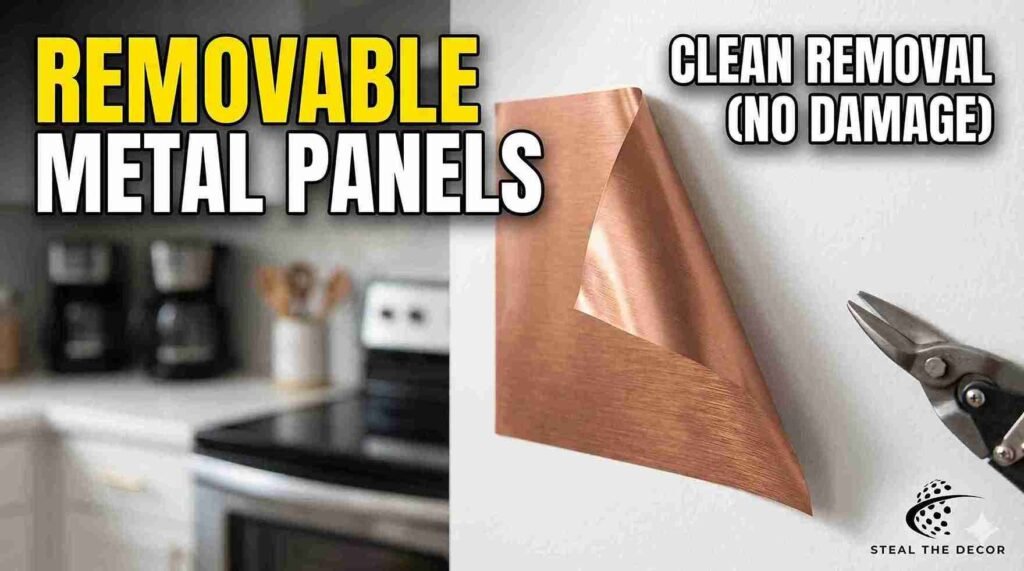
Pressed Tin and Faux Metal Panels: When You Want Something That Doesn’t Look Plastic
Here’s the thing about most temporary backsplashes: they look like temporary backsplashes. Vinyl and sticker-based solutions have a ceiling on realism. If you want something that passes as permanent from six inches away, pressed tin or faux metal panels are the upgrade path. I discovered these during a desperate search for a backsplash that would survive behind my stove without warping.
The Aspect Peel and Stick Metal Backsplash panels in Brushed Copper caught my eye. I bought a 4-pack from Home Depot for $39.97. These are thin aluminum sheets with a real metal surface and an adhesive backing. They’re lightweight but rigid — not floppy vinyl, actual metal you can tap with a fingernail and hear a satisfying tink. Cutting them required tin snips, which I didn’t own, so I borrowed a pair from my neighbor Dave who has every tool known to mankind and a slightly concerning enthusiasm for lending them out.
The installation was more demanding than vinyl tiles. Metal edges are sharp — I nicked my thumb once and bled onto a brand new panel. I still have that panel up; the tiny bloodstain is hidden behind my coffee maker. The adhesive grip was incredibly strong, which worried me given my past removal trauma. But when I eventually took them down eighteen months later, they released cleanly with a hairdryer and slow, patient peeling. No drywall damage. No crying on the floor.
Pros: Real metal finish, heat-resistant enough for behind stoves, convincing high-end look.
Cons: Sharp edges during installation, higher cost, requires tin snips, limited pattern options.
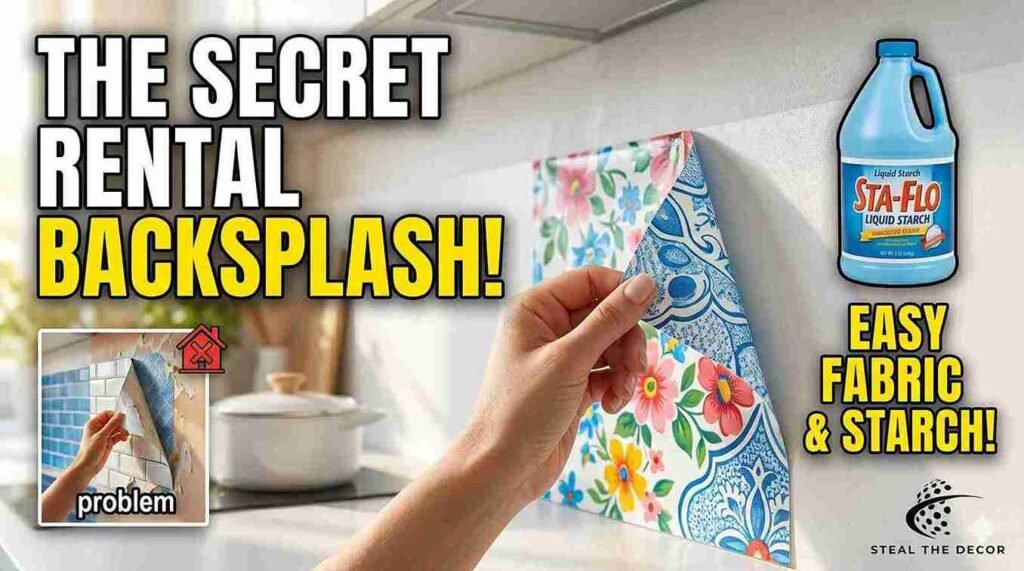
Fabric Backsplashes (Yes, Fabric) — The Weirdest One I’ve Actually Tried
I know how this sounds. Fabric. In a kitchen. Near grease and tomato sauce and the general chaos of cooking. I thought it was a Pinterest fever dream too, until my friend Kara showed me her apartment. She had stretched a piece of oilcloth fabric — that vintage-looking printed cotton coated in vinyl — across her backsplash area using liquid starch. Liquid starch. Like, the stuff from elementary school craft projects.
I tried it. I bought a yard of printed oilcloth from Joann Fabrics for about $14, cut it to size, and applied it to the wall using a sponge brush and Sta-Flo liquid starch ($4 at Walmart). The process felt deeply wrong. You’re essentially gluing fabric to a wall with sugar water. But it dried smooth and held firmly. When I wanted it gone six months later, I peeled a corner and the whole thing slid off. A quick wipe with warm water removed any starch residue completely.
The downside? Oilcloth isn’t invincible. A grease splatter near the stove left a faint stain that wouldn’t wipe clean. And the pattern I chose — a busy floral — looked charming for three months and then started feeling like I lived inside a tea cozy. It’s a niche solution, but for renters who change their mind constantly, the zero-commitment removal is unbeatable.
Pros: Insanely cheap, zero wall damage, endless pattern options, easily swapable.
Cons: Not heat-safe, can stain, edges need precise trimming, moisture can weaken starch bond.
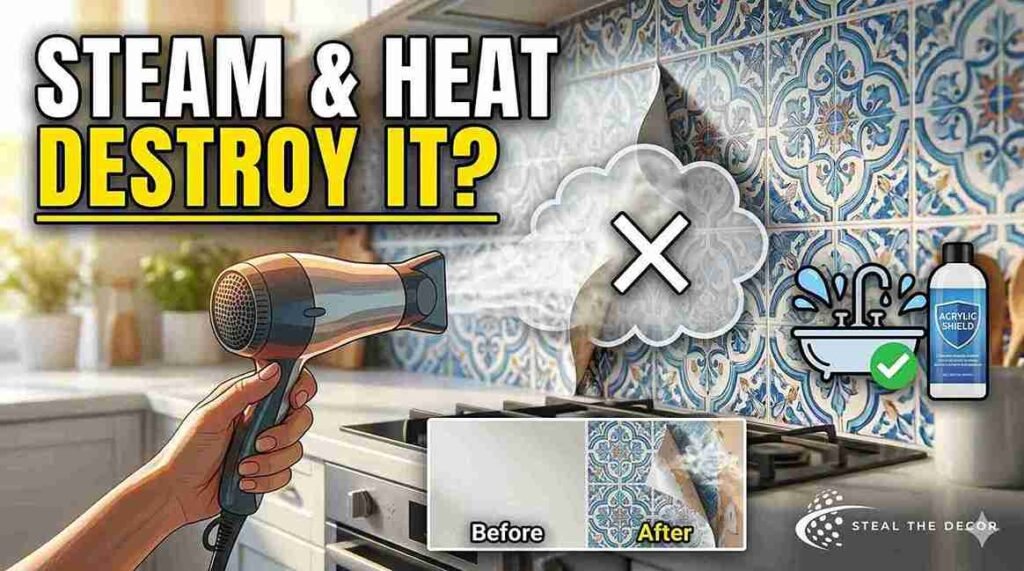
Removable Wallpaper as a Backsplash: What No One Tells You About Heat and Moisture
Removable wallpaper — the peel-and-stick kind, not traditional paste wallpaper — seems like a natural backsplash candidate. It’s designed for walls. It promises easy removal. It comes in approximately seven million patterns. I tried this in my second apartment using a roll of RoomMates Peel and Stick Wallpaper in a faux encaustic tile pattern ($34.99 per roll on Amazon).
The pattern was stunning. The installation was simple — smoother than tile panels because the wallpaper bends and flexes into corners. For the first month, I felt like an interior design prodigy. Then the steam happened. I have a rice cooker that vents aggressively upward, and the wallpaper seam directly above it started peeling within weeks. Moisture plus adhesive equals slow defeat. I re-stuck it twice before giving up and installing a small sheet of acrylic over that section as a shield.
Behind the sink, where splashing is constant but steam less concentrated, the wallpaper held up better. I’d recommend it for that zone — dry, visible, but not directly exposed to cooking heat or steam vents. The removal was flawless: peeled off in full sheets, zero residue, wall looked exactly as it did before. If you’re covering a large area and don’t cook much (no judgment, I lived on takeout for a full year once), this might be your solution.
Pros: Massive design variety, seamless look, easy large-area coverage, clean removal.
Cons: Seams lift with steam, heat-sensitive, not scrubbable, edges can curl in humidity.

Acrylic and Glass Panels: The Sleeper Hit of Rental Backsplashes
Nobody talks about acrylic panels enough. They’re not peel-and-stick in the traditional sense — they’re rigid sheets you mount using adhesive strips or Velcro — but they solve a problem almost every other temporary backsplash fails at: heat resistance. I stumbled onto this solution after the warped-vinyl-behind-the-stove incident.
I ordered a custom-cut 24″ x 30″ clear acrylic sheet from a seller on Etsy for $42. This thing was thick — about 1/8 inch — with polished edges and pre-drilled holes if you wanted screws (I did not). Instead, I attached it using Command Picture Hanging Strips — four pairs across the back, pressed firmly. The sheet floated about half an inch off the wall, creating a heat gap that actually worked. Behind it, I had a sheet of decorative paper (just a nice print from a craft store) that provided the pattern. The acrylic protected it from everything — grease, steam, aggressive pasta sauce explosions.
This setup lasted two full years across two apartments. I swapped the decorative paper once when I got bored. The Command Strips released cleanly both times. The acrylic panel itself developed some fine scratches from cleaning — microfiber cloths only, people, I learned that the hard way — but from a distance, it looked like a glass backsplash. I paid $42 once instead of replacing vinyl tiles every year. Do the math.
Pros: Excellent heat resistance, truly reusable, customizable with any paper or fabric behind it, zero wall contact.
Cons: Scratches over time, requires precise measurement, visible Command Strip tabs if you’re not careful, heavier than peel-and-stick options.
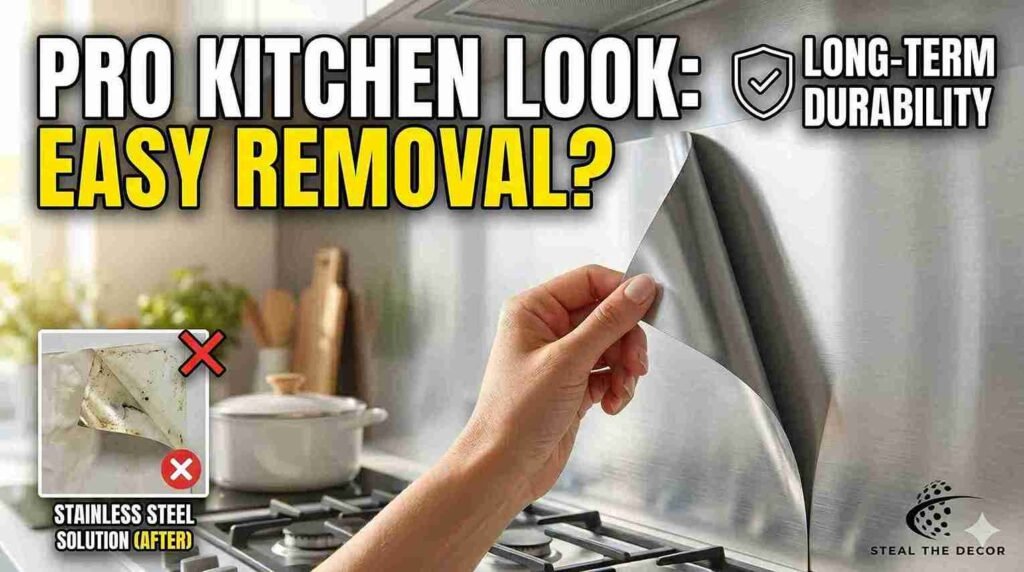
Temporary Stainless Steel Sheets: For When You Want That Pro Kitchen Look
I’ll admit this one was aspirational. I wanted my rental kitchen to look like a restaurant prep station — clean, metallic, professional. Temporary stainless steel backsplash sheets exist, and they’re exactly what they sound like: thin stainless steel panels with an adhesive backing. I bought the Broan-NuTone Stainless Steel Backsplash Panel — a single 24″ x 30″ sheet from Lowe’s for $44.98.
This thing looked incredible. Brushed steel, fingerprint-resistant coating, a faint industrial gleam that made my apartment feel 15% more adult. Installation required more care than vinyl because the metal is thin enough to bend if you’re not gentle. I accidentally creased a corner during peeling and that crease is still visible. It bothers me. Nobody else notices, but I do.
The adhesive was the real surprise — it held strong for over a year behind my stove where heat and steam would have murdered lesser products. Removal wasn’t as clean as I’d hoped. The adhesive left a faint residue that required Goo Gone and some elbow grease. No drywall damage, but not the “peels off like a dream” experience either. Worth it for the durability, but I’d only recommend it if you plan to leave it up long-term.
Pros: Professional appearance, high heat tolerance, easy to clean, fingerprint-resistant.
Cons: Bends easily during installation, adhesive residue possible, expensive for single-sheet coverage, limited to rectangular shapes.
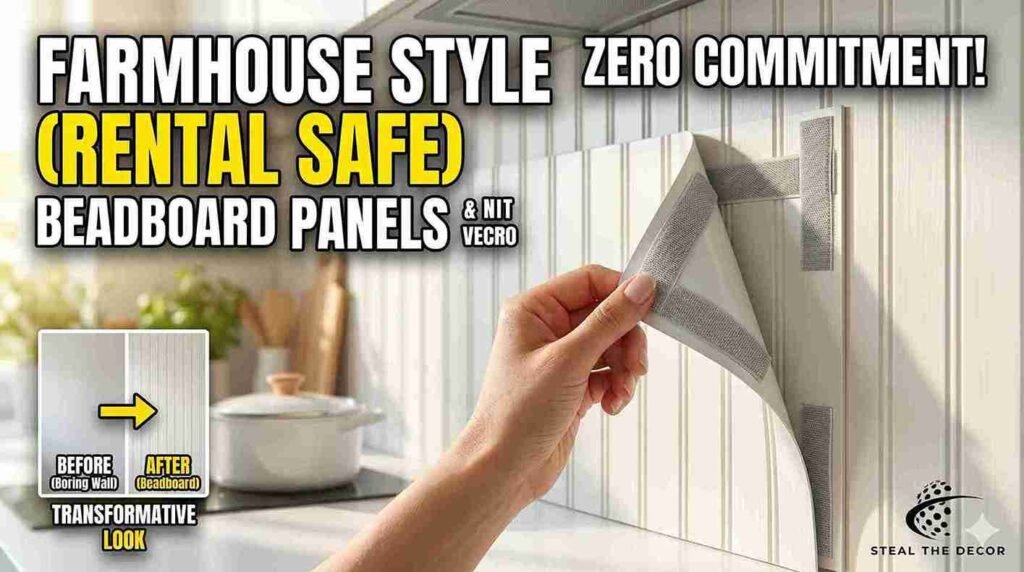
Beadboard and Shiplap Panels: Farmhouse Vibes Without The Commitment
The farmhouse trend refuses to die, and honestly, I get it. There’s something comforting about beadboard — those vertical grooves, the cottage-core energy, the way it makes a kitchen feel like a Nancy Meyers movie set. Temporary beadboard panels exist as peel-and-stick options or as thin MDF sheets you can mount with removable adhesive.
I tried the MDF route. Bought a 4′ x 8′ sheet of paintable beadboard panel from Home Depot for $26.97 and had them cut it to size in the store (free cutting service, use it). I painted it in “Swiss Coffee” by Behr — a warm white that matched my cabinets suspiciously well. Mounted it using heavy-duty Velcro strips along the top and bottom edges.
The look was transformative. That panel made my boring rental kitchen feel custom-built. Guests asked if the landlord had renovated. I said yes, because I am a liar sometimes. But the panel was heavy — the Velcro held, but barely. I added extra strips after one corner drooped during a humid Chicago July. Removal left no damage, but the Velcro adhesive needed a hairdryer to release. Would I do it again? For a long-term rental, absolutely. For a six-month lease, no — too much effort.
Pros: High-end custom look, paintable any color, covers large areas, convincing wood texture.
Cons: Heavy, requires cutting, Velcro can fail in humidity, paint adds time and cost, harder to remove cleanly than vinyl.
What I Wish I Knew Before Installing Any Temporary Backsplash
If I could go back and give 24-year-old me a talking-to in that first apartment kitchen, I’d say five things. One: clean the wall like you’re preparing for surgery. Grease is the enemy of every adhesive product, and kitchen walls are greasier than you think. Two: test one tile or one strip before committing to the whole wall. Live with it for a week. Check if edges lift, if steam affects it, if you actually like looking at it. Three: keep the packaging and a few spare tiles.
When I needed to replace one warped panel, the product was discontinued. My backsplash had a bald spot for three months. Four: take photos of the wall before installation. Document the condition so your landlord can’t blame pre-existing damage on your project. Five: accept that “temporary” doesn’t mean “zero effort to remove.” Everything requires some patience. Everything.
The Surface Matters More Than the Product
I’ve said it before, but it bears repeating because I still see Reddit threads ignoring this: the surface you’re sticking to determines your success. Glossy tile? Almost anything works. Matte painted drywall? Proceed with extreme caution. Textured plaster? You need a completely different strategy — probably a freestanding panel or a tension-mounted solution. When I moved into my current place with its weird orange-peel wall texture, I had to abandon peel-and-stick entirely and go with the acrylic panel setup. The texture prevented any adhesive from making full contact. Ignoring surface compatibility is the fastest way to waste money on removable kitchen backsplash ideas that peel off in a week.
Price Doesn’t Always Predict Performance
I’ve paid $12 for vinyl decals that outperformed $45 metal panels in terms of removal cleanliness. I’ve paid $28 for peel-and-stick tiles that looked better than a $120 custom-cut acrylic sheet. Price correlates loosely with quality in this category, but material type matters more. Vinyl products with 3M adhesive backing consistently remove cleaner than generic adhesives regardless of price. If I see “3M” anywhere on the packaging, I’m 60% more likely to buy. That’s not science, just pattern recognition from someone who’s peeled too many things off too many walls.
Frequently Asked Questions
What is the best temporary backsplash for renters?
Peel-and-stick vinyl tiles offer the best balance of affordability, appearance, and availability. The Art3d Peel and Stick Subway Tile panels provide convincing 3D texture at roughly $28 per pack, and removal is generally clean on glossy surfaces. For heat-prone areas like behind a stove, metal or acrylic panels hold up better than vinyl options. The “best” solution depends on your specific wall surface and kitchen layout.
Does peel and stick backsplash ruin walls?
It depends entirely on the wall surface and the adhesive quality. On glossy ceramic tile, most peel-and-stick products remove cleanly without residue. On matte painted drywall, some adhesives bond too aggressively and can peel away paint or drywall paper during removal. I lost a patch of drywall using cheap generic tiles on matte paint. Products with 3M adhesive backing tend to release more cleanly. Always test in an inconspicuous spot first.
How do you cover a backsplash without replacing it?
You have several options that don’t involve removing the existing backsplash. Peel-and-stick tiles or vinyl decals can be applied directly over old tile. Acrylic panels mounted with Command Strips can float in front of the existing backsplash, protecting the original surface entirely. Fabric applied with liquid starch is another zero-damage option that covers ugly tile without permanent commitment. I used the acrylic panel method over an existing backsplash I hated and it worked perfectly.
Can you put a temporary backsplash over existing tile?
Yes, and existing tile is actually the ideal surface for most temporary backsplash products. The smooth, non-porous surface of ceramic or porcelain tile allows adhesives to grip well while still releasing cleanly. Clean the tile thoroughly with rubbing alcohol before application to remove grease and grime. Avoid textured or uneven tile surfaces, which prevent full adhesive contact and lead to premature peeling. I’ve applied peel-and-stick tiles over existing glossy subway tile with zero removal issues.
How long does removable backsplash last?
Most quality peel-and-stick backsplash products last 1 to 3 years under normal kitchen conditions. Heat, steam, and frequent cleaning shorten that lifespan. Vinyl tiles near a stove may start lifting or warping within months. Acrylic and metal panels can last 3 to 5 years or longer since they’re more resistant to kitchen conditions. My acrylic panel setup lasted two full years and was still going strong when I moved out. Budget decals and stickers typically show wear within 6 to 12 months.
Is peel and stick backsplash heat resistant behind a stove?
Most vinyl peel-and-stick backsplashes are not rated for direct heat exposure behind a gas stove. Standard vinyl tiles tolerate temperatures up to 120-140°F, and a gas range can push heat beyond that near the back wall. I experienced warping on a tile placed directly behind a burner. Metal backsplash panels or acrylic sheets provide better heat resistance for stove-adjacent areas. If you must use vinyl behind a stove, install a heat shield or leave a larger gap between the tile and the burner.
Final Thoughts (And My Current Setup)
Right now, my kitchen has the acrylic panel with decorative paper behind it. It’s been there fourteen months. The paper is a geometric pattern in navy and cream that I bought at Paper Source for $6. The acrylic sheet has fine scratches I’ve learned to ignore. Behind my coffee station, I have a single peel-and-stick tile — a remnant from a previous experiment — that serves no purpose except covering a weird stain the apartment came with. My kitchen isn’t magazine-ready. It’s a patchwork of solutions accumulated over years of trial and error. But it feels like mine, and when I move out, every single thing on these walls will come down clean in under an hour. That’s the win.
What removable backsplash have you tried that actually worked? Or did you have a disaster like my first peel-and-stick meltdown? I want to hear about it — the weirder the solution, the better. Drop your story in the comments.
About The Author
Megan Calloway is a serial renter and chronic kitchen rearranger who has lived in seven apartments across four U.S. cities. She once wallpapered an entire bathroom with pages from a 1974 cookbook and immediately regretted the placement of “Aspic Salads” near the shower. She currently lives in Chicago with a rice cooker she’s had since college and a collection of Command Strips that has its own dedicated drawer.