
Table of Contents
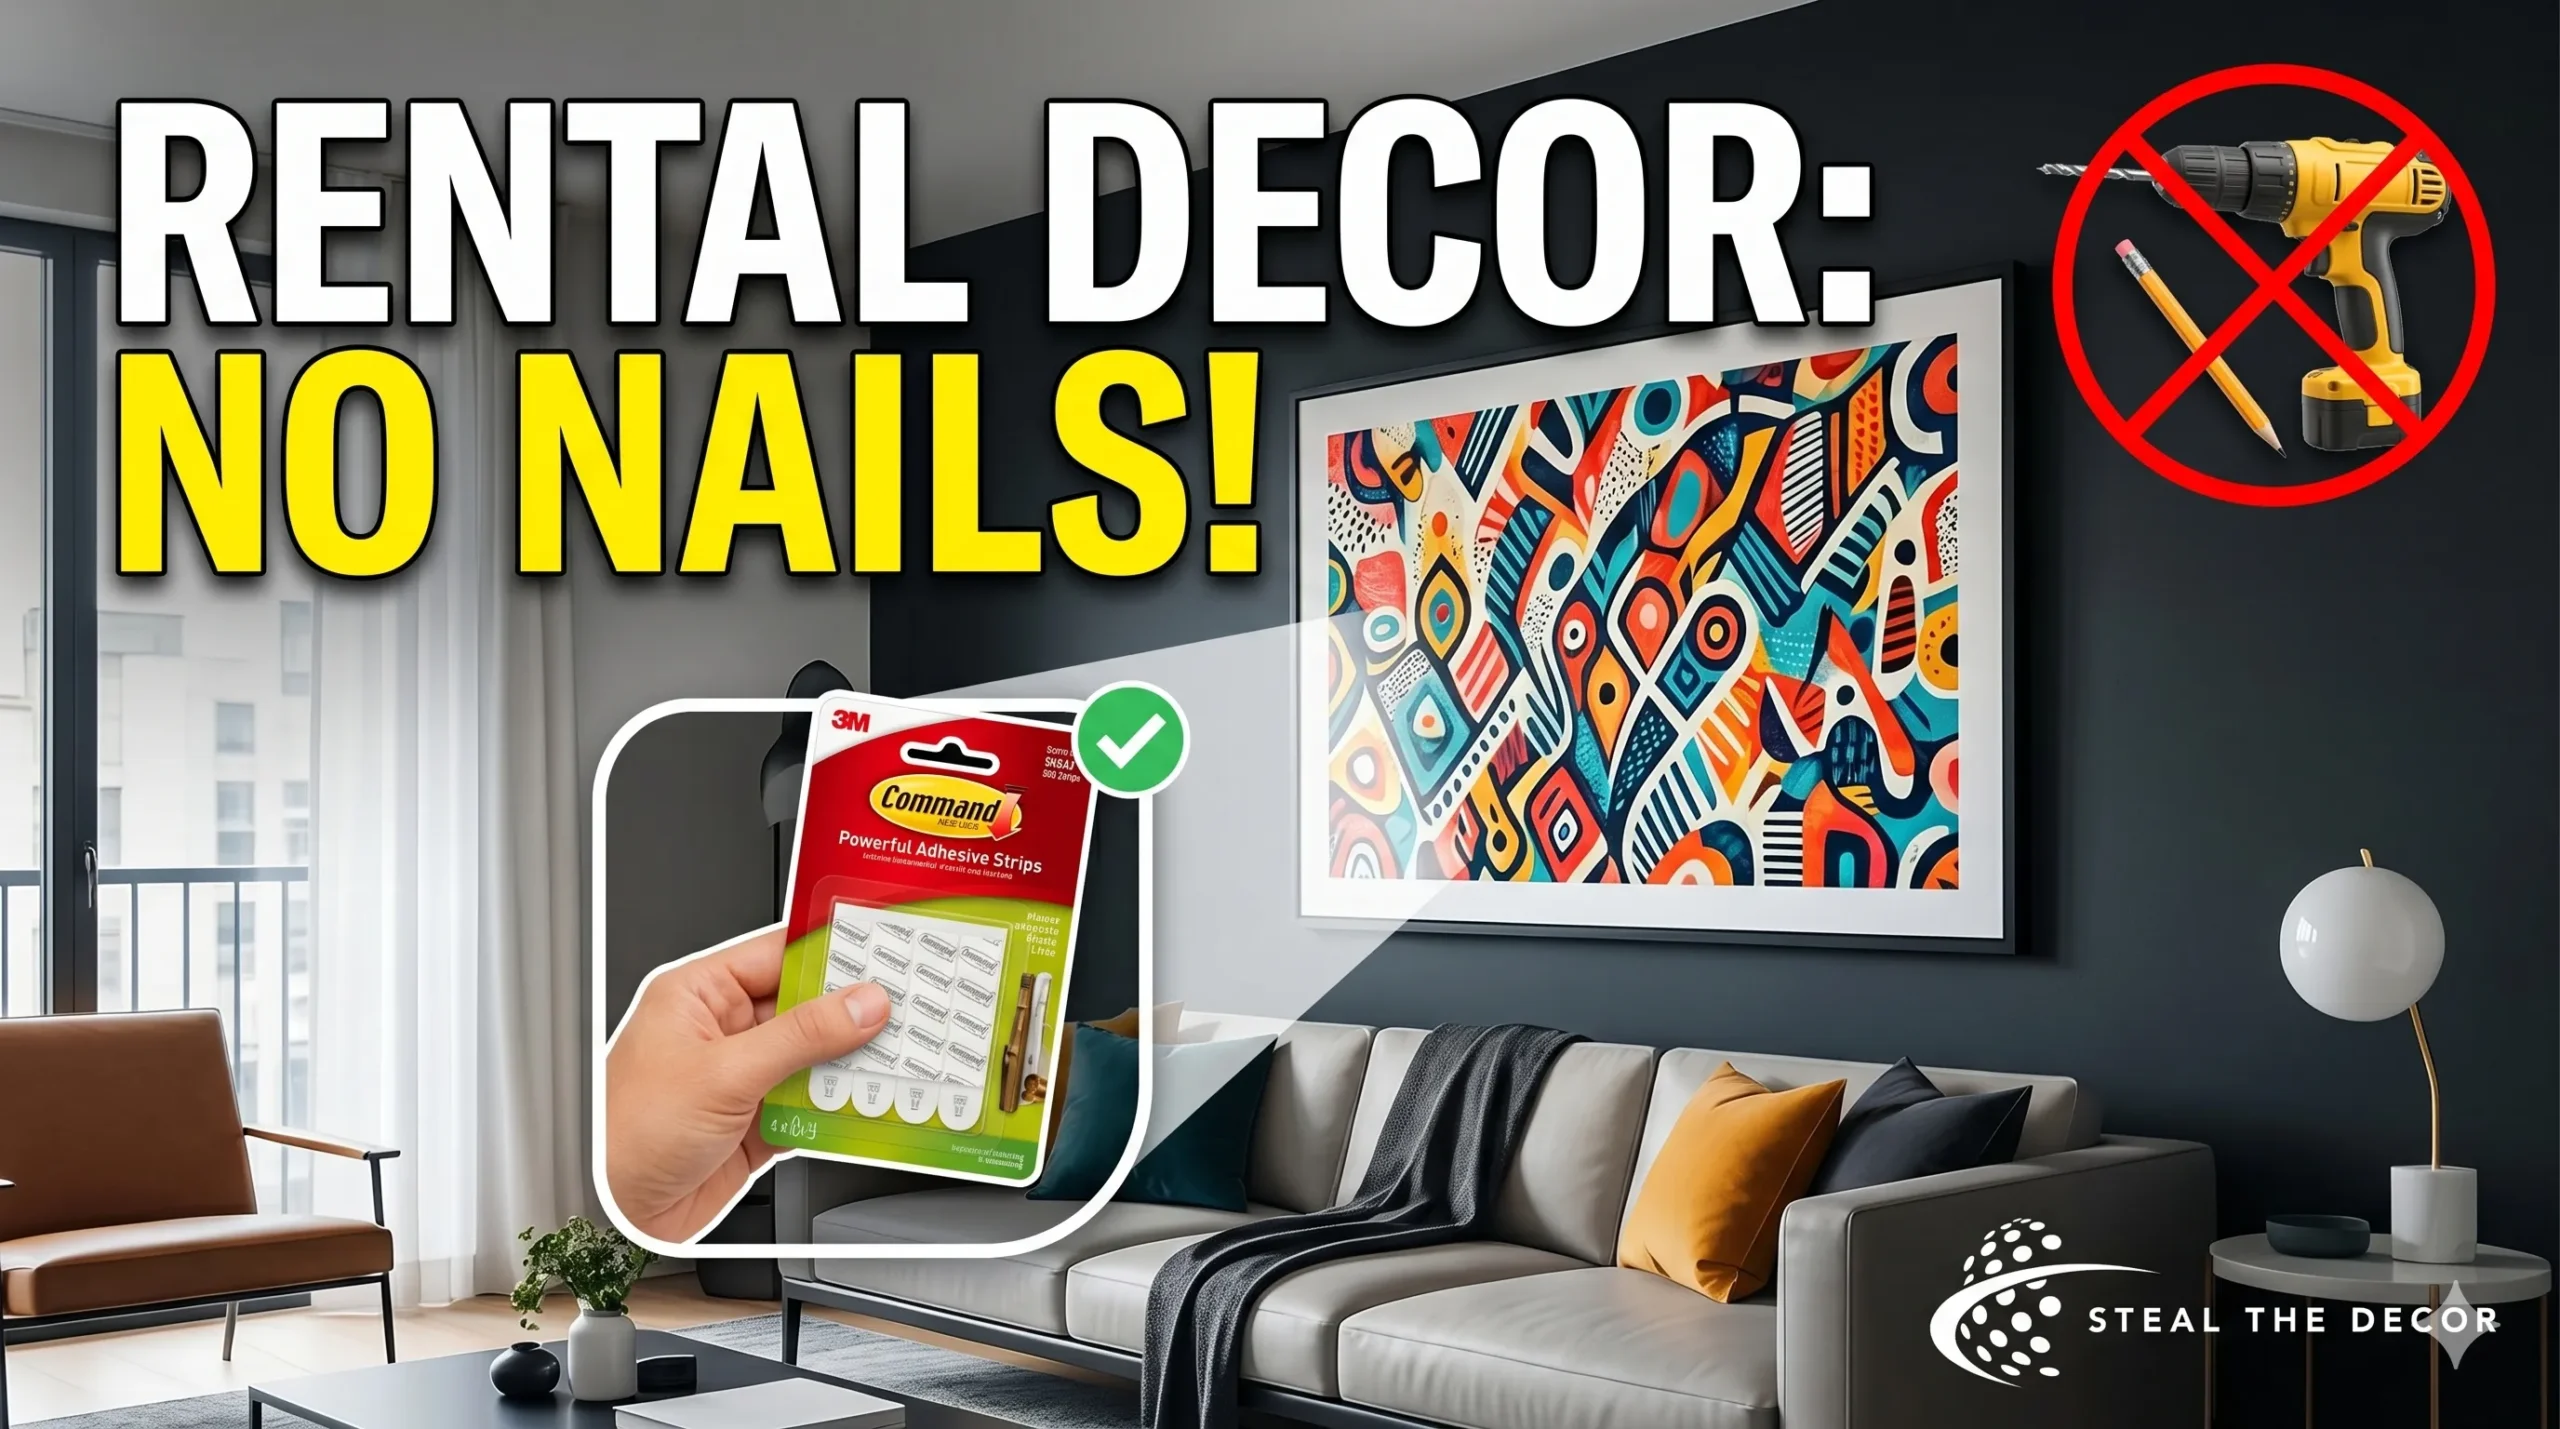
The lease said no holes in the walls. My landlord said it twice, actually, once in person and once in bold red text in the move-in packet. So for the first four months in my apartment, I lived with three blank white walls and a creeping sense that my living room looked like a waiting room. Big, empty walls do that. They make a space feel unfinished, temporary, as if you’re just passing through rather than actually living there.
That’s the real problem with rentals. You want a statement piece, something with presence, but the second you start picturing large-scale wall art above your couch, you also picture your security deposit walking out the door. Drilling a hole the size of a pencil eraser doesn’t sound like much until you’re staring at a move-out inspection sheet with a line item for “wall repair.”
Here’s the good news: you don’t need a single nail to pull off a gallery-worthy look. Renters across the country have figured out how to hang oversized art, mirrors, and tapestries using nothing but adhesive strips, tension rods, and a little bit of patience. Some of these tricks don’t even involve hanging anything at all.
I’ve tested most of these methods in my own apartment over the past couple of years, moving twice in that span. Some hacks worked on the first try. One did not, and I’ll get to that mess later. This guide covers wall types, the actual tools that hold serious weight, eight hacks you can start today, a step-by-step hanging tutorial, and how to take everything down without losing your deposit.
Understanding Your Walls Before You Hang Anything
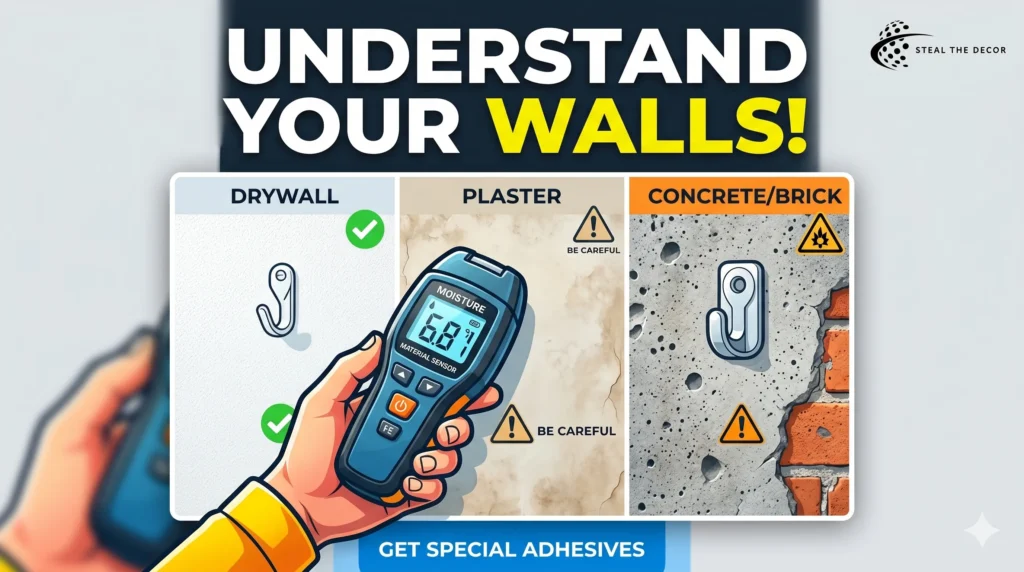
Not every wall behaves the same way, and that matters more than most decorating guides admit. Before you buy a single adhesive strip, it helps to know what’s actually behind your paint.
Drywall, plaster, and concrete each react differently to adhesives. Drywall is the most forgiving surface and works well with Command Strips, mounting tape, and most stick-on hooks. Plaster is harder and smoother, which is good for adhesion, but older plaster can be brittle and prone to small chips if you pull tape off too fast. Concrete and brick are the trickiest of the three. Standard adhesive often loses its grip within days because the surface is too porous or too textured for a clean bond. If you’re dealing with a converted loft or an older building with masonry walls, you’ll want specialty hardwall hangers instead of regular strips.
Most leases use the phrase “normal wear and tear” without ever defining it clearly, which leaves renters guessing. Normal wear and tear refers to the gradual decline a wall experiences just from everyday living — minor scuffs, faint marks from furniture, and slight fading near a window. Damage is different. Damage means something the renter caused that goes beyond ordinary use, like a fist-sized hole, cracked plaster, or peeled paint from yanking tape off too aggressively. Most property managers draw that line based on whether the wall needs more than a touch-up to look normal again.
This is where small mistakes add up fast. A single nail hole seems harmless, but it’s rarely just the hole. Paint chips around the edges. Spackle doesn’t always match the existing paint color, so you end up with a faint patch that’s only obvious under certain lighting. Multiply that by a dozen holes across a gallery wall, and you’ve created a repair job that costs real money out of your deposit. I learned this the hard way in my first apartment, long before I started taking the no-nail approach seriously.
Property managers often charge a flat per-hole patching fee at move-out, and that number adds up faster than people expect. A handful of small nail holes might only cost $10 or $15 each to patch, but a botched drywall anchor, the kind that rips a chunk of material out when removed, can run closer to $50 or more per spot once you factor in repainting an entire section to match. Multiply either number across a full gallery wall arrangement, and the math stops being trivial. That’s the real financial argument for damage-free hanging methods, beyond just keeping the wall looking nice while you live there.
It also helps to know what your specific lease actually says, since not every rental agreement treats wall damage the same way. Some leases explicitly allow a limited number of small nail holes as part of normal decorating, while others prohibit any hole at all, regardless of size. Reading that clause before you hang anything, rather than after, saves a lot of guessing during the move-out walkthrough.
The Damage-Free Adhesive and Tool Buying Guide for Large-Scale Wall Art
The right tool depends entirely on weight, wall surface, and how long you plan to keep the piece up. Buying the wrong adhesive for a heavy canvas is the single most common reason renters end up disappointed — usually around 2 a.m. when the art slides off the wall.
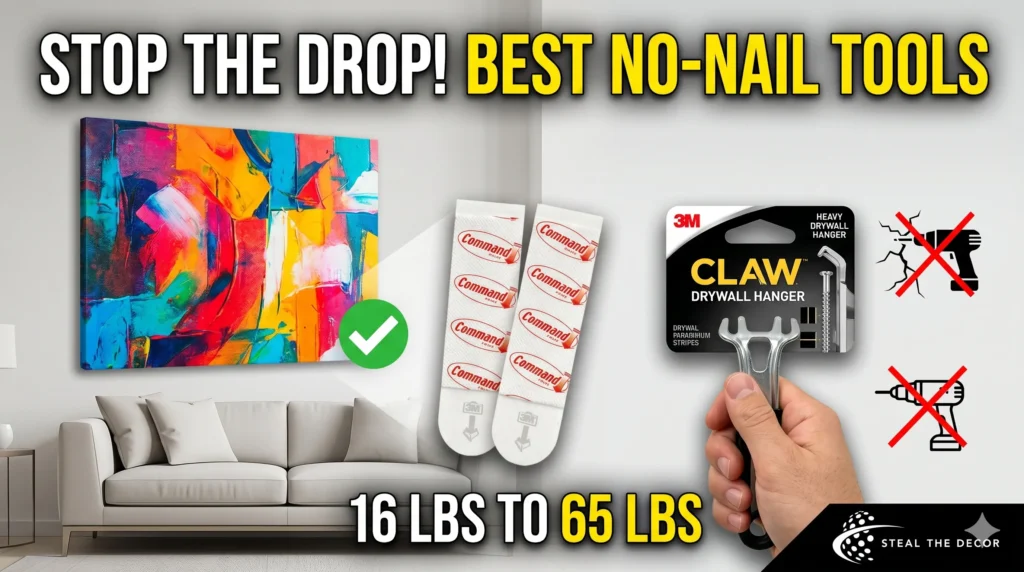
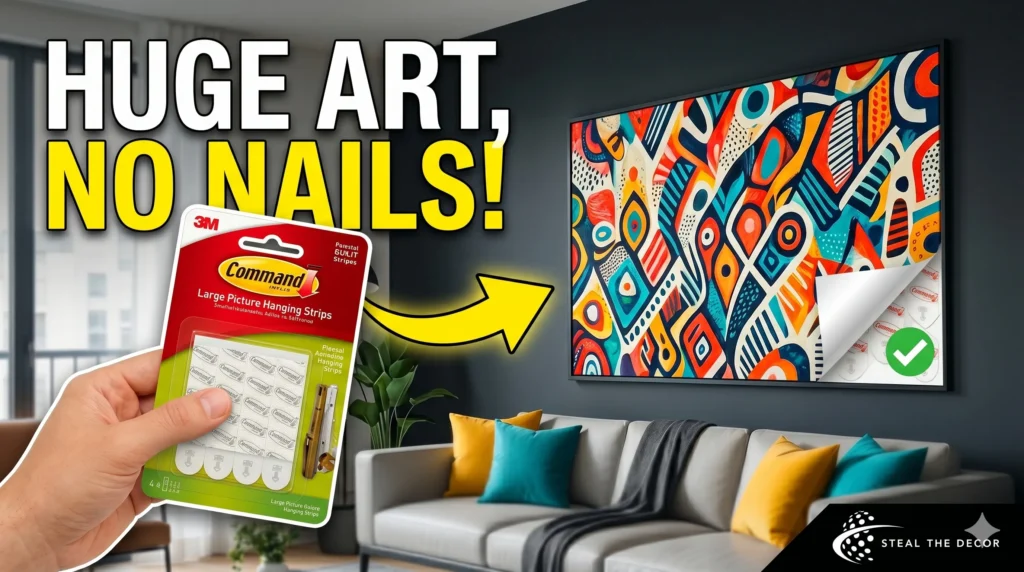
Command Picture Hanging Strips are the most recognizable option, and for good reason. They use a stretch-release adhesive that holds firmly until you pull the tab straight down, at which point it releases cleanly. Capacity varies by size: small strips top out around 1 lb, medium strips handle roughly 3 to 4 lbs, and the large picture hanging strips support up to 16 lbs per set when used in pairs. For anything heavier, 3M also makes X-Large strips rated up to 20 lbs and CLAW drywall hangers rated up to 65 lbs, which is genuinely impressive for something that needs zero studs.
| Tool | Typical Weight Capacity | Best Wall Surface | Removable Without Damage |
| Command Small Strips | Up to 1 lb | Smooth painted drywall | Yes |
| Command Large Picture Strips | Up to 16 lbs (per set) | Smooth painted drywall, tile | Yes |
| 3M Command X-Large Strips | Up to 20 lbs | Smooth painted drywall | Yes |
| 3M CLAW Drywall Hanger | Up to 65 lbs | Drywall only | Mostly (small pinhole) |
| Heavy-Duty Mounting Tape | 5–10 lbs | Smooth, non-textured surfaces | Sometimes leaves residue |
| Hardwall Hangers / Brick Clips | Varies by clip | Brick, concrete, masonry | Yes, designed for masonry |
| Tension Rod + S-Hooks | Up to 20 lbs | Between two walls or an alcove | Yes, no adhesive needed |
Heavy-duty mounting tapes from brands like Gorilla and Scotch work differently from Command Strips. They’re a continuous adhesive rather than a tab-release system, which means they grip harder but come off less cleanly. I’d avoid these on freshly painted walls, or anywhere you’re worried about the topcoat, because some formulations can pull paint with them if removed too quickly. They’re better suited for foam board, cardboard, or lightweight materials where a little surface residue on the back of the piece doesn’t matter.
If your apartment has exposed brick or structural concrete, regular adhesive strips will likely fail within a week. Hardwall hangers and brick clips are designed specifically for masonry surfaces, gripping the texture rather than relying on a flat, smooth bond. They’re a bit more expensive, but they’re the only realistic option if your building has that industrial-loft aesthetic.
Finally, tension rods and S-hooks solve a problem that adhesives can’t: genuinely heavy pieces. A spring-loaded tension rod wedged between two walls, inside a window frame, or across an alcove can support up to 20 lbs without touching the paint at all. Hang a piece of art from the rod using S-hooks and wire, and you’ve got a load-bearing system with zero adhesive risk.
One tool worth mentioning separately is poster putty, sometimes sold as mounting putty or adhesive tack. It’s a soft, reusable compound that works almost exclusively on paper prints and lightweight posters rather than framed art. It’s not strong enough for canvas or anything with real weight behind it, but for a quick, cheap way to put up an unframed print without leaving a sticky residue, it’s hard to beat. Most rolls or tubs cost under $5 and last through dozens of prints.
8 Genius Large-Scale Wall Art Hacks That Don’t Require a Single Nail
This is where things get genuinely fun. Each of these hacks works for a different budget, skill level, and wall situation, so pick whichever fits your space best.
1. The Oversized Engineering Print + Washi Tape Frame
Office supply stores like Staples and FedEx Office print large-format engineering documents, and most people don’t realize you can use that same printer for art. Upload any high-resolution black-and-white photo or graphic design, print it at 24×36 inches or larger, and you’ve got a statement piece for around $5 to $10. Skip the frame entirely. Instead, run colorful or metallic washi tape along the edges to create a clean border, then mount the whole thing with mounting tape on the back corners. The architectural, slightly oversized look reads as intentional, not cheap, and the washi tape peels away without a trace when you move out.
2. Fabric and Tapestry Wall Panels (The Liquid Starch Method)
This one surprises people every time. Mix liquid starch with a small amount of water, brush it onto the wall, and press a large piece of fabric or a tapestry directly onto the wet surface like wallpaper.
It bonds smoothly, smooths out wrinkles as it dries, and covers an entire wall for less than $30 if you buy fabric by the yard. When you’re ready to take it down, fabric soaked in warm water loosens the starch bond, and the wall underneath is completely unaffected.
I tried this in my bedroom with a patterned cotton fabric from a discount store, and it genuinely looked like wallpaper once it dried. The only catch is patience — you need a few hours of drying time before you touch it again.
3. Lightweight Foam Board Masterpieces
Foam boards from a dollar store can be taped together edge to edge to create a single oversized canvas, then wrapped in fabric, wallpaper, or a printed poster, the same way you’d wrap a gift. The finished piece weighs next to nothing, often under a pound for a 3×4-foot panel, which means a single Command Strips can hold it with room to spare. This is the cheapest hack on the list by a wide margin, usually costing under $15 total, and it’s forgiving for beginners since foam board is easy to cut and adjust if your measurements are slightly off.
4. The Lean-In (Floor and Furniture Layering)
Sometimes the easiest hack is skipping the hanging step entirely. Lean an oversized framed piece against the wall behind a console table, dresser, or low bookshelf, and let the furniture take the visual weight instead of the wall. Layer a second, smaller frame in front for depth. This works especially well in bedrooms with platform beds, where leaning art behind the headboard creates an editorial, lived-in look. There’s zero risk to the wall because nothing touches it, and you can rearrange the layout in thirty seconds whenever you’re bored with the arrangement.
5. Peel-and-Stick Wall Murals as Faux Art
Removable wallpaper murals aren’t just for covering an entire accent wall. Buy a single mural panel, usually $20 to $30, and apply it within a defined rectangle on your wall instead of covering the whole surface. Frame the edges with thin, removable trim or simple washi tape, and it reads exactly like an oversized framed print. Peel-and-stick material is designed to come off cleanly even after months on the wall, which makes this one of the lowest-risk hacks for renters who move often.
6. Frameless Canvas with Command Strips
A stretched canvas without a wood frame is surprisingly light, often under 3 lbs, even at 30×40 inches, because there’s no glass and minimal hardware. That weight range falls comfortably within the Command Strips capacity. Apply four large strips in a diamond pattern on the back corners, press firmly, and you’ve got a frameless, gallery-style piece that looks far more expensive than its actual cost. Canvas prints from online print shops or marketplace sellers regularly run $25 to $60, depending on size, which is reasonable for something this size.
7. Grid Gallery Wall With Lightweight Frames
Instead of one massive frame, use nine or twelve small, lightweight plastic or acrylic frames arranged in a tight grid. From a distance, the collective grid reads as a single large-scale art installation, even though each frame might weigh under a pound. This hack is genuinely clever for large-scale wall art on a budget, since acrylic frames cost a fraction of glass-and-wood versions, and each one only needs a single small Command Strips. The trade-off is installation time — measuring and leveling a 3×4 grid takes longer than hanging one piece, so set aside an afternoon.
8. Hanging Dowels and Poster Rails
Wooden or metal poster rails clip onto the top and bottom of a canvas or fabric print, giving it structure without a full frame. A loop of string or wire connects the top rail to a single small command hook, distributing the weight evenly across the dowel rather than concentrating it on one point. This method works particularly well for fabric tapestries and unframed prints that would otherwise sag or wrinkle. Magnetic poster rail kits have become popular recently because they snap together without any tools at all.

Step-by-Step: How to Hang Heavy Large-Scale Wall Art Without Nails
Getting the hack right matters less than getting the installation right. Even the best adhesive fails if you skip a step.
- Clean the wall first. Wipe the spot down with isopropyl alcohol, not household cleaner, to remove dust and oil that block adhesion.
- Measure and mark your spot. Use painter’s tape or a laser level to mark where the top of your piece will sit before committing to anything.
- Check the weight against your adhesive’s rating. Match the strip, tape, or hanger capacity to the actual weight of your framed piece, not an estimate.
- Apply the adhesive and press firmly. Hold each strip or tab against the wall for a full 30 seconds of firm pressure, not a quick pat.
- Wait through the curing time before hanging anything. This is the step almost everyone skips. Most adhesives need a full hour to bond properly before they can bear weight, and rushing this step is the number one reason art ends up on the floor.
- Hang the piece and test gently. Once cured, hang your art and give it a light tug to confirm the hold before walking away.
That curing window is genuinely the most important detail in this entire guide. I once hung a frame fifteen minutes after applying the strips because I was impatient and running late for something. It held for about two hours before sliding straight down the wall and cracking the glass. Lesson learned: set a timer, walk away, and don’t touch it.
The Exit Strategy: How to Remove Adhesives Without Peeling Paint
Taking large-scale wall art down the right way matters just as much as putting it up, especially if you want that deposit back in full.
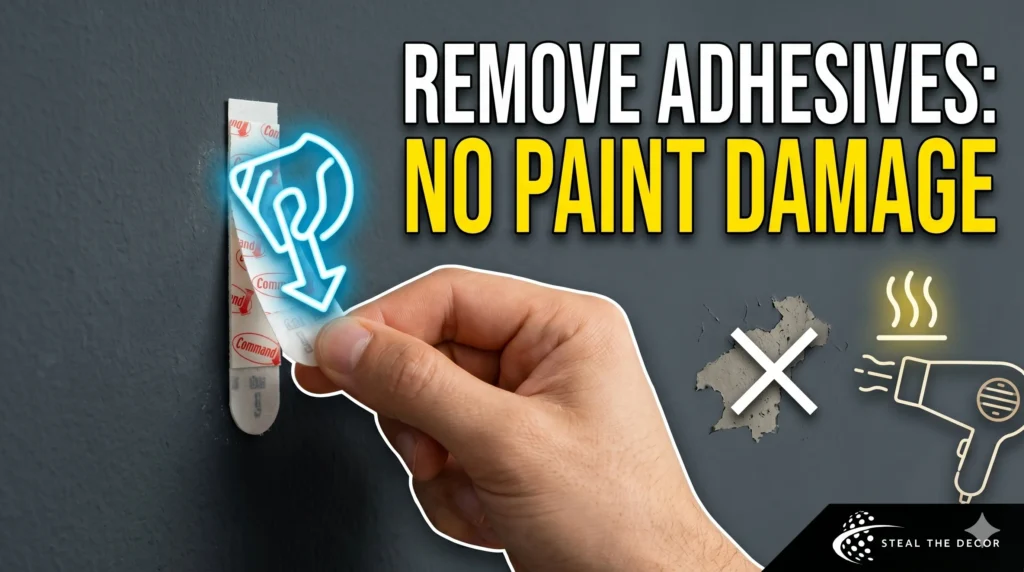
The single biggest mistake people make is pulling Command Strips outward, away from the wall, instead of straight down. Grip the tab at the bottom of the strip and pull it slowly downward, stretching the strip to its full length as you go. This releases the adhesive bond gradually instead of yanking the top layer of paint along with it. If the tab snaps off partway through, don’t panic and don’t pick at it with your fingernails.
When a strip gets stuck or breaks mid-pull, a hair dryer or heat gun becomes your best friend. Hold it about four to six inches from the strip and move it back and forth for twenty to thirty seconds to soften the adhesive. Once it’s warm to the touch, resume pulling down slowly. For truly stubborn cases, sliding a length of dental floss behind the strip and using a gentle sawing motion will cut through the bond without touching the wall surface at all.
Leftover residue is normal and easy to handle. A small amount of Goo Gone or rubbing alcohol on a soft cloth will dissolve sticky patches without harming most painted surfaces. Test a hidden spot first if you’re working with a textured or colored finish, just to be safe.

Where to Find Affordable Large-Scale Wall Art (Without Blowing Your Budget)
Big art doesn’t have to mean a big price tag. Etsy is full of digital download shops selling high-resolution printable art for $5 to $15, which you can size up at any print shop or office store for a fraction of what a retail gallery would charge. Unsplash and other public domain archives offer free high-resolution photography that prints beautifully at large sizes, especially black-and-white landscape or architectural shots.
Thrift stores are another underrated source, not necessarily for the art itself but for the frames. A scratched, outdated gold frame from a secondhand shop costs a few dollars and transforms completely with a coat of matte black or brass spray paint. Swap in a printed piece or canvas insert, and you’ve got a custom-looking statement frame for under $20 total. Target, Amazon, and World Market also carry ready-made large canvas prints in the $40 to $90 range if you’d rather skip the DIY step entirely and just buy something finished.
Seasonal timing matters more than people think when budgeting for large-scale wall art. Big-box retailers tend to discount oversized canvas and framed prints heavily during January clearance and again in late summer, right around when a lot of leases turn over, and new tenants are decorating. Watching for those windows instead of buying at full price in peak decorating season, like September or early spring, can knock 30 to 40 percent off the same piece.
Frequently Asked Questions About Hanging Large-Scale Wall Art
How do you hang large-scale wall art without nails?
The most reliable methods are heavy-duty command strips, tension rods, or simply leaning oversized pieces against the wall on furniture. Match the adhesive’s weight rating to your art, clean the wall with rubbing alcohol first, and let the adhesive cure for at least an hour before hanging anything.
What is the weight limit for Command Strips on large frames?
Standard large Command picture-hanging strips support up to 16 lbs per set, while 3M’s X-Large strips support up to 20 lbs, and CLAW drywall hangers support up to 65 lbs. Anything heavier than that generally needs a tension rod or a leaning display instead of adhesive alone.
How do you hang heavy art on drywall without finding a stud?
Drywall-specific hangers like 3M CLAW hooks use a hardened steel claw that locks into the drywall itself rather than relying on a stud, supporting up to 65 lbs without tools. For lighter pieces, Command Strips skip the stud question entirely since they bond to the painted surface.
Will my landlord charge me for nail holes in the wall?
Most leases distinguish small nail holes from genuine damage, but policies vary widely by property manager. Many landlords charge a patching fee per hole during move-out inspections, which is exactly why no-nail methods have become so popular among renters trying to protect their deposit.
Can you display oversized art without hanging it on the wall at all?
Yes, leaning large framed pieces against a wall behind furniture like a console table, dresser, or low bookshelf is a fully nail-free display method. A small dab of museum wax or a non-slip pad on the bottom edge keeps the frame from sliding on hard flooring.
Do Command Strips work on textured walls?
Command Strips and most adhesive hangers are designed for smooth, painted drywall, and they lose a significant amount of holding power on textured or popcorn ceilings and walls. The textured surface reduces the actual contact area the adhesive touches, so even a strip rated for 16 lbs might only reliably hold a fraction of that on rough plaster. For heavily textured walls, leaning methods or tension rods are usually a safer bet than relying on adhesive alone.
Which of these hacks are you trying first? Or have you found a renter-friendly trick that didn’t make this list? I’d love to hear about it in the comments.