
Table of Contents
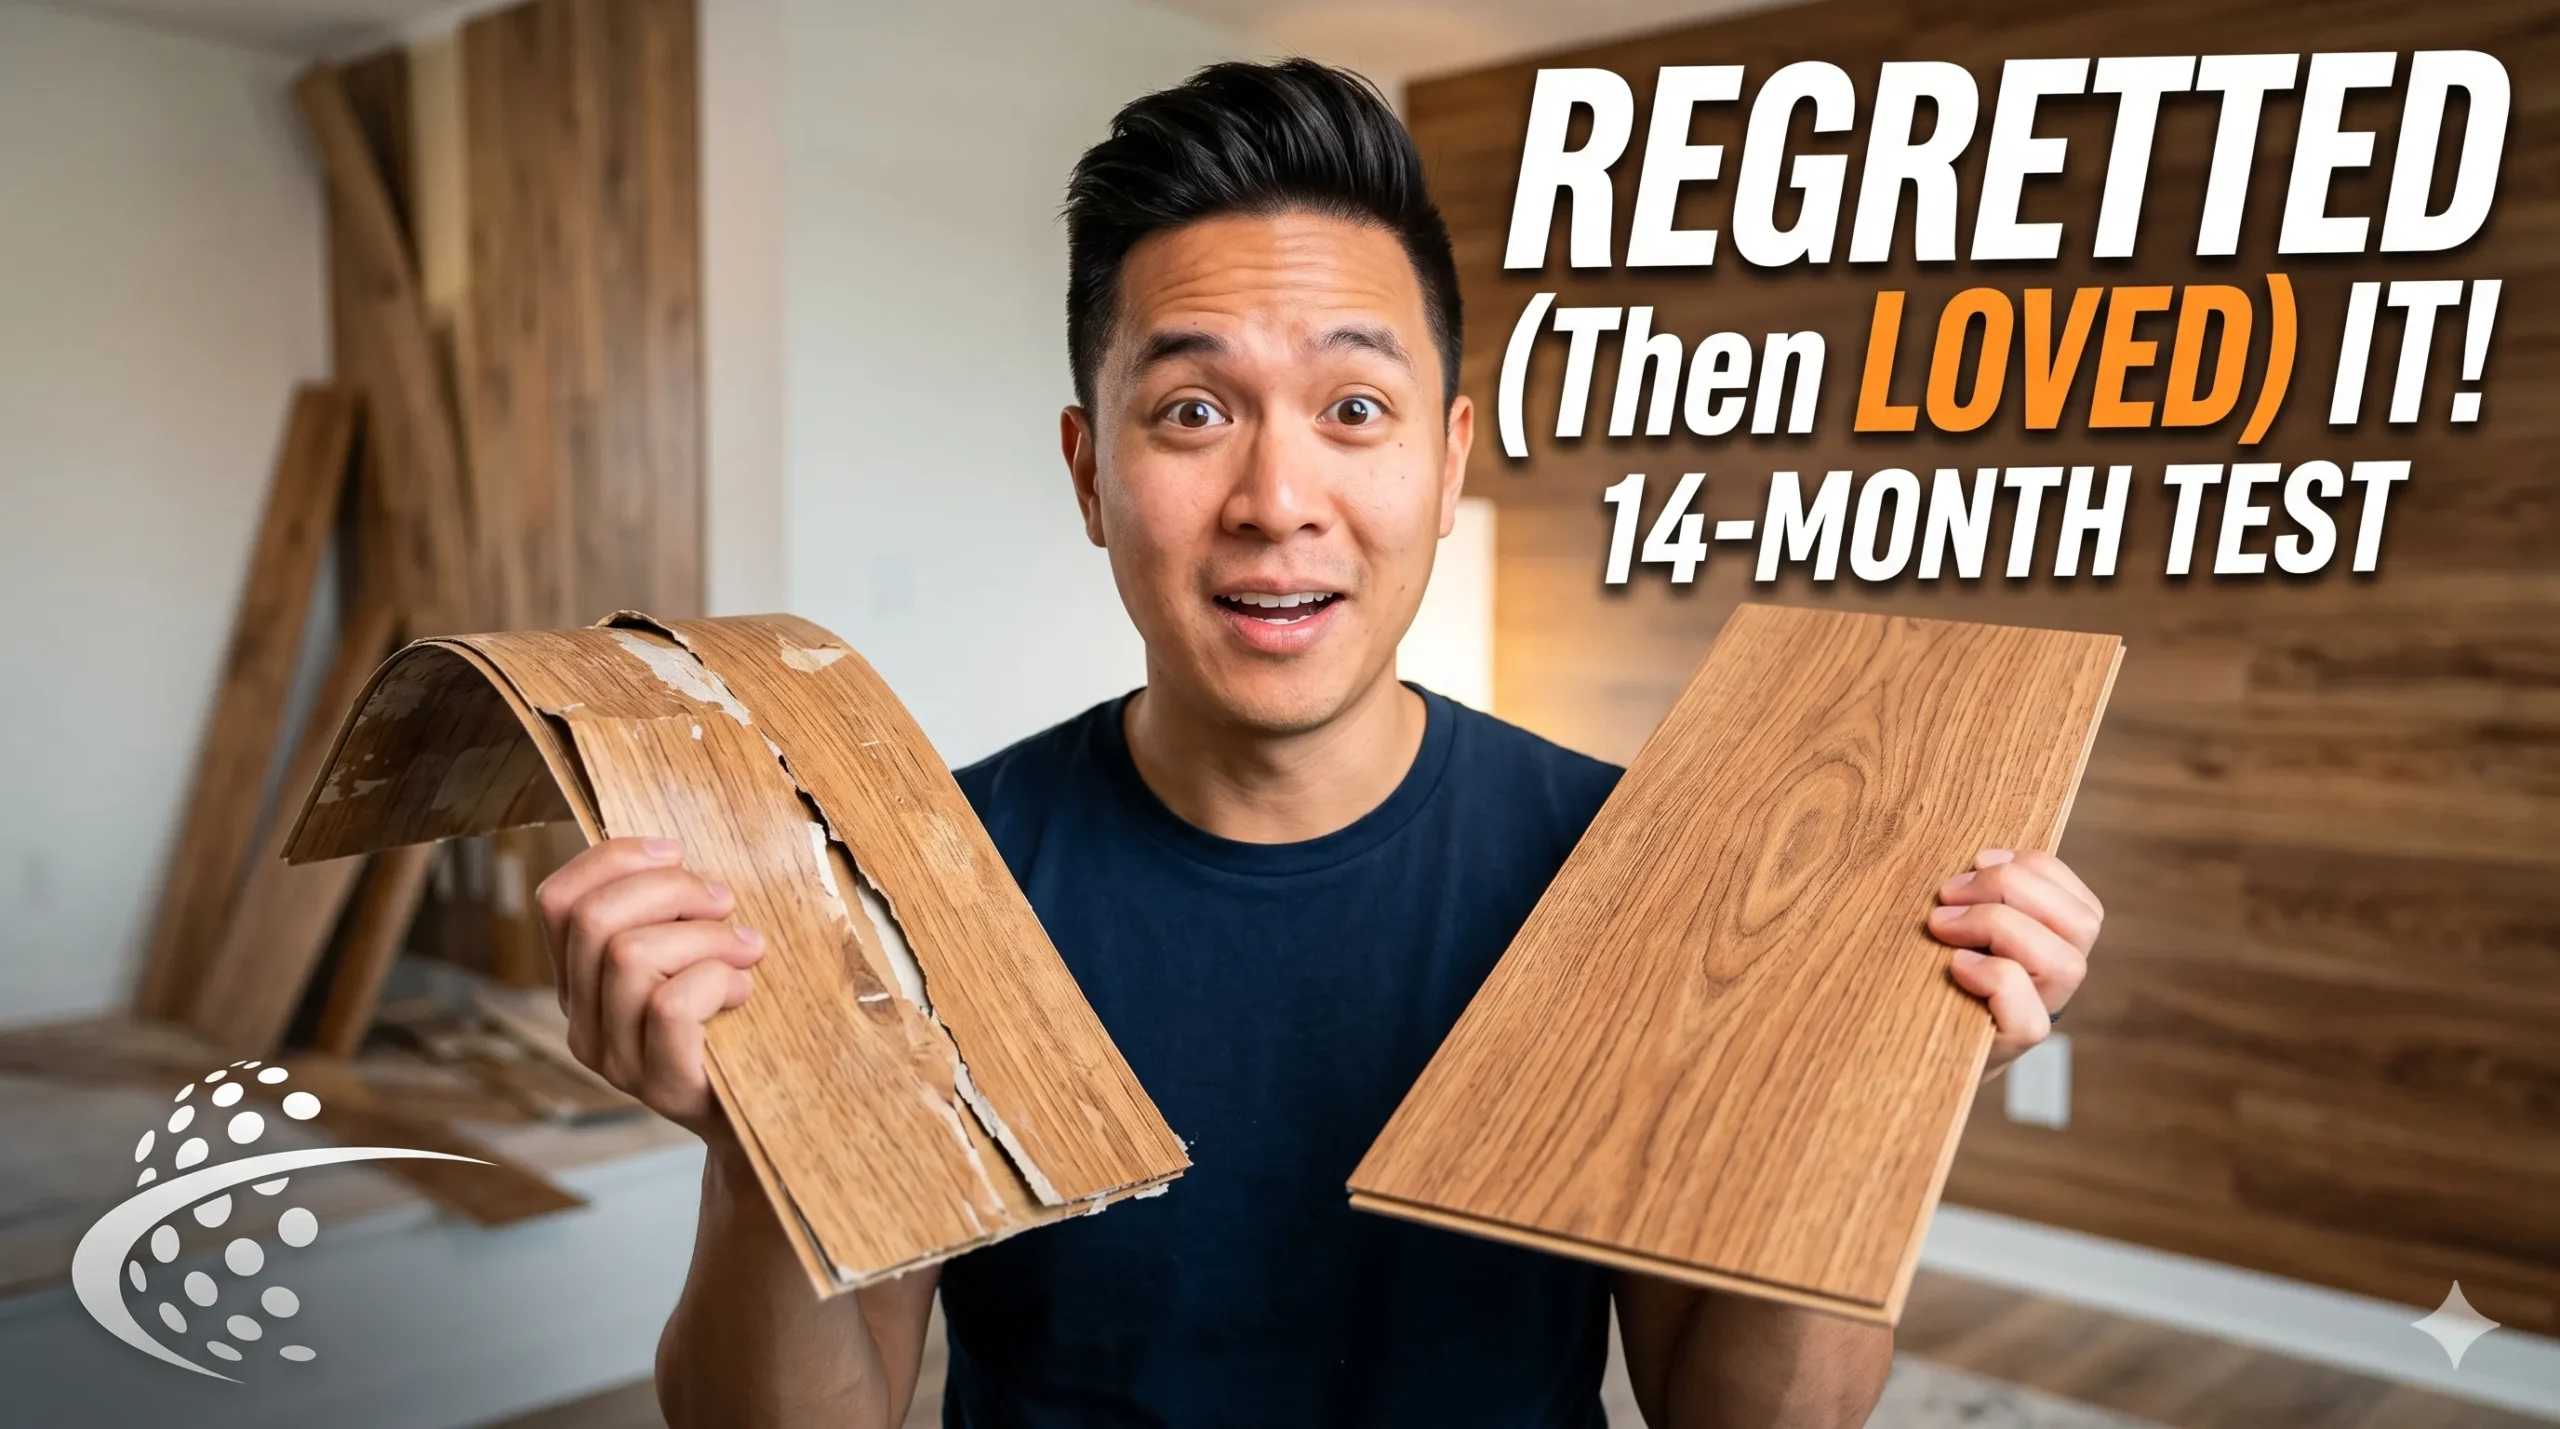
I bought my first box of peel-and-stick wood planks on a Tuesday night. By Wednesday afternoon, I was sitting on my apartment floor staring at a crooked seam that I couldn’t un-see. The box said “no tools required.” Technically true. What it didn’t say was that a crooked first plank will haunt you for the next year.
I live in a 700-square-foot rental in Austin, Texas. The walls were beige. Not a warm beige — the kind of beige that feels like a corporate waiting room. I wanted shiplap. The real stuff. But my lease said no nails, no paint, no permanent changes. So I Googled “rental-friendly wood wall” and fell into the rabbit hole of peel-and-stick wood planks. By midnight, I had three boxes in my Amazon cart and absolutely no idea what I was doing.
This article is what I wish I had read before peeling that first backing strip. It covers every mistake I made, every brand I tested, and exactly how things look 14 months later — in the kitchen, in the bathroom, and in that one corner I still avoid showing guests.
What Peel and Stick Wood Planks Actually Are — No Marketing Fluff
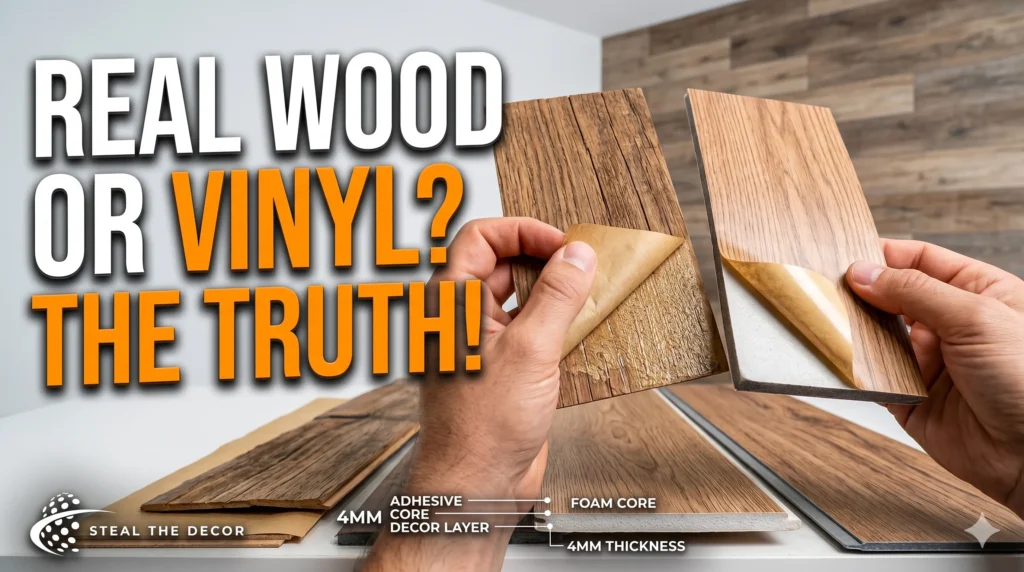
Peel-and-stick wood planks are thin, self-adhesive boards made from engineered wood, vinyl, or MDF with a wood veneer or printed wood-look surface. They typically range from 3mm to 6mm in thickness and come in planks resembling reclaimed barn wood, shiplap, or classic hardwood. The back has a pressure-sensitive adhesive covered by a peel-off film. You measure, you cut, you peel, you stick.
That’s the definition. Here’s what it misses.
These are not real wood planks in the traditional sense. The surface texture varies wildly between brands. Some feel convincingly like rough-sawn timber. Others feel like a photograph of wood laminated onto a foam backing. I learned this distinction the expensive way — by ordering the cheapest option first. That box is now under my bed, half-used, waiting for a project I’ll probably never start.
The appeal makes sense for renters and commitment-phobes. You get the look of a wood accent wall without nails, saws, or a security deposit deduction. But the gap between “easy DIY” and “easy to do well” is wider than most tutorials admit.
The $67 Mistake I Made in My First Hour
I started on a Saturday morning. Coffee in hand. Confidence high. I had watched exactly one YouTube video — a 6-minute clip where a woman transformed her bedroom in what looked like a leisurely afternoon. She made it look like peeling a giant sticker.
My accent wall was 9 feet wide by 8 feet tall. The planks I ordered were the RoomMates Reclaimed Barn Wood Peel and Stick Planks — $34 per box of 10 planks from Amazon. I bought two boxes. Total: $67 and change.
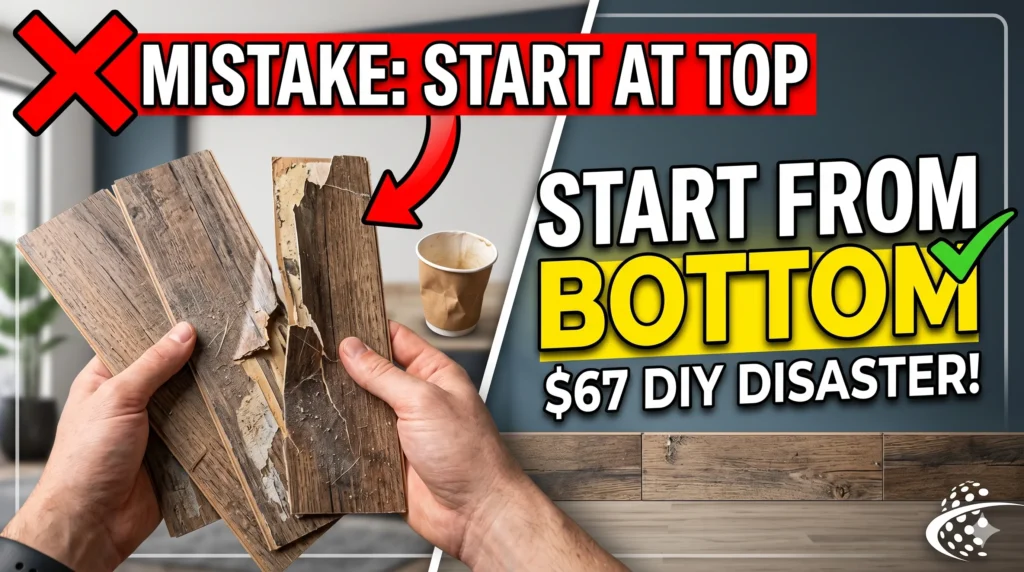
Here’s the mistake: I started from the top.
I assumed top-down would be easier because gravity would keep everything aligned. What actually happened was the opposite. Each plank sagged slightly before I pressed it down, creating micro-gaps I couldn’t see from eye level but that the afternoon light exposed brutally. By plank four, the seams looked like a staircase. I peeled them off, damaged two in the process, and started over from the bottom like every actual tutorial recommends.
Those two ruined planks cost me about $6.70 in materials. The real cost was the 45 minutes I spent on my hands and knees trying to salvage adhesive backing that had already collected dust and cat hair.
Peel-and-stick wood planks punish overconfidence. Start from the bottom. Use a level for every single row. If you think you can eyeball it, you can’t. I couldn’t.
Wall Preparation — What Nobody Tells You (And Why I Redid an Entire Wall)
Most product descriptions say “sticks to any clean, smooth surface.” This is technically accurate. It is also dangerously incomplete.
The Cleaning Step I Skipped
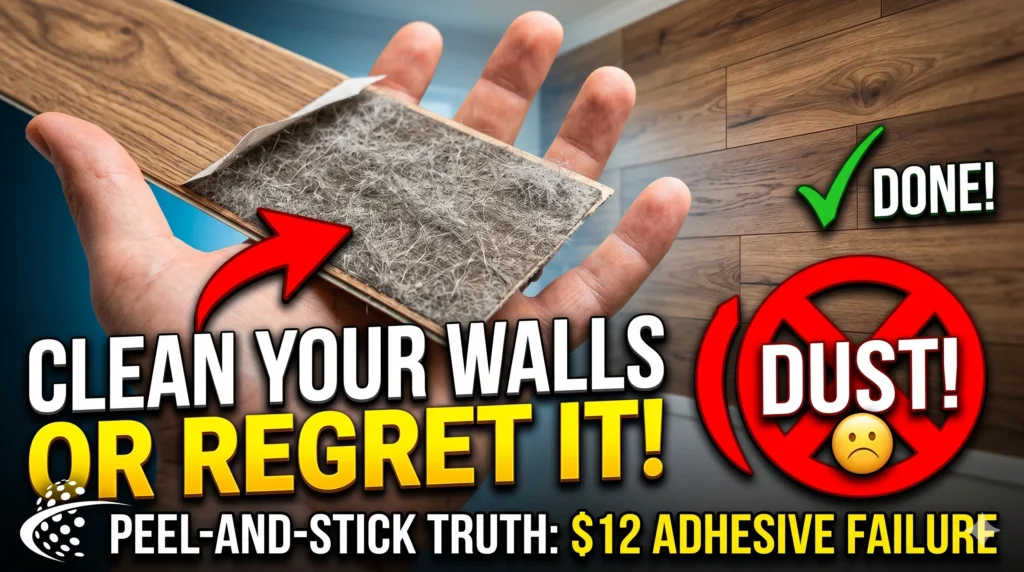
Before my first attempt, I wiped the wall with a dry microfiber cloth and called it done. I could not see any dust. The wall felt smooth. That was enough, I figured.
Two weeks later, the center plank of row three started lifting at the edge. When I pressed it back down, it held for a day, then lifted again. I peeled the whole plank off to investigate. The adhesive side had a thin film of gray fuzz — apartment dust so fine I hadn’t noticed it during installation.
I took down every plank. All of them. Then I washed the wall with a mixture of warm water and a few drops of dish soap. I let it dry for two hours. Then I wiped it again with 70% isopropyl alcohol on a lint-free rag. The rag came back gray. That gray was the reason my planks were failing.
Clean your wall like you’re prepping for surgery. Dust is the enemy of adhesion. Construction dust, pet dander, even the residue from old candles — it all sits between the adhesive and the paint. You won’t see it until the planks start peeling.
The Temperature Rule That Bit Me
My apartment thermostat stays around 72°F. The wall I was covering sits on an exterior-facing surface. What I didn’t know was that the wall itself was significantly colder in January — roughly 62°F when I measured it with a $12 infrared thermometer from Home Depot.
Most peel-and-stick adhesives need a surface temperature between 65°F and 85°F to bond properly. Below that range, the adhesive stiffens. It feels like it sticks initially, but the bond never fully cures. Two of my kitchen planks peeled at the edges within three days because the wall was too cold when I applied them.
I waited until spring for the kitchen wall. April, 74°F ambient temperature, wall measured at 71°F. Every plank adhered perfectly on the first attempt. The difference was night and day. If you’re installing these in winter or in an unheated room, warm up the space for at least 24 hours beforehand. Or just wait. I wish I had.
Real Installation — Time, Tools, and That One Corner I Still Avoid Looking At
My accent wall took four hours. Not the “under one hour” that some listings promise. Four hours — including the do-over from the top-down mistake, the cleaning debacle, and cutting around one outlet that nearly made me quit.
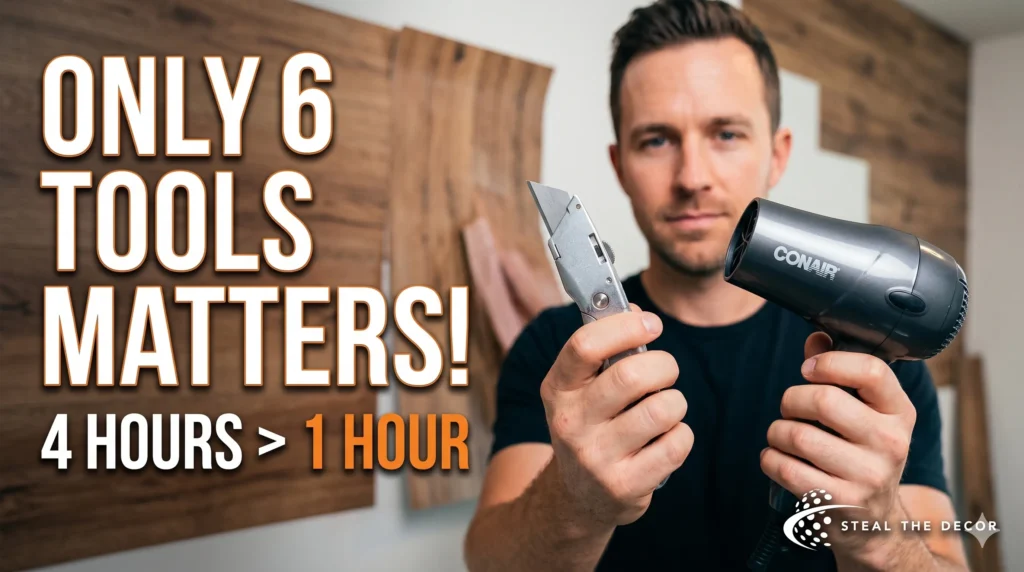
Tools I Actually Used (Not the 14-Piece List YouTube Says You Need)
Some tutorials recommend a full toolkit: jigsaw, miter saw, adhesive primer, brayer roller, metal straightedge, the works. I used six things, and three of them were optional.
Here’s what genuinely mattered:
- A utility knife with fresh blades — I swapped blades after every 5 cuts because even slight dullness tears the wood veneer instead of slicing it clean. I bought a 50-pack of Stanley blades for $11 at Walmart.
- A metal ruler, 36 inches long — I used it as a straightedge for cutting and as a spacer along the baseboard. $9 from Amazon.
- A small level, 9 inches — Every row, no exceptions. $6 at Home Depot.
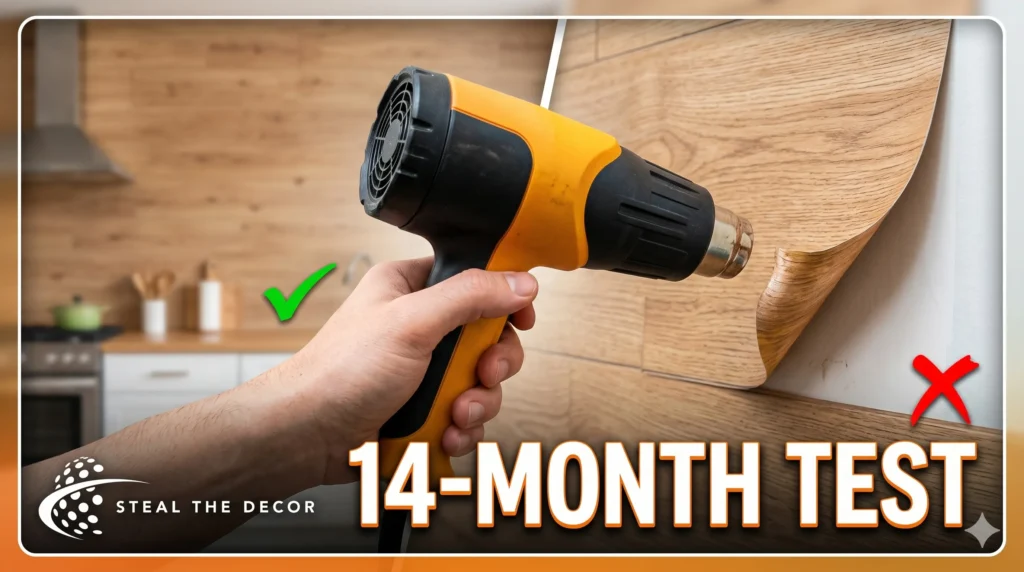
- A hair dryer — This was a game-changer. Heating the adhesive backing for 10 seconds before pressing made a visible difference in edge adhesion. My wife’s Conair dryer, borrowed without asking, worked perfectly.
- A J-roller — I didn’t buy one for the first wall and used a rolling pin wrapped in a microfiber cloth instead. It worked okay. For the second wall, I bought an actual J-roller for $11 on Amazon. The difference in pressure application was noticeable. Edges lay flatter.
- Pencil and measuring tape — Obvious, but you’d be surprised how many times I eyeballed a measurement and regretted it.
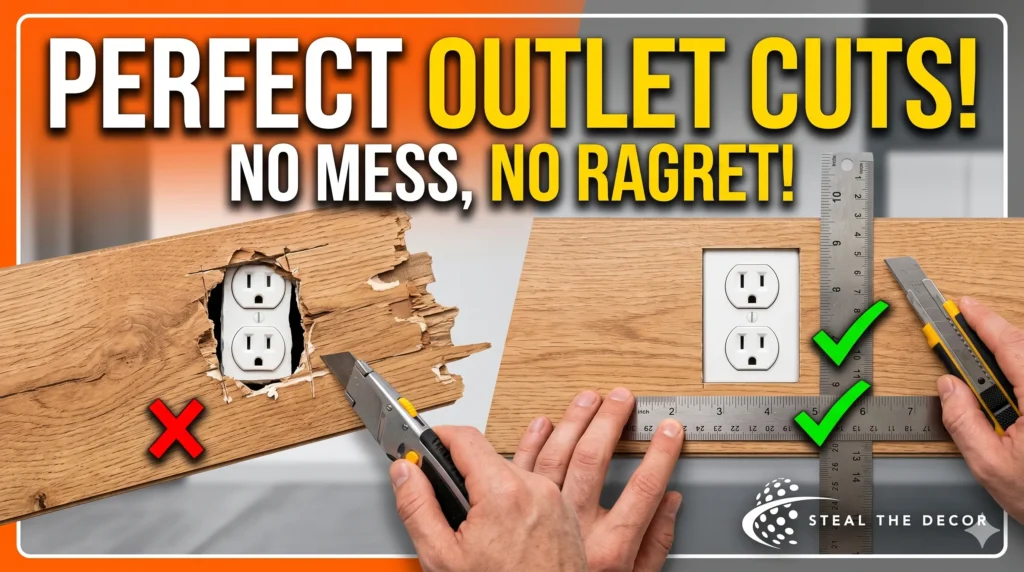
Cutting Around Outlets Without Losing Your Mind
There is a specific frustration in realizing your perfectly measured plank now needs a rectangular hole for an outlet cover. I ruined one plank trying to freehand it with a utility knife. The cut went jagged, and the resulting gap looked terrible.
What worked: I placed the plank in position without peeling the backing, marked where the outlet sat, then cut the opening on a flat surface using the metal ruler as a guide. Score the line three times with moderate pressure, then snap the piece out cleanly. The key was patience — three light passes instead of one aggressive cut.
I still have one outlet in the kitchen where the gap around the cover plate is slightly wider than I’d like. I notice it every time. No guest has ever pointed it out. But I know it’s there.
How They Look After 14 Months — The Good, The Bad, The Peeling Corner
This is the section I’d have killed to read before buying. Long-term performance separates marketing claims from reality.
Kitchen Wall — Still Solid
The kitchen accent wall still looks genuinely good. No peeling edges. No warping. The seams are tight. I wipe it down once a month with a barely-damp microfiber cloth, and it hasn’t faded or discolored. The wall faces away from the stove, so it isn’t getting hit with grease or steam directly. That positioning probably saved it.
One plank near the light switch has a tiny nick from where I accidentally hit it with a pot handle. At a glance, it looks like a natural knot in the wood. I’m calling that a design feature.
Bathroom Wall — Mixed Results
I installed a smaller section in the half-bathroom — just the wall behind the mirror, roughly 4 feet by 4 feet. This was the real test. Bathrooms are humid. Peel-and-stick adhesives hate humidity.
After 8 months, the bottom plank near the sink started curling at the corner. It lifted about a quarter-inch. I pressed it back with heat from the hair dryer, and it held for another two months before lifting again. The steam from showers seems to affect the outer edges most. I don’t think these planks will survive another summer in a full bathroom with a shower. In a powder room without a shower, they might last years.
If you’re installing peel-and-stick wood planks in a bathroom, seal the edges with a thin bead of clear silicone caulk. I didn’t do this initially. When I finally did, the lifting stopped. But the caulk line is slightly visible if you look closely. It’s a trade-off.

Which Brands I Tested — And Which One I’d Never Buy Again
I used three different brands across three walls in my apartment. Each had strengths, and one had no strengths at all.
RoomMates Reclaimed Barn Wood ($34 per box, Amazon) was the first and the best. The texture feels legitimate — there are raised grain patterns you can actually feel with your fingers. The adhesive held strong where I prepped the wall correctly. Colors varied enough between planks to look natural without being chaotic. The downside: the planks are slightly thinner than I expected, and the edges can tear if you cut with a dull blade.
Stikwood Original Weathered Wood ($89 per box of 10 square feet, directly from Stikwood’s website) was the premium option. These are real wood veneer, not printed. The thickness, the scent, the weight — everything felt higher quality. They looked stunning on the wall. The problem was the adhesive. It’s aggressively strong on initial contact, which means repositioning is nearly impossible. I misaligned one plank by maybe 2mm and had to live with it. For $89 a box, you shouldn’t have to “live with” anything.
Art3d Peel-and-Stick Wood Planks ($27 per box, Amazon) were the budget pick. And honestly, they looked like a budget pick. The surface pattern repeats noticeably — every third plank had the same knot in the same spot. Up close, the “wood grain” looks like a digital print because it is one. The adhesive was mediocre. Edges lifted in the hallway within two weeks. I didn’t return them because I’d already cut half the box. They’re still on a small section of wall in my entryway, and I feel nothing about them. Not hate, not love. They’re just… there. Meh.
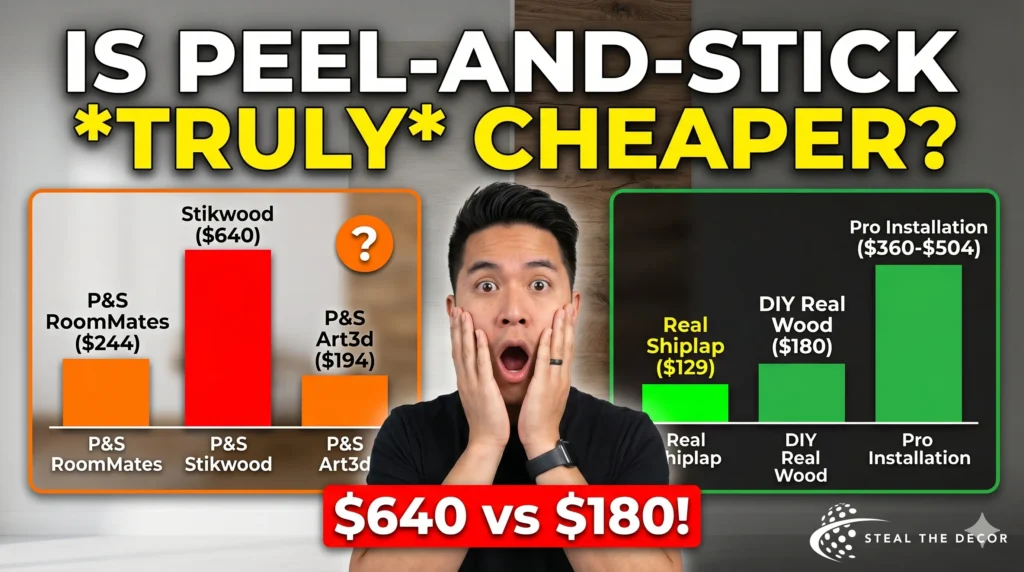
Cost Breakdown — Is This Actually Cheaper Than Real Wood?
Real shiplap isn’t cheap. Neither are peel-and-stick wood planks, especially the good ones. Here’s how the math shook out for my 72-square-foot accent wall:
| Material | Cost per Sq Ft | Total (72 sq ft) |
| RoomMates Peel and Stick Wood Planks (Amazon) | $3.40 | $244.80 |
| Stikwood Weathered Wood | $8.90 | $640.80 |
| Art3d Peel and Stick Planks (Amazon) | $2.70 | $194.40 |
| Real Shiplap (Home Depot, pine, 8-inch) | $1.80 | $129.60 |
| Real Shiplap + Nails + Paint + Primer | $2.50 | $180.00 |
| Professional Shiplap Installation (labor + materials) | $5.00 – $7.00 | $360 – $504 |
Real shiplap is cheaper in materials. Significantly. But it requires tools, nails, the ability to cut boards, and the permanent alteration of your wall. For renters like me, that $244 peel-and-stick option wasn’t just about looks — it was about getting my security deposit back someday.
The value proposition shifts if you own your home. Permanent real wood adds resale value. Peel and stick does not. If you’re a homeowner, think about whether you want an upgrade or a temporary fix. I wanted a temporary fix I could undo in an afternoon. That’s what I got.
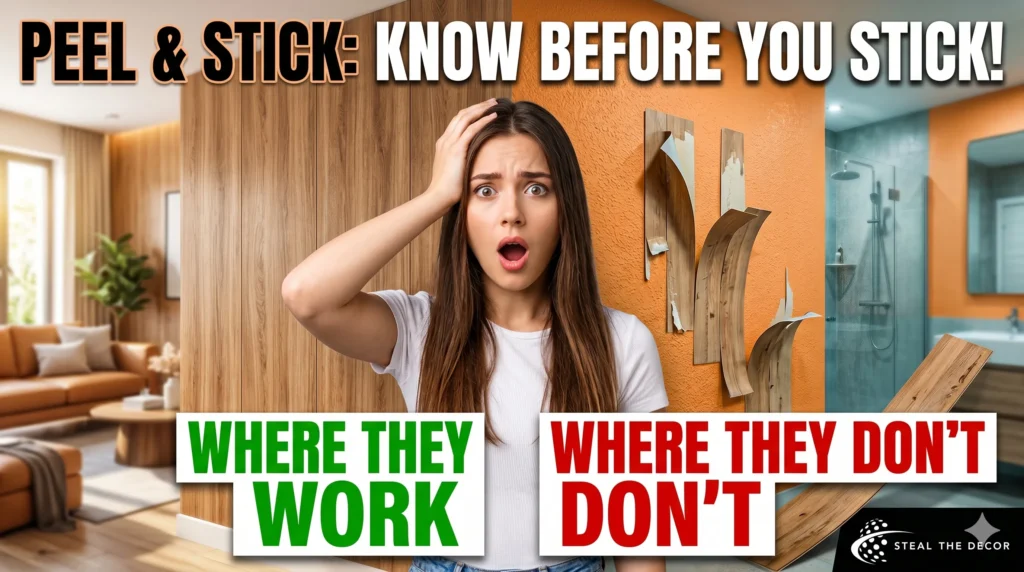
Rooms Where Peel and Stick Wood Planks Make Sense (And Where They Don’t)
Not every wall in your house wants these planks. Some rooms are perfect. Others are disasters waiting to happen.
Where they work: Accent walls in living rooms, primary bedroom headboard walls, home office backgrounds for Zoom calls, half-bathrooms without showers, hallways with low moisture, and rental apartments where lease restrictions block permanent changes. The dining nook in my apartment has a 5-foot wall I covered in the RoomMates planks, and it’s now the most photographed corner of the home.
Where they don’t work: Full bathrooms with showers, kitchen backsplashes behind the stove, any surface that gets direct water exposure, laundry rooms with poor ventilation, exterior-facing walls in cold climates without proper insulation, and any wall with heavy texture. My hallway has a slight orange-peel texture, and the planks held — but the adhesion wasn’t as strong as on the smooth kitchen wall. Heavy knockdown texture or popcorn walls? Forget it. You’d need to skim-coat first, which defeats the point of a simple peel-and-stick solution.
Ceilings are also a no-go. I tried one plank on the ceiling above my desk just to test. Gravity won. The plank peeled off at 3 a.m. and scared the absolute life out of me and my cat.

Removing Them — What Happens to the Wall Underneath
This is what every renter actually wants to know: Will I lose my deposit?
I removed a small test section — four planks from the hallway where the Art3d edges had already started lifting. The removal process was straightforward. I heated each plank with the hair dryer for about 30 seconds, lifted a corner with a putty knife, and pulled slowly at a 45-degree angle. The planks came off in one piece.
The wall underneath told a more complicated story.
Two of the four planks left zero residue. The paint was pristine. The other two peeled off tiny flakes of paint — nothing catastrophic, but visible upon close inspection. This was on builder-grade apartment paint with a flat finish, which is the least durable surface you can stick anything to. Semi-gloss or satin finishes hold up better during removal. Eggshell is a toss-up.
My plan for full removal is slow heat, steady tension, and a small container of matching paint for touch-ups. I don’t expect to lose my deposit. But I do expect to spend an afternoon with a hairdryer and some spackle. The “damage-free” claim is mostly true. Mostly.
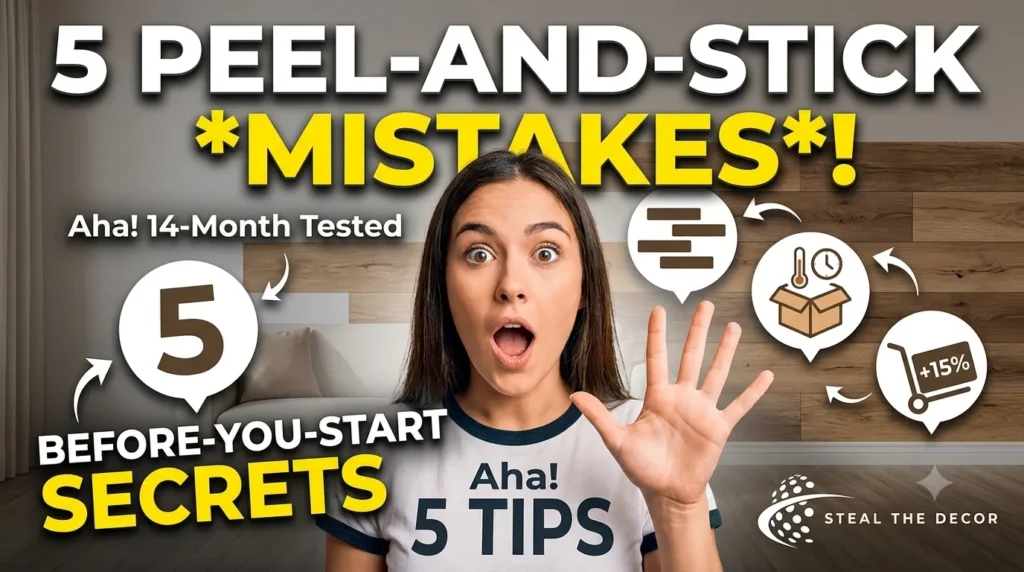
5 Things I Wish Someone Had Told Me Before I Started
Acclimate the planks for 48 hours. The wood needs to adjust to your home’s humidity and temperature. I skipped this on my first box, and the planks expanded slightly after installation, creating small buckles at the seams. Leave the boxes open in the room where you’ll install them.
Order 15% extra. The “coverage per box” number assumes zero mistakes, zero miscuts, and zero planks that arrive damaged. Reality is messier. I needed 3 extra planks for my wall after errors and weird outlet cuts. Having a fourth spare saved me a week of waiting.
Stagger the seams like real flooring. Offset each row by at least 6 inches so the vertical seams don’t line up. I learned this from a wood-flooring friend. It makes the finished wall look intentional, not like a sticker collage.
The adhesive smells for a day or two. It’s not toxic-level, but it’s noticeable. Open windows. Run a fan. If you have migraines or scent sensitivity, plan the installation for a day you can air out the room.
Pets will notice. My cat spent the first week sniffing the wall obsessively. She also tried to scratch one corner. The planks held up to light, clawing but not determined, scratching. If you have a cat that loves destroying furniture, these might become a very expensive cat toy.
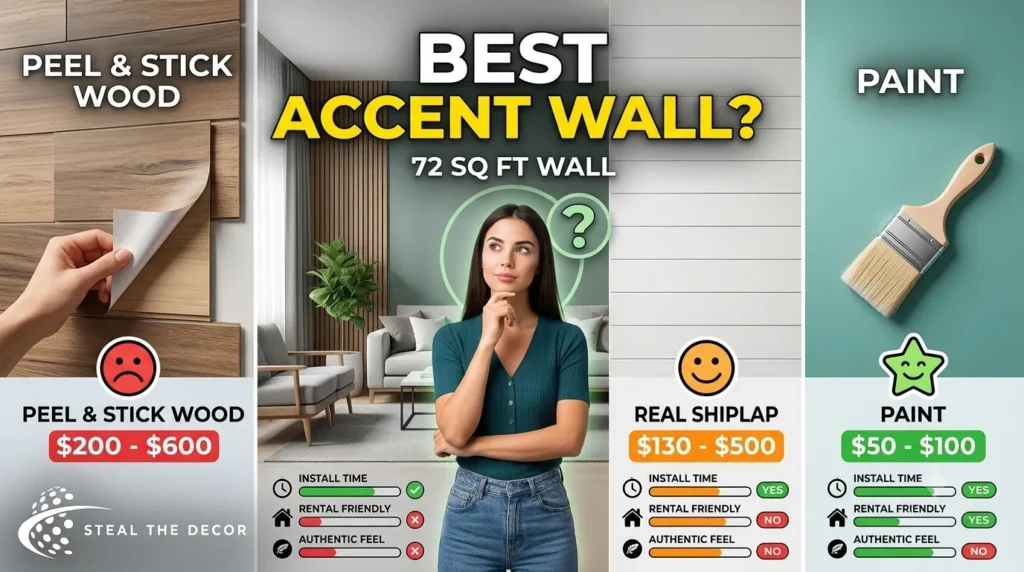
Comparison Table — Peel-and-Stick Wood Planks vs. Real Shiplap vs. Paint
| Feature | Peel-and-Stick Wood Planks | Real Shiplap | Accent Wall Paint |
| Cost (72 sq ft) | $195 – $640 | $130 – $500 | $50 – $100 |
| Installation Time | 3 – 6 hours | 1 – 2 days | 2 – 4 hours |
| Skill Level | Beginner | Intermediate | Beginner |
| Removability | Easy to moderate | Permanent | Permanent (paint over) |
| Authentic Wood Feel | Varies by brand | Yes | None |
| Rental-Friendly | Yes | No | With permission |
| Water Resistance | Low to moderate | Moderate (sealed) | High (semi-gloss) |
| Longevity | 3 – 7 years | 20+ years | 5 – 10 years |
| Resale Value Impact | None | Positive | Neutral |
Frequently Asked Questions
Can peel-and-stick wood planks be used in a bathroom?
Yes, with serious caveats. Powder rooms and half-baths without showers are fine. Full bathrooms with steam and moisture need edge sealing with clear silicone caulk. Even then, expect some lifting over time near high-moisture zones. I installed them in my half-bath, and they’ve held up decently with the caulk trick. I wouldn’t put them in a shower-surround bathroom without accepting that replacement might be necessary in a couple of years
How long do peel-and-stick wood planks last?
Three to seven years under normal indoor conditions, depending on brand quality, wall preparation, and humidity exposure. My roommate’s planks at 14 months show minimal wear. The Art3d budget planks started failing within weeks. Proper wall cleaning and temperature control during installation significantly extend the lifespan. High-traffic areas or direct sunlight can shorten it.
Do peel-and-stick wood planks damage walls?
Sometimes. On smooth, well-painted walls with semi-gloss or satin finish, removal is usually clean with minimal paint pull. On flat or matte paint, some paint flecking is common. Heavy-textured walls fare worse — adhesive can grip unevenly and tear the surface during removal. Heat the planks before pulling them off, go slowly, and budget for minor touch-ups. Damage-free is a goal, not a guarantee.
Can you install peel-and-stick wood planks over tile?
Yes, but the tile surface must be perfectly clean, degreased, and dry. The grout lines will create subtle indentations that may telegraph through thinner planks. I tried one test plank over the kitchen backsplash tile, and it held fine, but the grout line was faintly visible underneath. If you’re covering large tile areas, consider a primer or leveling compound first. Smooth, non-porous tile offers good adhesion. Textured or heavily glazed tile can be problematic.
Are peel-and-stick wood planks waterproof?
No. They are water-resistant at best. The surface can handle occasional splashes if wiped dry quickly, but sustained moisture will cause swelling, warping, and adhesive breakdown. Kitchens with splashing risks need careful placement away from sinks and stoves. Bathrooms need edge sealing. Outdoor use is absolutely not recommended. If you need truly waterproof wall covering, look at vinyl panels instead.
How do you clean peel-and-stick wood planks?
Use a barely-damp microfiber cloth — never soaking wet. Wipe gently along the grain direction. Avoid spray cleaners, bleach, abrasive sponges, or steam cleaners. For textured planks with deep grooves, a vacuum with a soft brush attachment works well for dust. I clean mine once a month with just water. Stubborn spots get a tiny drop of mild dish soap on the cloth, then I immediately wipe with a water-only cloth to remove any residue.
The Verdict — Would I Do It Again?
Yes. But differently.
I’d buy the mid-range RoomMates planks again without hesitation. I’d skip the budget brands entirely — the savings aren’t worth the gaps, the repeating patterns, and the slow peeling. I’d budget a full weekend instead of a rushed Saturday. I’d clean the walls like a person who learned the hard way that invisible dust exists and it hates adhesive.
Peel-and-stick wood planks aren’t perfect. They’re a compromise. They give you the look of a wood accent wall without nails, without a contractor, and without permanently altering a space you might not own. The trade-off is that they’re thinner than real wood, sensitive to temperature and humidity, and occasionally frustrating to install perfectly.
But when that afternoon light hits the kitchen wall — the one I prepped properly, the one where every seam is tight — it looks really, genuinely good. Not “good for a rental.” Just good.
About the Author
Samir Kulkarni is a content writer based in Austin, Texas, who has lived in six apartments across four states and has patched approximately 147 wall holes in his lifetime. He owns three identical utility knives because he keeps losing them in different rooms and refuses to walk 20 feet to retrieve one.
Have you tried peel-and-stick wood planks in your home? Did your cat also try to scratch them off the wall? I want to hear about it — the wins, the peeling corners, the brand you’d never touch again. Drop your experience in the comments.