
Table of Contents
Dust. That’s what greeted me every time I glanced above my kitchen cabinets during my first year in a Chicago rental — a foot of empty, grease-flecked air nobody had bothered to plan for. My cabinets stopped eighteen inches short of the ceiling, and the landlord’s paint job clearly hadn’t touched that gap in a decade.
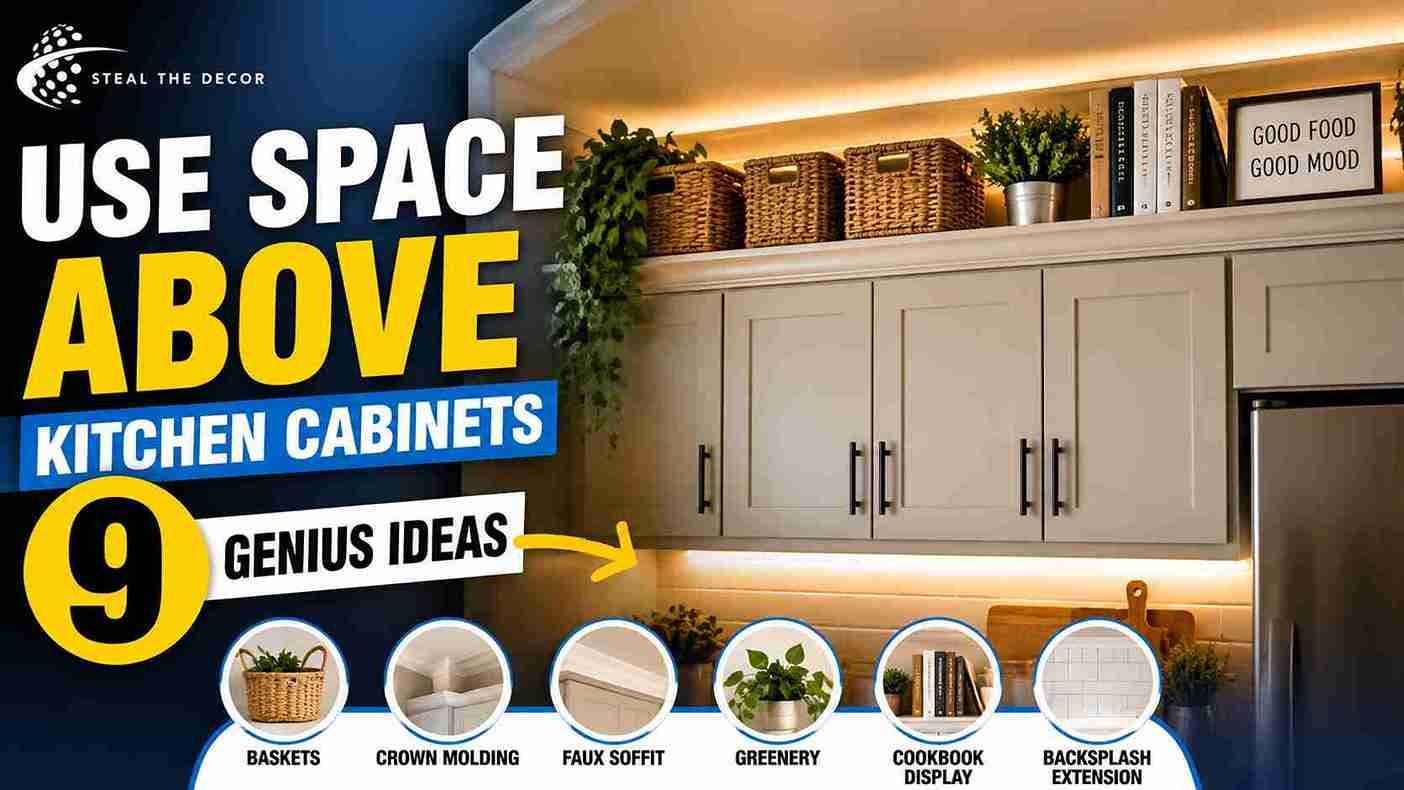
So I spent three weekends figuring out how to utilize space above kitchen cabinets without hiring a contractor, breaking my lease, or losing a cent of my deposit. Six methods, to be exact—woven baskets, a faux soffit panel, a temporary crown molding kit, greenery, a cookbook display, and a peel-and-stick backsplash extension—all tested in my own 650-square-foot apartment kitchen. Two failed outright. Four are still up there today. This guide walks through what actually worked, what to skip, and exactly what it cost me to turn that dead gap into the best-looking corner of my kitchen.
⚡ The Short Version: The easiest way to utilize space above kitchen cabinets is to combine storage and decor—woven baskets like the Seville Classics Foldable Wicker Storage Baskets hold rarely-used items, while a faux soffit panel or crown molding kit (around $40–$90) creates a finished, built-in look. For rentals, stick to lightweight, non-permanent solutions like tension-mounted shelves or Command-strip-hung decor — never anything that requires drilling into the cabinet frame or ceiling.
Why the Space Above Kitchen Cabinets Exists
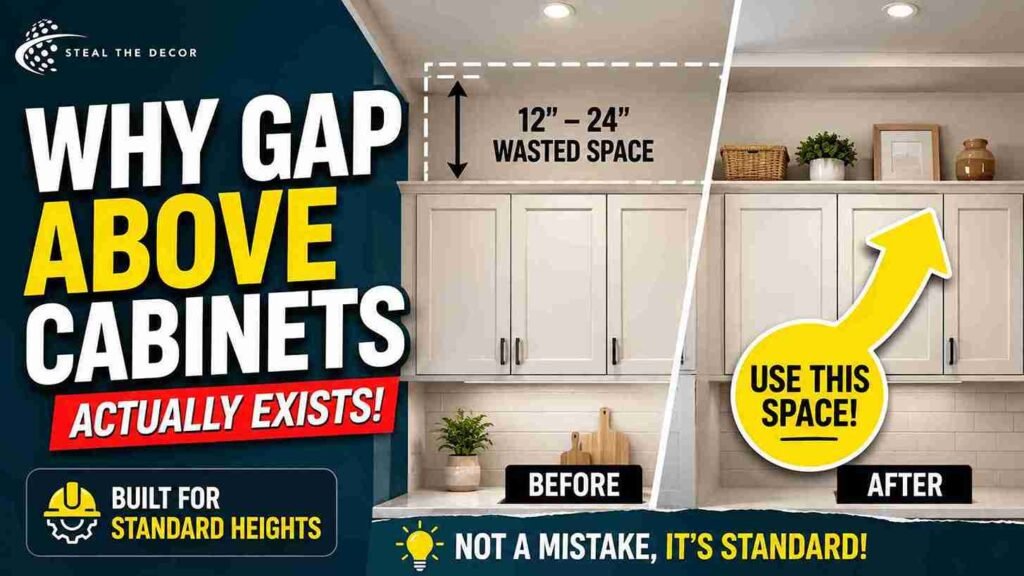
That awkward gap above your cabinets isn’t a design mistake. It’s a construction shortcut. Standard kitchen cabinets are built to a uniform height — typically 30 or 36 inches — regardless of a room’s actual ceiling height, so builders leave a gap rather than custom-order cabinetry for every unit. In apartment buildings especially, that gap often runs anywhere from 12 to 24 inches, which is exactly why so many renters end up staring at an empty, dust-prone area they never asked for decor—never with 9 or 10-foot ceilings, which tend to have the widest gaps. Newer construction with standard 8-foot ceilings? Sometimes almost none at all.
Bottom line: If your kitchen has dead space above kitchen cabinets, that’s a byproduct of standardized cabinet sizing—not something you’re stuck living with as-is.
Storage or Decor First? Choosing Your Approach
Before buying a single basket, figure out what you actually want the space to do for you. Storage-first renters use the gap for extra pantry overflow — cereal boxes, small appliances, seasonal serveware, anything rarely touched. Decor-first renters treat it as a display shelf for plants, art, or a curated collection, which tends to photograph better but adds almost no functional storage.
Here’s the framework I actually use with readers. Want storage? Go with baskets or bins. Want a clean, built-in look? Install a faux soffit panel or crown molding. Want personality? Add plants, art, or a cookbook display. Want the custom-cabinetry, luxury look? Extend the cabinets with a temporary panel insert instead.
And most rental kitchens do best with a hybrid—storage on one end, decor on the other—since very few of us have only one need up there. In my apartment, the side above the stove became storage. Heat and grease made decor impractical there. The side above the sink turned into a small plant display instead.
Bottom line: pick your primary goal first. It’s the one decision that determines which products are actually worth buying.
Best Storage Ideas for Space Above Kitchen Cabinets
Storage is the single most requested use for this space, and after three weekends of testing, six methods rose to the top of my list.
- Woven storage baskets. The Seville Classics Foldable Wicker Storage Baskets (around $28–$45 for a set of two) fit most 14–18 inch gaps and hold lightweight, rarely-used items like extra napkins, holiday serveware, or takeout containers. They fold flat for cleaning, which matters more than you’d think once dust and kitchen grease get involved.
- Clear stacking bins. The IRIS USA Stackable Storage Bins (typically $15–$24) work well if you want to see contents at a glance — useful for small-appliance boxes or bulk pantry overflow you don’t want touching cabinet wood directly.
- A dedicated cookbook shelf. If you cook often but don’t want cookbooks cluttering counters, stacking them horizontally above the cabinets keeps them accessible with a step stool and looks intentional rather than crammed.
- Small-appliance overflow storage. Rarely-used appliances — a waffle iron, an extra slow cooker — are heavy enough to sit flat without tipping and light enough not to strain the cabinet frame.
- Seasonal decor bins. Holiday dishware and decorations you touch twice a year belong here more than almost anywhere else in a small kitchen, freeing up prime lower-cabinet real estate for daily-use items.
- Decorative wood crates. Stacked open-front crates (around $20–$35 each) give you visible, grab-and-go storage for items like paper towels or reusable bags — and they read as intentional styling instead of clutter.
Not gonna lie — I made a mistake here. I’d avoid stacking anything directly above the hinge side of your cabinet doors. Mine sagged slightly after six months of an overloaded basket sitting right above the hinges. That’s the one honest failure I’ll walk through in more detail later.
For a full breakdown of budget-friendly kitchen upgrades that pair well with this project, I wrote a complete rental kitchen makeover on a budget guide covering everything from cabinet fronts to lighting.
Bottom line: reserve this space for items you touch less than once a month, and keep total weight under what a single basket handle rated for 15–20 lbs can safely hold.
💡 Pro Tips for Renters:
- Measure your gap depth before buying baskets — most cabinets are only 12–13 inches deep, and a basket that’s even an inch too deep will overhang and look sloppy.
- Line baskets with a thin dust cloth or shelf liner ($4–$6) so grease and dust don’t bake onto fabric or wicker near a stovetop.
- Group items by weight, not category—put your heaviest bin dead-center above a wall stud line (even faux soffits benefit from weight balance) rather than at the ends.
- If your cabinets are painted a specific finish, buy or spray-paint baskets and bins in a close-matching tone. Mismatched materials are the fastest way to make the space look like an afterthought.
- Test-fit with a cardboard mockup before ordering anything — it saves a return shipping headache more often than you’d expect.
Decor Ideas for Above Kitchen Cabinets
Decor turns a functional gap into an actual design feature, and it’s where most above-cabinet displays fall flat with generic, dusty silk plants. Faux greenery rated for kitchen use — I used a set of Nearly Natural Artificial Eucalyptus stems (around $18–$26) — adds softness without the maintenance or the risk of real plants dying from stovetop heat. If you’d rather go with real, low-light-tolerant plants like pothos, I cover exactly how to hang plants without drilling in a separate guide, which also works for trailing plants set on top of cabinets.
Artwork and oversized prints leaned against the wall above cabinets—not hung, just propped—give a curated, gallery-style look without a single nail. I used two framed botanical prints from HomArt (around $22 each) propped at a slight angle, which also makes them easy to pull down entirely at move-out. For more layout ideas on scaling art to an awkward space, my large-scale wall art for apartments post covers proportion rules that apply just as well above cabinets as they do on an accent wall.
Decorative pottery and jugs — thrifted or new — fill negative space between plants and books without adding real storage function, which is fine if your goal is purely visual. Woven decor baskets (different from storage baskets) turned sideways as wall texture is another trick stylists use to add warmth to an otherwise flat gap.
Rotating seasonal decor here — a few sprigs for fall, string lights for winter — keeps the space from feeling static without any of it requiring tools.
Bottom line: decor above cabinets works best when every piece is either lightweight, propped instead of stacked precariously, or specifically rated for near-stove humidity and heat.
Practical Solutions to Hide or Fill the Gap Entirely
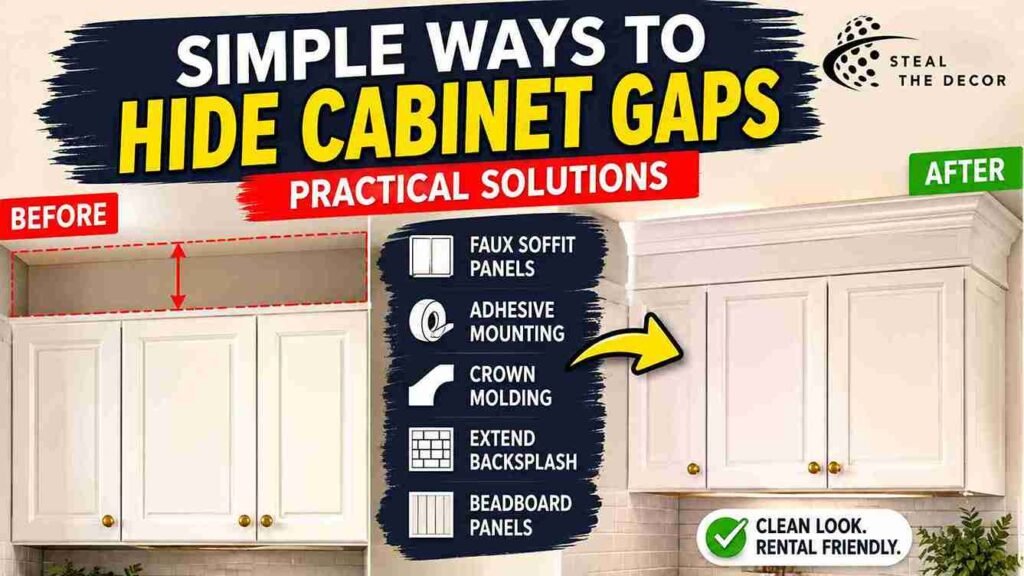
If baskets and plants still leave the gap looking unfinished, a faux soffit panel closes it completely for a built-in look. Measure the gap’s height, width, and depth first, then cut a lightweight MDF or foam panel to size. The DumaWall PVC Panel Kit (around $45–$70 for enough coverage for a standard kitchen) is a common choice because it’s paintable and light enough to rest on cabinet tops without permanent fasteners.
Secure the panel using tension mounting or heavy-duty renter-safe adhesive strips rather than screws into the cabinet frame or ceiling—Command Large Picture Hanging Strips by 3M (typically $9–$14 per pack) hold most lightweight panel sections without leaving residue on removal. 3M publishes exact weight-rating and removal instructions for every strip size, and I’d genuinely check those before mounting anything heavier than a single wicker basket.
For a crown molding look without permanent installation, pre-cut foam crown molding kits (around $30–$55) can be adhered to the cabinet’s top edge with the same renter-safe adhesive, then painted to match your trim.
If you’d rather extend the backsplash tile look upward instead of closing the gap with a panel, a peel-and-stick tile sheet continued above the cabinets creates visual continuity from the counter to the ceiling. My removable kitchen backsplash ideas guide has the full method, including which adhesive tiles survive stovetop heat without curling.
Finally, beadboard or shiplap panel inserts cut to fit and secured the same tension-mounted way give the space a farmhouse kitchen finish. I get deeper into panel techniques that actually hold up over time in my rental-friendly wall paneling post.
Bottom line: if your goal is a clean, contractor-finished look, a faux soffit or molding kit beats decor every time. Just mount with adhesive or tension—never screws into rented cabinetry.
Above-Cabinet Solutions Compared
| Product / Method | Price Range | Ease of Use (1–5) | Damage Risk | Best For | Our Rating |
|---|---|---|---|---|---|
| Seville Classics Wicker Baskets | $28–$45 | ⭐⭐⭐⭐⭐ | ✅ None | Everyday extra storage | 5/5 |
| DumaWall PVC Faux Soffit Panel | $45–$70 | ⭐⭐⭐ | ✅ None | Built-in, finished look | 4.5/5 |
| Foam Crown Molding Kit | $30–$55 | ⭐⭐⭐⭐ | ✅ None | Farmhouse or traditional kitchens | 4/5 |
| Nearly Natural Faux Greenery | $18–$26 | ⭐⭐⭐⭐⭐ | ✅ None | Decor-only kitchens | 4.5/5 |
| Peel-and-Stick Backsplash Extension | $22–$40 | ⭐⭐⭐ | ⚠️ Minor residue on removal | Modern kitchens wanting continuity | 4/5 |
Choose the Best Option by Kitchen Type
Not every kitchen needs the same fix—which is where most guides on this topic stop short. Here’s what I’d recommend based on kitchen type and ceiling height:
| Kitchen Type | Recommended Solution | Budget Tier | Damage Risk | Why It Works |
|---|---|---|---|---|
| Small kitchen | Woven baskets + clear bins | Budget ($15–$45) | ✅ None | Adds storage without visually shrinking the room |
| Rental kitchen | Tension-mounted faux soffit | Moderate ($45–$90) | ✅ None | Finished look with zero permanent alteration |
| Modern kitchen | Backsplash tile extension | Moderate ($22–$60) | ⚠️ Low | Continues clean lines from counter to ceiling |
| Farmhouse kitchen | Foam crown molding + baskets | Moderate ($60–$100) | ✅ None | Traditional trim look with practical storage |
| High-ceiling kitchen | Faux cabinet-height extension panels | Premium ($90–$150) | ✅ None | Closes a large gap convincingly |
| Low-ceiling kitchen | Decor only (plants, art, minimal styling) | Budget ($20–$50) | ✅ None | Avoids visually lowering an already tight ceiling |
Common Mistakes Renters Make With This Space
Overloading a single basket. This is the mistake I made personally. I stacked an extra slow cooker on top of an already-full wicker basket, and within six months the front lip had started to sag near the hinges. Split heavy items across two smaller containers instead of one large one.
Ignoring stovetop heat and grease. Anything decorative directly above a range—real plants, unsealed fabric baskets, paper items—degrades fast from rising heat and airborne grease. Keep porous or heat-sensitive materials at least two feet from the cooktop’s centerline.
Using permanent adhesive or screws. It’s tempting to just screw a shelf bracket into the cabinet frame for stability, but that’s exactly the kind of fix that costs renters their deposit. Renter-safe tension mounts and rated adhesive strips hold just as well for lightweight loads.
Mismatching materials and finishes. A bright white basket against dark wood cabinets, or a glossy panel next to matte cabinetry, reads as an afterthought rather than a design choice. Match tone and finish as closely as you can, or paint to match.
Forgetting cleaning access. Renters often build a display so tall or so tightly packed that dusting it becomes a monthly chore nobody wants to do. Leave at least an inch of clearance around items so a duster or cloth can actually reach them.
Keeping the Space Dust- and Grease-Free
This area collects more dust than almost anywhere else in a kitchen. Simply because it’s rarely at eye level. A quick wipe-down every two to three weeks with a microfiber cloth and a degreasing spray keeps buildup manageable—I use a diluted dish soap solution, which cuts grease without damaging painted MDF panels or wicker fixtures. Sealed bins and closed baskets collect noticeably less dust than fully open shelving, so if you’re not a frequent cleaner, factor that into which storage method you pick.
Bottom line: whatever you put up there, plan for a five-minute cleaning routine every few weeks—or you’ll be looking at a much bigger job come spring.
Real Results: What I Got For $187
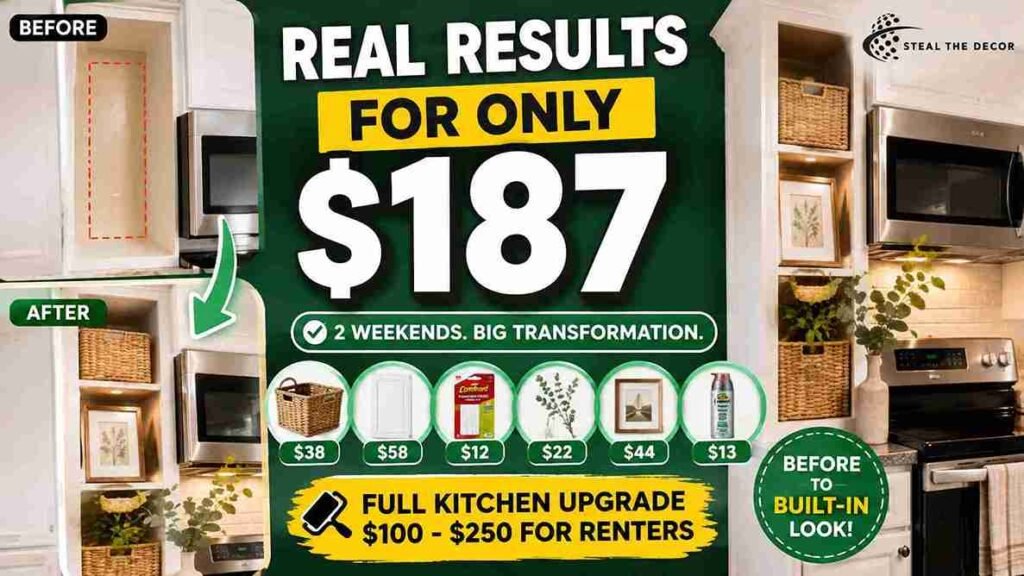
Here’s the actual cost breakdown from my own kitchen: two Seville Classics wicker baskets ($38), one DumaWall faux soffit panel kit for the stove-side gap ($58), a pack of Command Large Picture Hanging Strips ($12), one set of Nearly Natural faux eucalyptus stems ($22), two HomArt framed prints ($44), and a can of matching spray paint for the panel edges ($13). Total: $187 across two weekends of work.
Honestly? I didn’t think the faux soffit panel would look as convincing as it does. It completely transformed the stove-side gap into what looks like a real built-in—multiple guests have asked if it came that way from the builder. What didn’t work: my first basket placement, mentioned earlier, sagged slightly from overloading, and I had to redistribute weight and add a second basket to fix it. In my experience, spreading the budget across both a functional fix and a decorative one gave a far more finished result than putting the full $187 into either alone.
Bottom line: a realistic, full-kitchen transformation of this space costs most renters somewhere between $100 and $250, depending on how much of the gap you’re closing versus decorating.
What to Check With Your Landlord Before You Start
Even renter-safe methods are worth a quick check against your lease. Review the alteration clause for any language about “affixing” items to cabinetry; confirm whether your building has specific fire-clearance rules near stovetops; and—if you’re unsure about tenant protections in your state—HUD’s tenant rights resource is a solid starting point for understanding what counts as a reversible change versus a permanent alteration.
🔑 Key Takeaways
- Standard kitchen cabinets are built to uniform heights of 30 or 36 inches, which is why most kitchens have a 12–24 inch gap above them regardless of the room’s actual ceiling height.
- The Seville Classics Foldable Wicker Storage Baskets (around $28–$45) are the highest-rated renter-safe storage solution for lightweight, rarely used kitchen items.
- A DumaWall PVC faux soffit panel (around $45–$70) mounted with Command Large Picture Hanging Strips by 3M creates a built-in look without drilling into cabinetry or ceilings.
- Items placed within two feet of a stovetop’s centerline degrade faster from grease and heat, so keep porous or decorative materials farther from the range.
- A full above-cabinet transformation combining storage and decor typically costs renters between $100 and $250.
- Overloading a single basket or shelf is the most common failure point, and weight should be distributed across at least two containers.
- Small kitchens do best with basket storage, while modern kitchens benefit most from a continued backsplash tile line up to the ceiling.
Final Thoughts
That dusty gap above my cabinets went from the most ignored corner of my kitchen to the one guests actually comment on—and it took two weekends and under $200 to get there. The biggest lesson from testing six different methods: decide whether you want storage or style first, because that single choice determines everything else you buy. Have you tried utilizing the space above your kitchen cabinets? Tell me what worked, or didn’t, in your rental. If you’re tackling more of the kitchen at once, my rental kitchen makeover on a budget guide is the natural next stop.
FAQ: how to utilize space above kitchen cabinets
What is the best way to use the space above kitchen cabinets?
The best approach combines storage and decor: lightweight baskets for rarely used items on one side and plants, art, or a faux soffit panel on the other. Match the method to your kitchen type — small kitchens benefit most from baskets, while modern kitchens often look best with a continued backsplash line.
How do I install a faux soffit panel above my cabinets?
Measure the gap’s height, width, and depth; cut a lightweight MDF or PVC panel to size; and secure it with renter-safe tension mounts or Command strips rather than screws. Paint to match your trim once it’s in place for a fully built-in look.
Is it safe to store dishes or food above kitchen cabinets?
Sealed dishware is generally fine, but open food storage isn’t recommended because of grease, dust, and temperature swings near the stove. Stick to rarely-used serveware, appliances, or bins rather than anything you’re eating from regularly.
Does decorating above kitchen cabinets leave damage or residue?
Not if you stick to tension mounts, propped items, or rated adhesive strips like Command products, which remove cleanly from painted surfaces. Damage typically only happens when renters use screws, nails, or permanent construction adhesive.
How much does it cost to fill the space above kitchen cabinets?
Budget solutions like baskets and faux plants run $15–$50 total, while a full faux soffit or crown molding installation typically costs $100–$250 depending on kitchen size. My own full transformation, storage, and decor combined came to $187.
What’s the best brand for renter-safe above-cabinet projects?
Command by 3M is the most reliable brand for renter-safe mounting, while Seville Classics and IRIS USA consistently rank highest for lightweight, well-reviewed storage baskets and bins in this specific use case.
What should I do if my above-cabinet storage looks cluttered or starts to sag?
Redistribute weight across two smaller containers instead of one large one, and remove anything you haven’t touched in over six months. If a shelf or panel is visibly sagging, that’s a sign it’s overloaded and needs to be reset before it fails.