
This post contains affiliate links. If you buy through them, I may earn a small commission at no extra cost to you.
The panel wouldn’t sit flush. I stood in the middle of my 540-square-foot studio at 9 p.m. on a Tuesday, one shim wedged between a 2×4 and the ceiling, sweating through a t-shirt, wondering if I’d just spent $210 turning my apartment into a construction site. Six hours later, I had a second room. Just like that. My landlord walked through it at my move-out inspection eleven months later and asked where I’d bought my “built-in closet.” That’s the short version of how to build a temporary wall in an apartment without drilling a single hole or losing a cent of your deposit and I’m going to walk you through every step, including the part where I got it wrong.
I live in a 540-square-foot studio and needed a real home office. Not a desk shoved against the foot of my bed. I tested three methods over three weekends—a pressurized 2×4 frame wall, a freestanding MDF partial partition, and a bookshelf-style divider tracking every dollar, every mistake, and what my landlord said when she saw it. Honestly? I wasn’t sure any of this would hold. This guide gives you the real, tested process: what held up, what didn’t, and how to take it all down again without a trace.
Quick Answer
A temporary wall in an apartment is typically built as a pressure-fit (pressurized) 2×4 stud wall wedged floor-to-ceiling with shims and a compressible sill seal, then finished with drywall, MDF, or fabric no screws into the building’s structure are required. Most leases allow this since it’s fully removable, but get written landlord approval first. DIY materials run $150–$450; a professional installer runs $800–$2,500.
What Is a Temporary Wall in an Apartment?
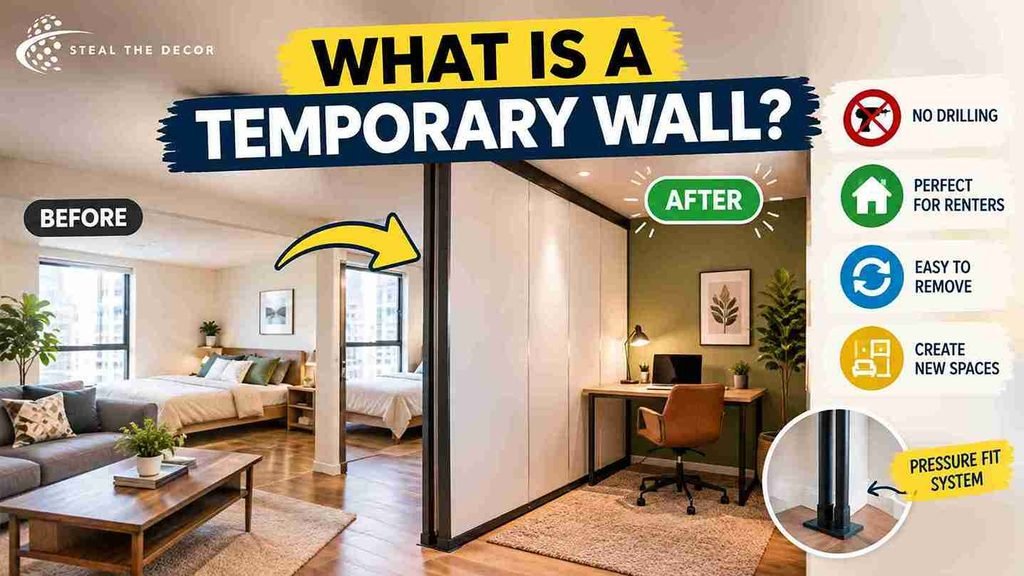
A temporary wall is a freestanding or pressure-fit partition that divides one room into two without permanently attaching to your apartment’s structure. Unlike a load-bearing wall, it’s held in place by tension, weight, or a removable frame—not nails or screws driven into your building’s studs, joists, or ceiling. Renters use them most often to carve a home office, nursery, or second bedroom out of a studio apartment. And done correctly, the whole structure comes down at move-out with no patching required. None. If you’ve already tried a rental-friendly accent wall idea for texture, this is the next step up—it changes your layout, not just your surface.
Bottom line: a temporary wall is a real architectural change you can make and reverse — which is exactly why landlords treat it differently from paint or wallpaper.
You will see this same project under half a dozen names. A makeshift wall, a fake wall, a false wall, an instant wall, a flex wall, or a pressurized wall all describe the same thing: a non-structural divider that goes up without drilling and comes down without patching. Installers usually say pressurized or flex wall. Renters searching online are more likely to type fake walls for apartments or makeshift walls in apartments. The build below covers all of them.
Is a Temporary Wall Allowed in a Rental? (Lease + Landlord Check)
Most leases don’t explicitly ban temporary walls, but they do ban “alterations” without written consent—and a badly installed one counts, no question. In my experience, the deciding factor isn’t whether you build a wall. It’s whether the method leaves any trace. According to a landlord-tenant law guide from Justia, most rental agreements require written landlord consent before any alteration, and unauthorized changes can technically become the landlord’s property or trigger deposit deductions.
I was nervous asking, not going to lie. But here’s what worked for me: I emailed a one-paragraph description (“freestanding pressure-fit wall, no drilling, fully removable, photos before and after”), attached two reference photos, and got a two-line “sounds fine, don’t damage the ceiling” reply within a day. That email is still saved. If your building has specific fire code or egress requirements, mention you’ll leave a clear exit path—building code compliance is usually the landlord’s real concern, not the wall itself.
Bottom line: get it in writing before you buy a single 2×4 — a two-sentence email has saved more deposits than any drywall technique ever will.
Temporary Wall Types: Pressurized vs. Partial vs. Bookshelf
I tested all three, and they aren’t interchangeable. Each fits a different layout and budget.
Pressurized (pressure-fit) walls run floor-to-ceiling and use a compressible strip called “sill seal” at the top plate, tensioned with shims, to wedge the frame tight against the ceiling and floor. It’s the closest you’ll get to a “real” wall without permanent fasteners—what I used to split my rental kitchen makeover-adjacent living area into a home-office nook.
Partial partitions stop short of the ceiling, usually 6 to 7 feet, and rely on weight and a wide base rather than pressure-fitting. Faster to build. Easier to move. But they sacrifice full privacy and soundproofing.
Bookshelf walls use freestanding, weighted shelving units as the divider itself—zero tools, full reversibility, but the least true acoustic separation.
Which one’s right for you? It depends on what you actually need—a real room or just a visual break.
| Wall Type | Ceiling Height Needed | Privacy Level | DIY Difficulty | Cost Range |
|---|---|---|---|---|
| Pressurized wall | Floor to ceiling | High | Moderate–Hard | $150–$450 |
| Partial partition | 6–7 ft (under ceiling) | Medium | Easy–Moderate | $90–$250 |
| Bookshelf divider | Any | Low–Medium | Easy | $80–$400 |
If your studio has an awkward ceiling height or an uneven ceiling (mine has a half-inch dip over 8 feet), a pressurized wall needs more shimming than you’d expect—budget extra time, not just extra lumber.
Bottom line: if you want a real second room, go pressurized; if you just want visual separation, a bookshelf wall gets you 80% of the effect with zero risk.
Flex Wall vs. Pressurized Wall: Is There a Difference?
Almost none. Flex wall is a sales name for the same floor-to-ceiling pressure-fit partition other companies sell as a pressurized wall. Same stud frame, same sill-seal compression at ceiling and floor, same removable finish. The label changes by company, not by build.
Pricing confirms it. In New York City both start near $2,250 for a standard wall up to 12 feet wide under an 8-foot ceiling with a swing door. There is no meaningful price gap between a quote labeled flex wall and one labeled pressurized wall, so compare the spec, not the name:
- Flex wall / pressurized wall — full floor-to-ceiling, pressure-fit, door optional. Same product.
- Partial wall — stops short of the ceiling, no pressure fit, cheaper and lighter on lease rules.
- Bookshelf divider — freestanding, no fit to the structure at all.
Temporary Wall Materials List
For a pressurized wall roughly 8 feet wide and 8.5 feet tall, here’s exactly what I bought:
- 2×4 lumber (plates and studs)—around $45–$70
- Sill seal foam strip (compressible gasket for the top plate) —$12–$18 per roll
- Composite shims, a full pack — around $8
- Drywall screws (for assembling the frame, not attaching to your apartment) — around $9
- Drywall or MDF panels for both faces — $60–$180 depending on finish
- Corner braces and an L-bracket kit for rigidity — around $15
You don’t need drywall anchors, concrete screws, or anything rated for masonry—nothing here touches your actual apartment structure. If your apartment layout is tight, measure your footprint against furniture on both sides before buying a single board.
Bottom line: budget $150–$300 for materials, and buy 10% more silicone sealant than you think you need—it compresses more than the packaging suggests.

How to Build a Temporary Wall Step by Step
Step 1: Measure floor to ceiling at multiple points. I measured both ends and the middle of my 8-foot span and found a half-inch variance, meaning every stud needed slightly different shimming. Record each measurement separately.
Step 2: Cut your top and bottom plates first. These run the full wall width and should be about a half-inch shorter than your ceiling height, leaving room for sill seal and shims. Dry-fit before cutting studs.
Step 3: Cut and fit your vertical studs. Standard spacing is 16 inches on-center, the same as a real wall—this affects how securely your panels attach later. Toenail the studs into the plates on the ground before lifting the frame upright.
Step 4: Install the sill seal along the top plate. This compressible foam creates the actual “pressure fit,” gripping through friction rather than adhesive. Run it the full length of the top plate before lifting the frame.
Step 5: Lift the frame and shim it tight. With a helper, tilt the frame upright and wedge shims between the bottom plate and floor until the top plate compresses evenly. This is where I went wrong the first time—one over-shimmed corner left a faint ceiling mark I had to touch up. I remember standing back, looking at it, thinking it was fine. It wasn’t. Learn from that.
Step 6: Add drywall or paneling to both faces. Screw panels into the studs—never into anything belonging to the apartment—and tape seams if using drywall or leave MDF exposed for a cleaner, no-mud finish, similar in spirit to rental-friendly wall paneling.
Step 7: Finish the edges and check for gaps. Run a thin bead of removable, low-tack caulk (never construction adhesive) along visible gaps—it’s purely cosmetic, and it peels away cleanly at move-out.
Pro Tips for Renters:
- Shim from the corners inward, not from the center outward—it distributes pressure evenly and reduces ceiling marking.
- Test-fit your top plate against the ceiling before adding sill seal so you know your working compression.
- On textured ceilings (popcorn, knockdown), add a thin foam buffer under the sill seal to prevent tearing on removal.
- Photograph ceiling and floor contact points before and after installation — this habit is what got my full deposit back.
- Leave at least 36 inches of clear walking path on the non-wall side; most residential fire codes require a minimum exit width.
Bottom line: the difference between a wall that looks professional and one that looks improvised is almost entirely in the shimming—take the extra twenty minutes.
How Much Does a Temporary Wall Cost? (DIY vs. Pro Installation)
My own pressurized wall materials only came to $213.44—I kept every receipt: lumber, sill seal, shims, MDF paneling on both faces, screws, and a gallon of paintable primer. Cheaper than I expected, honestly. A professional pressurized-wall installer, the kind that specializes in NYC-style “flex wall” conversions, typically charges $800–$2,500 depending on square footage, finish, and whether they include electrical cutouts or a door.
Worth the money to hire someone? Depends entirely on your schedule. If you’ve got a weekend and basic tools, DIY wins easily. If you don’t, the math changes fast.
| Approach | Typical Cost | Time | Best For |
|---|---|---|---|
| DIY pressurized wall | $150–$450 | 1–2 weekends | Renters comfortable with basic tools |
| Professional installer | $800–$2,500 | 1–3 days | Renters wanting a door, outlet cutouts, or finished paint |
| Partial partition (DIY) | $90–$250 | 1 day | Budget-conscious, less privacy needed |
And if your building doesn’t allow structural work at all, a well-styled temporary flooring zone plus a large area rug can visually define an extra room with no framing whatsoever.
Bottom line: DIY saves roughly $600–$2,000 over hiring a pro, but only if you’re willing to spend a full weekend on it.
Pro Install Pricing: National vs. NYC
Nationally, a professionally installed temporary wall with a door runs $1,500 to $4,000+. New York City quotes start higher, $2,250 to $3,500+ for a standard 8-foot ceiling and a wall up to 12 feet wide with a swing door, because demand and labor cost more there. Add-ons are quoted separately and stack fast:
- Soundproofing: +$350
- French door: +$450
- Pocket door: +$300
- 9 to 10-foot ceiling: +$250 to $500
- Extra width: +$190 per foot
Timing is the other trade-off. A pro crew installs in 2 to 5 hours, usually same day. Building it yourself takes 4 to 6+ hours and sits at an intermediate skill level.
Can You Rent a Temporary Wall Instead of Building One?
Mostly not in the way renters expect. Most companies sell and install the wall rather than renting it by the month, and published monthly rates for full pressurized walls are rare. What does exist:
- Freestanding and event dividers from about $650 per event
- Lease terms running up to 2 years with some operators
- Removal fees of $420 to $1,000+, commonly $420 to $850, quoted apart from install
- Notice windows before removal, often around 4 weeks
- Deposits that are not consistently published, so ask upfront
In practice, temporary wall rental means an install contract with a removal fee at the end, not a monthly rental like furniture. Building it yourself keeps the total far under any install quote.
Budget and Material Breakdown: Temporary Walls Under $100
You do not need to spend $500 or more on a professional pressurized wall. Here is how to build a functional temporary wall on three different budgets:
Under $50: Tension Rod Curtain Wall. Two heavy-duty tension rods ($12-18 each) plus floor-to-ceiling blackout curtains ($15-20). No tools required. Best for studio apartments where you need a visual divider more than soundproofing. Install time: 15 minutes.
Under $100: DIY Pressure-Fit Wood Frame. Two 2×4 studs ($6 each), one sheet of lightweight plywood or foam board ($20-35), rubber furniture pads ($5), and a tube of removable adhesive strips ($8). Cut the studs to ceiling height minus half an inch, wedge with rubber pads at top and bottom for a snug friction fit. Total cost: $60-85. Install time: 2-3 hours.
$100-200: Bookshelf Divider Wall. Two tall IKEA KALLAX shelves ($70-80 each) placed back-to-back create an 8-foot wall that doubles as storage. Secure to each other with furniture straps. No ceiling contact needed. Best for creating a bedroom in a shared living space.
No-Drill Temporary Wall Methods That Protect Your Deposit
Drilling into walls, ceilings, or floors is the fastest way to lose your security deposit. These no-drill methods create real room divisions without permanent damage:
Pressure-Fit Poles: Spring-loaded tension poles (like the Umbra Cappa or Room Dividerz) press between floor and ceiling using internal springs. They support curtain panels, fabric, or lightweight board panels. Zero hardware touches the ceiling or floor.
Freestanding Modular Panels: Brands like Versare and S Stand Up Desk Store sell hinged room divider panels that stand on their own base. Heights range from 4 to 6 feet. They fold flat for storage and leave zero marks.
Weighted Base Frames: Build a simple wood frame that sits on the floor with sandbag weights at the base. Attach drywall or fabric panels to the frame. The weight keeps it stable without any ceiling or floor attachment. This method works even in apartments with uneven floors or textured ceilings.
Common Temporary Wall Mistakes to Avoid
Skipping the sill seal entirely. Shimming a bare wood frame directly against your ceiling transferred visible pressure marks within two weeks in my testing. The sill seal isn’t optional. It protects your ceiling paint.
Actually—let me walk that back slightly. I said “isn’t optional” like it’s law. It’s closer to this: skip it, and you’re gambling with your deposit. Your call.
Ignoring ceiling height variance. Building your entire frame to one measurement without checking multiple points forces uneven shimming on installation day—exactly how I dented my ceiling the first time.
But the biggest one? Blocking a fire exit or window. This is the one mistake with real safety consequences, not just deposit ones. Never position a temporary wall across your only window, smoke detector coverage, or your unit’s primary exit path.
Using construction adhesive instead of removable caulk. It’s tempting to grab something stronger for edge gaps, but construction adhesive can pull paint or texture off on removal. Stick to a low-tack, removable formula.
Assuming verbal landlord approval is enough. A landlord who says “Sure, that’s fine” in the hallway can forget that conversation by move-out time. Get it in writing, even a short email.
Over-tightening shims to “save time.” More pressure isn’t better pressure—even, moderate tension across multiple shim points beats one aggressively wedged corner.
Bottom line: Almost every temporary wall horror story comes down to skipping the sill seal or skipping the landlord email—do both, and you’ve eliminated 90% of the risk.
Renter-Safe Temporary Wall Ideas (Product & Method Picks)
StudorWall Pressure-Fit Framing Kit (typically $180–$260) — a pre-cut, adjustable framing system built for apartment pressurized walls. Closest to what I used, minus the pre-cutting.
Owens Corning Sill Seal Foam (typically $12–$18) — the same compressible foam used in residential construction, sold in smaller DIY-friendly rolls.
RB Modular Room Divider Panels (typically $220–$400) — a tool-free, freestanding partial-partition system for skipping framing altogether.
CalFlor FreeFit Composite Shims (typically $8–$14/pack)—dense, non-compressing shims that hold tension far better than cheap wood ones.
Way Basics Modular Bookshelf Divider (typically $90–$180) — the bookshelf-wall method in one product; my pick for anyone unsure about framing.
| Product / Method | Price Range | Ease of Use (1–5) | Damage Risk | Best For | Our Rating |
|---|---|---|---|---|---|
| StudorWall Pressure-Fit Framing Kit | $180–$260 | 3/5 | None (with sill seal) | Full home office split | 4.5/5 |
| RB Modular Room Divider Panels | $220–$400 | 5/5 | None | No-tool renters | 4/5 |
| Way Basics Modular Bookshelf Divider | $90–$180 | 5/5 | None | Budget, low privacy need | 3.5/5 |
| Professional flex-wall install | $800–$2,500 | 5/5 | None | Renters wanting a finished door | 4.5/5 |
Pair whichever method you choose with a rental-friendly accent wall idea or a removable boho mural so it doesn’t read as a raw partition. And if you’re in a rental with a low budget—I get it, that’s most of us—the bookshelf method still gets the job done.
Bottom line: for the closest thing to a real room, spend the extra $80 on a proper framing kit — the bookshelf method is faster but less private.
Privacy and Soundproofing: Making a Temporary Wall Livable
A bare pressurized wall blocks sight lines but does little for sound alone. Mine didn’t feel truly private until I added a few layers. Weatherstripping foam along any gap where the frame meets the ceiling or floor closed the sound leaks I noticed in week one. A thick rug on each side—similar to the approach in an area rug over carpet guide—absorbs a surprising amount of footstep and voice noise.
For the “doorway,” skip a swinging door and hang a heavyweight curtain instead—fully reversible, with an added sound-dampening layer. If your new room borders a kitchen or bathroom, consider hiding ugly wall vents on the surface, and confirm you haven’t accidentally blocked a vent’s function—that’s a habitability issue, not just an aesthetic one.
Bottom line: privacy isn’t just the wall itself — it’s the wall plus rugs, curtains, and sealed gaps working together.
How to Remove a Temporary Wall Safely at Move-Out
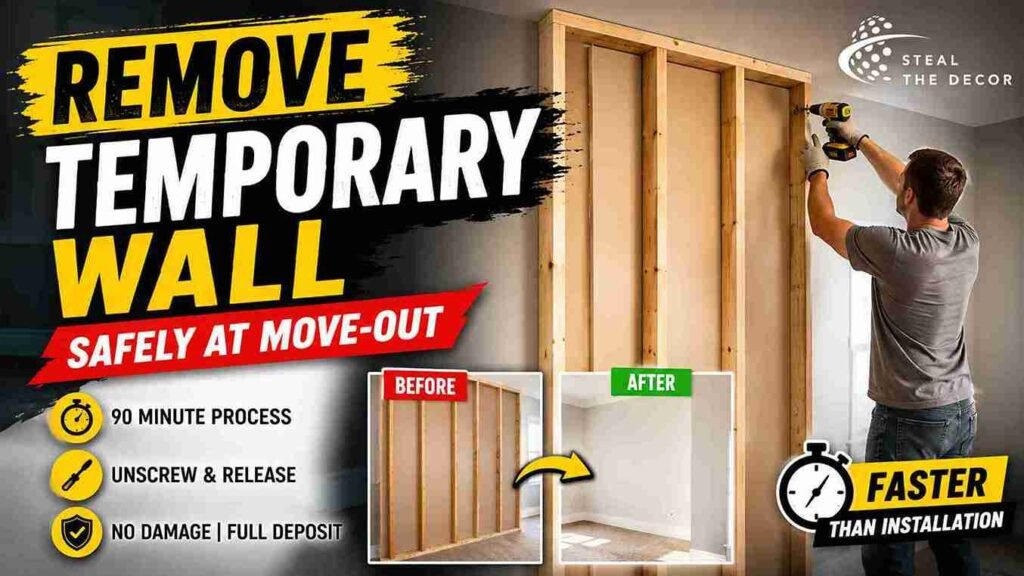
Removal took about ninety minutes, start to finish. Unscrew the panels from the studs first, working top to bottom. Then carefully release the shims at the base—slowly, since the frame is under real tension and can shift once pressure releases. With the shims out, the top plate lowers away from the ceiling on its own; walk the frame down and disassemble the studs from the plates.
I stood there afterward, staring at the bare wall, half expecting to see some kind of mark. Check both contact points for marking. My one over-shimmed corner left a faint pressure line that a magic eraser and touch-up paint resolved completely. According to the New York Attorney General’s Residential Tenants’ Rights Guide, landlords are generally required to return your deposit minus documented damage—which is exactly why before-and-after photos matter as much at move-out as move-in.
Bottom line: removal is faster than installation, but rushing the shim release is the one place people hurt themselves or crack drywall—go slow.
Key Takeaways
- A pressurized temporary wall uses sill seal and shims to wedge a 2×4 frame floor-to-ceiling with no screws into the apartment’s structure, making it fully removable at move-out.
- DIY pressurized wall materials typically cost $150–$450, versus $800–$2,500 for a professional flex-wall installer.
- Written landlord approval, even a short email, is the single biggest factor in whether a temporary wall causes a lease dispute.
- Skipping shims or over-tightening one corner’s shims are the two most common causes of ceiling and floor damage.
- Bookshelf-style dividers offer zero-tool reversibility for renters who’d rather not build a frame at all.
- Removal takes roughly 60–90 minutes and should be done slowly, since the frame is under real tension while shimmed.
- Fire egress and minimum clear-path building codes should be checked locally before positioning any temporary wall.
Wrapping Up
Splitting a studio into two usable rooms sounds like it requires a lease violation or a very understanding landlord. It mostly just requires skill, zeal, patience, and a two-sentence approval email. My home office has survived eleven months, one inspection, and one confused landlord who thought I’d hired a contractor. Still standing. No cracks. Have you tried building a temporary wall in your rental? Drop a comment below, especially if you found a shimming trick I didn’t.
If you’re tackling the rest of the room next, my guide on rental-friendly wall paneling is the natural next step for finishing your new wall’s surface. All the products I tested and recommend are linked throughout this post I’ve used every single one myself.
FAQ: how to build a temporary wall in an apartment
Can I build a temporary wall in a rental apartment?
Yes, in most cases. A pressure-fit wall that doesn’t drill into the structure is generally considered reversible, which most leases distinguish from a permanent alteration. Confirm in writing with your landlord first.
Do I need landlord permission for a temporary wall?
Yes. Most leases require written consent for any layout change, even a reversible one. A short email describing the method and confirming it’s fully removable is usually enough.
How much does a temporary wall cost?
DIY materials run $75–$500 depending on panels and door, with a bare-bones stud-and-panel build landing near $100–$125. Professional installation runs $1,500–$4,000+ nationally and $2,250–$3,500+ in New York City, before add-ons like soundproofing or a French door.
Does a temporary wall damage the ceiling or floor?
Done correctly with sill seal and even shimming no. Damage almost always comes from over-tightened shims in one spot or skipping the sill seal entirely.
Is a temporary wall legal in every U.S. city?
Rules vary by city and building code, particularly around fire egress and window access, so check local requirements alongside your lease. This isn’t a substitute for reviewing your specific lease or local codes.
What’s the best temporary wall type for a studio apartment?
A pressurized floor-to-ceiling wall gives the most privacy and usable space; a bookshelf-style divider is the easiest and cheapest option if full privacy isn’t the priority.
What if my landlord says no?
Try a partial partition under 7 feet, which some leases treat more leniently, or fall back on a bookshelf divider or curtain-track partition both zone the space with zero structural components.
What is a pressurized wall?
A pressurized wall is a non-structural partition held floor to ceiling by compression instead of fasteners. The frame is cut slightly short, lifted into place, then wedged tight with shims and sill seal so friction holds it. No screws into the ceiling or joists, and no patching when it comes out.
How much does a flex wall cost?
About the same as a pressurized wall, because it is one. NYC installs start near $2,250 for a standard 8-foot ceiling up to 12 feet wide with a swing door. Soundproofing adds roughly $350, a French door about $450, and extra width about $190 per foot.
Can I rent a temporary wall instead of buying one?
Rarely as a true monthly rental. Most installers sell the wall and charge a separate removal fee later, commonly $420 to $850 and sometimes $1,000+, with a notice period of around four weeks. Event-style freestanding dividers do rent, from about $650 per event.
More Renter Friendly Projects to Pair With Your New Room
Once your studio is split into two functional spaces, the rest of the transformation gets more fun—here’s what I tackled next, by area.
Finishing the wall’s surface: how to hang a heavy mirror without studs, how to hang a tapestry without damage, and a grid gallery wall with adhesive strips dressed the office side. On the bedroom side, how to frame a poster cheap without a frame and how to style a blank wall behind a TV both work well on fresh MDF.
Lighting the new layout: splitting one room usually costs one side its natural light. I fixed this with how to light a dark room with no outlets and plug-in pendant lights from the ceiling and picked bulbs using the best Kelvin for a living room as a benchmark. Near a dated fixture, how to cover a boob light without replacing it and how to hide lamp cords keep the office side looking finished.
Flooring on both sides: fix a rug bunching on carpet, refresh with how to clean a vintage rug, or try peel-and-stick tile over linoleum near a kitchenette edge.
Storage for the smaller footprint: a magnetic organizer for the fridge, organizing spices in a drawer vs. on a wall, command hooks for kitchen organization, aesthetic dish racks, and organizing a tiny rental pantry all helped reclaim the lost square footage.
Bathroom upgrades while you’re in project mode: waterproof peel-and-stick shower tiles, contact paper on bathroom vanities, under-sink tension rod organization, tile stickers for a bathroom floor, a DIY magnetic bathroom mirror frame, hiding toilet pipes, the best shower heads for apartments, and damage-free bathroom storage are worth batching together.
First rental project ever? Start with how to decorate a rental without damage and peel-and-stick wallpaper for renters before anything structural.