
Table of Contents
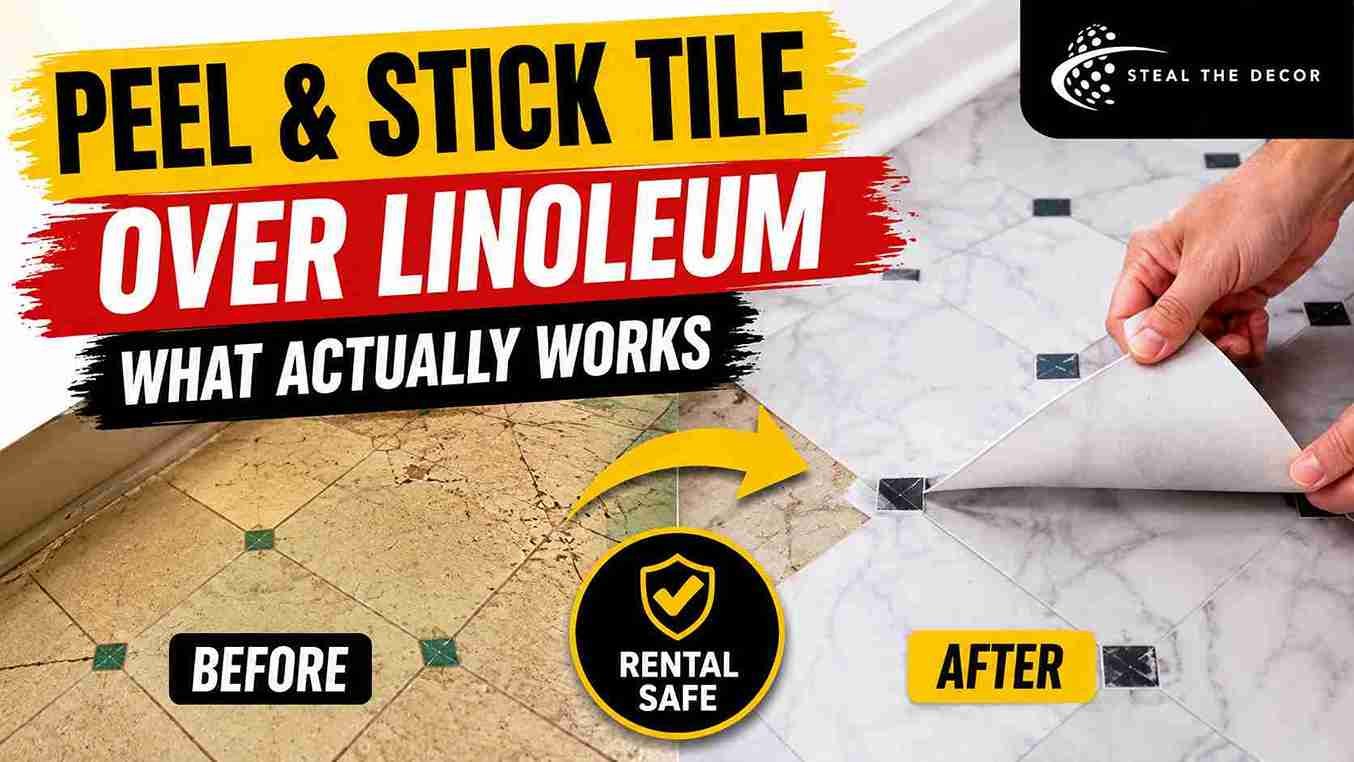
The linoleum in my kitchen had a fake grout line pattern embossed into it—the kind that reads as “tile” from six feet away and as a bad joke up close. I moved in, set my coffee mug down on it, and thought: no. Absolutely not. But also—I can’t rip this up; it’s not mine to rip up. That’s the exact bind peel-and-stick tile over linoleum solves. It’s also exactly where most renters get it wrong.
I spent three weekends testing four different application methods on that same floor. One failed within ten days. One worked but left a residue I had to fight with Goo Gone. One held it up clean for eight months—zero landlord complaints. Not gonna lie, I was skeptical going in. This guide walks through what I tested, what I’d never do again, and the exact deposit-safe method that actually worked.
The Short Version: Yes, you can install peel-and-stick tile over linoleum—but only if the surface is clean, degreased, and free of raised texture. Embossed linoleum lines will “telegraph” through thin tiles within weeks if you skip prep. The safest renter method adds a removable buffer layer (painter’s tape or contact paper) between the original linoleum and the new tile, so the adhesive never touches your landlord’s floor directly. Budget $1.50–$4 per square foot for tiles like FloorPops or SmartTiles, plus $20–$40 for prep supplies.
What Is Peel-and-Stick Tile (And Why It Works Over Linoleum)
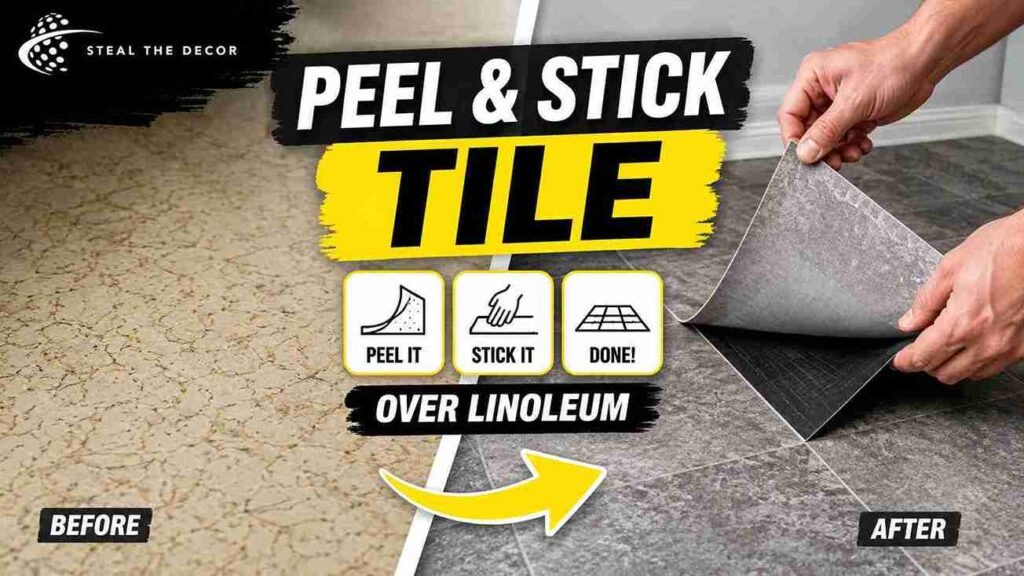
Peel-and-stick tile is a self-adhesive vinyl flooring product—usually Luxury Vinyl Tile (LVT)—with a pressure-sensitive backing you expose by peeling off a paper liner, then press directly onto a surface. No thinset. No grout. No professional installer standing in your kitchen for a day. It’s popular with renters specifically because linoleum and sheet vinyl are both smooth, nonporous surfaces—which is exactly what adhesive-backed tile needs to bond well. In theory.
Here’s the catch: “smooth” and “flat” aren’t the same thing. And a lot of older linoleum has raised texture that peel-and-stick tile will happily reveal, not hide.
Bottom line: peel-and-stick tile is one of the few flooring upgrades you can install and remove yourself in a weekend — but the linoleum underneath decides whether it looks flawless or embarrassing.
Will Peel-and-Stick Tiles Ruin Your Original Linoleum Floor?
Short answer: no, not on its own. Direct adhesive contact and moisture are what actually cause problems. In my experience, the risk was never the tile itself—it was what I did, or skipped, before laying it down.
It works fine when the linoleum is intact, flat, and clean and you use a buffer layer or a low-tack adhesive built for temporary installs. It goes wrong when you skip cleaning—grease under vinyl adhesive causes adhesion failure, and the tile lifts at the edges within weeks. It also goes wrong when the linoleum is embossed and untreated, which gives you subfloor texture telegraphing (the old pattern ghosts through the new tile) or when water gets under the seams in a bathroom and breaks the bond from beneath.
Here’s what most renters actually get wrong about the risk, though: the real damage risk isn’t to the linoleum. It’s from their deposit, from adhesive residue left behind at move-out. Completely different problem. Completely different fix — more on that below.
Bottom line: the linoleum survives peel-and-stick tile just fine. Your deposit is the thing you actually need to protect.
The Landlord-Safe Method: Painter’s Tape / Contact Paper Base Hack
Here’s the trick almost no other guide mentions—and it’s the single biggest thing that changed my results: don’t let the tile’s adhesive touch the linoleum at all.
Most tutorials tell you to clean the floor and stick tile straight down. I did that in my first test section, under the window, and it looked great for about two months. Then I lifted a corner to check on it before a lease-renewal walkthrough. There was a faint, tacky residue on the linoleum. Not enough to fail an inspection — but enough to make me nervous.
So for the rest of the kitchen, I laid a layer of removable contact paper (Con-Tact brand shelf liner, about $8 a roll) directly over the cleaned linoleum and smoothed it with a J-roller, then applied the peel-and-stick tile on top of that. On heavy-traffic strips near the sink, I reinforced the contact paper seams with painter’s tape first. At move-out, this buffer layer peels away in one piece — tile and all — and the original linoleum underneath looks exactly like it did the day I moved in.
And if flooring isn’t the only project on your rental to-do list: this same “never let adhesive touch the original surface” logic is why I use a similar low-tack layer under peel-and-stick wallpaper for renters—same principle, different surface.
Bottom line: if you do nothing else in this guide, add the buffer layer. It’s the difference between a deposit-safe project and a gamble.
Surface Prep: How to Clean and Fix Textured Linoleum
Before any tile goes down, the linoleum needs three things: to be degreased, to be flat, and to have any embossed texture dealt with. Skip one of these, and you’ll feel it later—usually right when you least want to.
- Deep clean with a degreaser. Mop with a TSP (trisodium phosphate) solution or a strong degreaser—kitchen linoleum in particular holds cooking grease you genuinely cannot see. Let it dry fully, at least 24 hours.
- Test for embossing. Run a straight edge or a piece of paper flat across the floor. Feel ridges? That’s the classic fake “grout line” pattern, and it will telegraph through thin peel-and-stick tile.
- Fill or bridge the texture. You’ve got two renter-safe options here: a self-leveling embossing leveler (a skim-coat compound, roughly $25–$35 a bag) troweled into the grooves, or—the easier, fully reversible option—a layer of thick underlayment paper or the contact-paper buffer from the section above, which bridges the grooves instead of filling them.
- Prime if needed. On glossy or worn linoleum, a latex primer or deglosser helps the tile’s adhesive (or your buffer layer) actually grip instead of sliding around mid-install.
This is the step almost every competitor guide skips. It’s also the reason so many people report their peel-and-stick floor looking “wavy” within a month. If you’ve dealt with a similar texture problem on walls, it’s the same idea I cover in peel-and-stick wallpaper on textured walls—you’re not fighting the texture. You’re bridging it.
Bottom line: skip the embossing check, and your $200 flooring project ends up looking like it’s wearing a wetsuit two sizes too small.
Step-by-Step Installation Guide (Center Point to Edge Cuts)
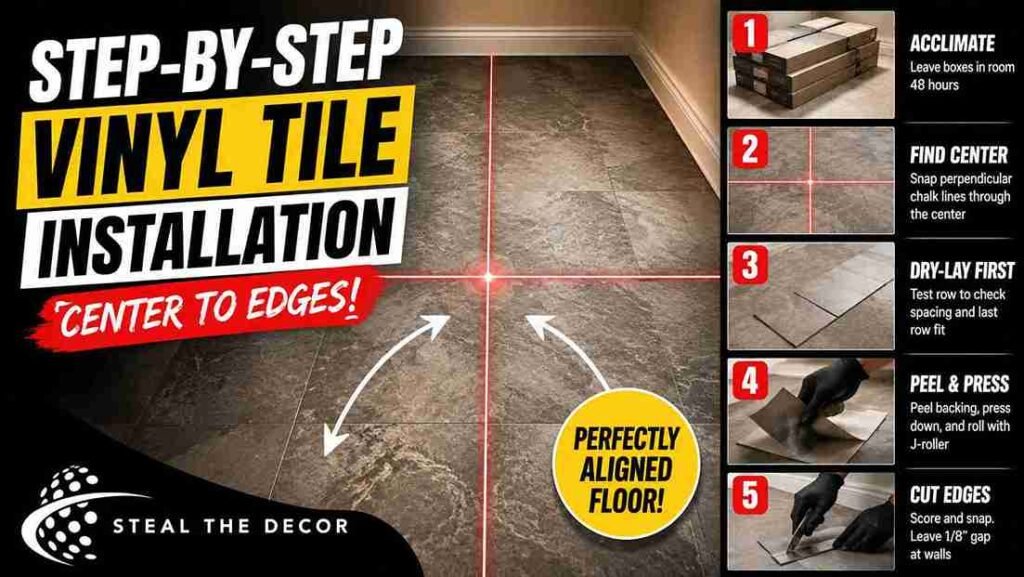
Step 1: Acclimate the tiles. Leave unopened tile boxes in the room for at least 48 hours before installing. US apartments run HVAC systems that keep rooms warmer or cooler than a warehouse, and vinyl tile expands and contracts with temperature. Skip this and you’ll see gaps or buckling within a season.
Step 2: Find your center point. Measure the room and snap two perpendicular chalk lines through the center, dividing the floor into quadrants. Starting from the center — not a wall — keeps your pattern symmetrical even if the room isn’t perfectly square. Most rentals aren’t.
Step 3: Dry-lay a test row. Before peeling any backing, lay a full row of tiles along one chalk line to check spacing and see how the last row lands against the wall. Adjust your starting point now — not after you’re committed.
Step 4: Peel and press from the center out. Remove the backing in small sections, press each tile into place, then go over it firmly with a J-roller to force out air bubbles and seat the adhesive. Work outward, one quadrant at a time.
Step 5: Cut edge pieces with a utility knife and a straight edge. Score, then snap. Don’t try to saw through vinyl tile in one pass—it tears. Leave a small expansion gap (about 1/8 inch) at the walls; baseboards or trim will hide it.
Step 6: Seal seams in wet zones. In kitchens and bathrooms, run a bead of clear, removable silicone caulking along the floor-to-wall seam and around any fixtures, so moisture can’t work under the tile edges.
If you’re tiling a bathroom specifically, pair this with my full breakdown in how to apply vinyl floor stickers in a rental bathroom, which covers toilet-flange cutting and a few other bathroom-specific edge cases this guide doesn’t touch.
Bottom line: center-out installation and a real 48-hour acclimation period are what separate a floor that looks pro from one that gaps by winter.
💡 Pro Tips for Renters:
- Buy 10% more tile than your square footage. You will miscut at least a few edge pieces, and dye lots vary between orders—trust me on this one.
- Roll a rolling pin or wine bottle over freshly laid tiles the night after install. A second pass a few hours later catches bubbles the J-roller missed as the adhesive settles.
- Keep your leftover tile boxes and receipts for the entire lease. If one tile lifts in year two, matching the exact SKU matters more than matching the color by eye.
- Never install directly over a floor register or heating vent seam — the temperature swing there causes tiles to lift faster than anywhere else in the room.
- Got ugly wall vents in the same unit? Tackle both projects the same weekend. You’ll already have the utility knife and painter’s tape out.
Waterproofing Hacks for Rental Kitchens & Bathrooms
Kitchens and bathrooms are not equal risk zones. Most guides treat them the same. They shouldn’t.
In a kitchen, the main threat is occasional spills and dishwasher leaks—manageable with a good seam seal and prompt cleanup. A bathroom is a different animal: sustained moisture near the shower or tub, day after day, is a much harsher environment for any adhesive-backed product. The fix in both cases is the same tool, just applied more aggressively in bathrooms—a thin bead of clear removable silicone caulking at every seam, every fixture base, and especially the joint between tile and tub or shower pan. Wipe excess caulking immediately with a damp cloth for a clean line.
Skip the caulking near a shower and you’re not really risking the linoleum. You’re risking the tile itself lifting at the edges within a few months once water starts wicking underneath.
Bottom line: a $6 tube of clear caulking is cheaper than redoing an entire bathroom floor at month four.
Common Mistakes Renters Make With Peel-and-Stick Tile Over Linoleum
Skipping the acclimation period. This was my mistake in test round one — I opened the boxes and started tiling that same afternoon. Two tiles near the window developed visible gaps within six weeks as the material contracted in a room cooler than the warehouse it shipped from. Lesson learned the annoying way.
Not degreasing kitchen linoleum. Regular mopping doesn’t remove cooking-oil residue. If you can feel any slickness underfoot after cleaning, it’s not clean enough for adhesive yet.
Installing straight onto embossed texture. Covered above, but it’s worth repeating: this is the single most common complaint in peel-and-stick tile reviews, and it’s entirely preventable.
Skipping the buffer layer to “save time.” It adds maybe 20 minutes per room. The adhesive residue it prevents can cost you far more than 20 minutes at move-out.
Cutting corners on edge pieces with scissors instead of a utility knife. Scissors crush the vinyl edge and leave a visibly ragged line against the baseboard. A straight edge and a fresh blade actually matter here.
Ignoring the wall-to-floor expansion gap. Tiling tight against the wall with zero gap is exactly what causes buckling once the material expands in summer heat.
Bottom line: Almost every “peel-and-stick tile failure” story online traces back to one of these six things—not the product itself.
Renter-Safe Products We Actually Recommend
Does brand actually matter here? Somewhat. The tile itself matters less than your prep — but a few brands make the forgiving-for-beginners list, and a few don’t.
| Product / Method | Price Range | Ease of Use (1–5) | Damage Risk | Best For | Our Rating |
|---|---|---|---|---|---|
| Luminary Peel and Stick Floor Tiles by FloorPops | $2–$4/sq ft | ⭐⭐⭐⭐ | ✅ None (with buffer layer) | Kitchens, geometric patterns | 4.5/5 |
| Metro Peel and Stick Tiles by SmartTiles | $3–$5/sq ft | ⭐⭐⭐⭐ | ✅ None (with buffer layer) | Small bathrooms, subway-tile look | 4/5 |
| Peel and Stick Wood-Look Planks by Achim Home Decor | $1.50–$3/sq ft | ⭐⭐⭐ | ⚠️ Low | Living rooms, entryways | 4/5 |
| Interlock Vinyl Tile by TrafficMaster (Home Depot) | $1–$2.50/sq ft | ⭐⭐⭐⭐⭐ | ✅ None | Budget-first renters, laundry rooms | 4/5 |
| Con-Tact Clear Grip Shelf Liner (buffer layer) | $6–$10/roll | ⭐⭐⭐⭐⭐ | ✅ None | The deposit-safe buffer layer itself | 5/5 |
If wood-look planks are more your style than tile, I’ve got a full separate breakdown in peel-and-stick wood planks covering plank-specific layout patterns.
Bottom line: for a first-time install, TrafficMaster’s interlocking system is the easiest to forgive mistakes on. FloorPops gives you the widest pattern selection if you’re chasing a specific look.
How to Remove Peel-and-Stick Tiles When Moving Out (Zero Damage)
Step 1: Start at a corner or edge and lift slowly at a low angle rather than pulling straight up. This cuts the odds of the tile snapping or leaving backing behind.
Step 2: If you used the contact-paper buffer method, the tile and buffer layer usually come up together in large sheets—exposing the original linoleum underneath completely.
Step 3: For any adhesive residue that does remain (more likely if you skipped the buffer layer), apply Goo Gone or a citrus-based adhesive remover. Let it sit for the time listed on the label, then wipe with a soft cloth—never a scouring pad, which can scratch linoleum’s protective coating.
Step 4: Finish with a plain water mop to clear any remaining residue film before your move-out walkthrough.
Bottom line: the buffer-layer method turns move-out day from a scraping project into a fifteen-minute peel.
What to Check With Your Landlord Before You Start
- Confirm your lease doesn’t have a specific flooring-alteration clause — some do, most don’t mention peel-and-stick products at all.
- Ask if there’s a preferred move-out condition standard for floors specifically.
- Take dated photos of the existing linoleum before you start, in case there’s ever a dispute about pre-existing wear.
- Check whether your building has any pet- or moisture-related flooring restrictions that could affect a kitchen or bathroom install.
- Not sure where you stand? The U.S. Department of Housing and Urban Development keeps a tenant rights overview worth a quick read before you start any flooring project.
- When in doubt, a two-line email to your landlord describing the reversible install—and confirming you’ll remove it before move-out—is cheap insurance.
Bottom line: a two-minute email up front is a lot less stressful than a deposit dispute after the fact.
Real Results: What I Got for $67.40
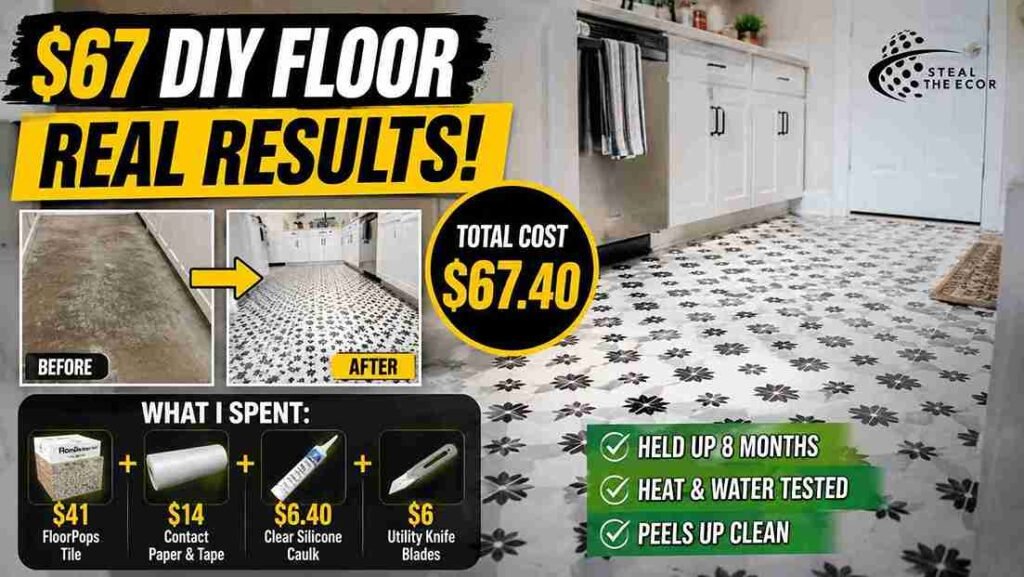
Total spend for my 42-square-foot kitchen: $67.40—$41 for two boxes of FloorPops tile, $14 for a roll of Con-Tact contact paper and painter’s tape, $6.40 for a tube of clear silicone caulking, and $6 for a fresh utility knife blade multipack (I already owned the J-roller and chalk line).
What worked: the buffer-layer method held up completely clean for eight months, through two heat waves and one slow dishwasher leak I didn’t notice for a full day. What didn’t: My very first test section, installed without the buffer layer as a control, left a faint tacky residue I had to treat with Goo Gone before it passed inspection. I also under-ordered tile by one box and ended up with a visible dye lot mismatch in the last row near the fridge. Barely noticeable to anyone else. I noticed it every single day for a month.
Bottom line: $67 and a weekend bought a floor that doesn’t look like a rental anymore—and one I know I can peel back to original with zero drama when I move.
🔑 Key Takeaways
- Peel and stick tile over linoleum works reliably when the surface is degreased, flattened, and installed with a removable buffer layer such as contact paper or painter’s tape between the linoleum and the tile adhesive.
- Embossed or textured linoleum causes subfloor texture telegraphing if tiled over directly, which is why an embossing leveler or underlayment buffer is a required prep step, not an optional one.
- A 48-hour tile acclimation period before installation prevents the gapping and buckling that HVAC-driven temperature swings cause in most US apartments.
- Popular renter-safe brands include FloorPops, SmartTiles, Achim Home Decor, and TrafficMaster from Home Depot, ranging from roughly $1 to $5 per square foot.
- Clear removable silicone caulking at seams and fixture bases protects against moisture damage in kitchens and, especially, bathrooms.
- A full peel-and-stick tile project over a small kitchen or bathroom typically costs $50–$150 and can be completed in a single weekend.
- The buffer-layer method allows the entire installation to be removed cleanly at move-out, protecting a renter’s security deposit without professional flooring removal.
Conclusion
Linoleum doesn’t have to be the floor you’re stuck staring at until your lease ends. The whole project really comes down to two things: respecting the prep work your specific floor needs and never letting adhesive touch the original surface directly. Get those right, and peel-and-stick tile becomes one of the most satisfying, reversible upgrades you can make in a rental.
Have you tried this in your rental? Tell me what happened below — especially if you ran into a texture problem I didn’t cover here. If floors are just the start of your refresh, I’d also point you toward my guide on a full rental kitchen makeover on a budget for what to tackle next. All the products I tested and recommend are linked above—I’ve tried every single one myself.
More rental-friendly projects to pair with this one: Removable kitchen backsplash ideas · Temporary flooring: best interlocking options · Area rug over carpet: the complete guide · How to hang a gallery wall without nails · Damage-free ways to hang large mirrors · Rental-friendly accent wall ideas · How to remove wallpaper without damaging paint · I tried fabric as wallpaper in my rental · Large-scale wall art for apartments
🧰 Want the Full Damage-Free Rental Playbook?
This lamp cord fix is just one piece of the puzzle. For everything else — walls, vents, mirrors, shelves, and more — here’s my Ultimate Damage-Free Home Styling Guide (2026 Edition). Click here to grab the full guide →
FAQ: Peel and Stick Tile Over Linoleum for Renters
What is the best method for peel-and-stick tile over linoleum?
The safest method is cleaning and degreasing the linoleum first, addressing any embossed texture, and then installing a removable buffer layer like contact paper before applying the peel-and-stick tile—this keeps adhesive off the original floor entirely.
How do you install peel-and-stick tile over linoleum?
Acclimate tiles for 48 hours, snap chalk lines to find the room’s center, dry-lay a test row, then work outward, pressing tiles with a J-roller and cutting edge pieces with a utility knife, leaving a small expansion gap at the walls.
Is peel-and-stick tile over linoleum safe for rentals?
Yes, when installed with a buffer layer between the linoleum and the tile adhesive. Without one, there’s a moderate risk of adhesive residue at removal, though the linoleum itself is rarely damaged either way.
Does peel and stick tile leave residue or damage on linoleum?
Direct-adhesive installs can leave light tacky residue, removable with Goo Gone or a citrus-based adhesive remover. Installs using a contact-paper or painter’s-tape buffer typically peel up clean with no residue at all.
How much does peel-and-stick tile over linoleum cost?
Most renters spend $50–$150 for a small kitchen or bathroom, covering tile ($1.50–$5 per square foot), a buffer layer, caulking, and basic tools like a utility knife and J-roller.
What’s the best brand of peel-and-stick tile for this project?
FloorPops offers the widest pattern selection for kitchens, SmartTiles works well for small bathroom footprints, and TrafficMaster from Home Depot is the most forgiving, budget-friendly option for a first attempt.
What do I do if my peel-and-stick tile starts lifting?
Lift the affected tile fully, clean any residue underneath with Goo Gone, confirm the area is completely dry, and then re-press a fresh adhesive patch or replacement tile—keeping spare tiles from your original box on hand makes this a five-minute fix.