
Table of Contents
Water hit the fringe first. Then the dye started running pink across my hardwood, and I hadn’t even grabbed a towel yet. Four minutes into “quickly spot-cleaning” a vintage rug I’d bought it at an estate sale for $60—in a rental where my security deposit was very much on the line, I was on my knees blotting pink water off someone else’s hardwood floor. Not my finest moment.
I spent the next three weekends figuring out how to clean a vintage rug the right way. Four methods tested. One corner of a $12 thrift-store rug ruined on purpose, to see what not to do. And, eventually, a process that got my rug clean without touching the floor underneath it. This guide is that process — start to finish, including the parts that went wrong.
If you’ve inherited a hand-knotted rug from a grandparent, thrifted one that smells faintly of a stranger’s basement, or you’re just staring at a decade of ground-in dirt and wondering where to start—you’re in the right place. What follows is renter-safe, tested, and built around one non-negotiable: whatever you do to the rug can’t touch your rental’s floors.
One thing upfront: this isn’t a “one product fixes everything” guide. Vintage rugs vary wildly — different fibers, different dyes, different decades of wear — and a method that works beautifully on one rug can genuinely ruin another. So instead of a single recipe, you’re getting a decision process: how to figure out what you’re actually working with, how to test before you commit, and which of the five methods I tried actually earned a place in my routine.
And if you’re staring at a rug right now wondering if it’s even safe to touch—that’s exactly the right question. The goal here isn’t a rug that looks brand new. It’s clean, safe, and still recognizably vintage.
Quick Answer: To clean a vintage rug safely, vacuum it on low suction with no beater bar, run a colorfastness test on a hidden corner, and spot-clean with a diluted wool-safe detergent like Zout by ZoutSpray or a WoolSafe-approved product applied to a cloth—never pour directly onto the rug. Wool and cotton vintage rugs can usually be cleaned at home; silk, viscose, and rugs over 100 years old should go to a professional. Always place a moisture barrier under the rug before wet-cleaning to protect rental flooring.
What Counts as a “Vintage” Rug (And Why It Changes How You Clean It)
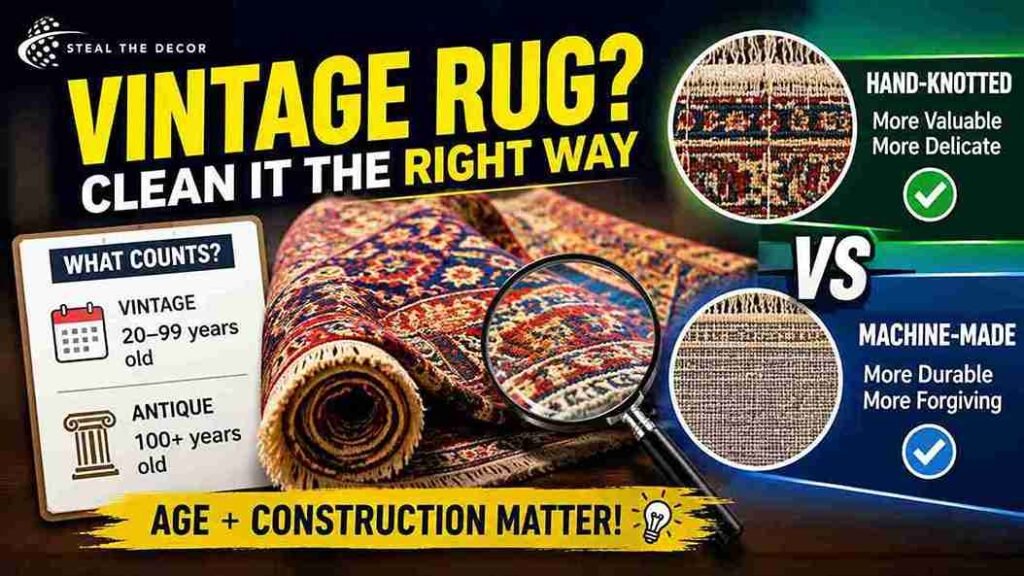
A vintage rug is generally anything 20–99 years old, while “antique” refers to rugs 100 years or older—and that age gap matters more than most cleaning guides admit. Older rugs are more likely to use natural dyes and vegetable dyes instead of modern synthetic ones, which means they’re far more prone to color bleeding when they get wet. They’re also more likely to have a cotton warp foundation that weakens with repeated saturation.
In my experience, the age of a rug tells you less about how dirty it looks and more about how carefully you need to treat it. A 1990s machine-made wool rug and a 1960s hand-knotted Persian rug can look equally dingy on the surface. Underneath, though, they’re completely different animals — and they can’t be cleaned the same way.
Construction matters just as much as age. A hand-knotted rug is built knot by knot around a woven foundation, which makes it more valuable but also more vulnerable—over-wetting can loosen individual knots or weaken the cotton warp they’re tied around. A machine-made vintage rug, by contrast, is generally more forgiving of moisture because its backing is glued or woven as a single piece rather than hand-tied. If you’re not sure which you have, flip the rug over: an irregular, slightly uneven pattern on the back usually means hand-knotted, while a uniform, mesh-like backing points to machine-made.
Bottom line: before you touch a sponge, figure out roughly how old your rug is, how it was constructed, and what it’s made of—that decision alone determines every step that follows.
Should You Clean It At Home? (Decision Matrix)
Not every vintage rug is a DIY candidate, and figuring this out first will save you from an expensive mistake.
| Rug Condition | Recommendation |
|---|---|
| Over 100 years old (antique) | Professional cleaning only |
| Silk, viscose, or “art silk” | Professional cleaning only |
| Wool or cotton with surface dirt/light staining | Safe for DIY home cleaning |
| Visible moth damage or dry rot | Professional assessment first |
| Unknown fiber content | Do a burn test on a fringe thread, or ask a professional |
I learned the silver rule the hard way. Not gonna lie — I was pretty confident going in. A “silk-look” runner I assumed was viscose lost its sheen permanently after a water test, because viscose behaves almost nothing like real wool once it’s wet. Lesson learned, one runner ruined.
If you’re not sure what your rug is made of, a quick way to check is to gently tug a loose fiber from the fringe: wool feels slightly rough and springs back, while silk and viscose feel smooth and go limp when damp.
Moth damage deserves its own mention—it’s easy to miss until you’re already mid-clean. Small, irregular holes clustered in one area, rather than scattered evenly across the rug, are usually a sign of moth larvae rather than general wear. And if you spot this, stop what you’re doing and isolate the rug from other textiles first. Moths spread fast to nearby wool items—sweaters, blankets, anything sharing that closet.
Bottom line: when in doubt about age or fiber, don’t experiment on the whole rug — a wrong guess here is expensive and often permanent.
Colorfastness Test: Do This Before You Clean Anything
This is the step almost everyone skips. It’s also exactly the step that would have saved my floor. Thirty seconds. That’s all it takes.
- Dip a white cloth in cool water mixed with a drop of mild, wool-safe detergent.
- Blot — don’t rub — a hidden corner of the rug, ideally underneath a piece of furniture.
- Press the cloth against the spot for 10 seconds, then check the cloth for any color transfer.
- If the cloth stays white, proceed. If any color shows up, stop. That rug needs a professional, because home wet cleaning will likely cause dye bleed, and there’s no undoing it once it happens.
Bottom line: thirty seconds of testing tells you whether you’re about to clean your rug or ruin it — never skip it, no matter how sturdy the rug looks.
5 Renter-Safe Ways to Clean a Vintage Rug
Here’s what I actually tested, ranked from gentlest to most intensive. But before the list, a warning: don’t jump to method three or four just because your rug looks bad. Start at one. Always.
- Dry vacuuming, low suction, no beater bar. This is step one for every vintage rug regardless of condition. Use a vacuum with an adjustable suction setting—I used a Shark Stratos Cordless (around $280–$350) on its lowest setting—and vacuum in the direction of the pile, never against it, to avoid pulling at loose knots.
- Baking soda deodorizing. For musty basement or storage smells, sprinkle plain baking soda over the whole rug, let it sit for at least four hours (overnight is better), then vacuum it up on low suction. This pulled most of the odor out of my estate-sale rug without any moisture at all.
- Diluted wool-safe spot cleaning. For actual stains, mix a few drops of a WoolSafe-certified detergent into cool water, apply it to a cloth (never directly to the rug), and blot the stain from the outside in.
- Baking soda and white vinegar paste for stubborn spots. For set-in stains, a paste of baking soda and a small amount of white vinegar, left for 15–20 minutes and then blotted and rinsed with a barely-damp cloth, worked better than any spray cleaner I tried — though it should still be spot-tested first.
- Professional wet cleaning for anything beyond surface dirt. If your rug needs more than spot treatment, this is where I stopped doing it myself. A full soak-and-rinse clean redistributes moisture through the whole rug, and getting that wrong on a hand-knotted piece risks the foundation rotting from the inside out.
For rugs layered over carpet or hardwood, it’s worth reading my full area rug over carpet guide first—knowing what’s underneath your rug changes how much moisture is actually safe to use.
Bottom line: start dry, stay dry as long as possible, and only introduce moisture once you know exactly what you’re dealing with.
💡 Pro Tips for Renters:
- Slide a plastic sheet or old shower curtain under the rug before any wet-cleaning step — this is the single easiest way to stop dye or moisture from reaching your rental floor.
- Test your vacuum’s suction on a hidden corner first; even “gentle” settings can snag loose knots on older hand-knotted rugs.
- Cold water is safer than warm for colorfastness—warm water opens fibers faster and increases the odds of dye bleeding.
- If a stain doesn’t lift after two attempts, stop. A third attempt with more product usually sets the stain deeper instead of removing it.
- Photograph the rug’s condition before you start—if you’re renting a rug from a landlord’s furnished unit, this protects your deposit either way.
Step-by-Step: How to Wet-Clean a Vintage Rug Without Damaging Your Floors
A step-by-step method for cleaning a vintage rug safely at home, from vacuuming and the colorfastness test through drying, without damaging rental floors.
How to Clean a Vintage Rug Without Damaging Your Floors
A step-by-step method for cleaning a vintage rug safely at home, from vacuuming and the colorfastness test through drying, without damaging rental floors.
Estimated Cost: 34 USD
Supply:
- Plastic drop cloth or barrier
- Wool-safe detergent (e.g., Zout or WoolSafe-approved spot remover)
- Microfiber cloths
- Baking soda
Tools:
- Vacuum cleaner (low-suction, no beater bar)
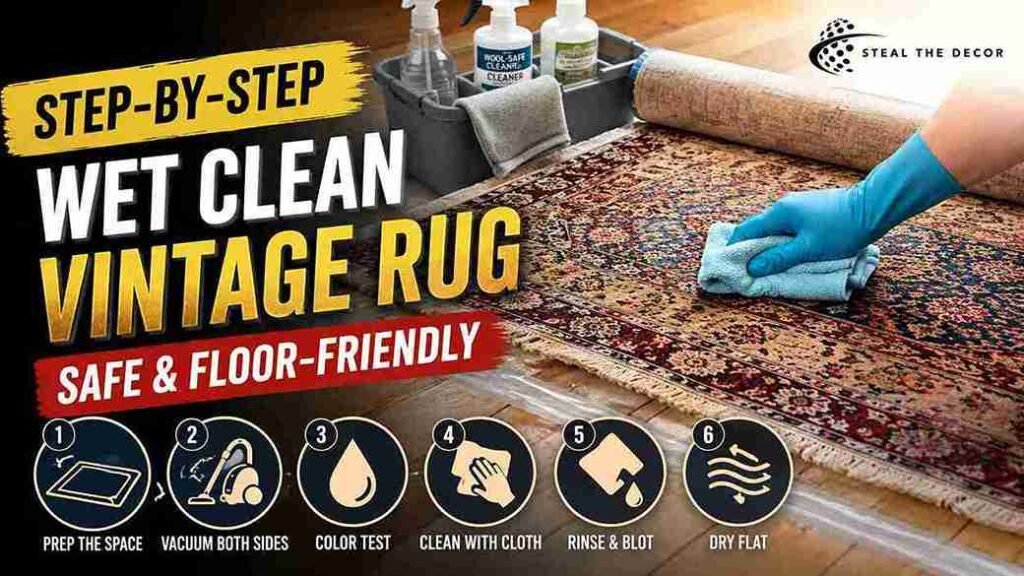
Step 1: Clear and prep the space. Move the rug to a hard-surface area if possible, and lay down a plastic barrier (a painter’s drop cloth works well, around $8–$12) underneath and slightly beyond the rug’s edges.
Step 2: Vacuum both sides. Vacuum the front on low suction, flip the rug, and vacuum the back—a surprising amount of loose dirt falls out of the foundation this way, and it means less dirt gets reactivated once moisture is introduced.
Step 3: Run the colorfastness test. Don’t skip this even if you tested before; do it again in the specific area you’re about to clean.
Step 4: Apply solution to a cloth, not the rug. Dip a microfiber cloth into your diluted wool-safe solution, wring it out until it’s just damp, and blot the stained area. This is the step that prevents saturating the foundation, which is the main cause of cotton warp rot in older rugs.
Step 5: Rinse with a barely damp cloth. Blot the area with a clean, damp (not wet) cloth to lift the cleaning solution back out. Repeat until no more suds transfer to the cloth.
Step 6: Dry flat, away from direct sunlight. Lay the rug flat—not hung, which can distort a hand-knotted rug’s shape—in a room with airflow but out of direct sun. Direct sunlight fades natural dyes fast; I lost noticeable color saturation on a test corner after just two hours in direct light.
Bottom line: the barrier under the rug and the cloth-not-rug application are the two steps that actually protect your rental—skip either one and you’re gambling with your deposit.
Common Mistakes Renters Make Cleaning Vintage Rugs
Steam cleaning wool. I remember pulling the steamer out, feeling pretty confident about it, and hitting the trigger on my sacrificial thrift-store rug. The color started running within seconds. Steam shrinks wool fibers and causes dye to bleed almost instantly—skip any steam attachment entirely on wool or hand-knotted rugs.
Using the beater bar. Standard vacuum beater bars catch on fringe and loose knots and can unravel the edge of a hand-knotted rug in a single pass. Switch to a suction-only setting or a handheld attachment instead.
Enzyme cleaners on pet stains. Enzyme cleaners are marketed as the go-to pet-stain fix, but they can break down wool protein fibers over repeated use. A baking soda and diluted white vinegar approach is gentler and, in my testing, just as effective on fresh stains.
Pouring water or solution directly onto the rug. This is the mistake that started this whole project for me. If you take one thing from this entire post, take this: direct pouring saturates the foundation, spreads the stain wider than it started, and is the single fastest way to get moisture through to your rental floor. Cloth first. Every time.
Drying in direct sunlight. It feels efficient, but direct UV exposure fades natural dyes noticeably within a few hours and can permanently shift the rug’s color.
Skipping the colorfastness test because “it looks sturdy.” Sturdiness has nothing to do with dye stability—I’ve seen thick, tightly woven rugs bleed color just as easily as thin ones.
Bottom line: most vintage rug damage doesn’t come from cleaning too little—it comes from one of these six shortcuts.
Renter-Safe Products We Actually Recommend
| Product / Method | Price Range | Ease of Use (1–5) | Damage Risk | Best For | Our Rating |
|---|---|---|---|---|---|
| Zout by ZoutSpray | $6–$10 | ⭐⭐⭐⭐ | ✅ None (diluted, cloth-applied) | Fresh spot stains | 4.5/5 |
| WoolSafe-Approved Spot Remover | $10–$18 | ⭐⭐⭐⭐ | ✅ None | Wool & hand-knotted rugs | 5/5 |
| Arm & Hammer Baking Soda | $3–$5 | ⭐⭐⭐⭐⭐ | ✅ None | Odor removal | 4.5/5 |
| Shark Stratos Cordless Vacuum | $280–$350 | ⭐⭐⭐⭐ | ✅ None (low suction, no beater bar) | Regular dry maintenance | 4/5 |
| Bissell SpotClean Pro | $180–$220 | ⭐⭐⭐ | ⚠️ Minor residue if overused | Larger stained areas | 3.5/5 |
Prices reflect what I found on Amazon at the time of testing and can shift, so treat these as ballpark ranges. Every product listed here I used on my own rug before recommending it—none of these are placed based on price or brand relationships.
What to Check With Your Landlord (and Lease) Before You Start
- Check your lease for any clause specifically covering furnished-unit rugs if the rug isn’t yours—cleaning a landlord’s rug incorrectly can be treated as damage.
- Look for language about water damage to flooring, since wet-cleaning indoors technically creates a moisture risk to hardwood underneath.
- Check whether your lease requires move-out condition documentation — photograph your rug (and the floor beneath it) before you start cleaning, not after.
- Review any mold or moisture clauses, since a rug that’s dried improperly can trap moisture against hardwood or carpet and create a mold issue that’s your responsibility to fix.
- If you’re unsure what your lease actually requires, HUD’s official tenant rights overview is a solid starting point for understanding what landlords can and can’t hold you responsible for.
Bottom line: a five-minute lease check before you start cleaning is a lot cheaper than a deposit dispute after.
Real Results: What I Got Cleaning My Vintage Rug for $34
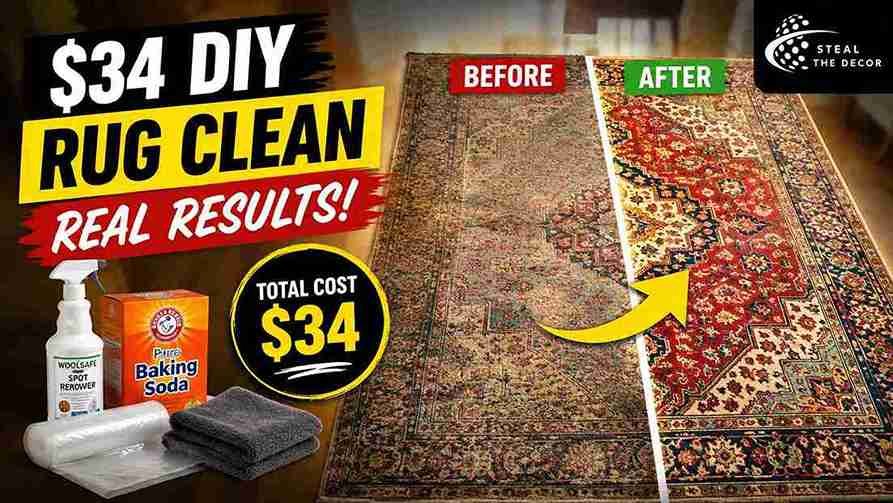
Total spend: $34—$9 for the WoolSafe spot remover, $4 for baking soda, $12 for the plastic drop cloth barrier, and $9 for a replacement microfiber cloth set after I ruined the first one with the vinegar paste. The estate-sale rug went from visibly gray and musty to noticeably brighter, with the basement smell completely gone after the baking soda treatment. What didn’t work: a set-in coffee stain near one corner faded but never fully disappeared—I’m treating that as a “professional cleaning someday” problem rather than a DIY one. The floor underneath, thanks to the plastic barrier, showed zero water marks or dye transfer.
Honestly? The process took longer than I expected — closer to three hours of hands-on work spread across a weekend, plus a full 24 hours of flat-drying time before I could put the rug back down. If you’re planning this yourself, don’t schedule it for the same day you need the room usable again.
I also underestimated how much the “sacrificial” thrift-store rug would teach me. Actually—let me put that more plainly: testing my mistakes on a $12 rug I didn’t care about before; touching the $60 one is the entire reason I didn’t ruin the rug that actually mattered to me.
Bottom line: for under $40 and one weekend, I got a rug that looks and smells dramatically better — but I also learned exactly where the line is between what a DIY clean can fix and what it can’t.
🔑 Key Takeaways
- A vintage rug is generally 20–99 years old, while rugs over 100 years old are classified as antique and should go to a professional cleaner rather than being cleaned at home.
- WoolSafe-certified cleaning products are specifically tested for colorfastness and fiber safety, making them the safest DIY choice for wool and hand-knotted vintage rugs.
- A colorfastness test using a damp white cloth on a hidden corner should be done before every cleaning session, not just the first one.
- Cleaning solution should always be applied to a cloth first, never poured directly onto the rug, to prevent saturating the foundation and causing cotton warp rot.
- Direct sunlight fades natural and vegetable dyes noticeably within a few hours, so vintage rugs should always be dried flat, out of direct light.
- A plastic barrier placed under the rug during wet-cleaning is the single most effective way to protect rental flooring from water or dye damage.
- Silk and viscose vintage rugs should never be wet-cleaned at home, since they behave very differently from wool once damp and can lose their sheen permanently.
Conclusion
A vintage rug doesn’t need a professional every time. Most surface dirt, odor, and light staining can be handled safely at home with the right prep and the right products. Two things actually matter here: testing before you clean, and protecting the floor underneath while you do it. Everything else is a detail.
If you’re setting a vintage rug up in a rental for the first time—and this is your first one, I get it—it’s worth pairing this with my area rug over carpet guide so the whole setup, not just the cleaning, stays deposit-safe.
Have you tried cleaning a vintage rug in your rental? Tell me what happened below — especially if you found a product or method I haven’t tested yet. Every product mentioned above is one I’ve actually tried myself before recommending it.
Keep exploring StealTheDecor’s rental-safe guides:
- Temporary flooring for rentals
- Damage-free removal techniques
- Damage-free ways to hang large mirrors
- Damage-free bathroom storage
- Organize a tiny rental pantry
- Under-sink organization with tension rods
- Best shower heads for apartments
- Rental kitchen makeover on a budget
- How to hide ugly wall vents
- Rental-friendly accent wall ideas
- Peel-and-stick wallpaper for renters
- Large-scale wall art for apartments
- Gallery wall without nails
- Tile stickers for bathroom floors
- Ultimate Damage-Free Home Styling Guide (2026 Edition)
FAQ: how to clean a vintage rug
What is the safest way to clean a vintage rug at home?
The safest method is dry vacuuming on low suction with no beater bar, followed by a colorfastness test, then spot-cleaning with a diluted wool-safe detergent applied to a cloth — never poured directly onto the rug.
How do I clean an antique rug without damaging it?
Rugs over 100 years old are generally best left to professional cleaners, since their foundations and natural dyes are more fragile. If you must spot-clean, always test colorfastness first and use the least amount of moisture possible.
Is it safe to clean a vintage rug in a rental apartment?
Yes, if you protect the floor underneath with a plastic barrier and avoid soaking the rug. The main risk isn’t the rug — it’s moisture or dye transferring to hardwood or carpet beneath it.
Does cleaning a vintage rug leave residue or damage?
Done correctly, no. Using a cloth-applied, wool-safe detergent and thorough rinsing leaves no visible residue. Damage typically comes from steam, enzyme cleaners, or oversaturating the foundation.
How much does it cost to clean a vintage rug at home?
Expect to spend $25–$50 on supplies for a DIY clean, compared to $75–$200+ for professional cleaning, depending on rug size and condition.
What’s the best product for cleaning a vintage wool rug?
A WoolSafe-certified spot remover is the most reliable pick, since it’s specifically tested for colorfastness and fiber safety on wool.
What do I do if I make a mistake while cleaning a vintage rug?
Stop immediately, blot (don’t rub) any spreading stain or moisture, and let the area dry flat before deciding whether it needs a professional’s help. Continuing to treat a spreading mistake usually makes it worse.