
Table of Contents
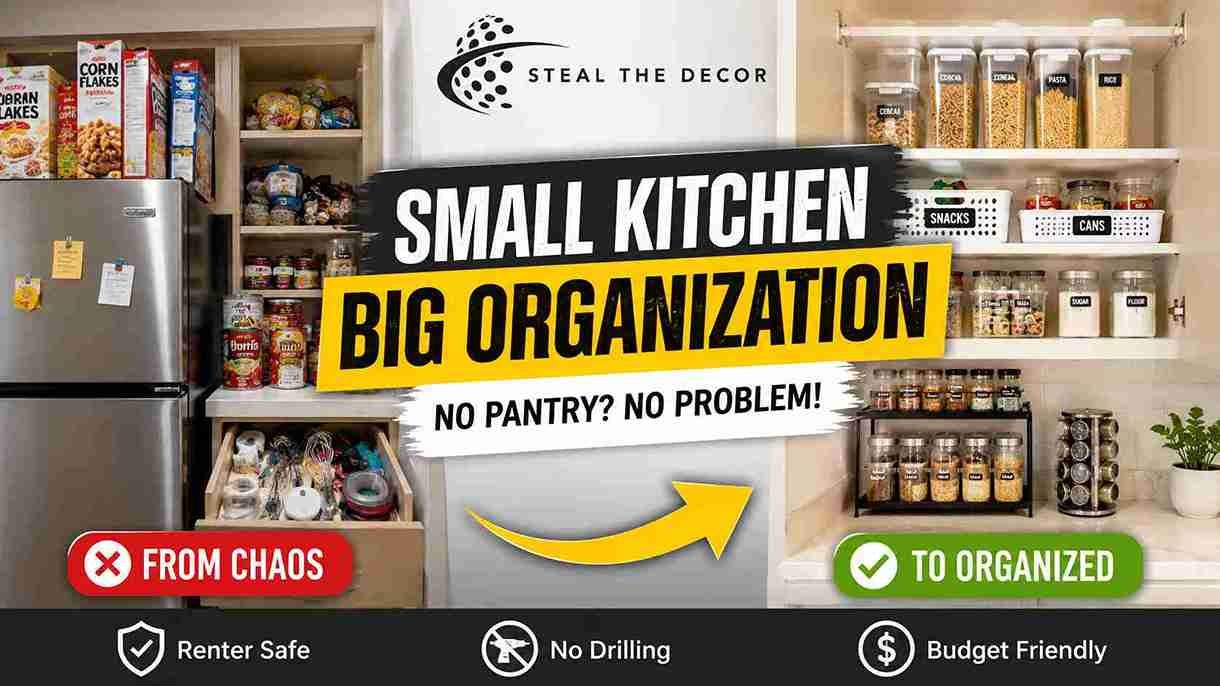
Cereal boxes stacked on top of the fridge. A junk drawer wearing the disguise of a “snack drawer.” Canned tomatoes sliding off a shelf mid-dinner-prep because there was nowhere else to put them. That was my kitchen — a 620-square-foot rental with zero pantry space. Not a closet, not a nook, not even one deep cabinet meant for bulk storage.
Figuring out how to organize a small kitchen without a pantry turned into a three-weekend project. I tested nine different methods before landing on a system that actually held up under real, everyday cooking — not just the one clean photo you take right after you finish organizing.
This guide walks through what worked, what flopped, and the renter-safe products that turned four regular cabinets and one countertop into a full pantry replacement. No drilling. No wall damage. Nothing that would cost me my deposit. Here’s exactly how I did it—with a cost breakdown included.
⚡ The Short Version: Organize a small kitchen without a pantry by decluttering first, then converting one or two cabinets into “zones” (baking, breakfast, snacks) using stackable bins and labeled clear containers. Add a rolling kitchen cart or freestanding shelf for overflow, use an over-the-door organizer for canned goods, and clear your countertops by moving everyday items into a drawer with dividers. This exact system held a full week of groceries in a kitchen with zero built-in pantry.
What Counts as “Pantry Storage” When You Don’t Have One
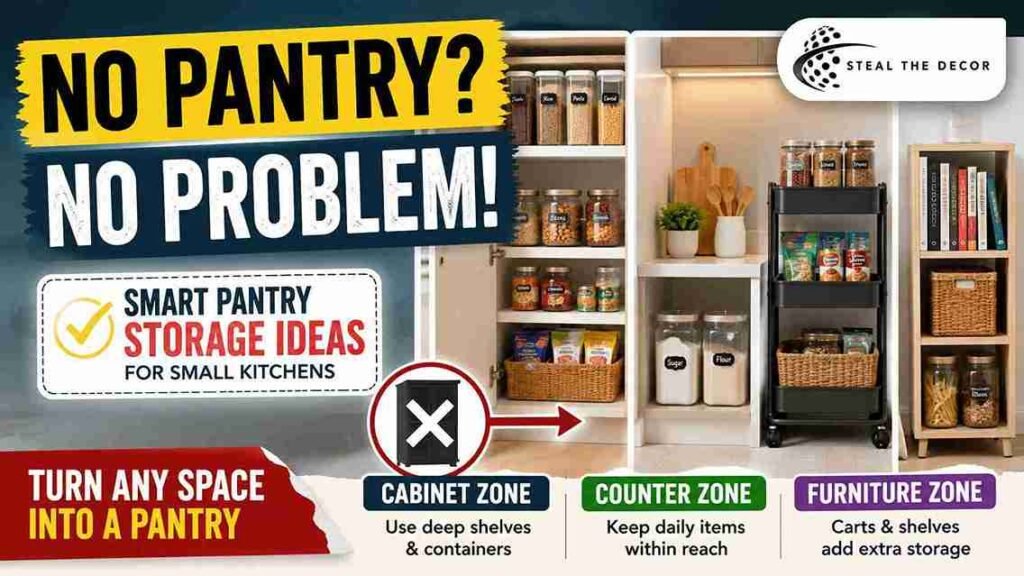
A pantry alternative is any dedicated storage zone that functions like a pantry, even though it was never built to be one. In a kitchen without a pantry, that role usually gets split across two or three cabinets, part of a counter, and one piece of furniture that technically isn’t “kitchen” at all—a rolling cart, a bookshelf, or a narrow bar cart repurposed for cans and boxes.
Not glamorous. But it works.
The average small apartment kitchen has somewhere between 8 and 14 linear feet of cabinet space and little to no dedicated dry storage—which is exactly why food storage in a small kitchen so often spills onto counters. According to organization resources like The Container Store, the fix isn’t more furniture. It’s assigning every food category a fixed “home,” just like a real pantry would.
Bottom line: you don’t need a pantry room to have a pantry system. You need zones, containers, and a plan for where bulk items live.
Can You Actually Organize a Kitchen With No Pantry? (Skeptic Check)
Yes — but only if you declutter before you buy anything. Most of the “pantry alternative” advice online skips straight to bins and rolling carts, which is exactly why so many of those setups collapse within a month: people are organizing clutter instead of removing it first.
I was skeptical of this myself, honestly. Bins and baskets always look great in the photo — the question is whether they hold up three weeks later, once you’re actually cooking dinner in a hurry.
In my experience, the method works well when you treat your existing cabinets as a real pantry—meaning food gets grouped by category, not shoved wherever it fits—and when you add exactly one piece of overflow storage, like a cart or an over-door rack, instead of five different bins that don’t talk to each other. It does not work if you skip labeling, because unlabeled bins turn into the same chaos as an unorganized cabinet within a couple of weeks. And it struggles in kitchens under 40 square feet, where a rolling cart may not physically fit. In that case, vertical storage inside existing cabinets does more work than any freestanding piece.
I also found the system falls apart fastest around bulk items—the 5-pound bag of rice and the box of 24 granola bars from a warehouse store. Those need their own designated spot from day one, or they end up as the thing sitting on the counter for a month. Bottom line: this works as a real pantry replacement if you declutter and zone first. Skip that step, and you’re just rearranging chaos.
10 Best Ways to Organize a Small Kitchen Without a Pantry
This is the exact list I worked through, in order, over three weekends. Each one builds on the last—I’d recommend tackling them in sequence rather than jumping around, though nobody’s stopping you if item 6 is calling your name first.
- Declutter first. Pull everything out of every cabinet and drawer, check expiration dates, and be honest about what you actually cook with. I got rid of four expired spice jars and a half-used bag of quinoa I’d been “saving” for over a year—reclaiming almost a full shelf before I organized a single thing.
- Use vertical space. Add shelf risers (around $12–$18 for a two-pack) inside a single cabinet to double its usable space, since most cabinets waste 30–40% of their height on empty air above shorter items. If the cabinet is on the darker side, a strip of battery-operated under-cabinet lighting makes it much easier to see what’s actually in there without pulling everything out.
- Turn a cabinet into a pantry. Pick your least-used cabinet — for me, the one above the fridge — and reserve it entirely for dry goods, the same way you’d use a real pantry shelf. This is the core move behind organizing a tiny rental pantry, which goes deeper into cabinet-to-pantry conversions if you want the full walkthrough. If your cabinet fronts are dated and it’s bothering you while you’re already in there organizing, updating rental kitchen cabinets without paint is worth a look—it’s fully reversible and pairs well with this project.
- Organize with bins and baskets. Group food by category—breakfast, baking, snacks—into labeled bins so you can pull out one bin instead of digging through a whole shelf. Clear storage containers work best here because you can see what’s low without opening anything.
- Add a pantry alternative piece. A rolling kitchen cart (typically $40–$70) or a narrow freestanding shelf gives you overflow storage without needing a single drill hole.
- Maximize drawer storage. Cabinet drawers near the stove are often wasted on junk — add drawer organizers to turn one into dedicated spice or snack storage instead. The same tension-rod trick used in under-sink organization with tension rods also works to divide a shallow drawer into sections without buying a custom insert.
- Create a spice zone. Whether that’s a drawer insert or a small wall-mounted rack, keeping spices in one place cuts cooking prep time significantly. I compared both setups in organizing spices in a rental drawer vs. a wall, and the drawer method won for anyone without wall space to spare.
- Use wall and door space. An over-the-door organizer on the inside of a cabinet door adds storage for canned goods or spice jars without touching a single wall. Command hooks — specifically Command hooks for kitchen organization — are the easiest no-drill way to add a hanging rail for utensils or small baskets.
- Store bulk items smartly. Anything from a warehouse store gets repackaged into a labeled, stackable bin the day it comes home — not left in its original box, which rarely stacks cleanly. This is also where an aesthetic dish rack earns its counter space back—a rack that doubles as drying and light storage does more work than a purely decorative one.
- Keep counters clear. Move everyday items like coffee filters or snack bars into a drawer with dividers so the counter stays a workspace, not overflow storage. If your sink area is eating counter space, over-the-sink storage ideas can reclaim a surprising amount of it with a single shelf that sits above the faucet.
Bottom line: if you only do three things from this list, declutter first, zone your cabinets by category, and add exactly one piece of overflow storage. That’s 80% of the results. Actually—scratch “one piece.” Make it one piece to start. You can always add a second later once you know what’s actually overflowing.
💡 Pro Tips for Renters:
- Measure your cabinet’s interior height before buying shelf risers — most standard risers need at least 7 inches of clearance to sit properly.
- Store the heaviest bins on the bottom shelf of a converted cabinet, not the top—it’s a small thing that prevents a lot of spills.
- Use a lazy Susan in a corner cabinet before adding any other product; it solves more “hidden” wasted space than bins do.
- Label bins with a wet-erase marker instead of a permanent label — categories shift as your groceries change week to week.
- If your cabinets are shallow, prioritize a magnetic organizer for the side of your fridge before buying a rolling cart — it’s free real estate most renters never use.
Step-by-Step: How to Set Up a No-Pantry Kitchen System Without Damaging Your Rental
And this is where most renters make their biggest mistake — jumping straight to “Contain” and skipping the first two steps entirely.
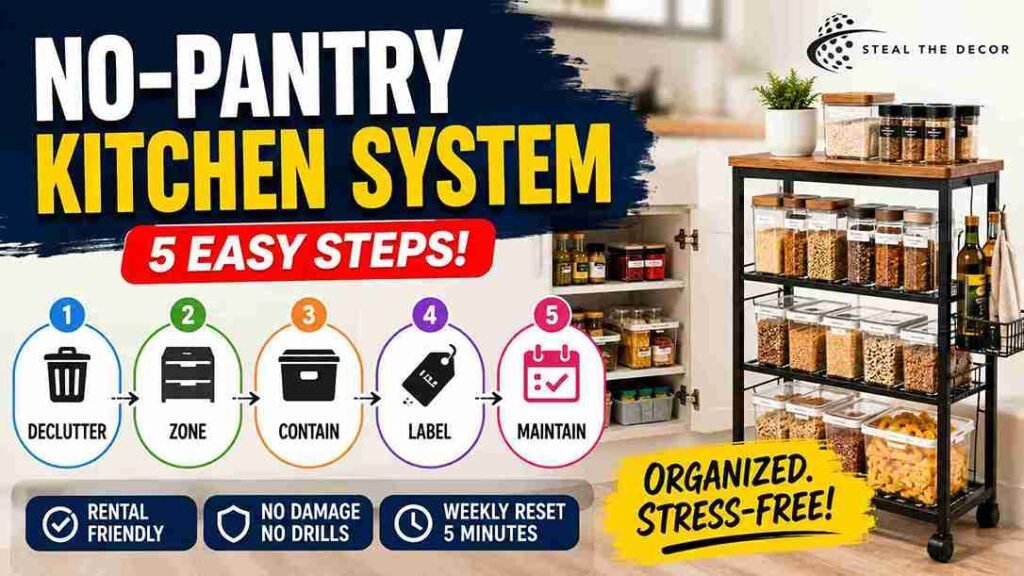
Step 1 — Declutter. Empty every cabinet and drawer completely, check dates, and separate what you actually use from what you don’t. This step alone took me almost two hours the first time. It’s also the step most people skip, which is exactly why most pantry-alternative setups fail within a month.
Step 2 — Zone. Decide which cabinet becomes “baking,” which drawer becomes “spices,” and which shelf becomes “snacks.” Write the zones down before buying a single product — it’s easy to buy bins that don’t match your actual categories.
Step 3 — Contain. Buy clear, stackable bins sized to your specific shelves — measure first. This is the step where a rolling kitchen cart or over-the-door organizer comes in if your cabinets alone can’t hold everything.
Step 4 — Label. Label every bin. Even the “obvious” ones. Unlabeled bins are the single biggest reason this system breaks down within a few weeks, according to nearly every renter I talked to while testing this.
Step 5 — Maintain. Do a five-minute reset once a week—restock bins, wipe down the cart, and toss anything expired. Bottom line: the setup takes a weekend, but the weekly reset is what actually makes it stick long-term.
Common Mistakes People Make Organizing a Small Kitchen Without a Pantry
Buying storage before decluttering. This trips up almost everyone—myself included the first time. Buying bins before you know what you’re actually storing means guessing at sizes. Declutter first. Measure and shop after.
Skipping labels. Unlabeled bins look organized for about two weeks, then quietly turn back into a junk drawer with a lid. A $6 label maker or even painter’s tape and a marker solves this.
Choosing a cart that doesn’t fit the walkway. I made this exact mistake. Not gonna lie — it was a little embarrassing. I bought a three-tier rolling cart that measured 16 inches wide, which sounded fine until it blocked my dishwasher door every time I opened it. Always measure your walkway clearance, not just the empty floor space.
Overloading a single shelf riser. Shelf risers have real weight limits, usually 20–30 pounds depending on the brand. Stack canned goods without checking, and you risk a shelf buckling.
Ignoring vertical space in tall cabinets. Most small kitchens waste 30–40% of cabinet height on empty air above shorter jars and boxes. Risers or stackable bins fix this instantly.
Forgetting bulk items need their own zone. Warehouse-store purchases are the fastest way to undo an organized kitchen if they don’t have a designated spot from day one.
Pantry Alternative Products We Actually Recommend
Rolling carts, over-door racks, and freestanding shelves all solve the same core problem: a lack of built-in dry storage. But they’re not interchangeable. Here’s how the three compare, based on what actually held up in a real kitchen over several weeks of daily use.
A rolling kitchen cart gives you the most flexibility since it can move between the kitchen and a nearby wall when you need the floor space back, and models like the Origami Foldable Rolling Cart fold flat for storage. If your cart will roll over old linoleum or vinyl, it’s worth knowing that peel-and-stick tile over linoleum holds up fine under light rolling weight, based on what I’ve tested.
A freestanding shelf holds more weight and works well in a corner that a cart can’t reach, but it doesn’t move once loaded. An over-the-door organizer is the only truly no-footprint option, mounting on the inside of a cabinet or pantry-adjacent door, though it’s limited to lighter, smaller items like spice jars and snack packets.
Once the storage itself is sorted, a few renters ask about the surfaces around it. If your counters are dated, DIY marble contact paper countertops is a same-weekend upgrade that doesn’t interfere with any of the organization work above, and it uses the same no-damage adhesive logic as the contact paper trick in using contact paper on bathroom vanities. If it’s the backsplash bothering you instead, removable kitchen backsplash ideas and hiding an ugly kitchen tile backsplash both cover fully reversible options.
For exact weight limits and mounting specs before buying any hanging or wall-adjacent piece, it’s worth checking the manufacturer’s own installation guide—Command’s product site lists specific weight ratings for their hooks and strips, which matters if you’re hanging anything heavier than a dish towel.
| Product / Method | Price Range | Ease of Use (1–5) | Damage Risk | Best For | Our Rating |
|---|---|---|---|---|---|
| 3-Tier Rolling Kitchen Cart | $40–$70 | ⭐⭐⭐⭐⭐ | ✅ None | Overflow pantry storage, moves as needed | 5/5 |
| Freestanding Wire Shelf Unit | $35–$60 | ⭐⭐⭐⭐ | ✅ None | Corner storage, heavier bulk items | 4/5 |
| Over-the-Door Pantry Organizer | $15–$25 | ⭐⭐⭐⭐ | ✅ None | Small items, canned goods, no floor space to spare | 4/5 |
| Stackable Clear Storage Bins (set) | $18–$32 | ⭐⭐⭐⭐⭐ | ✅ None | Cabinet zoning, dry goods | 5/5 |
| Command Hooks by 3M | $8–$14 | ⭐⭐⭐⭐⭐ | ✅ None | Hanging utensils or small baskets, no drilling | 5/5 |
Bottom line: if you only buy one thing from this list, make it the stackable clear bins — everything else is optional depending on your layout, but zoned, visible storage is the actual foundation of this whole system.
What to Check With Your Landlord Before You Start
Nearly everything on this list is fully renter-safe. Still, it’s worth confirming a few things before you start drilling, mounting, or repainting anything—even lightly.
- Confirm whether Command-brand adhesive products are allowed on your specific wall finish (some older or textured paint jobs don’t hold adhesive as well).
- Check your lease for any clause specifically about “modifications” to cabinets, even reversible ones like adding drawer liners.
- Ask before installing anything that requires a single screw, even a small one for an under-cabinet light.
- Confirm whether your lease says anything about hardware swaps if you’re considering replacing kitchen handles as part of your kitchen refresh.
- Photograph your cabinets and counters before you start, so you have a clear “before” record for your move-out walkthrough.
- If you’re unsure what counts as a reversible change versus permanent damage, a general tenant rights resource can clarify what your specific state considers normal wear and tear.
Bottom line: almost everything here is landlord-safe by design, but a five-minute lease check saves you a much longer conversation at move-out.
Real Results: What I Got for $52
Here’s the actual cost breakdown from my own kitchen, broken into three tiers depending on your budget. And if you’re the type who wants the exact numbers before committing to anything—I get it. Here they are.
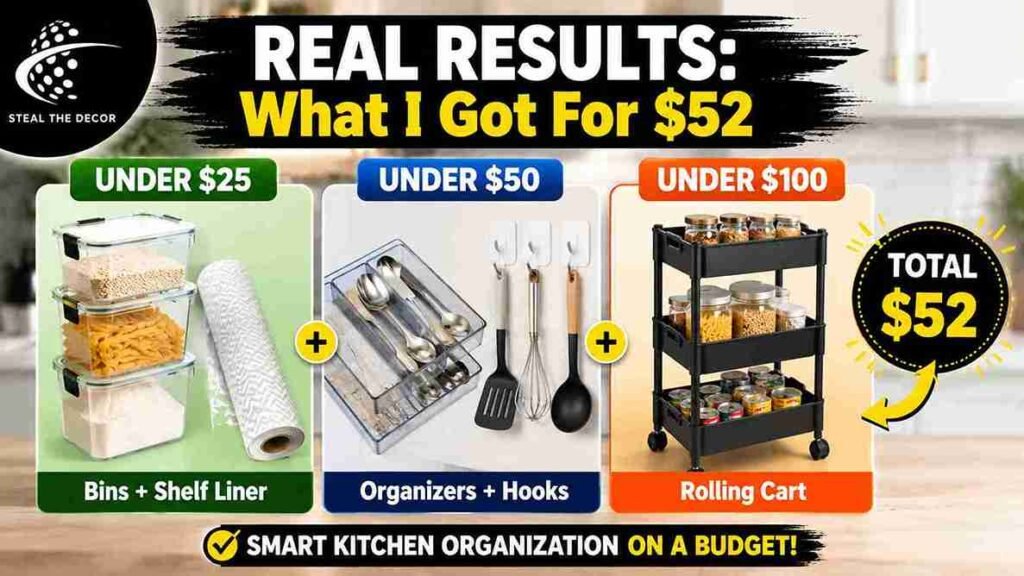
Under $25: A set of clear stackable bins ($18) plus a roll of shelf liner ($6) — this alone fixed about half my clutter problem.
Under $50: Add drawer organizers ($14) and a pack of Command hooks ($9) for a hanging utensil rail. This is roughly where I landed after the first two weekends of work.
Under $100: Add a rolling kitchen cart ($52) for overflow, which is what finally gave my bulk items—rice, pasta, and canned goods—a real home instead of a corner of the counter.
My honest failure: the first cart I bought was too wide for my kitchen’s walkway and had to go back. Measuring twice before buying anything with wheels is the single most important step in this whole project—trust me on that one. Total spend across all three tiers: $52, well under what I’d budgeted after reading “Rental Kitchen Makeover on a Budget” before starting this project.
🔑 Key Takeaways
- Organizing a small kitchen without a pantry starts with decluttering every cabinet before buying any storage products.
- A rolling kitchen cart in the $40–$70 range is the most flexible pantry alternative because it can be repositioned as needed.
- Command Hooks by 3M remove cleanly from most painted drywall, making them a deposit-safe option for hanging kitchen tools without drilling.
- Clear, stackable storage bins ($18–$32 per set) are the foundation of a zoned cabinet system and the single highest-impact purchase in this guide.
- Shelf risers can reclaim 30–40% of wasted vertical space inside a standard kitchen cabinet.
- An over-the-door organizer is the only fully no-footprint pantry alternative, ideal for kitchens too small for a rolling cart.
- A full no-pantry kitchen system can be set up for as little as $52 when built in stages across three budget tiers.
Final Thoughts
Not having a pantry felt like a dealbreaker for about a week. Then I realized the “pantry” was never really the room—it was the system. Once I zoned my cabinets, added labeled bins, and gave bulk items an actual home, the counter clutter disappeared almost overnight. And it’s stayed that way for months now, not just the first week after a big cleaning binge.
If your kitchen is even smaller than mine, it’s worth pairing this system with a deeper look at decorating a rental without damage, since a lot of the same no-drill, no-damage principles carry over from storage into the rest of the space. A few small finishing touches helped too—hanging plants from the ceiling without drilling added some life to the kitchen without eating any counter space, and removable wall decals for a minimalist look covered the one blank wall I never knew what to do.
If an ugly vent or exposed pipe is still bothering you once the storage is sorted, hiding ugly wall vents and hiding exposed pipes cover the same no-damage logic used throughout this guide. And the under-sink tension-rod method scales up nicely if you also tackle damage-free bathroom storage next.
Have you organized a kitchen with no pantry? Tell me what worked for you — I’d genuinely like to know if a setup like this held up in a smaller space than mine.
FAQ: how to organize a small kitchen without a pantry
What is a pantry alternative?
A pantry alternative is any storage solution that replaces a built-in pantry — usually a combination of zoned cabinets, clear stackable bins, and one piece of overflow storage like a rolling cart or over-the-door organizer. Together, these recreate the function of a pantry without needing a dedicated room or closet.
How do I organize a small kitchen without a pantry?
Start by decluttering every cabinet, then assign each one a u0022zoneu0022—baking, breakfast, or snacks—using labeled, clear containers. Add a rolling cart or freestanding shelf for overflow, and keep countertops clear by moving everyday items into a drawer with dividers.
Is this renter-safe?
Yes. Every method in this guide—stackable bins, drawer organizers, rolling carts, Command hooks, and over-door organizers—requires no drilling and no permanent changes to cabinets or walls, making it fully deposit-safe for a standard rental.
Does any of this leave residue or damage?
Command-brand adhesive products remove cleanly from most painted surfaces when taken down correctly, and none of the storage pieces recommended here require drilling. The one exception is textured or unusually old paint, which can sometimes hold adhesive strips less reliably.
How much does it cost to set up?
A basic setup with clear bins and shelf liner runs about $18–$25. Adding drawer organizers and hooks brings it to roughly $50, and a full system with a rolling cart lands around $90–$100 depending on the brand.
What’s the best product to start with?
Clear stackable storage bins are the best first purchase—they’re the foundation of the zoning system and typically cost $18–$32 for a full set, before you add any furniture-style pieces like a cart or shelf.
What do I do if a storage solution doesn’t work?
If a bin or cart doesn’t fit, most retailers accept returns on unopened or lightly used organizational products within 30 days — measure your space again before buying a replacement, since sizing is the most common reason these setups fail.